


一、创建coreData
coreData是苹果官方推广的数据库,支持可视化。与iOS结合的更紧密。
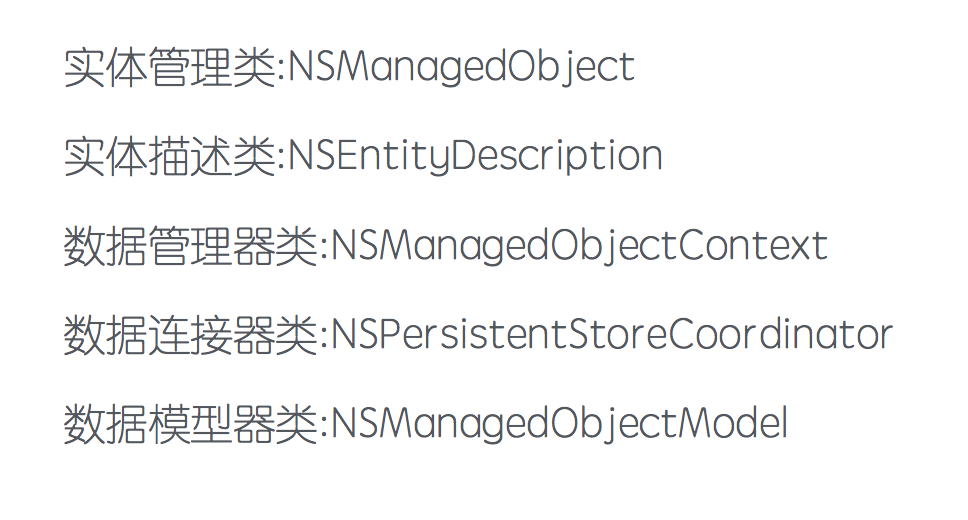
coreData的核心对象:
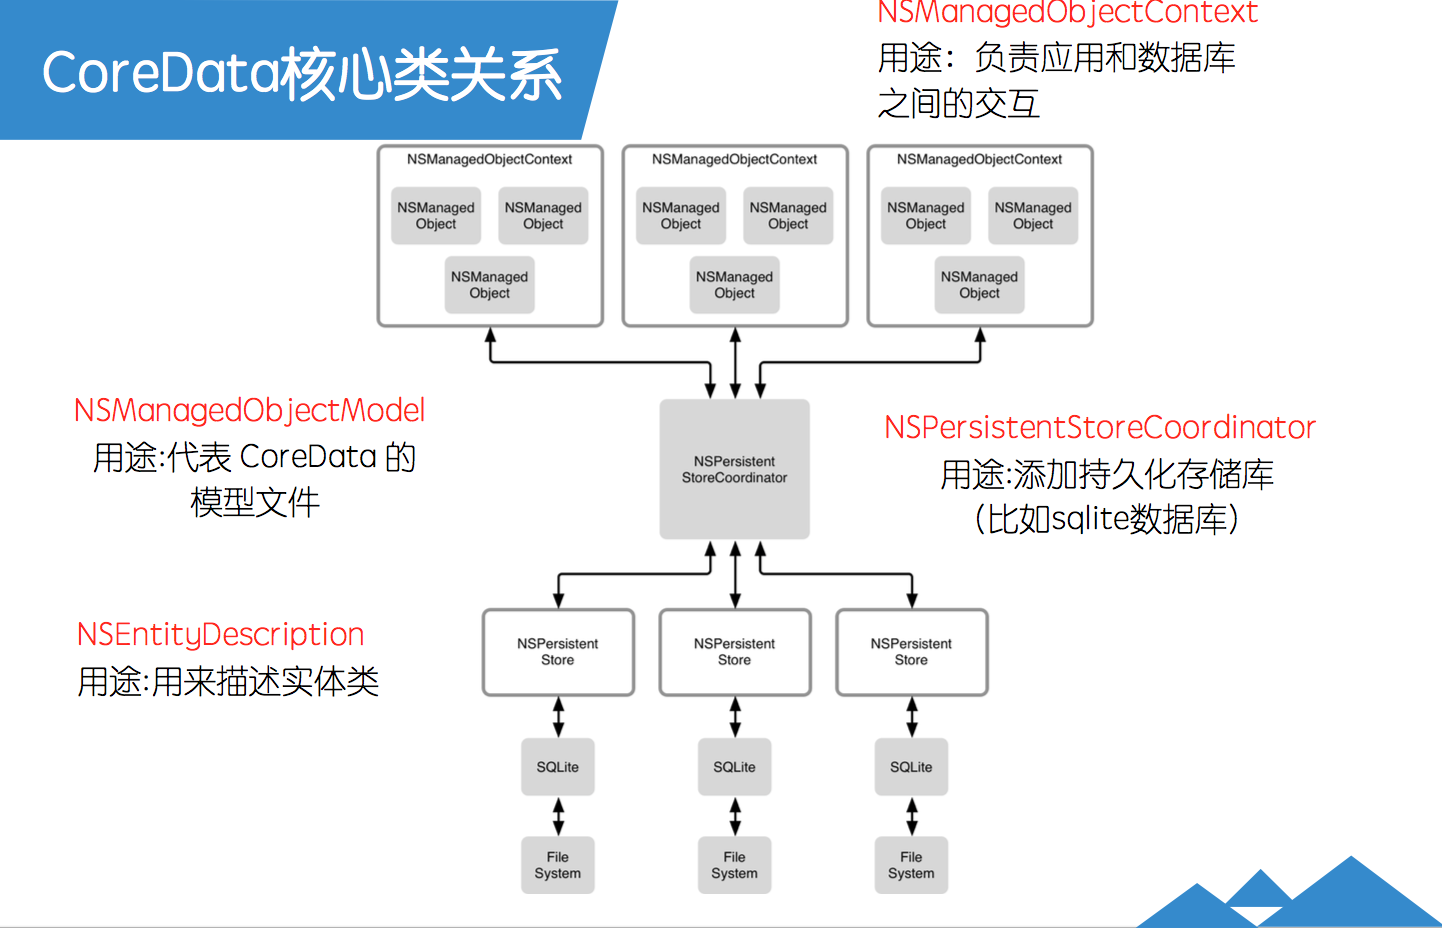
coreData核心对象关系:
1.持久化存储和存储文件:
NSPersistentStore:持久化存储,是对实际文件的一种object-C的表示方式。
存储文件:iOS支持四种存储类型。
NSSQLiteStoreType,NSBinaryStoretype,NSInMemoryStoreType,NSXMLStoreType。
2.被管理对象上下文:
NSManagedObjectContext:负责应用和数据库之间的交互。
数据的保存要用NSManagedObjectContext进行Save操作。
同理,查询等也需要他来进行。
3.被管理对象的相关类
NSmanagedObjectMode:被管理对象模型。(在操作中一直是以可视化的方式操作的)。
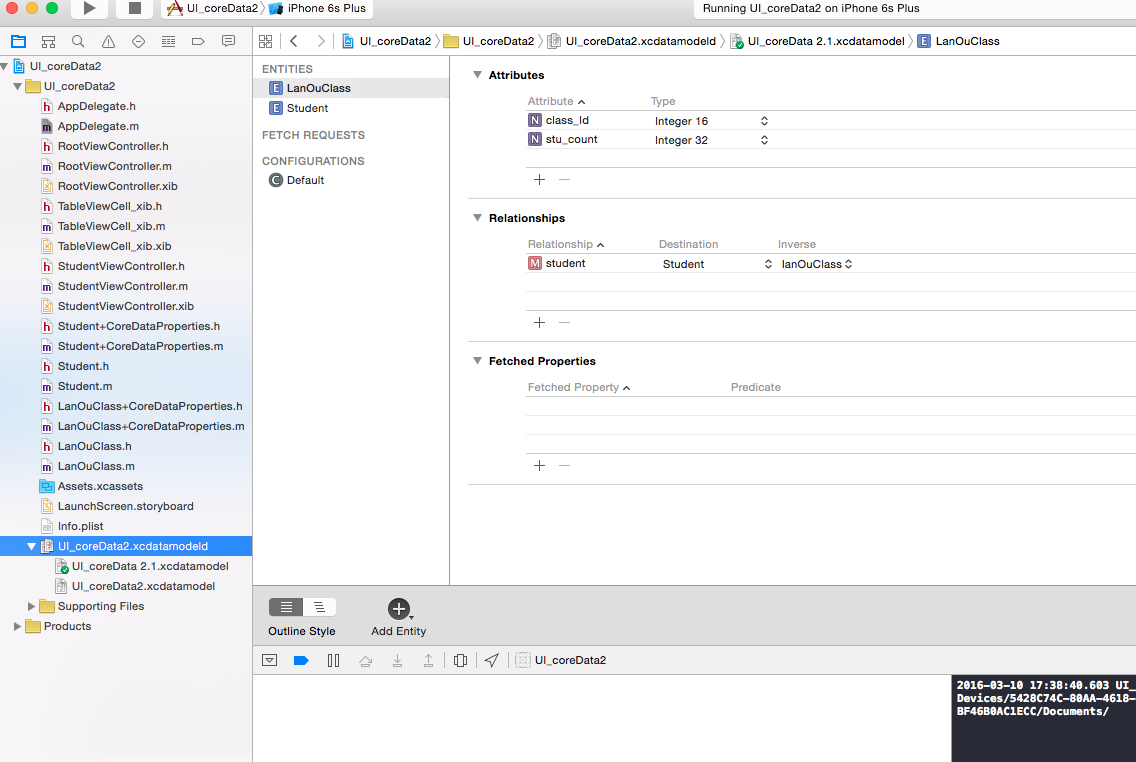
NSManagedObject:实体描述类,一般讲数据库中的表转化为模型时,都是这个类的子类。
Entity:实体类,实体是对文件数据的描述(这个解释比较抽象,通俗理解为在每次需要交互的时候,都由这个类来反馈数据库中的某个表(个人理解))。
下面附上一段插入数据和查询数据的代码,用来理解coreData。
-(void)insertData{
//    NSEntityDescription *entity = [NSEntityDescription entityForName:@"LanOuclass" inManagedObjectContext:[self context]];
//    LanOuClass *lanOuClass = [[LanOuClass alloc]initWithEntity:entity insertIntoManagedObjectContext:[self context]];
    //创建被管理实例对象Entity
    LanOuClass *lanOuClass = [NSEntityDescription insertNewObjectForEntityForName:@"LanOuClass" inManagedObjectContext:[self context]];
    //给实例对象赋值
    lanOuClass.class_Id = @(6660);
    lanOuClass.stu_count = @(10);
    //提前显示
    [self.dataMutableArr addObject:lanOuClass];
    NSIndexPath* indexPath =[NSIndexPath indexPathForRow:self.dataMutableArr.count - 1 inSection:0];
    [self.tableView insertRowsAtIndexPaths:@[indexPath] withRowAnimation:UITableViewRowAnimationFade];
    //滚动到最后一行
    [self.tableView scrollToRowAtIndexPath:indexPath atScrollPosition:UITableViewScrollPositionBottom animated:YES];
    //给实例化对象里的关联属性赋值;是个NSSet属性,有多个Student对象
    NSArray *nameArray = [NSArray arrayWithObjects:@"王",@"李",@"赵",@"钱",@"孙",@"周",@"吴",@"郑",@"冯",@"陈",nil ];
    NSArray *genderArray = [NSArray arrayWithObjects:@"男",@"女",nil];
    for(int i = 0; i<nameArray.count; i++ ){
        Student* stu = [NSEntityDescription insertNewObjectForEntityForName:@"Student" inManagedObjectContext:[self context]];
        stu.name = nameArray[i];
        stu.age = @(20+i);
        stu.gender =genderArray[arc4random()%2];
        //将学生和班级建立关联
        [lanOuClass addStudentObject:stu];
    }
    //保存对象,是由context对象执行,在appdelegate里面有详细的执行方法
    [[self appDelegate] saveContext];

}
再附上一段查询的代码:
//查询方法
-(void)fetchData{

    NSFetchRequest *fetchRequest = [[NSFetchRequest alloc] init];
    NSEntityDescription *entity = [NSEntityDescription entityForName:@"LanOuClass" inManagedObjectContext:[self context]];
    [fetchRequest setEntity:entity];
    // 添加查询条件语句
//    NSPredicate *predicate = [NSPredicate predicateWithFormat:@"<#format string#>", <#arguments#>];
//    [fetchRequest setPredicate:predicate];
    // 按某个字段对结果排序
    NSSortDescriptor *sortDescriptor = [[NSSortDescriptor alloc] initWithKey:@"class_Id"
                                                                   ascending:YES];
    [fetchRequest setSortDescriptors:[NSArray arrayWithObjects:sortDescriptor, nil]];

    NSError *error = nil;
    NSArray *fetchedObjects = [[self context] executeFetchRequest:fetchRequest error:&error];
    if (fetchedObjects == nil) {
        NSLog(@"空");
    }
    self.dataMutableArr = [fetchedObjects mutableCopy];
}
二、数据库版本迁移
在appdelegate.m里,做如下设置:
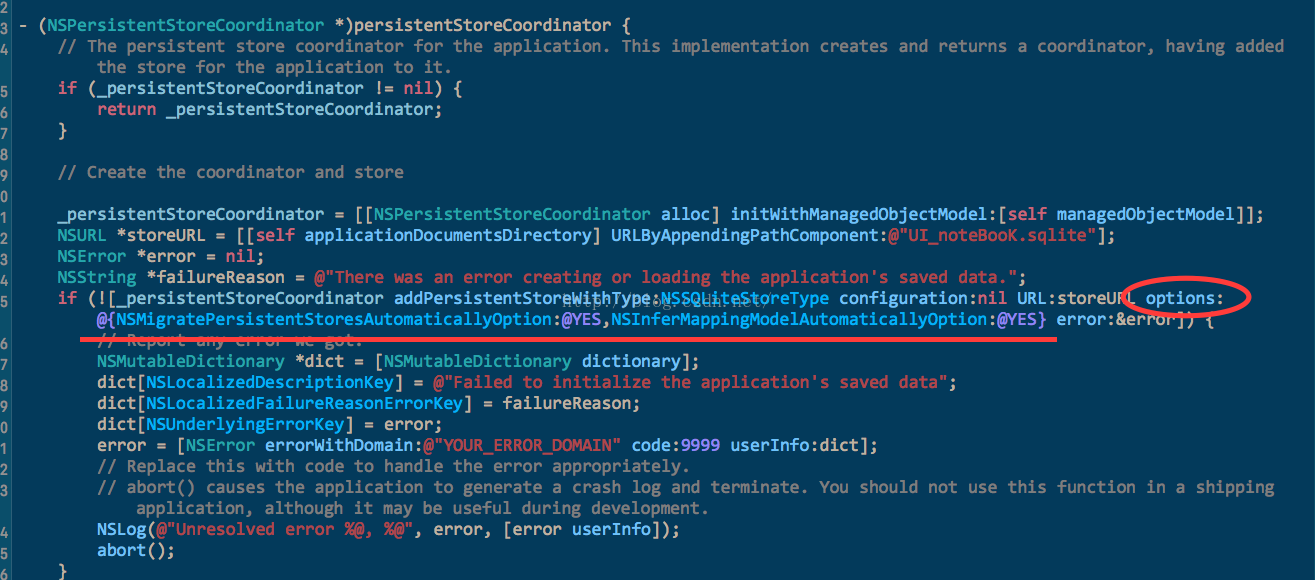
options原本为空,自行添加代码,使其支持版本迁移。
然后选中xcode,点击数据库,在editor选项卡中,选择add model version。
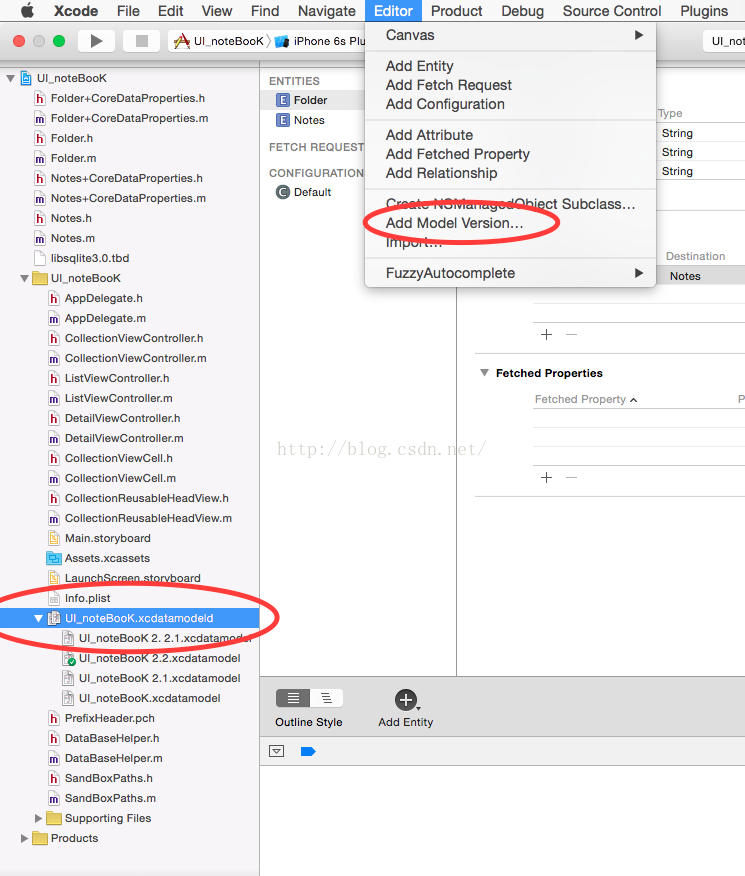
这样,就可以创建新的数据库,并修改里面的值了 。
#pragma mark - coreData
-(AppDelegate *)appdelegate{
    return [UIApplication sharedApplication].delegate;
}

-(NSManagedObjectContext*)context{
    return [[self appdelegate] managedObjectContext];
}
coreData操作是由appdelegate完成的,上面是得到当前appdelegate对象的方法。


 593
593


 被折叠的 条评论
为什么被折叠?
被折叠的 条评论
为什么被折叠?
 到【灌水乐园】发言


