


相信对于那些基础Android的人来说对于帧动画或补间动画应该并不陌生了吗?今天我给大家讲的是Android逐帧动画比较简单!
先上效果图!
下面仔细讲一下AnimationDrawable这个类
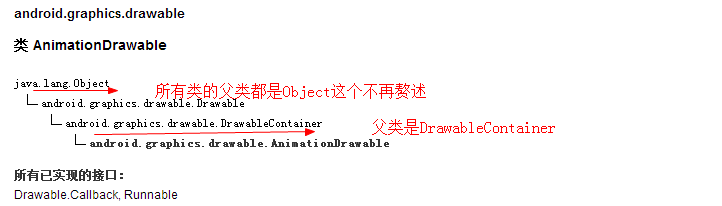
Object是所有类的父类毋庸置疑,其次它的间接父类是DrawableContainer
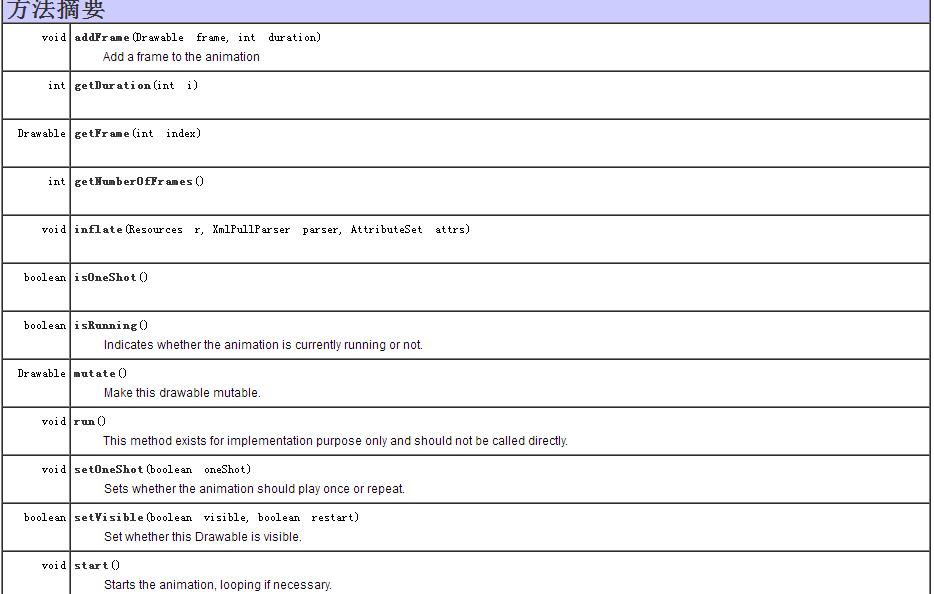
下面看下他们的构造方法以及函数
public class AnimationDrawable
extends DrawableContainer
implements Runnable
An object used to create frame-by-frame animations, defined by a series of Drawable objects, which can be used as a View object’s background.
The simplest way to create a frame-by-frame animation is to define the animation in an XML file, placed in the res/drawable/ folder, and set it as the background to a View object. Then, call run() to start the animation.
An AnimationDrawable defined in XML consists of a single element, and a series of nested tags. Each item defines a frame of the animation. See the example below.
spin_animation.xml file in res/drawable/ folder:
简单的来说创建一个逐帧动画就是创建一个xml文件,在res/drawable目录下然后在里面设置一个背景的View对象然后去启动动画。
顺序具体代码如下
anim_dialog_loading.xml
<?xml version="1.0" encoding="utf-8"?>
<animation-list xmlns:android="http://schemas.android.com/apk/res/android" android:oneshot="true" >
 <item android:drawable="@drawable/loading_0" android:duration="200"></item>
 <item android:drawable="@drawable/loading_1" android:duration="200"></item>
    <item android:drawable="@drawable/loading_2" android:duration="200"></item>
    <item android:drawable="@drawable/loading_3" android:duration="200"></item>
    <item android:drawable="@drawable/loading_4" android:duration="200"></item>

    <item android:drawable="@drawable/loading_5" android:duration="200"></item>
    <item android:drawable="@drawable/loading_6" android:duration="200"></item>
     <item android:drawable="@drawable/loading_7" android:duration="200"></item>

</animation-list>
倒序代码
anim_dialog_loading2.xml
<?xml version="1.0" encoding="utf-8"?>
<animation-list xmlns:android="http://schemas.android.com/apk/res/android" android:oneshot="true" >
 <item android:drawable="@drawable/loading_7" android:duration="200"></item>
    <item android:drawable="@drawable/loading_6" android:duration="200"></item>
    <item android:drawable="@drawable/loading_5" android:duration="200"></item>
    <item android:drawable="@drawable/loading_4" android:duration="200"></item>

    <item android:drawable="@drawable/loading_3" android:duration="200"></item>
    <item android:drawable="@drawable/loading_2" android:duration="200"></item>
     <item android:drawable="@drawable/loading_1" android:duration="200"></item>
      <item android:drawable="@drawable/loading_0" android:duration="200"></item>


</animation-list>
这里比较简单自己看API文档
了解之后就可以开车了,其实我们实现的功能很简单,主要输逐帧动画,顺序播放,倒序播放,以及停止播放动画设置每帧间隔时间为0.2秒
private void initView() {
        // TODO Auto-generated method stub
        iv_anim=(ImageView) findViewById(R.id.iv_anim);

    }
顺序逐帧播放动画
public void Order(View v){
        //顺序
        iv_anim.setImageResource(R.drawable.anim_dialog_loading);
        animationDrawable=(AnimationDrawable) iv_anim.getDrawable();
        animationDrawable.start();
        Log.i(TAG, "正在顺序播放动画");
    }
倒序逐帧播放动画
public void Back(View v){
        //倒序
        iv_anim.setImageResource(R.drawable.anim_dialog_loading2);
        animationDrawable=(AnimationDrawable) iv_anim.getDrawable();
        animationDrawable.start();
        Log.i(TAG, "正在倒序播放动画");
    }
停止播放逐帧动画
public void Stop(View v){
        //停止
    animationDrawable=(AnimationDrawable) iv_anim.getDrawable();
    animationDrawable.stop();
    Log.i(TAG, "正在停止播放动画");
    }
布局文件
activity_anim.xm文件
<?xml version="1.0" encoding="utf-8"?>
<LinearLayout xmlns:android="http://schemas.android.com/apk/res/android"
    android:layout_width="match_parent"
    android:layout_height="match_parent"
    android:orientation="vertical" >
     <ImageView
         android:id="@+id/iv_anim"
        android:layout_width="80dp"
        android:layout_height="80dp"
        android:contentDescription="@string/app_name"
       android:src="@drawable/a_1"
       android:scaleType="fitXY"
       android:padding="5px"
       android:layout_gravity="center"

        />
    <Button
        android:layout_width="match_parent"
        android:layout_height="wrap_content"
        android:text="顺序播放"
        android:onClick="Order"
        android:layout_marginTop="20dp"
         android:layout_marginLeft="20dp"
         android:layout_marginRight="20dp"

        />
     <Button
        android:layout_width="match_parent"
        android:layout_height="wrap_content"
        android:text="倒序播放"
         android:layout_marginTop="20dp"
         android:layout_marginLeft="20dp"
         android:layout_marginRight="20dp"
        android:onClick="Back"

        />
      <Button
        android:layout_width="match_parent"
        android:layout_height="wrap_content"
        android:padding="5px"
        android:text="停止"
         android:layout_marginLeft="20dp"
         android:layout_marginRight="20dp"
         android:layout_marginTop="20dp"
        android:onClick="Stop"/>


</LinearLayout>
最后上AnimationActivity完整Code
package com.zm.getareatest;

import android.app.Activity;
import android.graphics.drawable.AnimationDrawable;
import android.os.Bundle;
import android.util.Log;
import android.view.View;
import android.view.Window;
import android.view.WindowManager;
import android.widget.ImageView;

public class AnimationActivity extends Activity {
    private static final String TAG=AnimationActivity.class.getSimpleName();
    private ImageView iv_anim;
    private AnimationDrawable animationDrawable;
    @Override
    protected void onCreate(Bundle savedInstanceState) {
        // TODO Auto-generated method stub
        super.onCreate(savedInstanceState);
        this.requestWindowFeature(Window.FEATURE_NO_TITLE);
        getWindow().setFlags(WindowManager.LayoutParams.FLAG_FULLSCREEN, WindowManager.LayoutParams.FLAG_FULLSCREEN);
        setContentView(R.layout.activity_anim);
        initView();
    }
    private void initView() {
        // TODO Auto-generated method stub
        iv_anim=(ImageView) findViewById(R.id.iv_anim);

    }
    public void Order(View v){
        //顺序
        iv_anim.setImageResource(R.drawable.anim_dialog_loading);
        animationDrawable=(AnimationDrawable) iv_anim.getDrawable();
        animationDrawable.start();
        Log.i(TAG, "正在顺序播放动画");
    }
    public void Back(View v){
        //倒序
        iv_anim.setImageResource(R.drawable.anim_dialog_loading2);
        animationDrawable=(AnimationDrawable) iv_anim.getDrawable();
        animationDrawable.start();
        Log.i(TAG, "正在倒序播放动画");
    }
    public void Stop(View v){
        //停止
    animationDrawable=(AnimationDrawable) iv_anim.getDrawable();
    animationDrawable.stop();
    Log.i(TAG, "正在停止播放动画");
    }

}
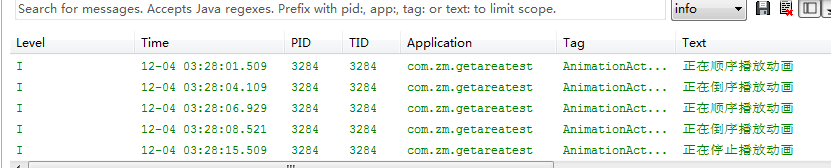
日志输出如下图所示
总结:
1、找到相关素材我这里已经提供大家直接下载即可
2、熟悉AnimationDrawable类构造方法以及函数
3、实现逐帧播放动画 按照顺序 倒序 停止等方法执行
4、记得在清单文件AdroidMainfest.xml注册ActivityAndroidStudio除外
素材如下
loading_0
loading_1
loading_2
loading_3
loading_4
loading_5
loading_6
loading_7
非常简单,另外有兴趣的可以加群一起撸代码!扫码直接进入开车哈哈!欢迎哈!转载请注明出处!谢谢!


 1万+
1万+


 被折叠的 条评论
为什么被折叠?
被折叠的 条评论
为什么被折叠?
 到【灌水乐园】发言


