


Preface
方法:初始的stage方法一样,没有任何的区别
此处,为了部分(偷懒的)同学方便,给出实例,实则非常简单。
核心的内容是在Controller.java中
    @FXML
    private void newButtonOnClicked(){
        try {
            //一定需要使用try-catch,不然编译器不会让你过的,Trust me!
            Parent anotherRoot = FXMLLoader.load(getClass().getResource("sample.fxml"));
            Stage anotherStage = new Stage();
            anotherStage.setTitle("Another Window Triggered by Clicking");
            anotherStage.setScene(new Scene(anotherRoot, 600, 329));
            anotherStage.show();
        } catch (Exception e){
            e.printStackTrace();
        }
    }
代码
代码结构
sample
├── Controller.java
├── main.fxml
├── Main.java
└── sample.fxml
Main.java
package sample;

import javafx.application.Application;
import javafx.fxml.FXMLLoader;
import javafx.scene.Parent;
import javafx.scene.Scene;
import javafx.stage.Stage;

public class Main extends Application {

    @Override
    public void start(Stage primaryStage) throws Exception{
        Parent root = FXMLLoader.load(getClass().getResource("main.fxml"));
        primaryStage.setTitle("Hello World");
        primaryStage.setScene(new Scene(root, 600, 400));
        primaryStage.show();
    }


    public static void main(String[] args) {
        launch(args);
    }
}
Controller.java(核心代码处)
package sample;

import javafx.fxml.FXML;
import javafx.fxml.FXMLLoader;
import javafx.scene.Parent;
import javafx.scene.Scene;
import javafx.scene.control.Button;
import javafx.stage.Stage;

public class Controller {

    @FXML
    private Button newButton;

    @FXML
    private void newButtonOnClicked(){
        try {
            //一定需要使用try-catch
            //下段实现的内容和Main.java中其实是一样的
            Parent anotherRoot = FXMLLoader.load(getClass().getResource("sample.fxml"));
            Stage anotherStage = new Stage();
            anotherStage.setTitle("Another Window Triggered by Clicking");
            anotherStage.setScene(new Scene(anotherRoot, 600, 329));
            anotherStage.show();
        } catch (Exception e){
            e.printStackTrace();
        }

    }

}
main.fxml
<?xml version="1.0" encoding="UTF-8"?>

<?import javafx.scene.control.Button?>
<?import javafx.scene.control.Label?>
<?import javafx.scene.layout.AnchorPane?>
<?import javafx.scene.text.Font?>

<AnchorPane prefHeight="400.0" prefWidth="600.0" xmlns="http://javafx.com/javafx/9" xmlns:fx="http://javafx.com/fxml/1" fx:controller="sample.Controller">
   <children>
      <Button fx:id="newButton" layoutX="310.0" layoutY="214.0" mnemonicParsing="false" onMouseClicked="#newButtonOnClicked" text="New FXML" />
      <Label alignment="CENTER" layoutX="142.0" layoutY="115.0" prefHeight="51.0" prefWidth="70.0" text="Main" textAlignment="CENTER">
         <font>
            <Font size="19.0" />
         </font>
      </Label>
   </children>
</AnchorPane>
sample.fxml
<?xml version="1.0" encoding="UTF-8"?>

<?import javafx.scene.control.Button?>
<?import javafx.scene.layout.AnchorPane?>
<?import javafx.scene.layout.ColumnConstraints?>
<?import javafx.scene.layout.GridPane?>
<?import javafx.scene.layout.RowConstraints?>


<GridPane alignment="center" hgap="10" vgap="10" xmlns:fx="http://javafx.com/fxml/1" xmlns="http://javafx.com/javafx/9" fx:controller="sample.Controller">
   <columnConstraints>
      <ColumnConstraints />
      <ColumnConstraints />
   </columnConstraints>
   <rowConstraints>
      <RowConstraints />
   </rowConstraints>
   <children>
      <AnchorPane prefHeight="329.0" prefWidth="369.0" GridPane.columnIndex="1">
         <children>
            <Button layoutX="201.0" layoutY="180.0" mnemonicParsing="false" text="Test" />
         </children>
      </AnchorPane>
   </children>
</GridPane>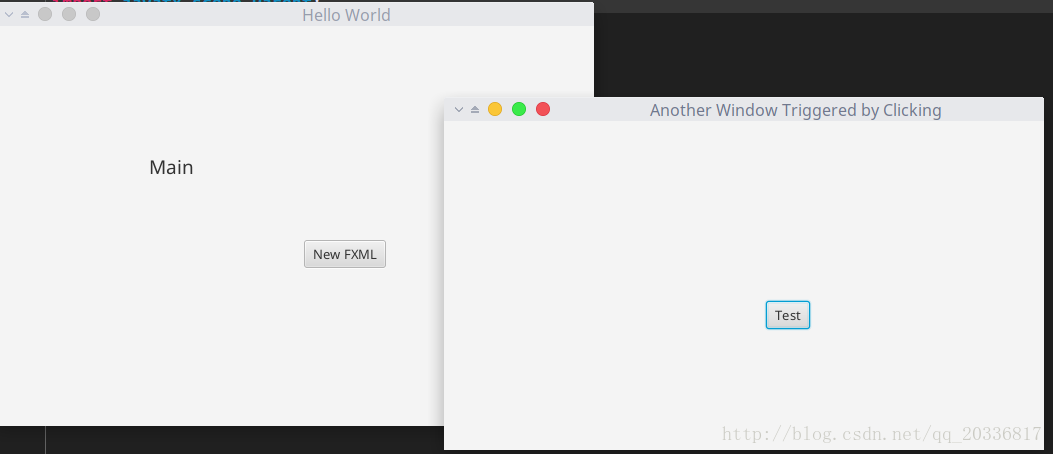


 970
970


 被折叠的 条评论
为什么被折叠?
被折叠的 条评论
为什么被折叠?
 到【灌水乐园】发言


