


Android客户端将用户的注册信息上传到Tomcat Web服务器,Servlet将注册信息写入到MySQL中。
1,准备工作
(1)在MySQL中创建好要使用的数据库和数据表。
(2)设置好Tomcat的数据库连接池。
2,Android客户端Activity和Layout的设计
(1)一个简单的注册界面,sign_layout.xml
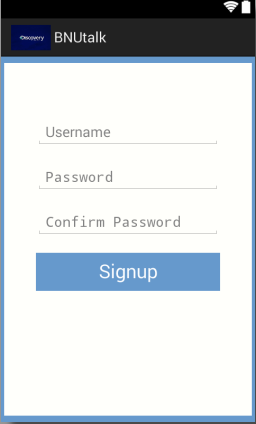
sign_layout.xml
<LinearLayout xmlns:android="http://schemas.android.com/apk/res/android"
    xmlns:tools="http://schemas.android.com/tools"
    android:layout_width="match_parent"
    android:layout_height="match_parent"
    android:focusableInTouchMode="true"
android:background="#ff6699cc"
    android:orientation="vertical"
    android:paddingBottom="@dimen/activity_vertical_margin"
    android:paddingLeft="@dimen/activity_horizontal_margin"
    android:paddingRight="@dimen/activity_horizontal_margin"
    android:paddingTop="@dimen/activity_vertical_margin"
    tools:context=".MainActivity" >

        <RelativeLayout
        android:layout_width="fill_parent"
        android:layout_height="fill_parent"
        android:background="#fffffffb"
        android:orientation="horizontal"
        android:padding="40dp" >

        <EditText
            android:id="@+id/etSgAccount"
            android:layout_width="match_parent"
            android:layout_height="wrap_content"
            android:layout_marginTop="30dp"
            android:layout_marginBottom="20dp"
            android:hint="@string/Account"
            android:inputType="textEmailAddress" />

        <EditText
            android:id="@+id/etSgPassword"
            android:layout_width="match_parent"
            android:layout_height="wrap_content"
            android:layout_below="@+id/etSgAccount"
            android:layout_marginBottom="20dp"
            android:hint="@string/Password"
            android:inputType="textPassword" />
         <EditText
            android:id="@+id/etSgRePassword"
            android:layout_width="match_parent"
            android:layout_height="wrap_content"
            android:layout_below="@+id/etSgPassword"
            android:layout_marginBottom="20dp"
            android:hint="@string/repassword"
            android:inputType="textPassword" />


        <Button
            android:id="@+id/btnSign"
            android:layout_width="match_parent"
            android:layout_height="wrap_content"
            android:layout_below="@+id/etSgRePassword"
            android:background="#ff6699cc"
            android:onClick="onLogin"
            android:text="@string/signup"
            android:textColor="#ffffffff"
            android:textSize="24sp" />
    </RelativeLayout>

</LinearLayout>
(2)编写对应的Activity——SignActivity.java
package com.bnutalk.activitytest;

import android.app.Activity;
import android.content.Intent;
import android.os.Bundle;
import android.view.View;
import android.widget.Button;
import android.widget.EditText;

public class SignActivity extends Activity {
    private EditText username;
    private EditText password;
    private Button signup;
    @Override
    protected void onCreate(Bundle savedInstanceState)
    {
        super.onCreate(savedInstanceState);
        setContentView(R.layout.sign_layout);
        username=(EditText) findViewById(R.id.etSgAccount);
        password=(EditText) findViewById(R.id.etSgPassword);
        signup=(Button) findViewById(R.id.btnSign);
    }
    /*发起HTTP请求*/
    public void onLogin(View v)
    {
        String url="http://172.22.140.237:8080/web/MysServlet";
        new HttpThread(url, username.getText().toString(), password.getText().toString()).start();
    }

}
其中的重要代码是函数onLogin,它表示当按下Signup按钮时,启动Http线程,向服务器发起Http请求。
/*发起HTTP请求*/
    public void onLogin(View v)
    {
    /*url要访问的Tomcat的Servlet地址,将ip换成Tomacat所在主机的ip*/
        String url="http://172.22.140.237:8080/web/MysServlet";

    /*调用访问网络的HttpThread*/
        new HttpThread(url, username.getText().toString(), password.getText().toString()).start();
    }
(3)新建一个Tread类——HttpTread
访问网络属于耗时操作,因此用一个单独的线程来实现。
package com.bnutalk.activitytest;

import java.io.BufferedReader;
import java.io.IOException;
import java.io.InputStreamReader;
import java.net.HttpURLConnection;
import java.net.MalformedURLException;
import java.net.URL;

import android.R.string;

public class HttpThread extends Thread {
    String url;
    String username;
    String password;

    public HttpThread(String url, String username, String password) {
        // TODO Auto-generated constructor stub
        this.url = url;
        this.username = username;
        this.password = password;
    }

    private void doGet() throws IOException {
        /*将username和password传给Tomcat服务器*/
        url=url+"?username="+username+"&password="+password;
        try {
            URL httpUrl = new URL(url);
            /*获取网络连接*/
            HttpURLConnection conn = (HttpURLConnection) httpUrl.openConnection();
            /*设置请求方法为GET方法*/
            conn.setRequestMethod("GET");
            /*设置访问超时时间*/
            conn.setReadTimeout(5000);
            BufferedReader reader=new BufferedReader(new InputStreamReader(conn.getInputStream()));
            String str;
            StringBuffer sb=new StringBuffer();
            //读取服务器返回的信息
            while((str=reader.readLine())!=null)
            {
                sb.append(str);
            }
            //把服务端返回的数据打印出来
            System.out.println("result"+sb.toString());
        } catch (MalformedURLException e) {
            // TODO Auto-generated catch block
            e.printStackTrace();
        }

    }

    /*在run中调用doGet*/
    @Override
    public void run() {
        try {
            doGet();
        } catch (IOException e) {
            // TODO Auto-generated catch block
            e.printStackTrace();
        }
    }
}
(4)在AndroidManifest.xml中添加网络访问权限
<uses-permission android:name="android.permission.INTERNET"/>如图:

3,Server和Servlet设置
(1)建立好一个server和一个web项目,在web下建立所需的Servlet
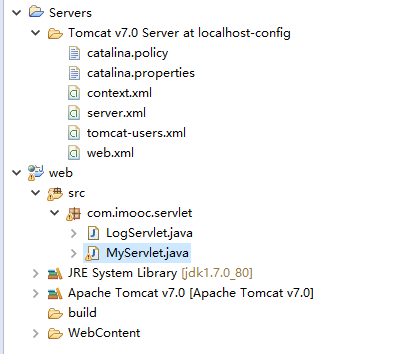
如图所示,注册用到的Servlet是MyServlet.java,请忽略LogServlet.java
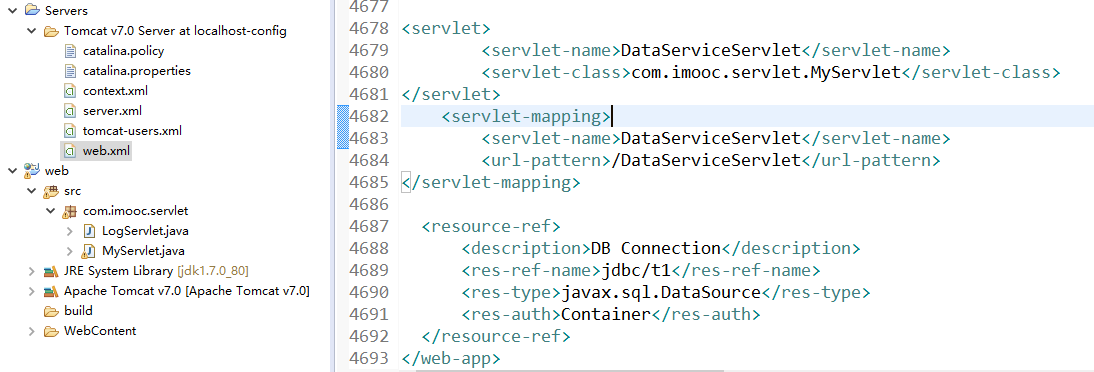
(2)在web.xml中注册Servlet
<servlet>
        <servlet-name>DataServiceServlet</servlet-name>
        <servlet-class>com.imooc.servlet.MyServlet</servlet-class>
</servlet>
    <servlet-mapping>
        <servlet-name>DataServiceServlet</servlet-name>
        <url-pattern>/DataServiceServlet</url-pattern>
</servlet-mapping>
如图所示:
(3)编写MyServlet.java
package com.imooc.servlet;

import java.io.IOException;
import java.io.PrintWriter;

import java.sql.*;

import javax.naming.InitialContext;
import javax.naming.NamingException;
import javax.servlet.ServletException;
import javax.servlet.annotation.WebServlet;
import javax.servlet.http.HttpServlet;
import javax.servlet.http.HttpServletRequest;
import javax.servlet.http.HttpServletResponse;
import javax.sql.DataSource;

import org.apache.catalina.Context;

import com.mysql.jdbc.Connection;
import com.mysql.jdbc.ResultSet;
import com.mysql.jdbc.Statement;

/**
 * Servlet implementation class MyServlet
 */
@WebServlet("/MyServlet")
public class MyServlet extends HttpServlet {
    private static final long serialVersionUID = 1L;

    /**
     * @see HttpServlet#HttpServlet()
     */
    public MyServlet() {
        super();
        // TODO Auto-generated constructor stub
    }

    /**
     * @see HttpServlet#doGet(HttpServletRequest request, HttpServletResponse
     *      response)
     */
    protected void doGet(HttpServletRequest request, HttpServletResponse response)
            throws ServletException, IOException {
        this.doPost(request, response);
    }

    /**
     * @see HttpServlet#doPost(HttpServletRequest request, HttpServletResponse
     *      response)
     */
    protected void doPost(HttpServletRequest request, HttpServletResponse response)
            throws ServletException, IOException {
            /*获取请求的数据,并向控制台输出*/
        String username = request.getParameter("username");
        String password = request.getParameter("password");
        PrintWriter out = response.getWriter();
        System.out.println("username" + "," + username);
        System.out.println("password" + "," + password);

        int rs ;
        String sql = "insert into bnutalk(id,username,psswd) values(3,?,?)";

        /*实现向MySQL中插入username和password*/
        try {
            InitialContext ctx = new InitialContext();
            DataSource ds = (DataSource) ctx.lookup("java:comp/env/jdbc/t1");
            /*获得数据库的连接*/
            java.sql.Connection conn =ds.getConnection();
            conn = ds.getConnection();
            /*执行sql*/
            PreparedStatement ps = conn.prepareStatement(sql);
            ps.setString(1, username);
            ps.setString(2, password);
            rs= ps.executeUpdate();
        } catch (SQLException se) {
            System.out.println("SQLException: " + se.getMessage());
        } catch (NamingException ne) {
            System.out.println("NamingException: " + ne.getMessage());
        }
    }
}
4,运行
(1)运行web项目,run on server

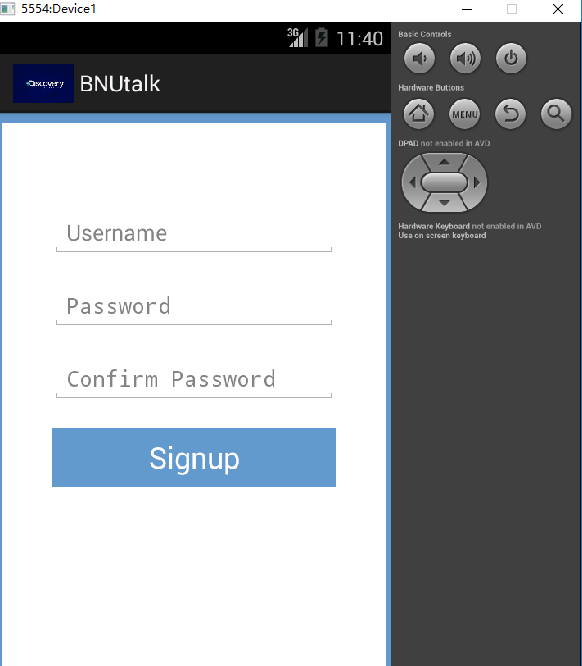
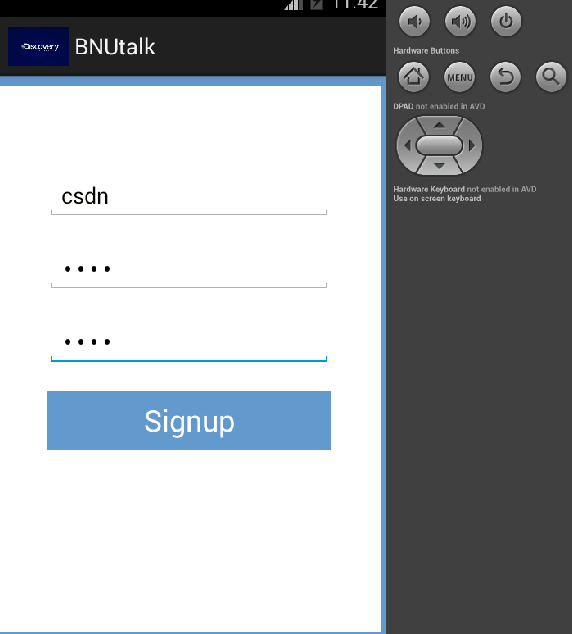
(2)运行Android客户端
如图:
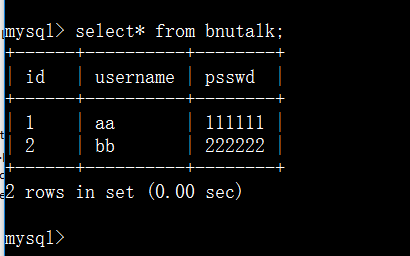
先看看此时数据表中的内容:
(3)注册一个用户
用户名和密码都是csdn
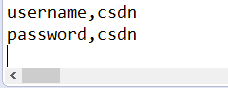
控制台输出:
再次查看数据表:

如果有看不懂的,可以先去补一补Servlet,Tomcat数据库连接池,MySQL,Thread这些基础知识,有个大概印象,最起码能知道其中的逻辑,大体框架,实现机制。脑海中一个框架图,再来看代码就很简单了。


 487
487


 被折叠的 条评论
为什么被折叠?
被折叠的 条评论
为什么被折叠?
 到【灌水乐园】发言


