


Barcode的一个实现案例
一、简介
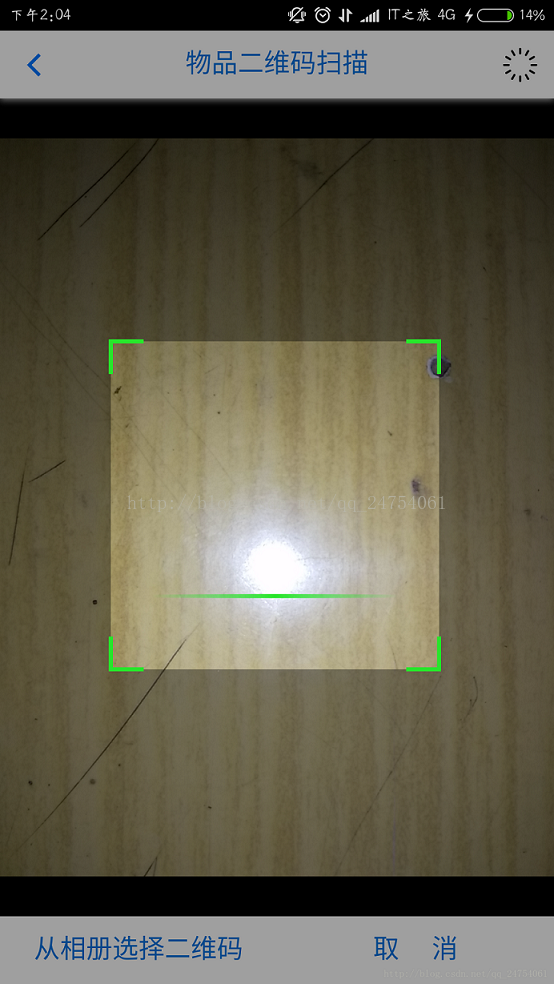
Barcode模块管理条码扫描,提供常见的条码(二维码及一维码)的扫描识别功能,可调用设备的摄像头对条码图片扫描进行数据输入。通过plus.barcode可获取条码码管理对象。博客有更新,修复了评论下面提出的一些问题,最新地址是 MUI 结合 HTML5+ 实现的二维码扫描功能 (更多内容,可参阅程序员在旅途)
二、实现的效果
三、实现 代码 (完整 源代码)
<!doctype html>
<html>
   <head>
	<meta charset="UTF-8">
	<title></title>
	<meta name="viewport" content="width=device-width,initial-scale=1,minimum-scale=1,maximum-scale=1,user-scalable=no" />
	<link href="css/mui.min.css" rel="stylesheet" />
	<script src="js/mui.min.js"></script>
	<style type="text/css">
		#bcid{
			width: 100%;
			height: 100%;
			position: absolute;
			background: #000000;
		}
		html, body ,div{
			height:100%;
			width: 100%;
		}
		.fbt{
			color: #0E76E1;
			width: 50%;
			background-color: #ffffff;
			float: left;
			line-height: 44px;
			text-align: center;
		}
	</style>
   </head>
  <body>
	<header class="mui-bar mui-bar-nav" style="background-color: #ffffff;">
	  <a class="mui-action-back mui-icon mui-icon-left-nav mui-pull-left"></a>
	  <h1 class="mui-title" style="color: #0E76E1;">物品二维码扫描</h1>
	  <span class="mui-icon mui-icon-spinner-cycle mui-spin mui-pull-right" id="turnTheLight"></span>
	</header>

	<div id="bcid">
	     <!--盛放扫描控件的div-->
	</div>

	<div class="mui-bar mui-bar-footer" style="padding: 0px;">
		<div class="fbt" onclick="scanPicture();">从相册选择二维码</div>
		<div class="fbt mui-action-back">取  消</div>
	</div>

	<script type="text/javascript">
	       scan = null;//扫描对象
		mui.plusReady(function () {
	          mui.init();
		  startRecognize();
	       });

		function startRecognize(){
		   try{
			  var filter;
			 //自定义的扫描控件样式
			 var styles = {frameColor: "#29E52C",scanbarColor: "#29E52C",background: ""}
			//扫描控件构造
			scan = new plus.barcode.Barcode('bcid',filter,styles);
			scan.onmarked = onmarked;
			scan.onerror = onerror;
			scan.start();
			//打开关闭闪光灯处理
			var flag = false;
			document.getElementById("turnTheLight").addEventListener('tap',function(){
			   if(flag == false){
			      scan.setFlash(true);
			      flag = true;
			   }else{
			     scan.setFlash(false);
			     flag = false;
			   }
			});
		  }catch(e){
			alert("出现错误啦:\n"+e);
		     }
		  };
			function onerror(e){
					alert(e);
			};
			function onmarked( type, result ) {
					var text = '';
					switch(type){
						case plus.barcode.QR:
						text = 'QR: ';
						break;
						case plus.barcode.EAN13:
						text = 'EAN13: ';
						break;
						case plus.barcode.EAN8:
						text = 'EAN8: ';
						break;
					}
					alert( text + " : "+ result );

			};

		// 从相册中选择二维码图片
		function scanPicture() {
		    plus.gallery.pick(function(path){
			    plus.barcode.scan(path,onmarked,function(error){
					plus.nativeUI.alert( "无法识别此图片" );
				});
		    },function(err){
		        plus.nativeUI.alert("Failed: "+err.message);
		    });
		}

		</script>
	</body>
</html>
三、做的过程中遇见的问题
a,div占满整个页面
1,此div宽高都为100%,父级元素的高度也为此(依次类推直至根节点),或者此div的position为absolute;
2,可采用js动态设置页面宽高
var height = window.innerHeight + 'px';//获取页面实际高度
var width = window.innerWidth + 'px';
document.getElementById("bcid").style.height= height;
document.getElementById("bcid").style.width= width;
b,扫描控件有上下边距
采用填充黑色来淡化视觉上面的差异,未实际解决,(如果你解决的话,欢迎留言,谢谢)
四、后来的补充
1, 针对评论提出的问题,优化了相关的代码,博客地址MUI 结合 HTML5+ 实现的二维码扫描功能。
2,主要优化的点:模块出现黑屏的问题,样式的问题,闪退等


 被折叠的 条评论
为什么被折叠?
被折叠的 条评论
为什么被折叠?
 到【灌水乐园】发言


