


一、问题简单描述
腾讯云CentOS7在用yum安装mysql时,参考mysql的官方文档安装(见最后的附录),出现了这样的问题:

二、原因:
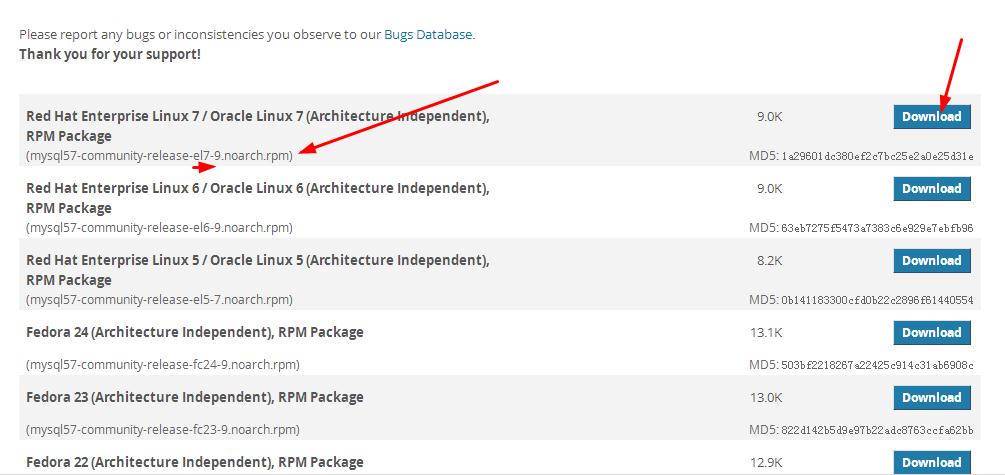
Go to the Download MySQL Yum Repository page in the MySQL Developer Zone.
mysql的yun源下载地址Select and download the release package for your platform.
Install the downloaded release package with the following command
(1)下载完成后,用SSH Secure File Transfer Client等工具将下载的rpm包上传到云服务器上。接着进入到mysql57-community-release-el7-9.noarch.rpm包所在的文件夹,执行下面的命令:
[root@ centos local]# sudo rpm -Uvh mysql57-community-release-el7-9.noarch.rpm
(2)之后,进入yum源的配置文件夹:
[root@ centos local]# cd /etc/yum.repos.d/
[root@ centos local]# ls
会发现,多出了两个mysql的yun源配置
备注:yum的配置一般有两种方式,一种是直接配置/etc目录下的yum.conf文件,另外一种是在/etc/yum.repos.d目录下增加.repo文件。问题来了
安装了mysql的yum源后,整个yum源都出了问题。
(1)例如:执行
[root@ centos local]#yum repolist all | grep mysql
会出现下面图中的问题
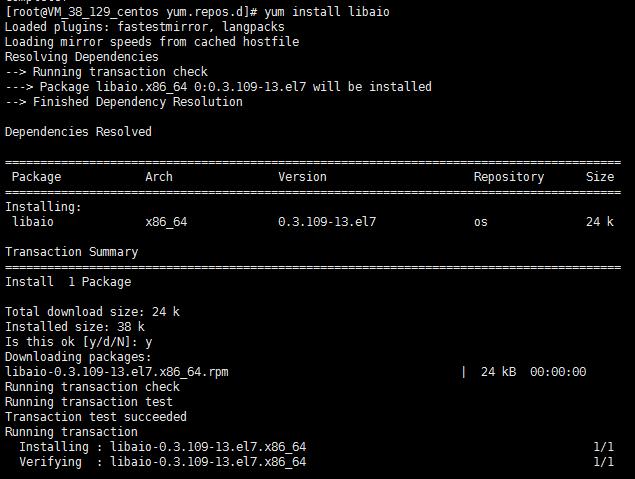
(2)执行下面命令,安装的是其他软件包,仍然出现同样的问题。推测一下,应该是该mysql的yum源有问题,导致了整个yum源出错了。
[root@ centos local]#yum install libaio
同样也会出现下面图中的问题
总结:腾讯云CentOS7用yum源安装mysql的方法行不通


三、解决方法
分两个步骤:一是删除已配置mysql的yum源;二是用tar方法安装mysql(详细看我的另一篇文章)
1. 删除刚刚配置的mysql的yum源
[root@ centos yum.repos.d]# yum remove mysql57-community-release-el7-9.noarch
进入yum源的配置文件夹,查看一下
[root@ centos local]# cd /etc/yum.repos.d/
[root@ centos local]# ls
可以发现,mysql的yum源别删除了:
此时再次安装其他软件包,可以看到恢复正常了。
接下来,可以用tar的方式安装mysql了。以下是我的另一篇博文:腾讯云CentOS7使用tar安装mysql
http://blog.csdn.net/qq_24891153/article/details/52763369

附录:linux上用yum安装mysql的官方文档摘录
A Quick Guide to Using the MySQL Yum Repository
Abstract
The MySQL Yum repository provides RPM packages for installing the MySQL server, client, and other components on Linux platforms. The packages also upgrade and replace any third-party MySQL packages installed from the Linux distros’ native software repositories, if replacements for them are available from MySQL.
The MySQL Yum repository supports the following Linux platforms :
EL5-, EL6-, and EL7-based platforms (for example, the corresponding versions of Red Hat Enterprise Linux, Oracle Linux, and CentOS)
Fedora 23 and 24
This is a quick guide to using the MySQL Yum repository. For more information, see Further Readings.
For legal information, see the Legal Notices.
For help with using MySQL, please visit either the MySQL Forums or MySQL Mailing Lists, where you can discuss your issues with other MySQL users.
For additional documentation on MySQL products, including translations of the documentation into other languages, and downloadable versions in variety of formats, including HTML and PDF formats, see the MySQL Documentation Library.
Document generated on: 2016-10-05 (revision: 49311)
Steps for a Fresh Installation of MySQL
Note:
The following instructions assume that MySQL is not already installed on your system using a third-party-distributed RPM package; if that is not the case, follow the instructions given in Replacing a Native Third-Party Distribution of MySQL.
1、Adding the MySQL Yum Repository
First, add the MySQL Yum repository to your system’s repository list. Follow these steps:
Go to the download page for MySQL Yum repository at http://dev.mysql.com/downloads/repo/yum/.
Select and download the release package for your platform.
Install the downloaded release package with the following command, replacing platform-and-version-specific-package-name with the name of the downloaded package:
shell> sudo rpm -Uvh platform-and-version-specific-package-name.rpm
For example, for version n of the package for EL6-based systems, the command is:
shell> sudo rpm -Uvh mysql57-community-release-el6-n.noarch.rpm
Note
Once the release package is installed on your system, any system-wide update by the yum update command (or dnf upgrade for dnf-enabled systems) will automatically upgrade MySQL packages on your system and also replace any native third-party packages, if Yum finds replacements for them in the MySQL Yum repository. See Upgrading MySQL with the MySQL Yum Repository and Replacing a Native Third-Party Distribution of MySQL for details.
2、Selecting a Release Series
When using the MySQL Yum repository, the latest GA release of MySQL is selected for installation by default. If this is what you want, you can skip to the next step, Installing MySQL with Yum.
Within the MySQL Yum repository (http://repo.mysql.com/yum/), different release series of the MySQL Community Server are hosted in different subrepositories. The subrepository for the latest GA series (currently MySQL 5.7) is enabled by default, and the subrepositories for all other series (for example, the MySQL 5.6 series) are disabled by default. Use this command to see all the subrepositories in the MySQL Yum repository, and see which of them are enabled or disabled (for dnf-enabled systems, replace yum in the command with dnf):
shell> yum repolist all | grep mysql
3、Installing MySQL
Install MySQL by the following command (for dnf-enabled systems, replace yum in the command with dnf):
shell> sudo yum install mysql-community-server
This installs the package for the MySQL server, as well as other required packages.
4、Starting the MySQL Server
Start the MySQL server with the following command:
shell> sudo service mysqld start
You can check the status of the MySQL server with the following command:
shell> sudo service mysqld status


 7378
7378


 被折叠的 条评论
为什么被折叠?
被折叠的 条评论
为什么被折叠?
 到【灌水乐园】发言


