


继续今天的学习心得,unity中小地图的制作,实现了小地图中红色小箭头代表场景中的主角,然后人物方向的转变,小地图中箭头也随之改变方向。
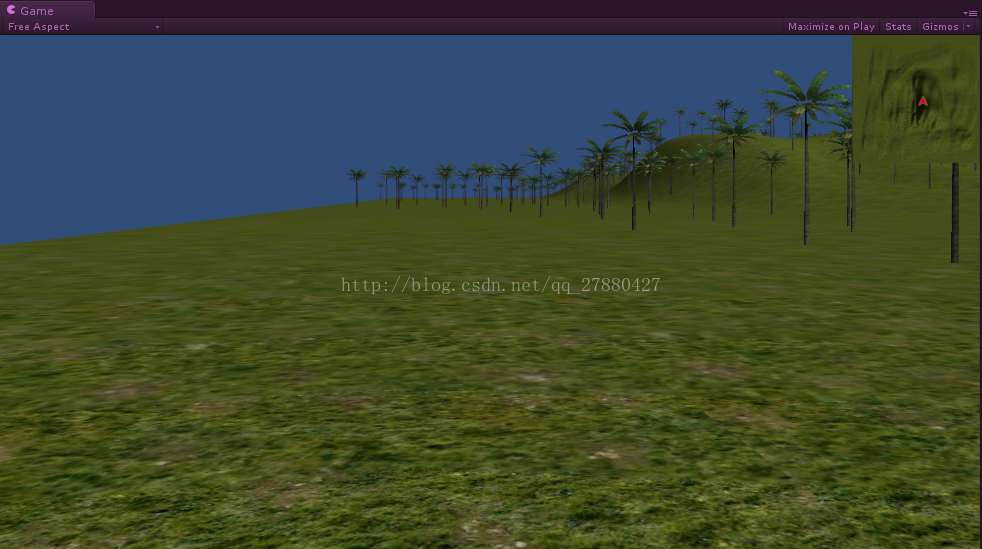
右上角就是小地图,上面有个红色小箭头就是代表主角人物所在场景中的位置,箭头的方向就代表人物所面向的方向。
步骤:
1.俯视图的制作
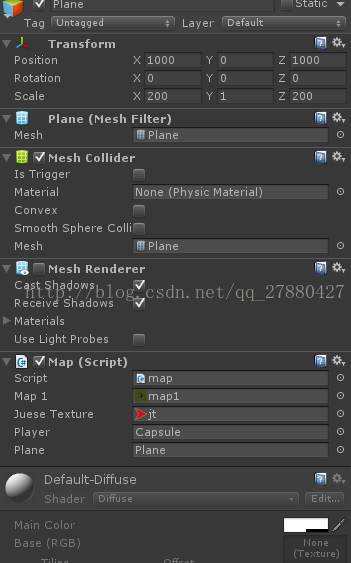
首先,我们将Scene场景调成俯视的角度;然后在创建一个Plane,然后点击该对象,在Inspector属性窗口将MeshRenderer取消,
2.代码的编写
using UnityEngine;
using System.Collections;

public class map : MonoBehaviour
{
    public Texture map1;//小地形图
    public Texture jueseTexture;//标识角色的图片
    float juesePosX = 0;
    float juesePosY = 0;
    public GameObject player;//角色
    public GameObject plane;//地形
    float planeWidth;//地形的宽
    float planeHeight;//地形的高
    float angle = 0; //人物旋转的角度
    void Start()
    {
        //获取地形的宽高
        planeWidth = plane.GetComponent<MeshFilter>().mesh.bounds.size.x * plane.transform.localScale.x;
        planeHeight = plane.GetComponent<MeshFilter>().mesh.bounds.size.z * plane.transform.localScale.z;
        print("width+heith:" + planeWidth + ", " + planeHeight);
        print("bounds:" + plane.GetComponent<MeshFilter>().mesh.bounds);
    }
    void OnGUI()
    {
        GUI.DrawTexture(new Rect(Screen.width - map1.width, 0, map1.width, map1.height), map1);

        GUIUtility.RotateAroundPivot(angle, new Vector2((Screen.width - map1.width) + juesePosX + 5, juesePosY + 5));
        GUI.DrawTexture(new Rect((Screen.width - map1.width) + juesePosX, juesePosY, 10, 10), jueseTexture);
    }

    void Update()
    {
        print("people:" + player.transform.position.x + "," + player.transform.position.y);
        print(1);
        //根据palyer在plane的比例关系,映射到对应地图位置。
        juesePosX = map1.width * player.transform.position.x / planeWidth + map1.width / 2;
        juesePosY = map1.height * (-player.transform.position.z) / planeHeight + map1.height / 2;

        print("x:" + juesePosX + "y:" + juesePosY);

        angle = player.transform.eulerAngles.y - 90;
        print("angle:" + angle);
    }
}
将该脚本拖放到Plane上,参数说明:JueseTexture是指小地图中箭头的图片,Player是人物模型的Controller,Plane是指当前带网格的Plane,Map1是指小地图的图片。
当然还有一种KGFMapSystem的插件,用来制作小地图就更炫更专业了,这里只是一个粗糙的小地图。你也可以尝试用一下更专业的插件来开发。


 1万+
1万+


 被折叠的 条评论
为什么被折叠?
被折叠的 条评论
为什么被折叠?
 到【灌水乐园】发言


