


摘自冯乐乐的《unity shader 入门精要》
直接给列出代码,有注释:
Shader "Custom/DiffusePixelLevelMat" {
	Properties
	{
		_Diffuse("Diffuse",Color)=(1,1,1,1)
	}

	SubShader
	{
		Pass
		{
			Tags{"LightMode"="ForwardBase"}

			CGPROGRAM

			#pragma vertex vert
			#pragma fragment frag

			#include "Lighting.cginc"

			fixed4 _Diffuse;

			struct a2v
			{
				float4 vertex:POSITION;
				float4 normal:NORMAL;
			};

			struct v2f
			{
				float4 pos:SV_POSITION;
				//这里与前面的相比做了更改
				fixed3 worldNormal:TEXCOORDO;
			};

			v2f vert(a2v v)
			{
				v2f o;

				//Transform the vertex from object space to projection space
				//变换对象空间的顶点投影空间
				o.pos=mul(UNITY_MATRIX_MVP,v.vertex);

				// Transform the normal from object space to world space
				//把局部法线转换成空间法线
				o.worldNormal = mul(v.normal, (float3x3)_World2Object);

				return o;
			}

			fixed4 frag(v2f i):SV_Target
			{
				//get ambient term
				//获取局部法线
				fixed3 ambient =UNITY_LIGHTMODEL_AMBIENT.xyz;

				//get the normal in world space
				//获取空间法线
				fixed3 worldNormal=normalize(i.worldNormal);

				//get the light direction in world space
				//获取空间光照
				fixed3 worldLightDir=normalize(_WorldSpaceLightPos0.xyz);

				//compute diffuse term
				//计算漫反射
				fixed3 diffuse=_LightColor0.rgb*_Diffuse.rgb*saturate(dot(worldNormal,worldLightDir));

				fixed3 color=ambient+diffuse;

				return fixed4(color,1.0);
			}

			ENDCG
		}
	}
	FallBack "Diffuse"
}
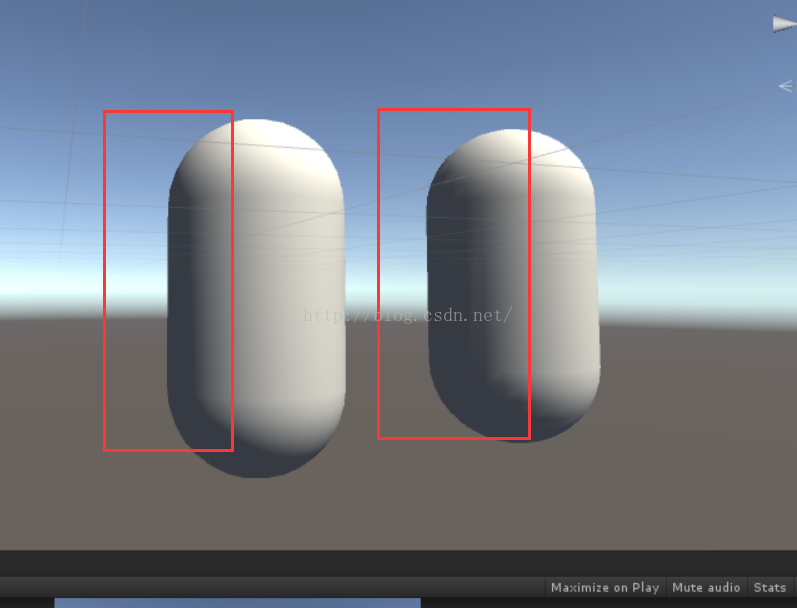
左边为逐像素光照,右边为漫反射模型
漫反射模型和逐像素光照的对比,在光暗的交汇处有很明显的差别


 693
693


 被折叠的 条评论
为什么被折叠?
被折叠的 条评论
为什么被折叠?
 到【灌水乐园】发言


