


本实例主要演示servlet的开发步骤。
工具:tomcat Jcreator 浏览器
1 在tomcat文件夹的webapps文件夹内新建WebFirst文件夹,接着在WebFirst下新建WEB-INF文件夹,Web-INF文件夹下新建classes文件夹以及lib文件夹,同时新建、web.xml文件
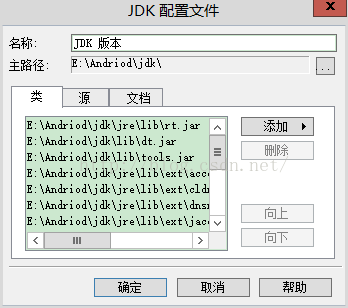
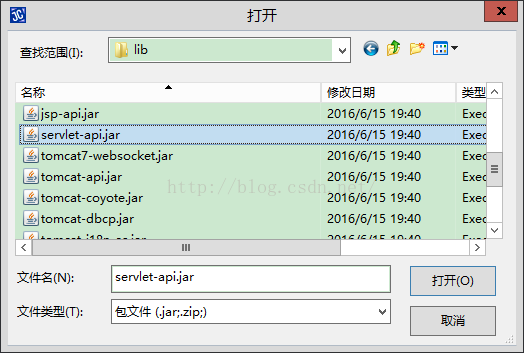
2 使用Jcreator新建java文件,并且导入servlet-api包
(1)导入jar包
(2)编写源代码,保存到之前新建的classes文件夹
编写基本java文件如下:
package com.tsinghua;
import javax.servlet.*;
import java.io.*;
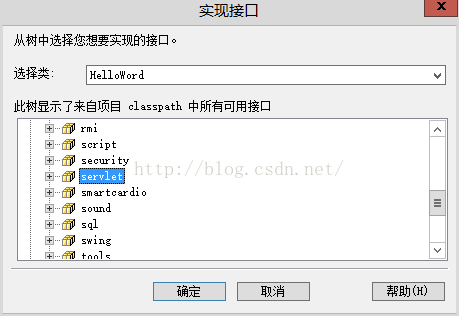
class HelloWord{
}
实现接口(如图):

实现全部源代码:
//first Servlet(使用接口)

package com.sw;

import javax.servlet.*;
import java.io.*;
import javax.servlet.Servlet;
import javax.servlet.ServletConfig;
import javax.servlet.ServletException;
import javax.servlet.ServletRequest;
import javax.servlet.ServletResponse;
import java.io.IOException;

public class HelloWord implements Servlet{
	/**
	 * Method init
	 *
	 *
	 * @param parm1
	 *
	 @throws ServletException
	 *
	 */
	 //用于初始化servlet(类似于类的构造函数)
	 //该函数只会被调用一次(当用户第一次访问时调用)
	public void init(ServletConfig parm1) throws ServletException {
		// TODO: 在这添加你的代码
		System.out.println("init it");
	}

	/**
	 * Method getServletConfig
	 *
	 *
	 * @return
	 *
	 */
	 //得到serclet配置文件
	public ServletConfig getServletConfig() {
		// TODO: 在这添加你的代码
		return null;
	}

	/**
	 * Method service
	 *
	 *
	 * @param parm1
	 * @param parm2
	 *
	 @throws ServletException
	 @throws IOException
	 *
	 */
	 //用于处理业务逻辑
	 //书写业务逻辑代码
	 //每次访问时都会被调用
	 //Request用于获得客户端的信息
	 //Response用于向客户端返回信息
	public void service(ServletRequest parm1, ServletResponse parm2) throws ServletException, IOException {
		// TODO: 在这添加你的代码
		//从parm2中得到printwriter
		System.out.println("service it");

		PrintWriter pw=parm2.getWriter();
		pw.println("First servlet!");
	}

	/**
	 * Method getServletInfo
	 *
	 *
	 * @return
	 *
	 */
	public String getServletInfo() {
		// TODO: 在这添加你的代码
		return null;
	}

	/**
	 * Method destroy
	 *
	 *
	 */
	 //销毁servlet实例(释放内存)
	 //1 重装serclet(webapps)时候 2 关闭tomcat时 3 关机时
	public void destroy() {
		// TODO: 在这添加你的代码
		System.out.println("destory!");
	}


}
3 编写web.xml文件如下(之前新建的web.xml文件)
<?xml version="1.0" encoding="ISO-8859-1"?>
<!--
 Licensed to the Apache Software Foundation (ASF) under one or more
  contributor license agreements.  See the NOTICE file distributed with
  this work for additional information regarding copyright ownership.
  The ASF licenses this file to You under the Apache License, Version 2.0
  (the "License"); you may not use this file except in compliance with
  the License.  You may obtain a copy of the License at

      http://www.apache.org/licenses/LICENSE-2.0

  Unless required by applicable law or agreed to in writing, software
  distributed under the License is distributed on an "AS IS" BASIS,
  WITHOUT WARRANTIES OR CONDITIONS OF ANY KIND, either express or implied.
  See the License for the specific language governing permissions and
  limitations under the License.
-->

<web-app xmlns="http://java.sun.com/xml/ns/javaee"
  xmlns:xsi="http://www.w3.org/2001/XMLSchema-instance"
  xsi:schemaLocation="http://java.sun.com/xml/ns/javaee
                      http://java.sun.com/xml/ns/javaee/web-app_3_0.xsd"
  version="3.0"
  metadata-complete="true">

  <display-name>Welcome to Tomcat</display-name>
  <description>
     Welcome to Tomcat
  </description>

  <servlet>
  <!--servlet名字-->
  <servlet-name>HelloWord</servlet-name>
  <!--sevlet(包名+类名)-->
  <servlet-class>com.sw.HelloWord</servlet-class>
  </servlet>

  <!--??-->
  <servlet-mapping>
  <!--??-->
  <servlet-name>HelloWord</servlet-name>
  <!--浏览器访问的url(任意)-->
  <url-pattern>/first</url-pattern>
  </servlet-mapping>

</web-app>
4 打开浏览器
输入:http://localhost:8080/WebFirst/first即可进行访问,查看到数据


 1391
1391


 被折叠的 条评论
为什么被折叠?
被折叠的 条评论
为什么被折叠?
 到【灌水乐园】发言


