昨天在做项目中,遇到一个需要显示扇形图的功能,网上搜了一下,发现code4app里面也没有找到我想要的那种类似的效果,没办法了,只能自己学习一下如何画了。
首先我们需要了解一个uiview的方法
-(void)drawRect:(CGRect)rect我们知道了这个方法,就可以在自定义UIView的子类的- (void)drawRect:(CGRect)rect里面绘图了,关于drawrect的调用周期,网上也是一找一大堆,等下我会整理一下,转载一篇供你们参考。
废话少说,下面直接开始代码
首先我们自定义一个继承字uiview的子类,我这里就起名字叫pieview了
首先我们试试先画一个圆
#import "pieview.h"
//直径,其实radius是半径的意思吧,哈哈 算了先用着,demo都写好了就不改了,你们知道就行了
#define radius 50

@implementation pieview

-(void)drawRect:(CGRect)rect
{
        CGContextRef ctx = UIGraphicsGetCurrentContext();//获取图形上下文
        CGPoint cent=CGPointMake((self.frame.size.width/2)-radius/2, (self.frame.size.height/2)-radius/2);//设置图形开始画的坐标原点,根据实际需要设置,我这是随便写的
        CGContextAddEllipseInRect(ctx, CGRectMake(cent.x, cent.y, 100, 100));这个是核心函数,在这里设置图形的开始从哪里画,画的宽度和高度是多少。如果宽高不一样 可就是椭圆了啊
         [[UIColor greenColor] set];//设置颜色
        CGContextFillPath(ctx);//实心的
        //CGContextStrokePath(ctx);空心的
}

@end
然后我们创建一个控制器 pieViewController 引用我们的pieview,展示一下效果
#import "pieViewController.h"
//#import "myview.h"
//#import "JYpieview.h"
#import "pieview.h"
@interface pieViewController ()

@end

@implementation pieViewController

- (void)viewDidLoad {
    [super viewDidLoad];
    pieview *view=[[pieview alloc]init];
    view.frame=CGRectMake(4, 150, 150, 300);
    [self.view addSubview:view];

}
- (void)didReceiveMemoryWarning {
    [super didReceiveMemoryWarning];
    // Dispose of any resources that can be recreated.
}
@end
好了看一下效果吧
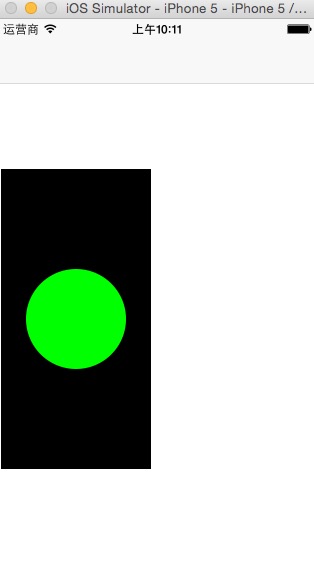
好了,下面让我们开始扇形图的制作吧
#import "pieview.h"
//直径
#define radius 50
#define PI 3.14159265358979323846

@implementation pieview
//计算度转弧度
static inline float radians(double degrees) {
    return degrees * PI / 180;
}
-(void)drawRect:(CGRect)rect
{
    CGPoint cent=CGPointMake((self.frame.size.width/2)-radius/2, (self.frame.size.height/2)-radius/2);
    CGContextRef ctx = UIGraphicsGetCurrentContext();
    CGContextClearRect(ctx, rect);

    float angle_start = radians(0.0);
    float angle_end = radians(120.0);
    CGContextMoveToPoint(ctx, cent.x, cent.y);
    CGContextSetFillColor(ctx, CGColorGetComponents( [[UIColor greenColor] CGColor]));
    CGContextAddArc(ctx, cent.x, cent.y, radius,  angle_start, angle_end, 0);
    CGContextFillPath(ctx);

    angle_start = angle_end;
    angle_end = radians(360.0);
    CGContextMoveToPoint(ctx, cent.x, cent.y);
    CGContextSetFillColor(ctx, CGColorGetComponents( [[UIColor blueColor] CGColor]));
    CGContextAddArc(ctx, cent.x, cent.y, radius,  angle_start, angle_end, 0);
    CGContextFillPath(ctx);
}
@end
在运行一下,我们看下效果
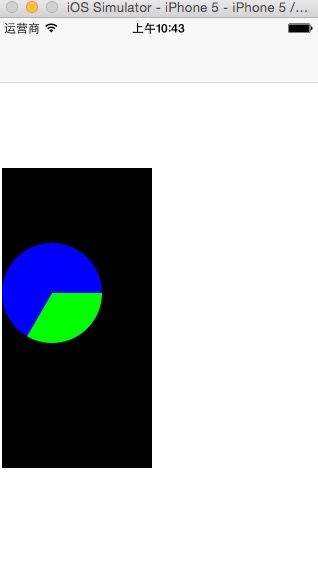
可使有没有觉得上面的代码很多重复的?对的,我们可以封装一个方法 那么重构后的代码我就一次性的贴上去了
#import "pieview.h"
//直径
#define radius 50
#define PI 3.14159265358979323846

@implementation pieview
//计算度转弧度
static inline float radians(double degrees) {
    return degrees * PI / 180;
}
static inline void drawArc(CGContextRef ctx, CGPoint point, float angle_start, float angle_end, UIColor* color) {
    CGContextMoveToPoint(ctx, point.x, point.y);
    CGContextSetFillColor(ctx, CGColorGetComponents( [color CGColor]));
    CGContextAddArc(ctx, point.x, point.y, radius,  angle_start, angle_end, 0);
    //CGContextClosePath(ctx);
    CGContextFillPath(ctx);
}
-(void)drawRect:(CGRect)rect
{
    CGPoint cent=CGPointMake((self.frame.size.width/2)-radius/2, (self.frame.size.height/2)-radius/2);
    CGContextRef ctx = UIGraphicsGetCurrentContext();
    CGContextClearRect(ctx, rect);

    float angle_start = radians(0.0);
    float angle_end = radians(121.0);
    drawArc(ctx, cent, angle_start, angle_end, [UIColor yellowColor]);

    angle_start = angle_end;
    angle_end = radians(228.0);
    drawArc(ctx, cent, angle_start, angle_end, [UIColor greenColor]);

    angle_start = angle_end;
    angle_end = radians(260);
    drawArc(ctx, cent, angle_start, angle_end, [UIColor orangeColor]);

    angle_start = angle_end;
    angle_end = radians(360);
    drawArc(ctx, cent, angle_start, angle_end, [UIColor purpleColor]);

}
@end
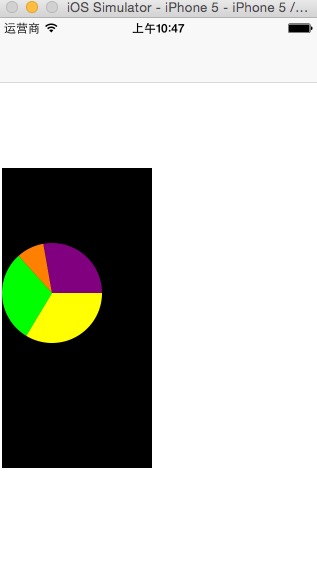
看下运行效果图
如果我们中途数据变了 想要改一下图形怎么办呢?
那么我们就需要用到这个
    //通知自定义的view重新绘制图形
//    [self setNeedsDisplay];
这时候我们就要pieview向外界提供一个接口属性,这是我做的模拟5面之后改变圆形的直径大小
.h文件
#import <UIKit/UIKit.h>

@interface pieview : UIView
//直径
@property(nonatomic,assign)float radius;
@end
.m文件
#import "pieview.h"
#define PI 3.14159265358979323846

@implementation pieview
//计算度转弧度
static inline float radians(double degrees) {
    return degrees * PI / 180;
}
static inline void drawArc(CGContextRef ctx, CGPoint point, float angle_start, float angle_end, UIColor* color,float radius) {
    CGContextMoveToPoint(ctx, point.x, point.y);
    CGContextSetFillColor(ctx, CGColorGetComponents( [color CGColor]));
    CGContextAddArc(ctx, point.x, point.y, radius,  angle_start, angle_end, 0);
    //CGContextClosePath(ctx);
    CGContextFillPath(ctx);
}
-(void)drawRect:(CGRect)rect
{
    CGPoint cent=CGPointMake((self.frame.size.width/2)-self.radius/2, (self.frame.size.height/2)-self.radius/2);
    CGContextRef ctx = UIGraphicsGetCurrentContext();
    CGContextClearRect(ctx, rect);

    float angle_start = radians(0.0);
    float angle_end = radians(121.0);
    drawArc(ctx, cent, angle_start, angle_end, [UIColor yellowColor],self.radius);

    angle_start = angle_end;
    angle_end = radians(228.0);
    drawArc(ctx, cent, angle_start, angle_end, [UIColor greenColor],self.radius);

    angle_start = angle_end;
    angle_end = radians(260);
    drawArc(ctx, cent, angle_start, angle_end, [UIColor orangeColor],self.radius);

    angle_start = angle_end;
    angle_end = radians(360);
    drawArc(ctx, cent, angle_start, angle_end, [UIColor purpleColor],self.radius);

}
-(void)setRadius:(float)radius
{
    _radius=radius;
    [self setNeedsDisplay];
}
@end
pieViewController.m文件
@implementation pieViewController

- (void)viewDidLoad {
    [super viewDidLoad];
    pieview *view=[[pieview alloc]init];
    view.radius=50;
    view.frame=CGRectMake(4, 150, 150, 300);
    [self.view addSubview:view];
    //view.backgroundColor=[UIColor clearColor];
    //模拟5秒后执行这个段代码
    dispatch_after(dispatch_time(DISPATCH_TIME_NOW, (int64_t)(5.0 * NSEC_PER_SEC)), dispatch_get_main_queue(), ^{
        view.radius=20;
    });
}
- (void)didReceiveMemoryWarning {
    [super didReceiveMemoryWarning];
    // Dispose of any resources that can be recreated.
}
@end
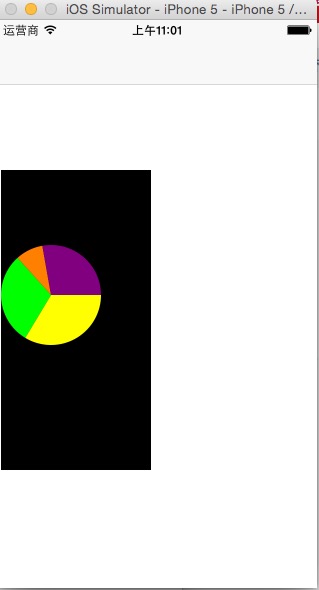
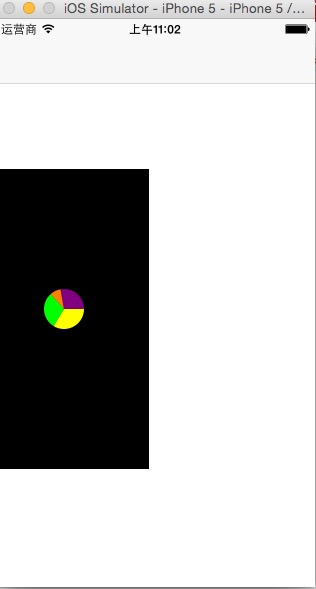
效果
5秒之后




 1285
1285


 被折叠的 条评论
为什么被折叠?


