


逼逼几句
- 这几天由于UI妹子的设计图还在审核,让我有时间研究了一下手势解锁的原理,到这里得感谢一下UI妹子,废话我就少说了,前几天我在CSDN翔神的博客上看见了一篇关于手势解锁的文章,主要平时我一般亏心事干得的,所以就研究研究,改一下其中的东西,修修了bug,为自己所用了,看上感觉这个自定义的很复杂,各种状态,好几种颜色,看着都有种不想做的冲动,想要成功,必先苦其心志,然后饿几天,当你有孔子的心态的时候,此刻你就应该拥有觉老师的分享,没有破釜沉舟的心态,就算天蓬元帅八戒来了也带不动你!!!又说多了,说这篇文章,你可以设置每行3个或者4个按钮,设置你自己想要的Color,让你一直过瘾为止。
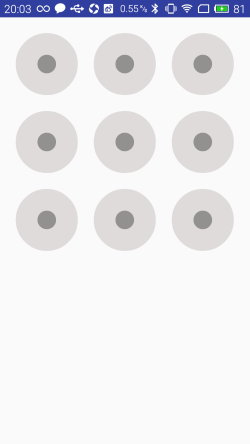
直接上效果图
- 这里我制作GIF比较麻烦就搞了一种状态

看完效果图之后,正常的你,应该有想下看的冲动,所以讲大致的思路
思路:
一. 先绘制单个的小圆(子View:GustureLockedView)
- 1.我们需要确定解锁园的构造:—个外圆、实心的内圆、三角形
- 2.确定手势按圆的几种状态(无触摸、按下、抬起),根据不同的状态设置不同的颜色值(4种Color)
- 3.计算圆的大小,以及各个尺寸大小,然后开始绘制
- 4.确定三角形线条path,画封闭的三角形(设置只有当手指抬起的时设置旋转的角度候再显示出来)
二.绘制整个的布局,把每个子View摆放上去(整个大的:GuestureLockedViewGroup)
- 1.获取自定义属性(主要是获取自己设置的颜色和每行子View的个数)
- 2.实例化画笔和线(设置画笔的链接时,显示的状态)
- 3.重写onMeasure方法,计算每个子View的大小与摆放位置(给每个子View设置一个id,然后根据id设置前后左右,或者是margin值)
- 4.重写onThouch 方法根据不同的手势去改变子View的颜色
- 5.自定义回调接口,方法密码匹配情况 与 错误的次数 以及选择的子View的id
实战步骤:
- 先放上变量,方便大家阅读
  private String TAG = "GustureLockedView";

    //没有触摸时,外圆颜色
    private int noFigerOutColor = 0xFFE0DBDB;

    //没有触摸时,内圆颜色
    private int noFigerInerColor = 0xFF939090;

    //手指在上面的时候,圆的颜色
    private int onFigerColor = 0xFF378FC9;

    //手机抬起时,被触摸的圆的颜色
    private int upFigerColor = 0xFFFF0000;

    //初始化手指状态
    private Mode status = Mode.STATUS_NO_FIGER;

    //外圆的宽度
    private int outRoundWeith;

    //内圆高度
    private int outRoundHight;

    //外圆半径
    private int mRound;

    //三角型的高的基数
    private float heigthRate = 0.333f;

    //内圆半径的基数
    private float mRoundRate = 0.3f;

    //画笔的宽度
    private int mStoreWidth = 2;

    //画笔
    Paint mPaint;

    //划线
    Path mPath;

    //旋转的度数
    private int mProcess = 0;

    /**
     *记录手指触摸状态
     */
    enum Mode{
        STATUS_NO_FIGER,STATUS_FIGER_ON,STATUS_UP_FIGER
}- 首先设置子View的在不同状态下的颜色值(最初只用到两种)
 public GustureLockedView(Context context,int noFigerOutColor,int noFigerInerColor,
                             int onFigerColor,int upFigerColor) {
        super(context);
        //初始化颜色
        this.noFigerOutColor = noFigerOutColor;
        this.noFigerInerColor = noFigerInerColor;
        this.onFigerColor = onFigerColor;
        this.upFigerColor = upFigerColor;
        //初始化画笔
        mPaint = new Paint(Paint.ANTI_ALIAS_FLAG);
        mPath = new Path();
    }
- 颜色值都有了,我们现在是不是要在onMeasure()方法里面做测量了,这面绘制的三角型的三点的坐标我也直接到这个方法做了
    @Override
    protected void onMeasure(int widthMeasureSpec, int heightMeasureSpec) {
        super.onMeasure(widthMeasureSpec, heightMeasureSpec);


        outRoundWeith = MeasureSpec.getSize(widthMeasureSpec);
        outRoundHight = MeasureSpec.getSize(heightMeasureSpec);


        outRoundWeith = outRoundWeith < outRoundHight ? outRoundWeith:outRoundHight;
        mRound = (outRoundWeith-mStoreWidth)/2;
        Log.i(TAG,"mRound::"+mRound);

    mPath.moveTo(outRoundWeith/2,mStoreWidth+2);
    //左边的点
                    mPath.lineTo(outRoundWeith/2mRound*heigthRate,mRound*heigthRate+mStoreWidth+2);
    //右边的点
            mPath.lineTo(outRoundWeith/2+mRound*heigthRate,mRound*heigthRate+mStoreWidth+2);
    //封闭然后组成一个三角型
    mPath.close();
    //当绘制重叠时,能融洽的结合(主要指颜色,哈)看不懂自己百度
    mPath.setFillType(Path.FillType.WINDING);

}- 三角型都有了,那我们差什么???对,没错,圆。。现在根据不同的状态绘制圆的颜色咯
  @Override
    protected void onDraw(Canvas canvas) {
        super.onDraw(canvas);

        switch (status){
        //当没有手指触摸的时候
            case STATUS_NO_FIGER:

                //外圆
                mPaint.setStyle(Paint.Style.FILL);
                mPaint.setColor(noFigerOutColor);
                canvas.drawCircle(outRoundWeith/2,outRoundWeith/2,mRound,mPaint);
                //内圆
                mPaint.setColor(noFigerInerColor);
                canvas.drawCircle(outRoundWeith / 2, outRoundWeith / 2, mRound * mRoundRate, mPaint);
                Log.i(TAG, "画圆了:::"+noFigerOutColor+outRoundWeith);
                break;
   //当手指在上面的时候
            case  STATUS_FIGER_ON:

                //外圆
                mPaint.setStyle(Paint.Style.STROKE);
                mPaint.setStrokeWidth(mStoreWidth);
                mPaint.setColor(onFigerColor);
                canvas.drawCircle(outRoundWeith/2,outRoundWeith/2,mRound,mPaint);

                //内圆
                mPaint.setStyle(Paint.Style.FILL);
                canvas.drawCircle(outRoundWeith/2,outRoundWeith/2,mRound*mRoundRate,mPaint);
                break;
//当手指离开界面,抬起的时候
            case STATUS_UP_FIGER:

                //外圆
                mPaint.setStyle(Paint.Style.STROKE);
                mPaint.setStrokeWidth(mStoreWidth);
                mPaint.setColor(upFigerColor);
                canvas.drawCircle(outRoundWeith/2,outRoundWeith/2,mRound,mPaint);

                //内圆
                mPaint.setStyle(Paint.Style.FILL);
                canvas.drawCircle(outRoundWeith/2,outRoundWeith/2,mRound*mRoundRate,mPaint);

                drawArrow(canvas);
                break;
        }

    }
- 上面的onMeasure() onDraw()都是系统自己调用的,如果我要改变自己的状态,如果只有系统的方法,是不是远远不够呢??是不是应该有自己的方法呢???下面我另外几个方面写出来,会在GuestureLockedViewGroup会调用他
  /**
     * 在 GuestureLockedViewGroup 中调用
     * 画三角型图标
     */
    public void drawArrow(Canvas canvas){
        if (mProcess!=-1){
            canvas.save();
            //当手指抬起时设置旋转的三角型度数
            canvas.rotate(mProcess,outRoundWeith/2,outRoundWeith/2);
            //前面指设置了三角型坐标,现在就要绘制了
            canvas.drawPath(mPath,mPaint);
            canvas.restore();
        }
    }


    /**
     * 为了设置三角型旋转的度数
     */
   public void setPrecess(int process){
       this.mProcess= process;
   }


    /**
     *设置手指触摸的状态
     * @param mode
     */
    public void setMode(Mode mode){
        this.status = mode;
        invalidate();
    }
*到这里我们算完成了皮毛,因为解锁页面很多按钮,我们才完成1个,算算,如果你设置每行3个,那个是1/9,如果每行4个呢,那就1/16。。直接我把上面的做好的view 重复的放到页面上去,记住我说是重复:
* 先看注释,方便阅读
  private String TAG = "GuestureLockedViewGroup";

    //没有触摸时,外圆颜色
    private int noFigerOutColor = 0xFFE0DBDB;

    //没有触摸时,内圆颜色
    private int noFigerInerColor = 0xFF939090;

    //手指在上面的时候,圆的颜色
    private int onFigerColor = 0xFF378FC9;

    //手机抬起时,被触摸的圆的颜色
    private int upFigerColor = 0xFFFF0000;

    //每行子view的数量
    private int mCount;

    //允许尝试的次数
    private int mTryCount;

    //画笔 和 线条
    private Paint mPaint;
    private Path mPath;

    //每个子view 的宽度及间距
    private int mGestureLockViewWidth;
    private int mMarginBetweenLockView;

    //用来储存选中的id
    private List<Integer> mChoose = new ArrayList<Integer>();

    //保存所有的GestureLockView
    private GustureLockedView[] mGestureLockViews;

    //选定的子view中心的坐标
    private int lastViewCentX ;
    private int lastViewCentY ;

    //终点坐标
    Point mPoint = new Point();

    //设置密码
    private  int[] passWord;

    //是否可以解锁
    private boolean isLoack = false;

    //监听的接口
    CheckPassWordStatusListener listener;
- 获取自己定义的属性 和 设置 画笔;
  public GuestureLockedViewGroup(Context context, AttributeSet attrs, int defStyleAttr) {
        super(context, attrs, defStyleAttr);

        TypedArray ta = context.obtainStyledAttributes(attrs, R.styleable.GuestureLockedViewGroup);
        noFigerOutColor = ta.getColor(R.styleable.GuestureLockedViewGroup_no_finger_color_out, 0xFFE0DBDB);
        noFigerInerColor = ta.getColor(R.styleable.GuestureLockedViewGroup_no_finger_color_inner, 0xFF939090);
        onFigerColor = ta.getColor(R.styleable.GuestureLockedViewGroup_on_finger_color, 0xFF378FC9);
        upFigerColor = ta.getColor(R.styleable.GuestureLockedViewGroup_up_finger_color, 0xFFFF0000);
        mTryCount = ta.getInt(R.styleable.GuestureLockedViewGroup_m_try_time, 3);
        mCount = ta.getInt(R.styleable.GuestureLockedViewGroup_mcount, 4);
        ta.recycle();

        mPaint = new Paint(Paint.ANTI_ALIAS_FLAG);

        // 初始化画笔
        mPaint.setStyle(Paint.Style.STROKE);
        mPaint.setStrokeCap(Paint.Cap.ROUND);
        mPaint.setStrokeJoin(Paint.Join.ROUND);
        mPath = new Path();
}- 通过测量摆放每个子View的位置
 @Override
    protected void onMeasure(int widthMeasureSpec, int heightMeasureSpec) {
        super.onMeasure(widthMeasureSpec, heightMeasureSpec);

        //获取控件的宽度
        int weigth = MeasureSpec.getSize(widthMeasureSpec);
        int higth = MeasureSpec.getSize(heightMeasureSpec);

        weigth = weigth < higth ? weigth : higth;

        //计算每个控件的大小
        // 计算每个GestureLockView的宽度
        mGestureLockViewWidth = (int) (4 * weigth * 1.0f / (5 * mCount + 1));
        //计算每个GestureLockView的间距
        mMarginBetweenLockView = (int) (mGestureLockViewWidth * 0.25);
        // 设置画笔的宽度为GestureLockView的内圆直径稍微小点(不喜欢的话,随便设)
        mPaint.setStrokeWidth(mGestureLockViewWidth * 0.29f);
        //设置子view的个数,以及摆放的位置
        if (mGestureLockViews==null){

            mGestureLockViews = new GustureLockedView[mCount*mCount];
            //设置大小
            for (int i=0; i<mGestureLockViews.length; i++){
                RelativeLayout.LayoutParams params = new RelativeLayout.LayoutParams(mGestureLockViewWidth,mGestureLockViewWidth);
                //初始化id
                mGestureLockViews[i] = new GustureLockedView(getContext(),noFigerOutColor,noFigerInerColor
                ,onFigerColor,upFigerColor);
                //设置id
                mGestureLockViews[i].setId(i + 1);
                //不是第一列的数,都在其的右边
                if (i%mCount!=0){
                    params.addRule(RelativeLayout.RIGHT_OF, mGestureLockViews[i - 1].getId());
                }

                //不是第一行都在指定Id的下边
                if(i>=mCount){
                    params.addRule(RelativeLayout.BELOW,mGestureLockViews[i-mCount].getId());
                }

                int leftMargin=0;
                int topMargin=0;
                int rightMargin = mGestureLockViewWidth/4;
                int belowMargin = mGestureLockViewWidth/4;
                //第一行
                if (i<mCount){
                    topMargin = mGestureLockViewWidth/4;
                }
                //第一列
                if(i%mCount==0){
                    leftMargin = mGestureLockViewWidth/4;
                }
                params.setMargins(leftMargin,topMargin,rightMargin,belowMargin);
                mGestureLockViews[i].setMode(GustureLockedView.Mode.STATUS_NO_FIGER);
                addView(mGestureLockViews[i], params);
            }
        }
    }
- 然后我们根据手势改变状态咯,获取手指的触摸点,看是落到那个子View上面
@Override
    public boolean onTouchEvent(MotionEvent event) {
        if(!isLoack){
            int lastX = (int) event.getX();
            int lastY = (int) event.getY();
            Log.i(TAG,"lastX::"+lastX+".........."+"lastY:::"+lastY);
            switch (event.getAction()){


                case MotionEvent.ACTION_MOVE:

                    mPaint.setColor(onFigerColor);
                    mPaint.setAlpha(50);
                    GustureLockedView view = checkRange(lastX,lastY);
                    Log.i(TAG,"view为Null::"+view);
                    if (view!=null){
                        int childId = view.getId();
                        if (!mChoose.contains(childId)){
                            mChoose.add(childId);
                            view.setMode(GustureLockedView.Mode.STATUS_FIGER_ON);

                            lastViewCentX = (view.getLeft()+view.getRight())/2;

                            lastViewCentY = (view.getTop()+view.getBottom())/2;

                            //如果size为1,开始的子view
                            if (mChoose.size()==1){
                                mPath.moveTo(lastViewCentX,lastViewCentY);
                            }else{
                                mPath.lineTo(lastViewCentX,lastViewCentY);
                            }

//                        if (mChoose.size() == 1)// 当前添加为第一个
//                        {
//                            mPath.moveTo(mLastPathX, mLastPathY);
//                        } else
//                        // 非第一个,将两者使用线连上
//                        {
//                            mPath.lineTo(mLastPathX, mLastPathY);
//                        }

                        }
                    }
                    mPoint.x = lastX;
                    mPoint.y = lastY;
                    break;

                case MotionEvent.ACTION_UP:
                    mPoint.x = lastViewCentX;
                    mPoint.y = lastViewCentY;
                    mPaint.setColor(upFigerColor);
                    mPaint.setAlpha(50);
                    for (int i=0; i<mChoose.size();i++){
                        mGestureLockViews[mChoose.get(i)-1].setMode(GustureLockedView.Mode.STATUS_UP_FIGER);
                    }
                    for (int i=0; i<mChoose.size()-1; i++){
                        //设置被选中的View的状态
                        GustureLockedView startView = (GustureLockedView) findViewById(mChoose.get(i));
                        GustureLockedView endView = (GustureLockedView) findViewById(mChoose.get(i+1));

                        int tanX = endView.getLeft() - startView.getLeft();
                        int tanY = endView.getTop() - startView.getTop();

                        // 计算角度
                        int angle = (int) Math.toDegrees(Math.atan2(tanY, tanX)) + 90;
                        startView.setPrecess(angle);
                    }

                    boolean isRight = contrastsPassVoid();

                    if (listener!=null&&mChoose.size()>0){
                        listener.checkPassWordIsRight(isRight);
                    }

                    break;
            }

            invalidate();
        }

        return true;
    }

    private boolean contrastsPassVoid(){
        if (passWord.length!=mChoose.size())
            return false;
        for (int i=0; i<passWord.length; i++){
            if (passWord[i]!=mChoose.get(i)){
                return false;
            }
        }

        return true;
    }


    /**
     * 检测范围
     * @param x
     * @param y
     */
    public GustureLockedView checkRange(int x, int y){

        for (GustureLockedView gustureLockedView: mGestureLockViews){
           int  mRang = (int) (mGestureLockViewWidth*0.15);

            if (gustureLockedView.getLeft()+mRang<x&&gustureLockedView.getRight()-mRang>x&&
                     gustureLockedView.getTop()+mRang<y&&gustureLockedView.getBottom()-mRang>y){
                return gustureLockedView;
            }
        }


        return null;
    }
- 上面的主要的方法,我都列举出来了,下面写几个一看就懂的方法
    /**
     * 一切初始化,在activity中调用。
     */
    public void resetView(){

        mPath.reset();
        mChoose.clear();
        for (GustureLockedView gustureLockedView : mGestureLockViews){
            gustureLockedView.setPrecess(-1);
            gustureLockedView.setMode(GustureLockedView.Mode.STATUS_NO_FIGER);
        }

    }

    /**
     * 设置密码
     * @param passWord
     */
    public void setPassWord(int[] passWord){
        this.passWord = passWord;
    }

    public interface  CheckPassWordStatusListener{

        void checkPassWordIsRight(boolean isRight);

    }

    /**
     * 设置回调的方法
     * @param checkPassWordStatusListener
     */

    public void setCheckPassWordStatusListener(CheckPassWordStatusListener checkPassWordStatusListener){
            this.listener =     checkPassWordStatusListener;
    }

    /**
     * 如果超过设置的次数就设置ture,用户就不能再滑动了
     * @param isLocked
     */
    public void setIsLocked(boolean isLocked){

        this.isLoack = isLocked;
}- 还没有看懂童鞋,在给你们看看activity中处理的逻辑了
public class MainActivity extends Activity {


    private SharedPreferences sp ;
    private SharedPreferences.Editor editor;
    private GuestureLockedViewGroup gvLockedView;
    @Override
    protected void onCreate(Bundle savedInstanceState) {
        requestWindowFeature(Window.FEATURE_NO_TITLE);
        super.onCreate(savedInstanceState);
        setContentView(R.layout.activity_main);
        sp =  getSharedPreferences("mTryCount", MODE_PRIVATE);
        editor = sp.edit();
        //默认最多四次
        editor.putInt("allCount", 5);
        editor.commit();
        gvLockedView = (GuestureLockedViewGroup) findViewById(R.id.gv_locked_view);
        gvLockedView.setPassWord(new int[]{1,2,3,4,5,6});
        gvLockedView.setCheckPassWordStatusListener(new GuestureLockedViewGroup.CheckPassWordStatusListener() {
            @Override
            public void checkPassWordIsRight(boolean isRight) {
                if (isRight){
                    Toast.makeText(MainActivity.this,"觉哥,你既然一次性解锁成功,你应该去盗银行!!",Toast.LENGTH_SHORT).show();
                    editor.putInt("allCount",5);
                    editor.commit();
                }else{
                    int count =  sp.getInt("allCount",0);
                    if (count==1){
                        //不能再解锁了
                        gvLockedView.setIsLocked(true);
                    }
                    count = --count;
                    editor.putInt("allCount",count);
                    editor.commit();
                    Toast.makeText(MainActivity.this,"你以为你可以像觉哥一样牛B轰轰的,还有"+count+"机会哦",Toast.LENGTH_SHORT).show();
                }

                mHandler.postDelayed(new Runnable() {
                    @Override
                    public void run() {
                        //按密码完成,恢复最初的状态。
                        gvLockedView.resetView();
                        gvLockedView.postInvalidate();
                    }
                },1000);

            }
        });
    }


    public Handler mHandler = new Handler();
}
- 另外附上 布局和自定义属性
<RelativeLayout xmlns:android="http://schemas.android.com/apk/res/android"
    xmlns:xj="http://schemas.android.com/apk/res-auto"
    android:layout_width="match_parent"
    android:layout_height="match_parent">

    <aguche.gestureunlocked.com.view.GuestureLockedViewGroup
        android:id="@+id/gv_locked_view"
        android:layout_width="match_parent"
        android:layout_height="match_parent"
        xj:m_try_time="3"
        xj:mcount="3"
        xj:no_finger_color_inner="#FF939090"
        xj:no_finger_color_out="#FFE0DBDB"
        xj:on_finger_color="#FF378FC9"
        xj:up_finger_color="#FFFF0000" />
</RelativeLayout>
- 今天就到这里了,觉老师得下班吃饭去了,别忘了点个赞。给我顶顶!!!!!!!!


 595
595

 被折叠的 条评论
为什么被折叠?
被折叠的 条评论
为什么被折叠?
 到【灌水乐园】发言


