


553 文件系统不允许
500 权限过大
530 权限过小 密码不对 服务不对
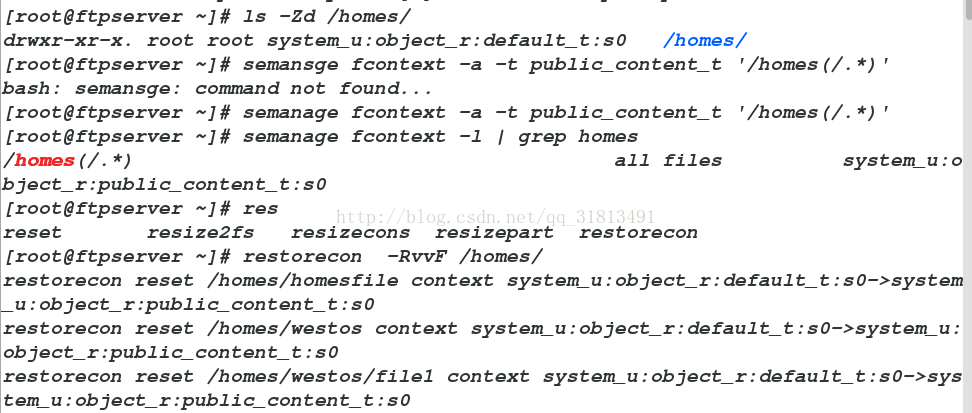
1.永久修改安全上下文
[root@ftpserver homes]# semanage fcontext -a(添加) -t(修改标签) public_content_t '/homes(/.*)?'##使用该语句永久设置
restorecon -R(第归)vv(显示)F(刷新) /homes/ ##重新加载
v(显示本身)
vv(显示目录中的所有)
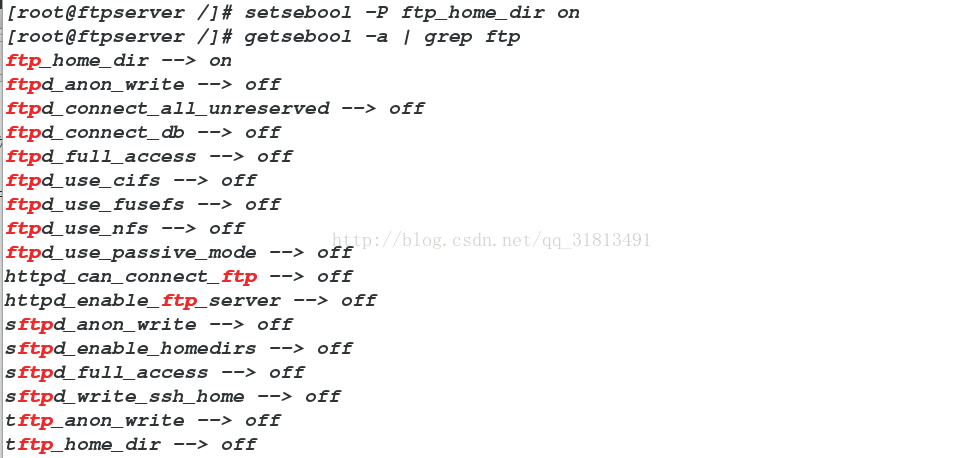
2.打开服务权限
141 getsebool -a | grep ftp
[root@ftpserver /]# getsebool -a | grep ftp
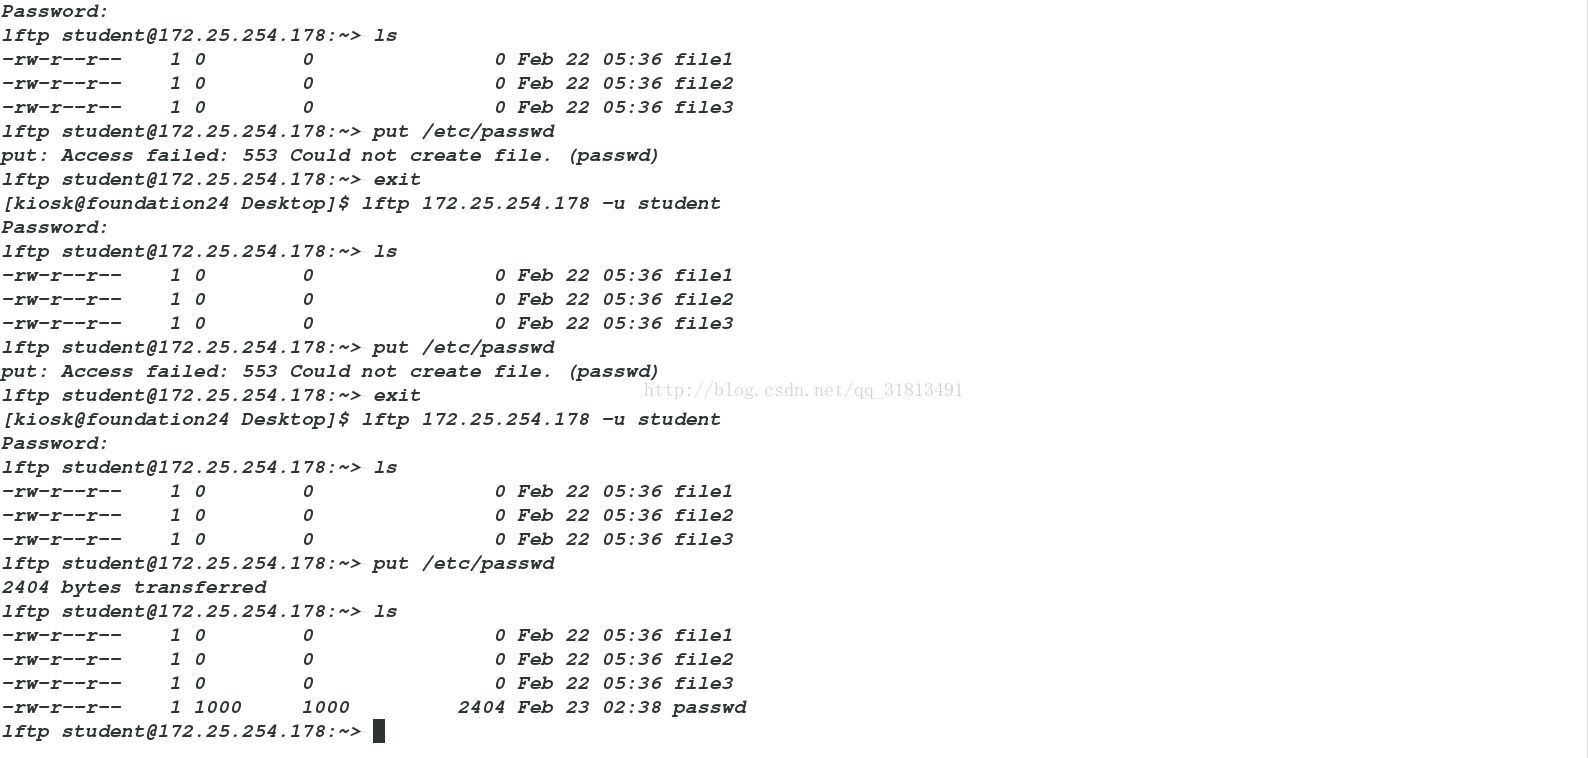
ftp_home_dir --> off ##这个就是控制写入
ftpd_anon_write --> off
ftpd_connect_all_unreserved --> off
ftpd_connect_db --> off
ftpd_full_access --> off
ftpd_use_cifs --> off
ftpd_use_fusefs --> off
ftpd_use_nfs --> off
ftpd_use_passive_mode --> off
httpd_can_connect_ftp --> off
httpd_enable_ftp_server --> off
sftpd_anon_write --> off
sftpd_enable_homedirs --> off
sftpd_full_access --> off
sftpd_write_ssh_home --> off
tftp_anon_write --> off
tftp_home_dir --> off
142 setsebool -P ftp_home_dir on
143 getsebool -a | grep ftp
3.selinux的两种模式
3.1强制模式(警告以及拒绝进入)
[root@ftpserver homes]# setenforce 1
[root@ftpserver homes]# getenforce
Enforcing
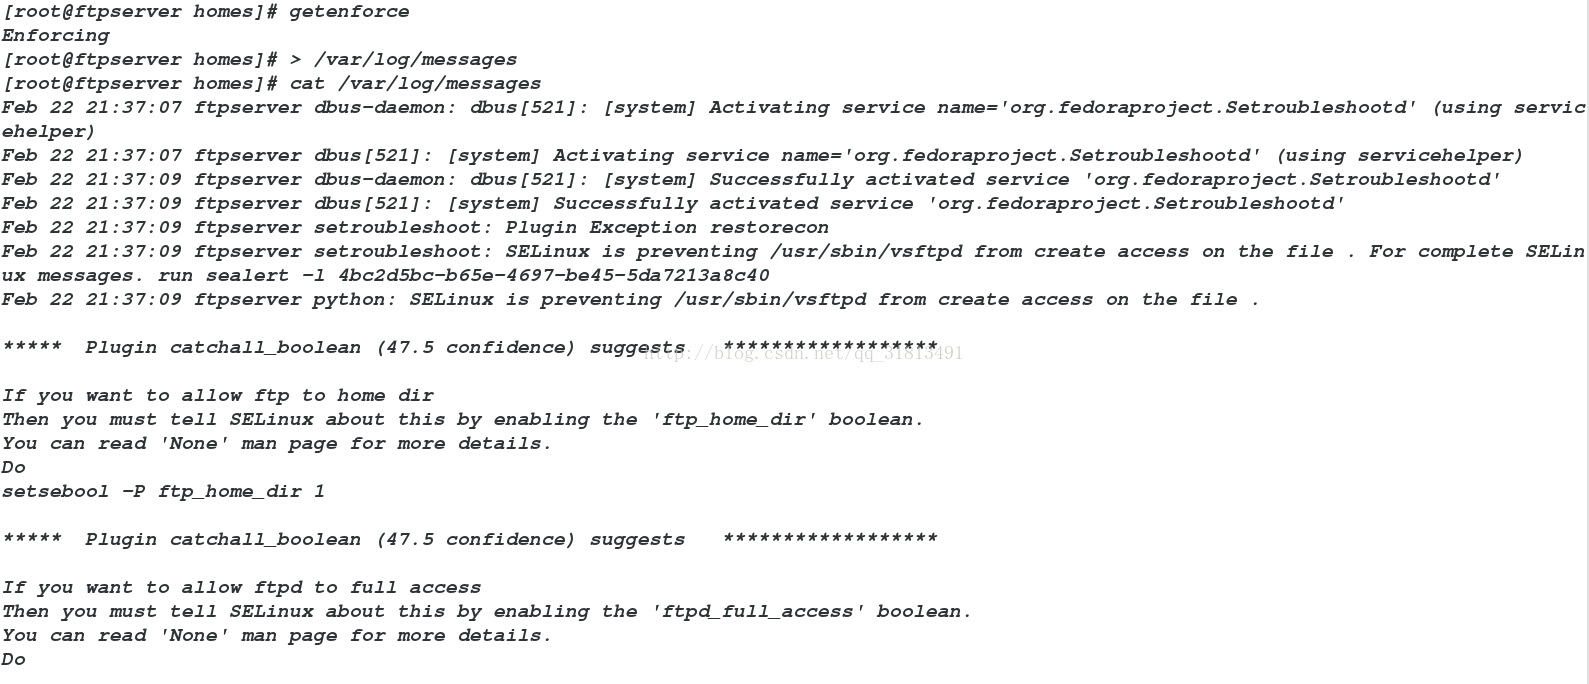
3.2警告模式(警告但是允许进入)
[root@ftpserver homes]# setenforce 0
[root@ftpserver homes]# getenforce
Permissive
原本该报错日志不在/var/log/messages ,此时在这个目录中,因为是有一个服务将原目录中的日志处理后放入该目录的。故如果没有这个服务,需要自己自行安装
4.文件处理工具
4.1 对文件打补丁
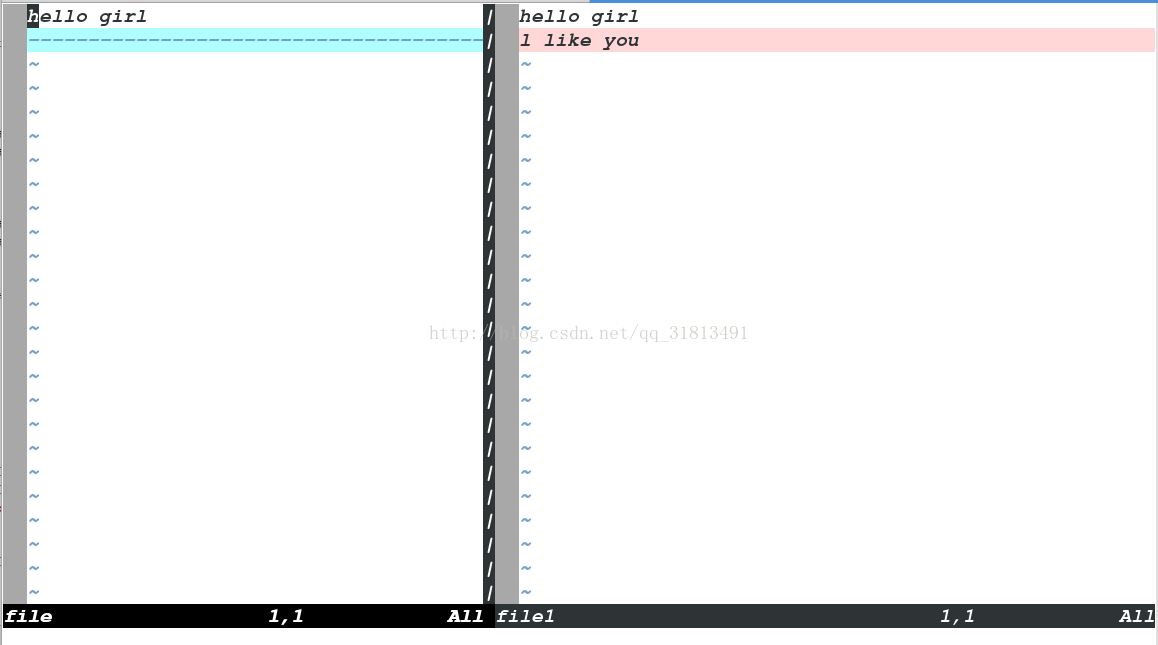
1 echo hello girl >file ##创建两个文件
2 echo hello girl >file1
3 echo l like you >>file1 ##给file1中追加文字,导致两个文件不同
4 cat file
5 cat file1
6 diff -c file file1 ##比较两文件的差别
7 diff -u file file1 > file.path ##制作两个文件的补丁
10 yum install patch -y ##安装补丁命令
11 patch file file.path ##将补丁打入file中

12 cat file
13 vimdiff file file1 ##另一种查看文件不同的命令,若不同则会高亮度显示
4.2过滤命令
18 cp /etc/passwd /mnt/ ##制作一个文件供下面所作测试
19 cd /mnt/
20 ls
21 cat passwd
22 vim passwd
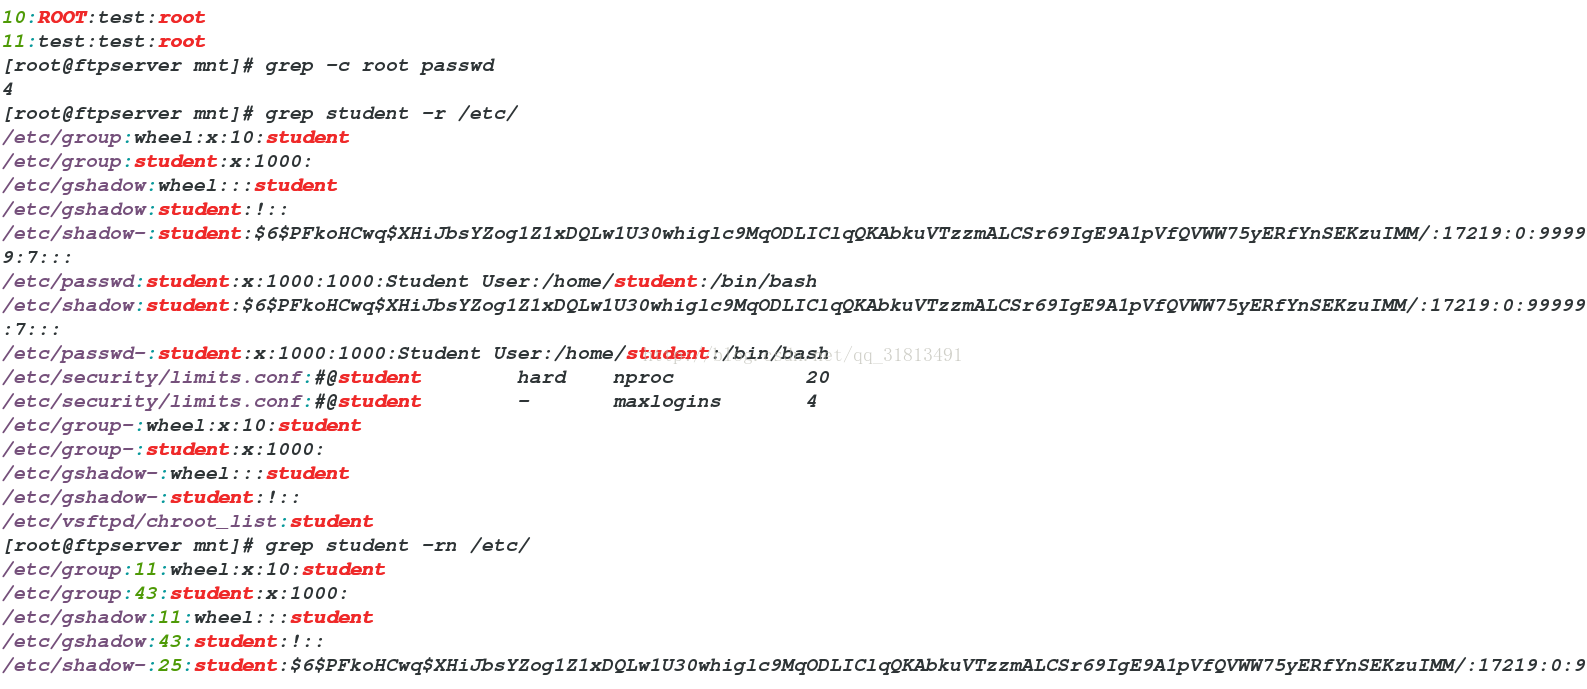
23 grep root passwd ##过滤含有root的行
24 grep root passwd -v ##反向过滤含有root的行,及不含有root的行
25 grep -i root passwd ##不区分大小写过滤含有root的行
26 grep -i root passwd -v ##过滤不含有root的行,不区分大小写
27 grep -in root passwd ##不区分大小写且显示所在行数
28 grep -c root passwd ##显示过滤结果的总行数
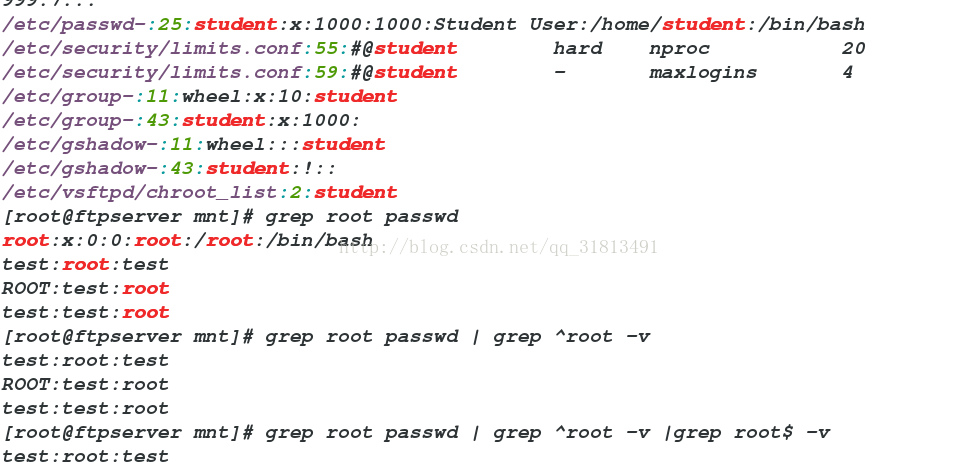
29 grep student -r /etc/ ##第归过滤该目录下的含有student的行
30 grep student -rn /etc/ ##第归过滤该目录下的含有student的行,并显示所在文件中的行数
31 grep root passwd
32 grep root passwd | grep ^root -v ##查找root在行尾的
33 grep root passwd | grep ^root -v |grep root$ -v ##查找root在中部的

4.3 cut 命令
42 ifconfig eth0 | head -n 2
43 ifconfig eth0 | head -n 2 |tail -n 1
44 ifconfig eth0 | head -n 2 |tail -n 1 |cut -c 14-27

4.4 sort排序和uniq
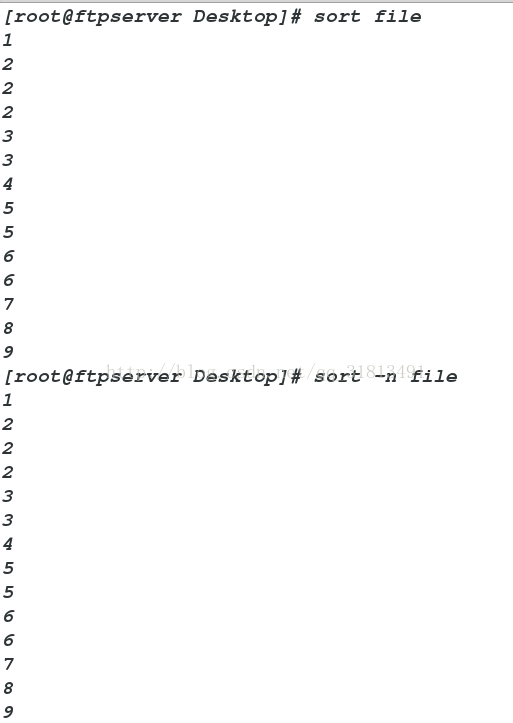
59 sort -n file ##升序
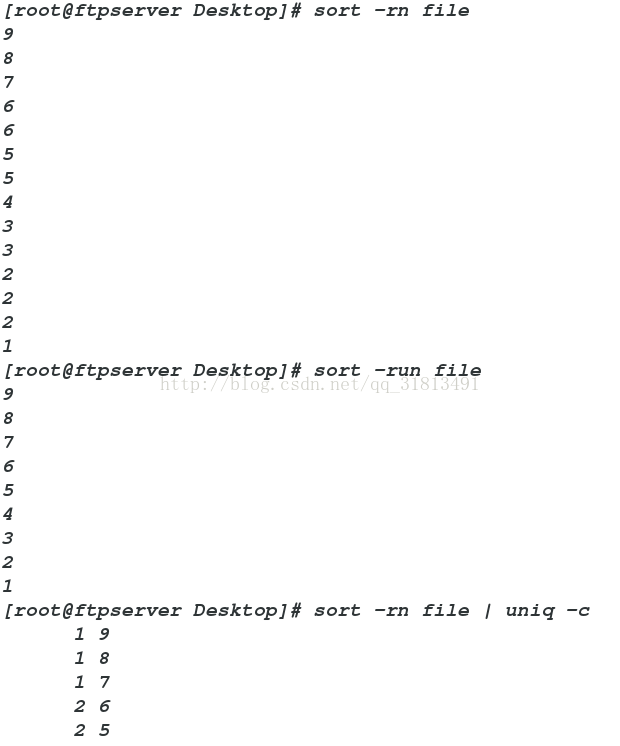
60 sort -rn file ##降序
61 sort -run file ##降序并不显示重复的
62 sort -rn file | uniq -c ##降序并统计出重复数字的数量
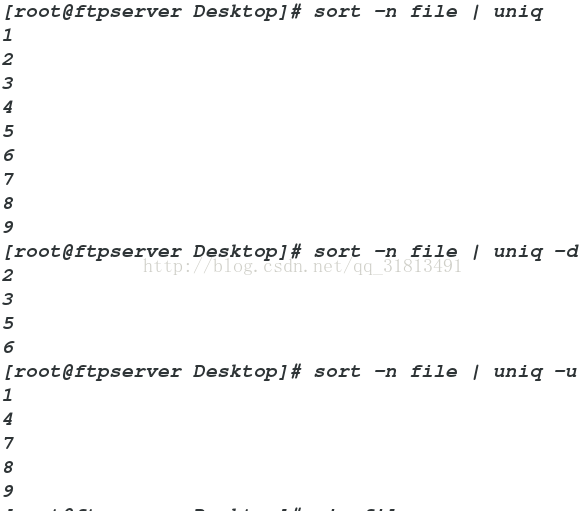
63 sort -n file | uniq
64 sort -n file | uniq -d
65 sort -n file | uniq -u
66 vim file
67 sort -t : -k 1 file
68 sort -t : -k 3 file
69 sort -t : -k 3 -n file
4.5 tr 和 sed
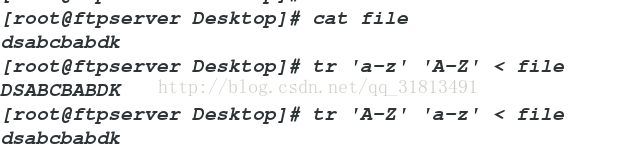
tr 'a-z' 'A-Z' passwd
tr 'A-Z' 'a-z' passwd
sed 5d passwd ##删除第五行
sed 5p passwd ##复制第五行
sed -n 5p passwd ##只显示第五行
vim rule ##里面写的是多条命令
sed -f rule passwd ##以rule为脚本执行passwd
多条规则也可书写在命令行中,只需要保证 -e 规则 -e 规则
5.系统修复
5.1 MBR
dd if=/dev/zero of=/dev/vda bs=446 count=1
重启后,选择光驱启动,进入命令行后执行
grub2-install /dev/vda
5.2 当删除了/boot/grud2/grub.cfg
此类情况若还没重启电脑,则执行下列即可
grub2-mkconfig > /boot/grub2/grub.cfg
Generating grub configuration file ...
Found linux image: /boot/vmlinuz-3.10.0-123.el7.x86_64
Found initrd image: /boot/initramfs-3.10.0-123.el7.x86_64.img
Found linux image: /boot/vmlinuz-0-rescue-946cb0e817ea4adb916183df8c4fc817
Found initrd image: /boot/initramfs-0-rescue-946cb0e817ea4adb916183df8c4fc817.img
done
若已经重启则:
set root='hd0,msdos1'
linux16 /boot/vmlinux-3.10.0-123.e17.x86_64 ro root=/dev/vda1
initrd16 /boot/initramfs-3.20.0-123.e17.x86_64.img
boot
修改grub.cfg中的:
(图5.2.1)
可以在开机启动时,多出这个增加的选项
5.3 当删除了/boot/vmlinux-3.10.0-123.e17.x86_64
重启选择网卡驱动
chroot /mnt/sysimage
yum install lftp
lftp 172.25.254.250
cd /pub/rhel7.0/Packsges
get kner..... ##获得内核文件
rpm2cpio kerner...... | cpio -id ##将内核文件解压为一目录
cp vmlinux-3.10.0-123.e17.x86_64 ##将内核文件复制到/boot中
退出即可(exit两次)
选择正常的驱动启动就行
5.4 当删除了文件/boot/initramfs-3.10.0-123.el7.x86_64.img
chroot /mnt/sysimage
mkinitrd /boot/initramfs-3.10.0-123.el7.x86_64.img 3.10.0-123.el7.x86_64 (为系统版本号)


 676
676


 被折叠的 条评论
为什么被折叠?
被折叠的 条评论
为什么被折叠?
 到【灌水乐园】发言


