


转载请注明出处:http://blog.csdn.net/qq_32451699/article/details/63274395
一、今天我们来自定义一个View来实现仿小米天气圆形比率条,这个控件实现起来非常简单,只需要自定义继承View即可实现,首先我们来看一下效果图:
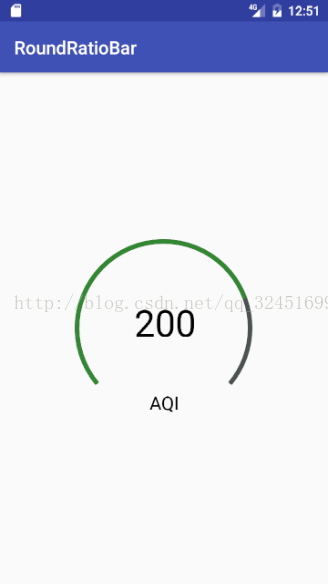
为了实现上图自定义View,首先我们来分析一下。我们需要绘制一个背景灰色的圆弧,然后我们再根据值文本的大小来绘制前景色绿色的圆弧,因此,我们要计算从哪里开始绘制,以及圆弧旋转的角度。绘制完圆弧之后,我们要绘制中间的值以及下方的标题,绘制这两个文本非常简单,但要注意绘制时测量一下文本的长度,从而使文字可以绘制在中间位置。下面我们离一步步实现:
(1)新建RoundRatioBar继承View,并在构造方法中获得绘制的属性
public class RoundRatioBar extends View{

    //开始角度
    private int mStartAngle;
    //底色旋转角度
    private int mRotateAngle;
    //背景色
    private int mBottomColor;
    //前景色
    private int mPaintColor;
    //文字颜色
    private int mTextColor;
    //宽度
    private int mPaintWidth;
    //画笔
    private Paint mPaint;
    //圆的半径
    private int mRadius;
    //圆的外接多边形
    private RectF mRect;
    //视图的宽和高
    private int mWidth;
    private int mHeight;
    //标题文本
    private String mTitleText;
    //值文本
    private String mValueText;

    public RoundRatioBar(Context context, AttributeSet attrs) {
        super(context, attrs);
        //从xml布局中获取属性值
        TypedArray typedArray = getContext().obtainStyledAttributes(attrs, R.styleable.RoundRatioBar);
        mStartAngle=typedArray.getInt(R.styleable.RoundRatioBar_start_angle,140);
        mRotateAngle = typedArray.getInt(R.styleable.RoundRatioBar_rotate_angle,0);
        mPaintColor = typedArray.getColor(R.styleable.RoundRatioBar_paint_color, Color.GREEN);
        mTextColor = typedArray.getColor(R.styleable.RoundRatioBar_text_color, Color.BLACK);
        mPaintWidth = (int)typedArray.getDimensionPixelSize(R.styleable.RoundRatioBar_paint_width,6);
        mBottomColor = typedArray.getColor(R.styleable.RoundRatioBar_bottom_color, Color.GRAY);
        mRadius = typedArray.getDimensionPixelSize(R.styleable.RoundRatioBar_round_radius,20);
        mTitleText = typedArray.getString(R.styleable.RoundRatioBar_title_text);
        mValueText = typedArray.getString(R.styleable.RoundRatioBar_value_text);
        if (mValueText == null){
            mValueText="0";
        }
    }
(2)复写View的 onMeasure方法,计算获得要绘制的长度和宽度
  @Override
    protected void onMeasure(int widthMeasureSpec, int heightMeasureSpec) {
        super.onMeasure(widthMeasureSpec, heightMeasureSpec);

        //获取测量模式
        int widthMode = MeasureSpec.getMode(widthMeasureSpec);
        int heightMode = MeasureSpec.getMode(heightMeasureSpec);

        //获取测量大小
        int widthSize = MeasureSpec.getSize(widthMeasureSpec);
        int heightSize = MeasureSpec.getSize(heightMeasureSpec);

        //如果为确定大小值,则圆的半径为宽度/2
        if (widthMode == MeasureSpec.EXACTLY && heightMode == MeasureSpec.EXACTLY) {
            mWidth = widthSize;
            mHeight = heightSize;
        }

        //如果为wrap_content 那么View大小为圆的半径大小*2
        if(widthMode == MeasureSpec.AT_MOST && heightMode == MeasureSpec.AT_MOST){
            mWidth = (mRadius+mPaintWidth)*2;
            mHeight = (mRadius+mPaintWidth)*2;
        }

        //设置视图的大小
        setMeasuredDimension(mWidth,mHeight);
    }
(3)在onDraw方法中进行绘制
   @Override
    protected void onDraw(Canvas canvas) {
        super.onDraw(canvas);
        initDraw();

        mRect = new RectF(mPaintWidth, mPaintWidth, 2*mRadius+mPaintWidth, 2*mRadius+mPaintWidth);
        //绘制底色
        canvas.drawArc(mRect, mStartAngle, 360-(mStartAngle-90)*2, false, mPaint);

        //绘制主色
        mPaint.setColor(mPaintColor);
        canvas.drawArc(mRect, mStartAngle, mRotateAngle, false, mPaint);

        //绘制具体值
        Paint textPaint = new Paint(Paint.ANTI_ALIAS_FLAG);
        textPaint.setColor(mTextColor);
        textPaint.setTextSize(ChangeDpToPx(this.getContext(),40f));
        Rect mBound1 = new Rect();
        textPaint.getTextBounds(mValueText, 0, mValueText.length(), mBound1);
        canvas.drawText(mValueText, mRadius+mPaintWidth-mBound1.width()/2, mRadius+mBound1.height()/2, textPaint);

        //绘制底部类型
        textPaint.setTextSize(ChangeDpToPx(this.getContext(),20f));
        Rect mBound2 = new Rect();
        textPaint.getTextBounds(mTitleText, 0, mTitleText.length(), mBound2);
        canvas.drawText(mTitleText, mRadius+mPaintWidth-mBound2.width()/2, mRadius*2.0f, textPaint);
    }
通过这三个主要步骤,就能实行了上面圆形比率条的绘制
注意事项:
(1)绘制文本时一定要把文本大小dp转换为px单位,可以使用以下两个方法实现:
  /**
     * 单位px转换为dp
     * @param context
     * @param pxValue
     * @return
     */
    private float ChangePxToDp(Context context, float pxValue) {
        final float scale = context.getResources().getDisplayMetrics().density;
        return (pxValue / scale + 0.5f);
    }

    /**
     * 单位dp转换为px
     * @param context
     * @param dpValue
     * @return
     */
    private float ChangeDpToPx(Context context, float dpValue) {
        final float scale = context.getResources().getDisplayMetrics().density;
        return (dpValue * scale + 0.5f);
    }
(2)要想使文本居中,我们一定要测的所要绘制文本的长度和宽度,然后计算文本的绘制位置。


 2440
2440


 被折叠的 条评论
为什么被折叠?
被折叠的 条评论
为什么被折叠?
 到【灌水乐园】发言


