


1.首先,需要在机器上安装flume工具
2.安装flume:
在文件夹 cd /usr/hdp/2.4.0.0-169/下创建flume文件目录
tar zxvf apache-flume-1.6.0-bin.tar.gz
mv apache-flume-1.6.0-bin flume
进入到flume文件的conf文件夹下边cd conf
3.在conf文件夹下创建test1文件:
vim test1:
# Name the components on this agent
a1.sources = r1
a1.sinks = k1
a1.channels = c1

# Describe/configure the source
a1.sources.r1.type = netcat
a1.sources.r1.bind =0.0.0.0
a1.sources.r1.port = 44444

# Describe the sink
a1.sinks.k1.type = logger

# Use a channel which buffers events in memory
a1.channels.c1.type = memory
a1.channels.c1.capacity = 1000
a1.channels.c1.transactionCapacity = 100

# Bind the source and sink to the channel
a1.sources.r1.channels = c1
a1.sinks.k1.channel = c1
a1.sinks.k1.type = logger–表示以日志的形式打印
返回到flume文件夹下cd ..
然后运行flume:命令如下:
bin/flume-ng agent –conf /conf/ –conf-file conf/test1 –name a1 -Dflume.root.logger=INFO,console
此时处于等待状态,图片
此时需要在eclipse端启动一个客户端:
在flume的avro source
package com.sxt.flume;
import org.apache.commons.io.output.ThresholdingOutputStream;
import org.apache.flume.Event;
import org.apache.flume.EventDeliveryException;
import org.apache.flume.api.RpcClient;
import org.apache.flume.api.RpcClientFactory;
import org.apache.flume.event.EventBuilder;
import java.nio.charset.Charset;
// 官方例程
/*
* As of Flume 1.4.0, Avro is the default RPC protocol.
* The NettyAvroRpcClient and ThriftRpcClient implement the RpcClient interface.
* The client needs to create this object with the host and port of the target Flume agent,
* and can then use the RpcClient to send data into the agent.
* The following example shows how to use the Flume Client SDK API within a user’s data-generating application:
*/
public class FlumeClientTest {
public static void main(String[] args) throws Exception{
MyRpcClientFacade client = new MyRpcClientFacade();
// Initialize client with the remote Flume agent's host and port
client.init("192.168.1.241", 44444);
// Send 10 events to the remote Flume agent. That agent should be
// configured to listen with an AvroSource.
// String sampleData = "ERROR";
String sampleData = "Hello Flume!";
System.out.println("发送数据");
for (int i = 0; i < 10; i++) {
client.sendDataToFlume(sampleData+" "+i);
}
client.cleanUp();
}
}
class MyRpcClientFacade {
private RpcClient client;
private String hostname;
private int port;
public void init(String hostname, int port) {
// Setup the RPC connection
this.hostname = hostname;
this.port = port;
this.client = RpcClientFactory.getDefaultInstance(hostname, port);
System.out.println("建立连接");
// Use the following method to create a thrift client (instead of the
// above line):
// this.client = RpcClientFactory.getThriftInstance(hostname, port);
}
public void sendDataToFlume(String data) {
// Create a Flume Event object that encapsulates the sample data
Event event = EventBuilder.withBody(data, Charset.forName("UTF-8"));
// Send the event
try {
client.append(event);
} catch (EventDeliveryException e) {
// clean up and recreate the client
client.close();
client = null;
client = RpcClientFactory.getDefaultInstance(hostname, port);
// Use the following method to create a thrift client (instead of
// the above line):
// this.client = RpcClientFactory.getThriftInstance(hostname, port);
}
}
public void cleanUp() {
// Close the RPC connection
System.out.println("断开连接");
client.close();
}
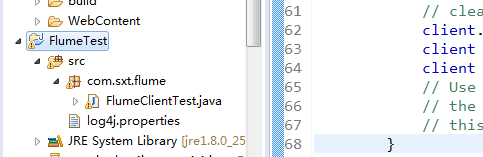
}项目的目录
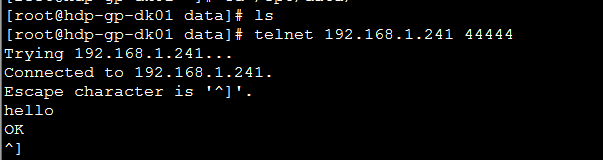
执行代码后开启flume的telnet 192.168.1.241 44444(复制节点)
二、使用avro source将客户端输入的数据写到本地的文件夹下
vim test2:
# Name the components on this agent
a1.sources = r1
a1.sinks = k1
a1.channels = c1

# Describe/configure the source
a1.sources.r1.type = avro
a1.sources.r1.bind =192.168.1.241
a1.sources.r1.port = 44444

# Describe the sink
a1.sinks.k1.type = file_roll
a1.sinks.k1.sink.directory=/home/sink
a1.sinks.k1.sink.rollInterval=0

# Use a channel which buffers events in memory
a1.channels.c1.type = memory
a1.channels.c1.capacity = 1000
a1.channels.c1.transactionCapacity = 100

# Bind the source and sink to the channel
a1.sources.r1.channels = c1
a1.sinks.k1.channel = c1
a1.sinks.k1.type = file_roll
a1.sinks.k1.sink.directory=/home/sink
接收到的数据存放到了sink本地的文件夹下边
1)执行flume的test2
bin/flume-ng agent –conf /conf/ –conf-file conf/test2 –name a1 -Dflume.root.logger=INFO,console
2)运行java代码
去文件/home/sink/下查看存放的数据
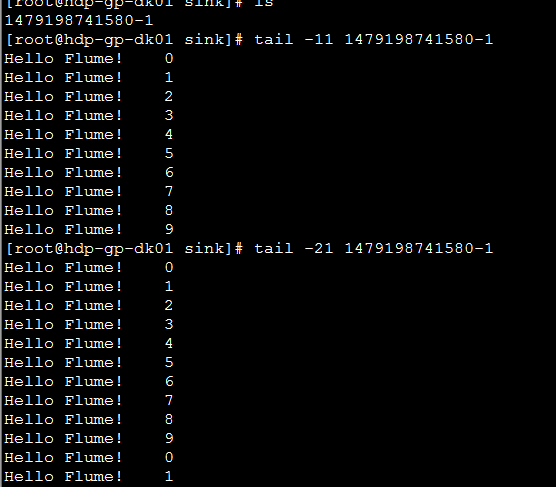
执行一次java代码就会多10条数据
三、读取文件夹下的目录内容存放到hdfs上
vim test4:
# example.conf: A single-node Flume configuration

# Name the components on this agent
a1.sources = r1
a1.sinks = k1
a1.channels = c1

# Describe/configure the source
a1.sources.r1.type =spooldir
a1.sources.r1.spoolDir=/opt/data

# Describe the sink
a1.sinks.k1.type=hdfs
a1.sinks.k1.hdfs.path=hdfs://192.168.1.245:8020/flume/data
a1.sinks.k1.hdfs.rollSize=10240000
a1.sinks.k1.hdfs.rollInterval=0
a1.sinks.k1.hdfs.rollCount=0
a1.sinks.k1.hdfs.idleTimeout=5
a1.sinks.k1.hdfs.fileType=DataStream


# Use a channel which buffers events in memory
a1.channels.c1.type = memory
a1.channels.c1.capacity = 1000
a1.channels.c1.transactionCapacity = 100

# Bind the source and sink to the channel
a1.sources.r1.channels = c1
a1.sinks.k1.channel = c1
首先,hdfs的集群可用,将存储到hdfs的active的节点上,文件夹/opt/data/的文件夹存在,并且有文件
运行flume下的test4后查看hdfs目录下存在文件
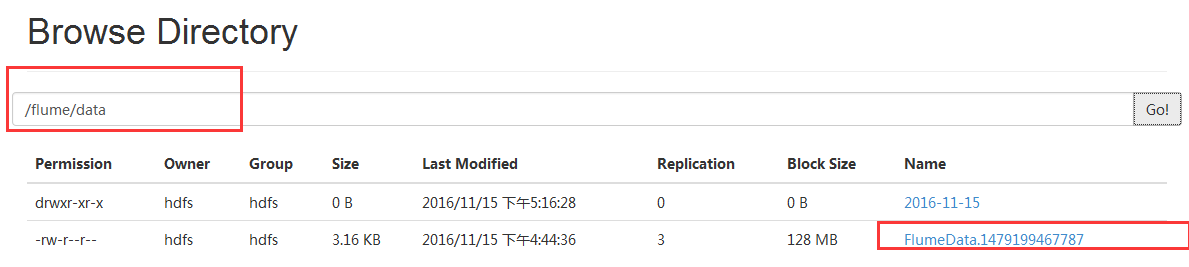
查看文件的内容可以使用hdfs

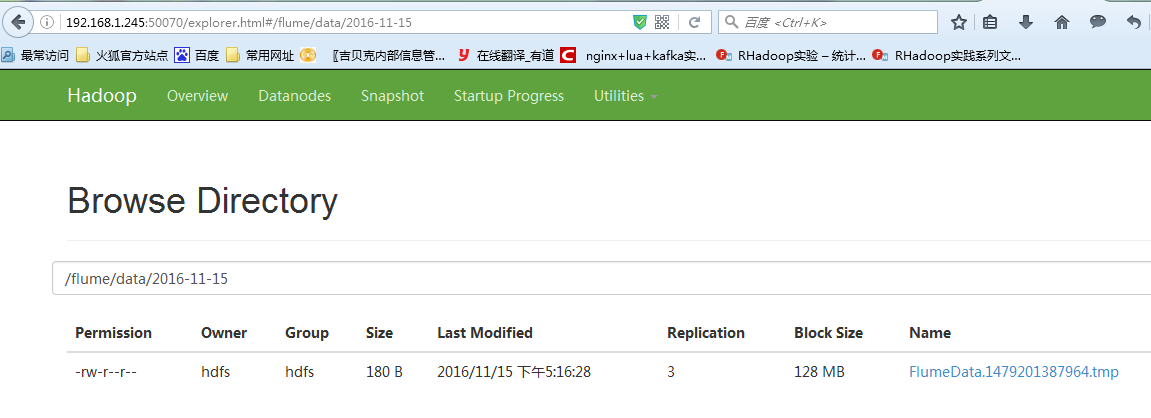
四、将avro端读取的数据传到hdfs上边
vim test6:
# example.conf: A single-node Flume configuration

# Name the components on this agent
a1.sources = r1
a1.sinks = k1
a1.channels = c1

# Describe/configure the source
a1.sources.r1.type =avro
a1.sources.r1.bind =0.0.0.0
a1.sources.r1.port = 44444

# Describe the sink
a1.sinks.k1.type=hdfs
a1.sinks.k1.hdfs.path=hdfs://192.168.1.245:8020/flume/data/%Y-%m-%d
a1.sinks.k1.hdfs.rollSize=10240000
a1.sinks.k1.hdfs.rollInterval=0
a1.sinks.k1.hdfs.rollCount=0
#a1.sinks.k1.hdfs.idleTimeout=5
a1.sinks.k1.hdfs.fileType=DataStream
a1.sinks.k1.hdfs.useLocalTimeStamp=true


# Use a channel which buffers events in memory
a1.channels.c1.type = memory
a1.channels.c1.capacity = 1000
a1.channels.c1.transactionCapacity = 100

# Bind the source and sink to the channel
a1.sources.r1.channels = c1
a1.sinks.k1.channel = c1
a1.sinks.k1.hdfs.path=hdfs://192.168.1.245:8020/flume/data/%Y-%m-%d
hdfs的数据按目录存放。
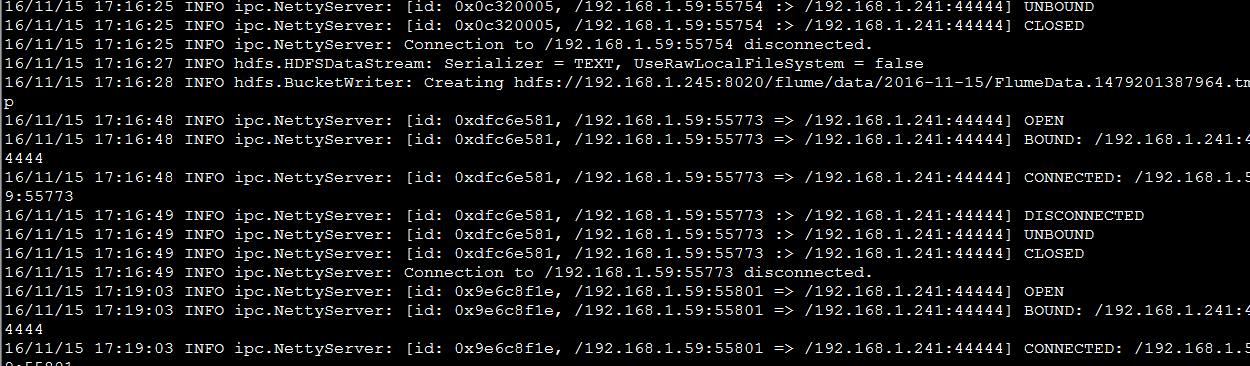
执行flume的test6文件,之后运行java客户端的代码,查看hdfs端

执行一次java代码,就会增加10条数据


 1407
1407


 被折叠的 条评论
为什么被折叠?
被折叠的 条评论
为什么被折叠?
 到【灌水乐园】发言


