


如何实现SSM配置Ueditor实现图片的自定义上传?上篇博客我们配置成功了用Ueditor实现了图片的上传,但是显然在实际开发的过程当中,我们的图片的地址和图片名称是要存在数据库,然而用Ueditor默认的上传功能,我们无法做到这点!下面是我来讲讲我的探索过程:
1.编辑ueditor.config.js文件
在实现了用Ueditor默认上传图片后,我看了很久那个大牛跟踪源码的博客(大牛的博客地址),我尝试着修改ueditor.config.js文件,如下图
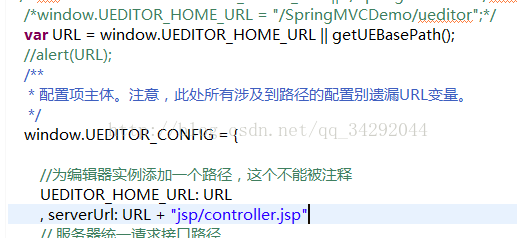
URL弹出后显示的是这一段:http://localhost:8080/SpringMVCDemo/ueditor
我尝试了很多遍按照那位大牛的做法,让请求直接请求到我自定义的controller当中,用自定义的方法加载config.json文件,然而按照那位大牛的方法始终会出现一个莫名其妙的错误,在尝试了很多遍无果后我决定放弃这种方法,还是直接让ueditor自动帮我加载config.json文件,后来想了想自己真是多此一举,Ueditor默认做到的事情,我为什么要求修改这个????哎!
2.在index.jsp页面更改请求
上面的办法失败后,我又在网上找到了下面的一段代码:
UE.Editor.prototype._bkGetActionUrl = UE.Editor.prototype.getActionUrl;
UE.Editor.prototype.getActionUrl = function(action) {
    if (action == 'uploadimage' || action == 'uploadscrawl' || action == 'uploadvideo') {
        return 'http://localhost:8080/SpringMVCDemo/uploadImage';
    } else {
        return this._bkGetActionUrl.call(this, action);
    }
} 
这里拦截了上传图片的请求路径,我让他转发到我指定的controller当中,这样就实现了第一步也是完成自定义上传图片最重要的一步!点击上传图片后,下面是上传图片请求的一些信息,如图:
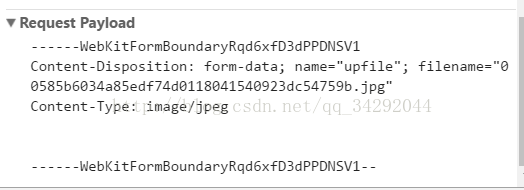
我们可以看到请求发到自定义controller之后附加了这么几个东西,最重要的是:form-data;name="upfile" 这个就是我们上传的图片!
3.自定义controller的写法
下面是uploadimage的传值规范
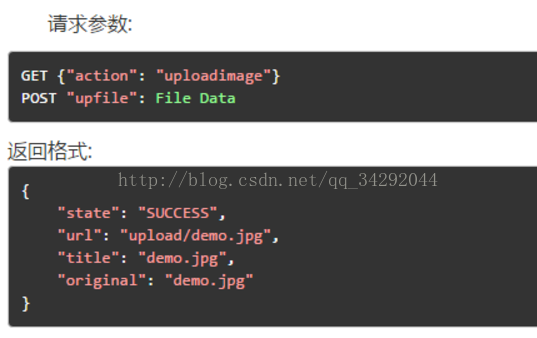
很明显我们需要传递一个json串,只要把这些属性填好就行了!!!!!
废话不多说,直接上代码:
@Controller
public class ImageController {

	@Autowired
	private ImageService imageService;


	 @RequestMapping(value="/uploadImage",method = RequestMethod.POST, produces = MediaType.APPLICATION_JSON_VALUE)
	 @ResponseBody
	    public Map<String,Object> uploadFile(@RequestParam(value = "upfile", required = false) MultipartFile file,
	            HttpServletRequest request,HttpServletResponse response){
		 Map<String,Object> map = new HashMap<String, Object>();
		 String realName = null;
		 String uuidName = null;
		 String realPath = null;

		 try {
			 Image image  = new Image();
			 //文件原来的名称
			 realName = file.getOriginalFilename();
			 //得到这个文件的uuidname
			 uuidName = this.getUUIDFileName(file.getOriginalFilename());
			 //图片保存的工程
			 realPath = request.getServletContext().getRealPath("/images");
			 //真实路径
			 String roolPath = request.getSession().getServletContext().getRealPath("/");
			 image.setName(realName);
			 image.setUrl(roolPath);
			 image.setUuidname(uuidName);

			 //得到文件的输入流
			InputStream in = new BufferedInputStream(file.getInputStream());
			//获得文件的输出流
			OutputStream out = new BufferedOutputStream(new FileOutputStream(new File(realPath,uuidName)));

			IOUtils.copy(in, out);
			in.close();
			out.close();
			//将图片信息传递到我的数据库当中
			int flag = imageService.insertImage(image);

			if(flag!=0){
			 map.put("state", "SUCCESS");// UEDITOR的规则:不为SUCCESS则显示state的内容
			 map.put("url","/images/"+uuidName);         //能访问到你现在图片的路径
			 map.put("title","");
			 map.put("original","realName" );
			}
		} catch (IOException e) {

		map.put("state", "文件上传失败!"); //在此处写上错误提示信息,这样当错误的时候就会显示此信息
        	map.put("url","");
        	map.put("title", "");
        	map.put("original", "");
        	e.printStackTrace();
		}
		 return map;
	 }


	 //下面是我的两个方法,取的uuidname防止文件同名问题
	 private String getExtName(String s, char split) {
	       int i = s.lastIndexOf(split);
	       int leg = s.length();
	       return i > 0 ? (i + 1) == leg ? " " : s.substring(i+1, s.length()) : " ";
	   }

	 private String getUUIDFileName(String fileName){
		    UUID uuid = UUID.randomUUID();
		    StringBuilder sb = new StringBuilder(100);
		    sb.append(uuid.toString()).append(".").append(this.getExtName(fileName, '.'));
		    return sb.toString();
		}


}
这就成功的把图片信息传递到数据库了额!直接上图!
你可以在eclipse工作目录的如下找到你上传的图片:

下面是数据库的信息:

尽管可以实现图片的自定义上传,然而这样也还是不够的,在你重新部署你的工程时,图片会被tomcat全部清空,所以你得把图片存在其他的地方,具体实现请看下一篇博客!!!


 3386
3386


 被折叠的 条评论
为什么被折叠?
被折叠的 条评论
为什么被折叠?
 到【灌水乐园】发言


