


在网上看了好多小程序上传图片,java后端接收的示例,但是不管在哪个网站看的,代码基本是一样的,都是代码特别多。
所以就自己写一个比较简单的。
一 小程序端
user.wxml
<view class='user_head'>
  <view>
    <image src='{{ptuser.avatarUrl}}' bindtap='updateHead'></image>
  </view>
  <text>点击选择头像</text>
</view>
user.js
 // 更换头像
  updateHead: function () {
    var that = this
    // 上传图片 获取路径
    wx.chooseImage({
      success: function (res) {
        console.log('临时路径:' + res.tempFilePaths[0])
            wx.uploadFile({
              url: app.globalData.baseUrl + '/file/uploadFile',
              filePath: res.tempFilePaths[0],
              name: 'file',
              success: function (result) {
                console.log("返回路径:" + result.data)
              }
            })
      },
    })
  },
二 java端
package cn.helloxhs.moudle.common;
import java.io.File;
import java.io.FileInputStream;
import java.io.FileNotFoundException;
import java.io.FileOutputStream;
import java.io.IOException;
import java.io.InputStream;
import java.io.OutputStream;
import javax.servlet.http.HttpServletRequest;
import javax.servlet.http.HttpServletResponse;
import org.apache.commons.fileupload.disk.DiskFileItem;
import org.springframework.stereotype.Controller;
import org.springframework.web.bind.annotation.RequestMapping;
import org.springframework.web.bind.annotation.ResponseBody;
import org.springframework.web.multipart.MultipartFile;
import org.springframework.web.multipart.commons.CommonsMultipartFile;
import cn.helloxhs.base.controller.BaseController;
/**
* 类说明
*
* @author 肖荷山
* @version 创建时间:2017年12月23日 上午11:14:27
*/
@Controller
@RequestMapping("/file")
public class FileController extends BaseController {
@RequestMapping("/uploadFile")
@ResponseBody
public Object uploadFile(HttpServletResponse response, HttpServletRequest request, MultipartFile file) {
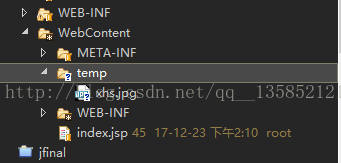
String realPath = request.getSession().getServletContext().getRealPath("/temp");
try {
CommonsMultipartFile cf = (CommonsMultipartFile) file;
DiskFileItem fi = (DiskFileItem) cf.getFileItem();
File f1 = fi.getStoreLocation();
InputStream ips = new FileInputStream(f1);
OutputStream ops = new FileOutputStream(realPath + "/" + "xhs.jpg");
byte[] b = new byte[1024];
int len;
try {
while ((len = ips.read(b)) != -1) {
ops.write(b, 0, len);
}
} catch (IOException e) {
e.printStackTrace();
} finally {
// 完毕,关闭所有链接
try {
ops.close();
ips.close();
} catch (IOException e) {
e.printStackTrace();
}
}
} catch (FileNotFoundException e) {
e.printStackTrace();
}
return realPath;
}
}
简单就好,没其他功能,单纯上传图片


 2228
2228


 被折叠的 条评论
为什么被折叠?
被折叠的 条评论
为什么被折叠?
 到【灌水乐园】发言


