


 本文介绍如何使用Nagios监控MySQL主从复制状态,包括设置监控用户、安装配置NRPE、编写检查脚本及配置Nagios服务端等步骤。
nagios监控mysql主从同步
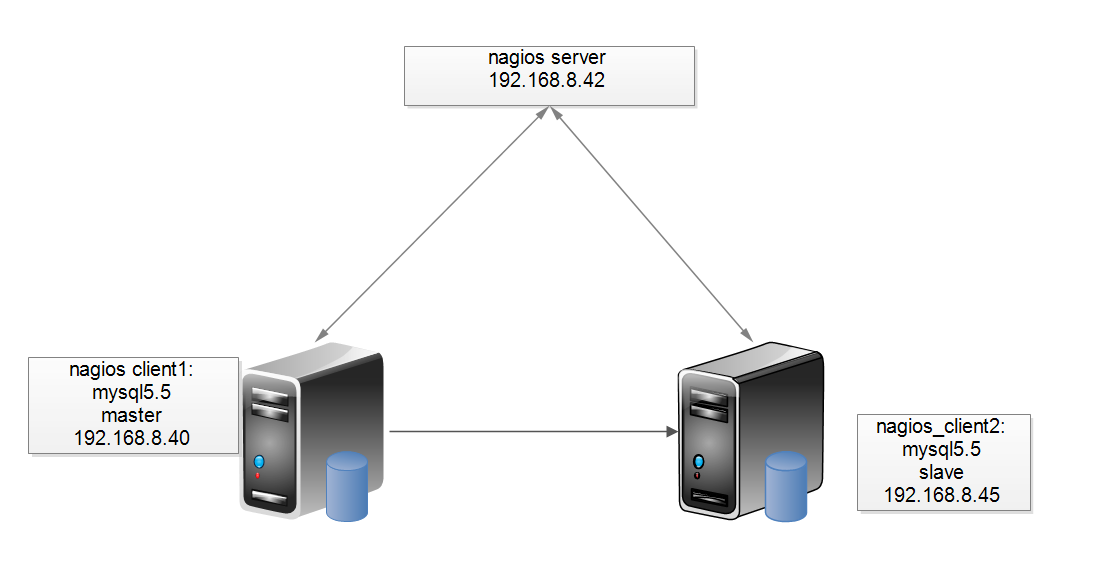
起因:nagios可能监控到mysql服务的运行情况,但确不能监控mysql的主从复制是否正常:有时候,同步已经停止,但管理人员却不知道。
登陆mysql从服务器,通过执行 mysql> show slave status/G 查看其输出,即可判定主从复制是否正常。下面是某个从服务器的输出:
mysql> show slave status\G
*************************** 1. row ***************************
Slave_IO_State: Waiting for master to send event
Master_Host: 192.168.8.40
Master_User: repluser
Master_Port: 3306
Connect_Retry: 60
Master_Log_File: mysql-bin.000008
Read_Master_Log_Pos: 34797869
Relay_Log_File: relay-bin.000003
Relay_Log_Pos: 34797915
Relay_Master_Log_File: mysql-bin.000008
Slave_IO_Running: Yes
Slave_SQL_Running: Yes
Replicate_Do_DB:
Replicate_Ignore_DB:
Replicate_Do_Table:
Replicate_Ignore_Table:
Replicate_Wild_Do_Table: TD_OA.%
Replicate_Wild_Ignore_Table: mysql.%
Last_Errno: 0
Last_Error:
Skip_Counter: 0
Exec_Master_Log_Pos: 34797869
Relay_Log_Space: 34798311
Until_Condition: None
Until_Log_File:
Until_Log_Pos: 0
Master_SSL_Allowed: No
Master_SSL_CA_File:
Master_SSL_CA_Path:
Master_SSL_Cert:
Master_SSL_Cipher:
Master_SSL_Key:
Seconds_Behind_Master: 0
Master_SSL_Verify_Server_Cert: No
Last_IO_Errno: 0
Last_IO_Error:
Last_SQL_Errno: 0
Last_SQL_Error:
Replicate_Ignore_Server_Ids:
Master_Server_Id: 1
1 row in set (0.00 sec)
这个输出,最关键处就是"Slave_IO_Running: Yes “和“Slave_SQL_Running: Yes ”,这两个值全是"Yes"就表明主从复制正常,否则就是有问题。
操作步骤:
1、在从数据库服务器增加一个用户,给予较低的权限,操作为
mysql> grant replication client on *.* to 'nagios'@'%' identified by 'nagios';
mysql> flush privileges;
2、登陆主服务器验证一下,看是否正常。操作为
/usr/local/mysql/bin/mysql -h192.168.8.45 -unagios -pnagios -e "show slave status\G"
注意:这个操作是在 shell下操作的
3、在从服务器安装 nrpe,然后在配置文件/usr/local/nagios/etc/nrpe.cfg加入一行
command[check_mysql_slave]=/usr/local/nagios/libexec/check_mysql_slave
4、在nagios client端即mysql从服务器编写脚本vim /usr/local/nagios/libexec/check_mysql_slave(这是监控其作用的核心),其内容如下:
#!/bin/sh
declare -a slave_is
slave_is=($(/usr/local/mysql/bin/mysql -unagios -pnagios -e "show slave status\G"|grep Running |awk '{print $2}'))
if [ "${slave_is[0]}" = "Yes" -a "${slave_is[1]}" = "Yes" ]
then
echo "OK -slave is running"
exit 0
else
echo "Critical -slave is error"
exit 2
fi
chmod +x /usr/local/nagios/libexec/check_mysql_slave
5、手动运行这个脚本,观察输出。
# /usr/local/mysql/bin/mysql -unagios -pnagios -e "show slave status\G"|grep Running |awk '{print $2}'
报错:
ERROR 1045 (28000): Access denied for user 'nagios'@'localhost' (using password: YES)
发现删除系统mysql库中user表自带的一些'::1'等匿名用户,并且对root配置密码后,问题解决
6、nagios服务端执行
# /usr/local/nagios/libexec/check_nrpe -H 192.168.8.45 -c check_mysql_slave
OK -slave is running
7、修改nagios服务端service.cfg文件。
/usr/local/nagios/etc/objects/service.cfg
添加
define service{
use generic-service
host_name node45.chinasoft.com
service_description check_mysql_slave
check_command check_nrpe!check_mysql_slave
}
8、功能测试


 324
324

 被折叠的 条评论
为什么被折叠?
被折叠的 条评论
为什么被折叠?
 到【灌水乐园】发言


