


这篇文章写了两次,真悲催,保存提示成功,刷新页面后,啥都找不着了原来在草稿箱。
一、虚拟机Linux(CentOS7)的安装以及网络设置
1.新建虚拟机的网络设置,采用桥接模式,分配局域网内的独立ip。
VMware 工具栏中的虚拟机 ->设置
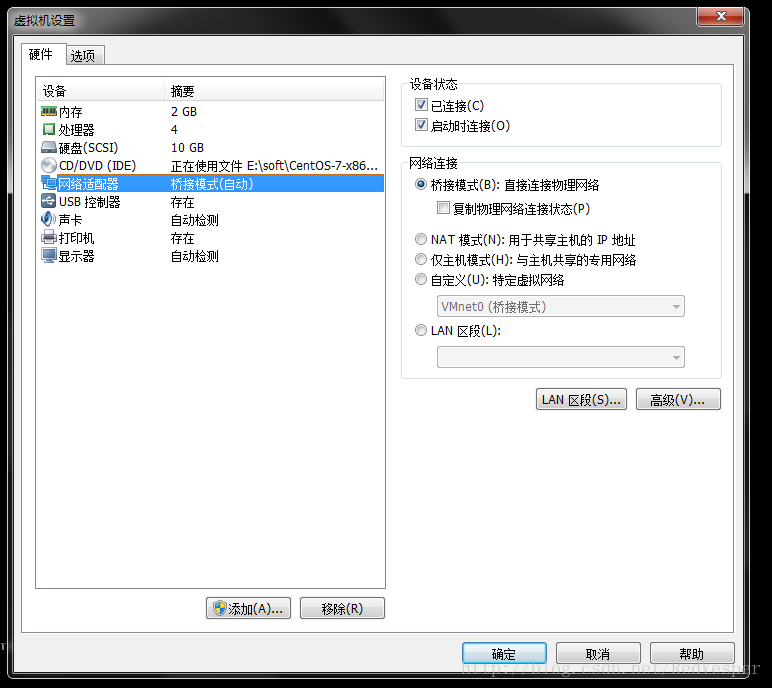
说明:此图是已经启动后截图
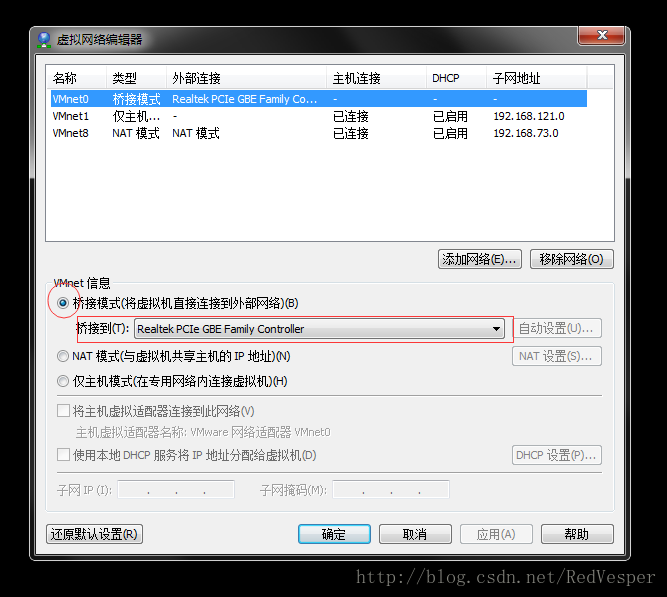
接下来,桥接模式选择虚拟网卡与物理网卡的桥接作用(就是要架桥访问网络,我杜撰的)。
2.安装完成CentOS后,网卡设备名称为:ens33,如果想设置为eth0,将需要改名处理,不改也可以上网。嘿嘿。。。
a.修改网卡名称,附带步骤,随自己所爱。
打开 /etc/sysconfig/grub 文件。
[root@localhost ~]#vi /etc/sysconfig/grub
GRUB_CMDLINE_LINUX 增加 net.ifnames=0 biosdevname=0 ;如果要跳帧分辨率 增加 vga=0x317 后面的值根据设置表参数以及自身机器来选择。
保存修改后退出(Esc->:wq)
[root@localhost ~]#grub2-mkconfig -o /boot/grub2/grub.cfg (必须执行!)
查看网络命令看到网卡变为eth0,但是网卡配置文件依然是ifcfg-ens33
b.配置网卡文件以及网络ip设置
网上有说需要修改以下三个配置文件,我只修改了一个文件。
- 1,配置DNS vi /etc/resolv.conf
- 2,配置网关:vi /etc/sysconfig/network
- 3,配置ip地址:vi /etc/sysconfig/network-scripts/ifcfg-eth0
[root@localhost ~]#cd /etc/sysconfig/network-scripts/
[root@localhost network-scripts]#rm ifcfg-ens33 ifcfg-eth0/ifcfg-eth0
[root@localhost network-scripts]#vi ifcfg-eth0
修改:
ONBOOT=no 更改为ONBOOT=yes
BOOTPROTO=dhcp 更改为BOOTPROTO=static
增加网卡设置:
IPADDR=192.168.0.80
NETMASK=255.255.255.0
GATEWAY=192.168.0.1
#电信给你上网的DNS,是啥就填写啥。
DNS1=202.96.134.10
DNS2=202.96.128.66
保存修改后退出(Esc->:wq)
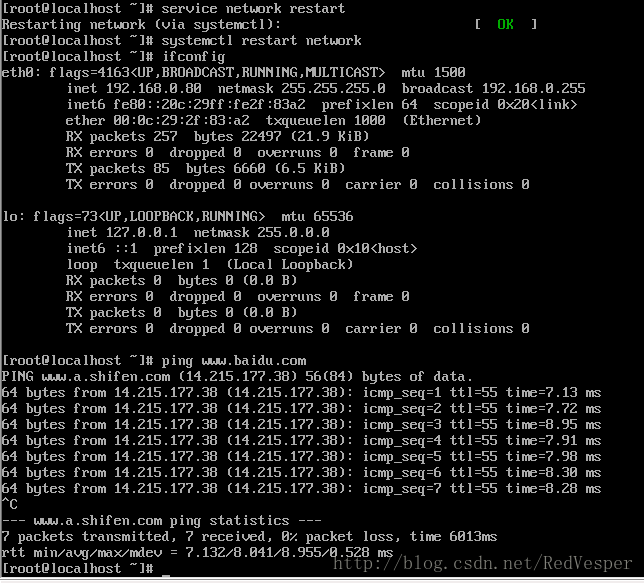
[root@localhostnetwork-scripts]# cd /root
[root@localhost ~]#service network restart or systemctl restart network
二、安装nginx,配置启动文件
1.Nginx 安装前,需要安装依赖包。
[root@localhost ~]# yum -y install gcc gcc-c++ pcre-devel zlib-devel wget
2.为nginx建立一个www组,并建立一个不登录的账户nginx,放入www用户组
[root@localhost ~]#groupadd -f www
[root@localhost ~]# useradd -d /var/cache/nginx -s /sbin/nologin -g www nginx
3.建立目录用于存放nginx日志文件,并赋权限
[root@localhost ~]# mkdir -p /var/log/nginx
[root@localhost ~]# mkdir -p /usr/local/nginx
[root@localhost ~]# chown -R nginx.www /var/log/nginx
[root@localhost ~]# chown -R nginx.www /usr/local/nginx
4.下载nginx 安装
[root@localhost ~]# cd /usr/local/src
[root@localhost src]# wget http://nginx.org/download/nginx-1.10.0.tar.gz (根据需要选择版本)
[root@localhost src]# tar -zxvf nginx-1.10.0.tar.gz
[root@localhost src]# cd nginx-1.10.0
[root@localhostnginx-1.10.0]# ./configure --prefix=/usr/local/nginx --user=nginx --group=www --pid-path=/run/nginx.pid --error-log-path=/var/log/nginx/error.log --http-log-path=/var/log/nginx/access.log
--prefix=/usr/local/nginx 安装制定的目录,根据自己需要设置目录。

没有错误信息提示的时候,可以make && make install
[root@localhost nginx-1.10.0]# make && make install
5.制作启动文件
[root@localhost nginx-1.10.0]# ln -s /usr/local/nginx/sbin/nginx /usr/sbin/nginx ( /usr/local/nginx/sbin/nginx 启动执行文件位置,创建连接文件)
[root@localhost nginx-1.10.0]# vi /usr/lib/systemd/system/nginx.service
[Unit]
Description=nginx - high performance web server
Documentation=http://nginx.org/en/docs/
After=network.target remote-fs.target nss-lookup.target
[Service]
Type=forking
PIDFile=/run/nginx.pid
ExecStartPre=/usr/sbin/nginx -t -c /usr/local/nginx/conf/nginx.conf
ExecStart=/usr/sbin/nginx -c /usr/local/nginx/conf/nginx.conf
ExecReload=/bin/kill -s HUP $MAINPID
ExecStop=/bin/kill -s QUIT $MAINPID
PrivateTmp=true
[Install]
WantedBy=multi-user.target
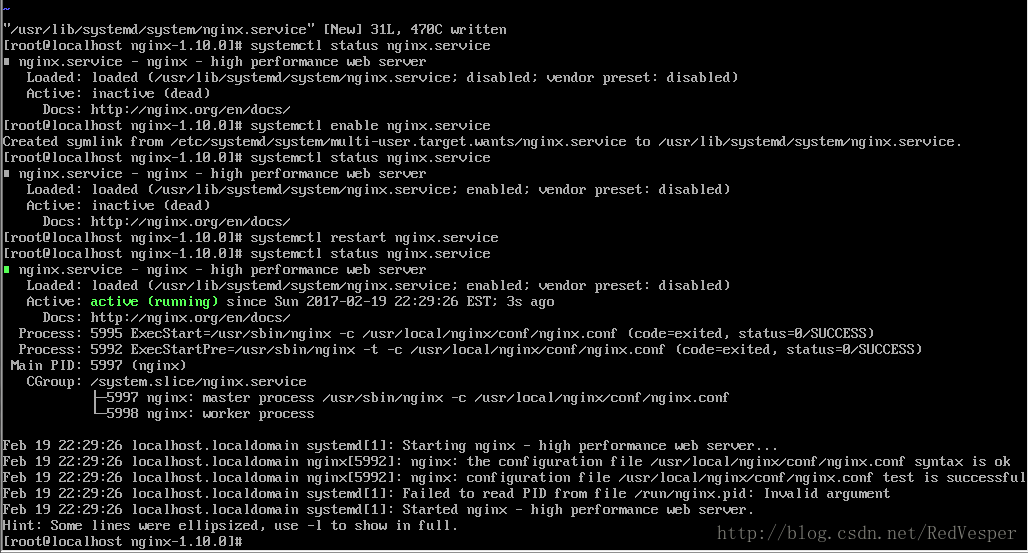
保存修改后退出(Esc->:wq)
[root@localhost nginx-1.10.0]# systemctl restart nginx.service
[root@localhost nginx-1.10.0]# systemctl status nginx.service
二、PHP安装以及php-fpm的相关配置
1.php安装前的依赖[root@localhost nginx-1.10.0] # yum -y install freetype freetype-devel png jpeg zlib gd php-gd* autoconf automak openssl openssl-devel bzip2-devel curl curl-devel libxml2 libxml2-devel zlib-devel libjpeg libjpeg-devel libpng libpng-devel
还需要 mhash mcrypt的支持的需要以下安装
[root@localhost nginx-1.10.0] #yum -y install epel-release
[root@localhost nginx-1.10.0] #yum update 注意执行命令的提示,输入 d 回车。
[root@localhost nginx-1.10.0] # yum install libmcrypt libmcrypt-devel mcrypt mhash 注意执行命令的提示,输入y 回车。

2.安装php 配置php-fpm
[root@localhost nginx-1.10.0] #cd ..
[root@localhost src] #wget http://cn2.php.net/distributions/php-5.6.30.tar.gz
[root@localhost src] #tar -zxvf php-5.6.30.tar.gz
[root@localhost src] #cd php-5.6.30
[root@localhost php-5.6.30]# ./configure --prefix=/usr/local/php5 --with-config-file-path=/usr/local/php5/lib --with-mysql=mysqlnd --with-libxml-dir --enable-ftp --enable-sockets --with-gd --with-jpeg-dir --with-png-dir --with-freetype-dir --with-zlib-dir --enable-gd-native-ttf --enable-magic-quotes --with-iconv --enable-mbstring=all --disable-cgi --with-openssl --with-mcrypt --enable-bcmath --enable-calendar --enable-exif --enable-libxml --with-bz2 --with-curl --with-xmlrpc --with-gettext --enable-cli --enable-debug --enable-zend-multibyte --with-mhash --enable-pcntl --enable-sysvsem --enable-inline-optimization --enable-soap --disable-ipv6 --enable-fpm
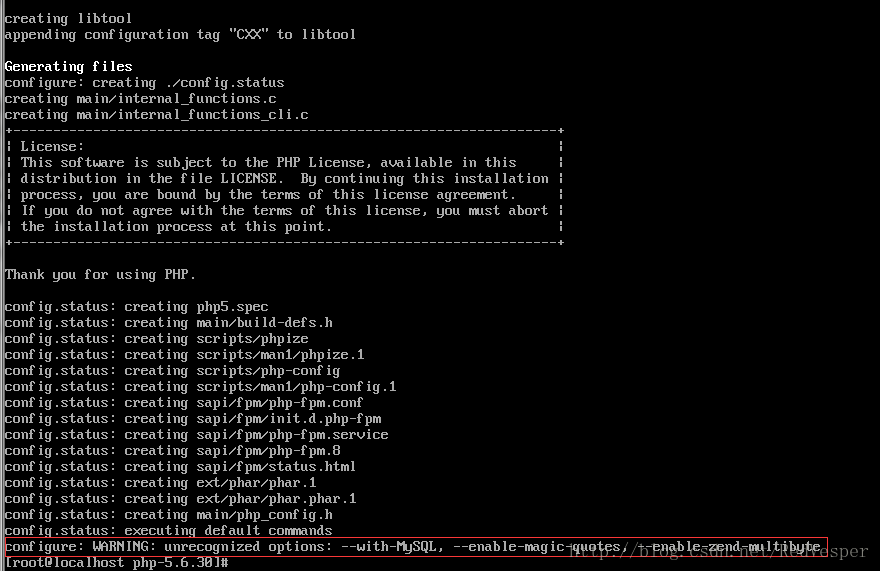
如果有错误,请查看error提示的信息安装对应的包文件或者是包依赖文件。如 yum install openssl openssl-devel
(警告,可以过,或者删除两个配置。)
[root@localhost php-5.6.30] #make && make install
[root@localhost php-5.6.30] #cp php.ini-development /usr/local/php5/lib/php.ini ( --prefix=/usr/local/php5)
[root@localhost etc] # cd /usr/local/php5/etc
[root@localhost etc] #cp php-fpm.conf.default php-fpm.conf
[root@localhost etc] #vi php-fpm.conf
启用如下几行,即去掉前面的分号(;)
pid = run/php-fpm.pid
error_log = log/php-fpm.log
log_level = notice
listen = 127.0.0.1:9000
listen.allowed_clients = 127.0.0.1
pm = dynamic
pm.max_children = 50
pm.start_servers = 5
pm.min_spare_servers = 5
pm.max_spare_servers = 35
pm.max_requests = 500
env[HOSTNAME] = $HOSTNAME
env[PATH] = /usr/local/bin:/usr/bin:/bin
env[TMP] = /tmp
env[TMPDIR] = /tmp
env[TEMP] = /tmp
保存修改后退出(Esc->:wq)
[root@localhost etc] #
3.便于以后的操作,进行以下设置并制作自启动文件:
[root@localhost etc]# ln -s /usr/local/php5/sbin/php-fpm /usr/sbin/php-fpm (/usr/local/php5/sbin/php-fpm 启动执行文件位置,创建连接文件)
[root@localhost etc]# vi /usr/lib/systemd/system/php-fpm.service
[Unit]
Description=php-fpm- high performance web server
Documentation=http://php.net/
After=network.target remote-fs.target nss-lookup.target
[Service]
Type=forking
PIDFile=/usr/local/php5/var/run/php-fpm.pid #注意路径
ExecStartPre=/usr/sbin/php-fpm -t -c /usr/local/php5/etc/php-fpm.conf
ExecStart=/usr/sbin/php-fpm -c/usr/local/php5/etc/php-fpm.conf
ExecReload=/bin/kill -s HUP $MAINPID
ExecStop=/bin/kill -s QUIT $MAINPID
PrivateTmp=true
[Install]
WantedBy=multi-user.target
保存修改后退出(Esc->:wq)
[root@localhost etc]# systemctl enable php-fpm.service (随系统启动)
[root@localhost etc]# systemctl status php-fpm.service (查看启动状态)
三、配置nginx 与php关联
1.nginx与php配置
[root@localhost etc]# vi /usr/local/nginx/conf/nginx.conf
user nginx www;
worker_processes 2;
error_log /var/log/nginx/error.log crit;
#error_log logs/error.log notice;
#error_log logs/error.log info;
pid /run/nginx.pid;
events {
worker_connections 2048;
}
http {
include mime.types;
default_type application/octet-stream;
sendfile on;
keepalive_timeout 65;
server {
listen 80;
server_name 127.0.0.1
# pass the PHP scripts to FastCGI server listening on 127.0.0.1:9000
location ~ \.php$ {
root html;
fastcgi_pass 127.0.0.1:9000;
fastcgi_index index.php;
fastcgi_param SCRIPT_FILENAME /scripts$fastcgi_script_name;
include fastcgi.conf;
}
}
}
保存修改后退出(Esc->:wq)
可以看看 [root@localhost etc]# vi /usr/local/nginx/conf/fastcgi.conf
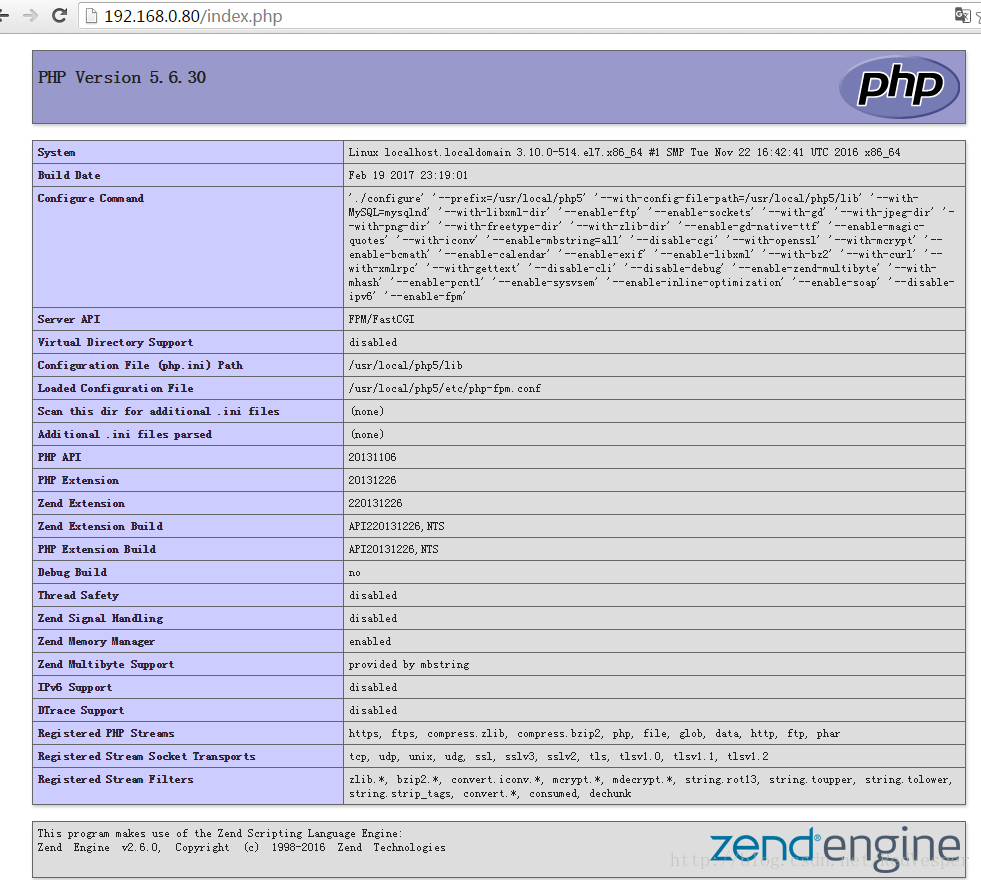
2.创建index.php文件查看php环境信息
[root@localhost etc]# mkdir -p /var/www/html
[root@localhost etc]# vi /var/www/html/index.php
<?php
phpinfo();
?>
保存修改后退出(Esc->:wq)
[root@localhost etc]# reboot
3.访问测试是否成功
打开浏览器 http://IP/index.php,能浏览恭喜你,安装成功了。


 1426
1426


 被折叠的 条评论
为什么被折叠?
被折叠的 条评论
为什么被折叠?
 到【灌水乐园】发言


