一、首先添加框架支持
- 添加jar包
- 配置xml
因为我们要使用spring mvc做表现层,spring aop配置事务,所以要导入mvc、aop、tx相关的东西 0.0
添加支持后的applicationContext.xml:
<beans xmlns="http://www.springframework.org/schema/beans"
xmlns:xsi="http://www.w3.org/2001/XMLSchema-instance"
xmlns:context="http://www.springframework.org/schema/context"
xmlns:mvc="http://www.springframework.org/schema/mvc"
xmlns:aop="http://www.springframework.org/schema/aop"
xmlns:tx="http://www.springframework.org/schema/tx"
xsi:schemaLocation="http://www.springframework.org/schema/beans
http://www.springframework.org/schema/beans/spring-beans-3.2.xsd
http://www.springframework.org/schema/context
http://www.springframework.org/schema/context/spring-context-3.2.xsd
http://www.springframework.org/schema/mvc
http://www.springframework.org/schema/mvc/spring-mvc-3.2.xsd
http://www.springframework.org/schema/aop
http://www.springframework.org/schema/aop/spring-aop-3.2.xsd
http://www.springframework.org/schema/tx
http://www.springframework.org/schema/tx/spring-tx-3.2.xsd ">
<context:component-scan base-package="com"></context:component-scan>
<mvc:annotation-driven />
<bean id="ssf" class="org.mybatis.spring.SqlSessionFactoryBean">
<property name="dataSource" ref="ds"/>
</bean>
<bean id="ds" class="org.springframework.jdbc.datasource.DriverManagerDataSource">
<property name="driverClassName" value="com.mysql.jdbc.Driver"/>
<property name="url" value="jdbc:mysql://localhost:3306/etoak"/>
<property name="username" value="root"/>
<property name="password" value="root"/>
</bean>
<bean class="org.mybatis.spring.mapper.MapperScannerConfigurer">
<property name="basePackage" value="com.etoak.dao"/>
<property name="sqlSessionFactoryBeanName" value="ssf"/>
</bean>
</beans>
二、配置事务:
为使用事务,我们在项目中添加service中间层。
并建立com.etoak.exception包,存放我们自定义的exception.
首先在applicationContext.xml中添加如下代码:
<tx:advice id="tran" transaction-manager="tm">
<tx:attributes>
<tx:method name="add*" isolation="DEFAULT" propagation="REQUIRED" read-only="false" timeout="-1"  rollback-for="com.etoak.exception.AddStudentException"/>
<tx:method name="del*"/>
<tx:method name="sel*" read-only="true"/>
<tx:method name="update*" timeout="10"/>
</tx:attributes>
</tx:advice>
<bean id="tm" class="org.springframework.jdbc.datasource.DataSourceTransactionManager">
<property name="dataSource" ref="ds"></property>
</bean>
<aop:config>
<aop:pointcut expression="execution(* com.etoak.service.*.*(..))"id="pc"/>
<aop:advisor acut-ref="pc"/>
</aop:config><tx:advice id="tran" transaction-manager="tm">
<tx:attributes>
<tx:method name="add*" isolation="DEFAULT" propagation="REQUIRED" read-only="false" timeout="-1"  rollback-for="com.etoak.exception.AddStudentException"/>
<tx:method name="del*"/>
<tx:method name="sel*" read-only="true"/>
<tx:method name="update*" timeout="10"/>
</tx:attributes>
</tx:advice>
<bean id="tm" class="org.springframework.jdbc.datasource.DataSourceTransactionManager">
<property name="dataSource" ref="ds"></property>
</bean>
<aop:config>
<aop:pointcut expression="execution(* com.etoak.service.*.*(..))"id="pc"/>
<aop:advisor acut-ref="pc"/>
</aop:config>
注: rollback-for 说明了回滚时报的异常,我们就以addStudent为例来看一下。
建立 addStudentException:
public class AddStudentException extends Exception {
public String getMessage(){ return "添加学生失败"; } }
编写service层:
StudentService.java:
@Repository
public interface StudentService{
public int addStudent(Student stu) throws Exception;
public int delStudentById(int id);
public int updateStudent(Student stu);
public Student selectStudentById(int id);
public List<Student> selectAllStudents();
public int StudentCount();
public List<Student> selectStudentByPage(Map map);
}
StudentServiceImpl.java
@Repository
public class StudentServiceImpl implements StudentService {
@Autowired
private StudentDaoIF dao;
@Override
public int addStudent(Student stu) throws Exception {
int i = 0;
try {
i = dao.addStudent(stu);
}catch(Exception e) {
thrownew AddStudentException();
}
returni; }
//其他方法略...
 }
到现在添加学生的事务就配置好了。
我们可以用测试类测一下:
public class TestMybatis {
public static void main(String[] args) throws Exception {
ApplicationContext ac = new ClassPathXmlApplicationContext("applicationContext.xml");
ac = new FileSystemXmlApplicationContext("src/applicationContext.xml");
StudentService dao = (StudentService)ac.getBean("studentServiceImpl");
Student stu = (Student)ac.getBean("student");
stu.setName("a");
stu.setPassword("aaaa");
dao.addStudent(stu);
List<Student> list;
list = dao.selectAllStudents();
System.out.println(list.get(0).getName());
}
}
这里password字段超出了限制,所以事务回滚,会报我们自定义的异常:

三、整合spring mvc部分
前面我们已经导入了框架支持(jar、xml) ,这里就不赘述了,
还是以添加学生的例子来说明下spring mvc的使用。
首先在web.xml中配置spring中央控制器:
<?xml version="1.0" encoding="UTF-8"?>
<web-app version="2.5" xmlns="http://java.sun.com/xml/ns/javaee" xmlns:xsi="http://www.w3.org/2001/XMLSchema-instance"
xsi:schemaLocation="http://java.sun.com/xml/ns/javaee http://java.sun.com/xml/ns/javaee/web-app_2_5.xsd">
<servlet>
<servlet-name>etoak</servlet-name>
<servlet-class>com.etoak.util.MyDispatcherServlet</servlet-class>
<init-param>
<param-name>contextConfigLocation</param-name>
<param-value>/WEB-INF/applicationContext.xml</param-value>
</init-param>
</servlet>
<servlet-mapping>
<servlet-name>etoak</servlet-name>
<url-pattern>*.do</url-pattern>
</servlet-mapping>
<display-name></display-name>
<welcome-file-list>
<welcome-file>index.jsp</welcome-file>
</welcome-file-list>
</web-app>
applicationContext.xml上面已经配置好了现在不需要添加其他配置,只需要把这个文件复制到WEB-INF目录下,当时放在src下只是为了测试方法哦~
编写测试页面: index.jsp:
<%@ page language="java" import="java.util.*" pageEncoding="utf-8"%>
<!DOCTYPE HTML PUBLIC "-//W3C//DTD HTML 4.01 Transitional//EN">
<html>
<head>
<title>测试</title>
<script type="text/javascript" src="js/jquery-1.10.2.js"></script>
<script type="text/javascript">
function ok(){ $.ajax({
url:"addStudent2.do",
type:"post",
dataType:"json",
data:{ name: $("#name").val(), password:$("#password").val() },
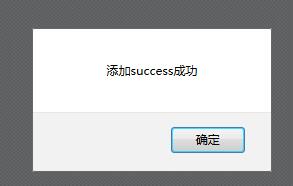
success: function(data){alert("添加"+data.status+"成功"); },
error:function(){ alert("系统错误"); } }); }
</script>
</head>
<body>
返回视图:<br/>
<form action="addStudent1.do" method="post">
用户名:<input name="name" type="text"/>
<br/> 密码:<input name="password" type="text"/>
<br/>
<input type="submit" value="提交">
<br/>
</form>
返回json:<br/><form>
用户名:<input id="name" name="name" type="text" /><br/>
密码:<input id="password" name="password" type="text" /><br/>
<input type="button" value="提交" οnclick="ok()" ><br/>
</form>
</body>
</html>
跳转页面 success.jsp:
<%@ page language="java" import="java.util.*" pageEncoding="utf8"%>
<%@taglib prefix="c" uri="http://java.sun.com/jstl/core"%>
<!DOCTYPE HTML PUBLIC "-//W3C//DTD HTML 4.01 Transitional//EN">
<html>
<head>
<title>成功</title>
</head>
<body>
操作成功 用户名为:${student.name}
密码为:${student.password}
</body>
</html>
编写Controller层 addStudentController.java
@Controller
public class AddStudentController {
@Autowired
private StudentService dao;
@RequestMapping("/addStudent1.do")
public String add1(Student stu,ModelMap map) throws Exception{
dao.addStudent(stu);
map.put("student",stu);
return "forward:success.jsp"; }
@RequestMapping(value = "/addStudent2.do",method = RequestMethod.POST)
@ResponseBody
public Map add2(Student stu) throws Exception{
Map map = new HashMap();
dao.addStudent(stu);
map.put("status", "success");
return map; } }
注:这里我们使用两种方式接受返回结果,1是返回页面和数据,数据放在modelMap里面的同时他会自动放在request中一份,所以前台显示的时候我们可以直接用el表达式${student.name}来显示返回字段。2是返回json数据,注意写法使用@ResponseBody注解,同时要在applicationContext.xml中添加<mvc:annotation-driven /> 这句,前面已经加好这里不再赘述。另外返回json需要添加spring中json的jar包。
下面是返回视图的结果:

返回json的结果:


 331
331


 被折叠的 条评论
为什么被折叠?


