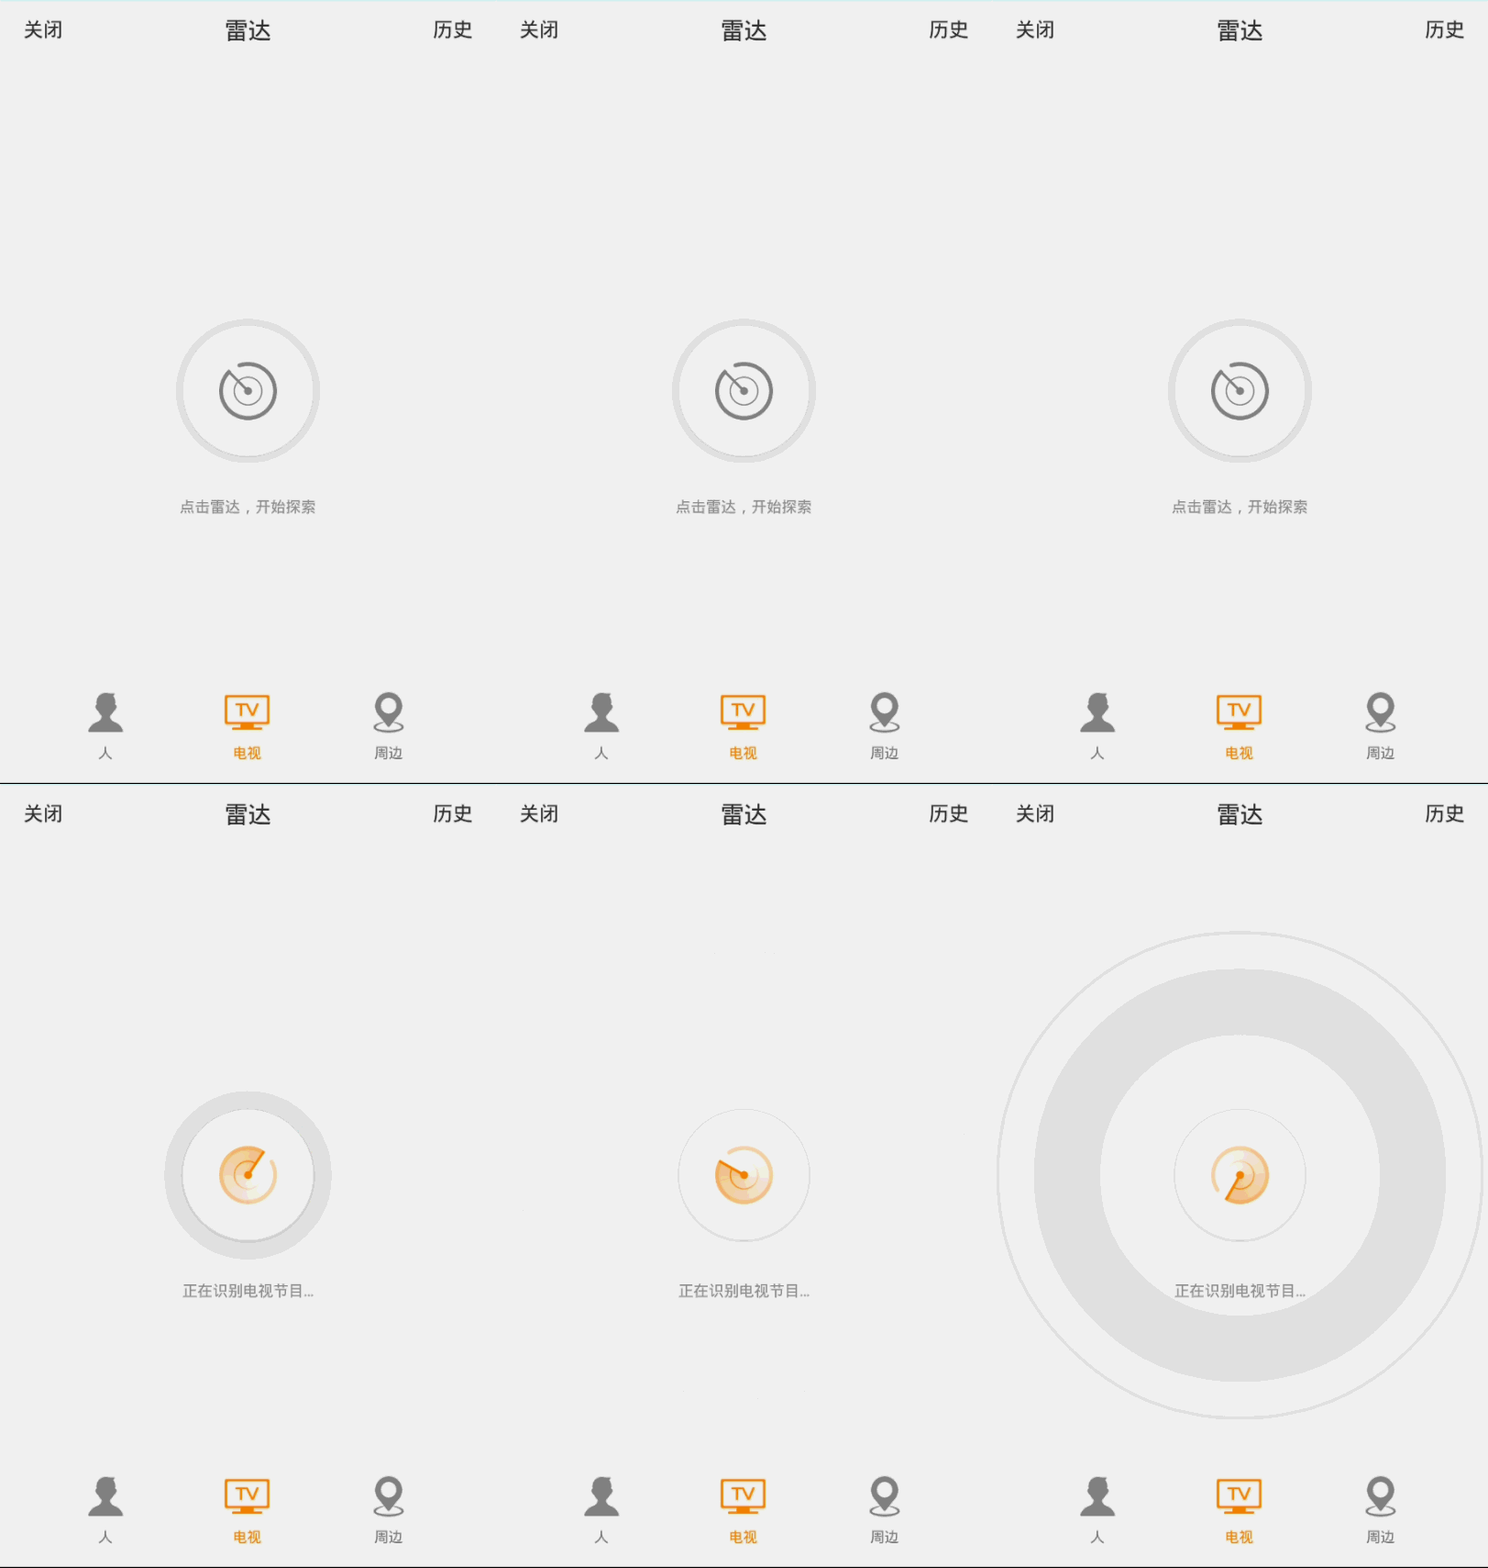
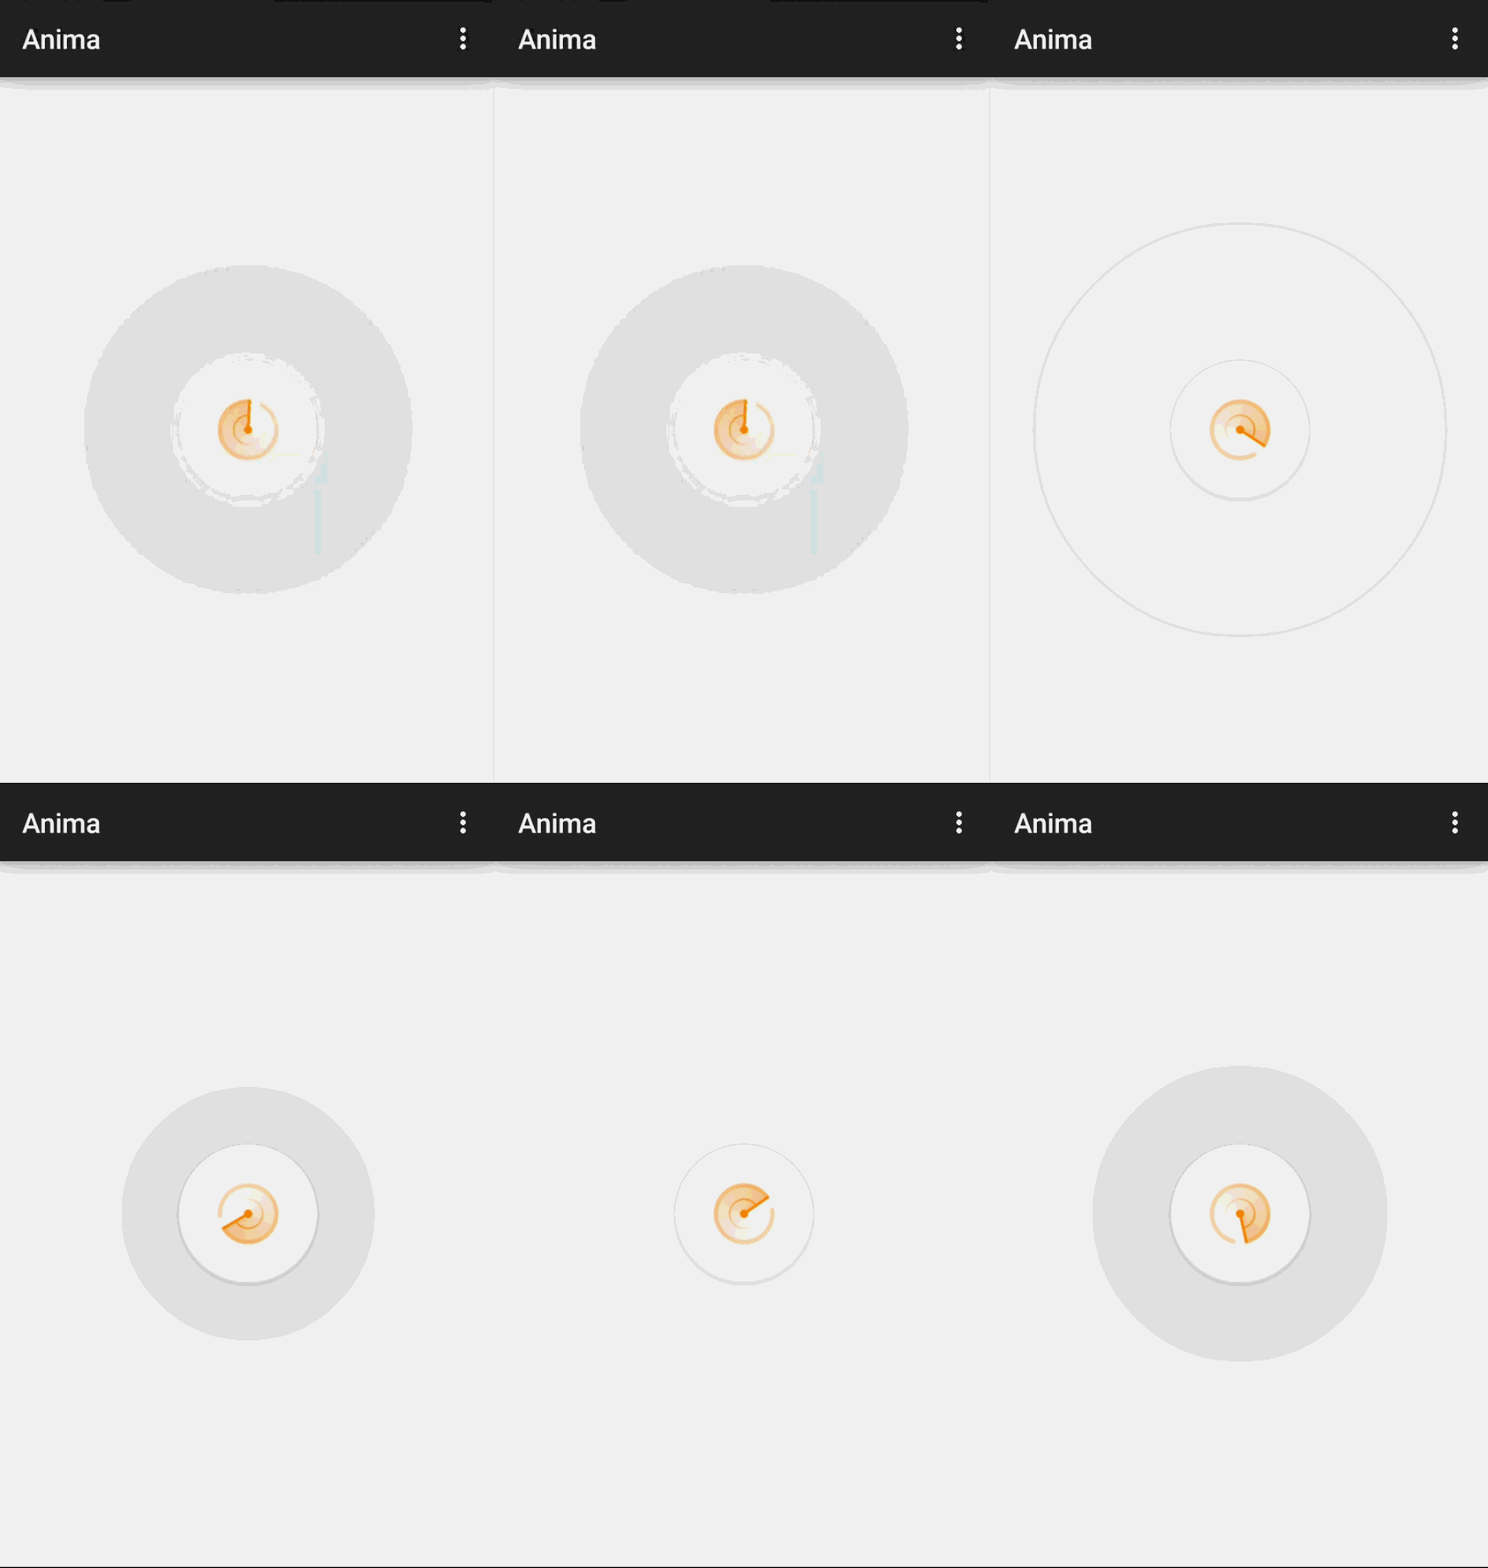
模仿新浪微博雷达搜索动画效果
昨天更新的了新浪微博看到个好玩的玩意,雷达搜索,功能就不介绍了,当然作为安卓开发的第一眼看到的不是功能,而是搜索界面的雷达搜索动画效果,然后思绪了一下就模仿了写了一个,当然可能写的有点简单,这个见谅了,基本实现了该有的动画效果 怎么也有90%的相识度。
录制的gif略卡,PS有没有好点的gif生成软件推荐推荐
新浪微博效果
本软件的效果
一、首先来看我实现的布局文件
用的是RelativeLayout相对布局 其中动画分为几个中间的旋转为一个imageview 其它的形状各为一个Activity
看布局文件
<RelativeLayout xmlns:android="http://schemas.android.com/apk/res/android"
    xmlns:tools="http://schemas.android.com/tools"
    android:layout_width="fill_parent"
    android:layout_height="fill_parent"
    android:background="#F2F2F2" >

    <RelativeLayout
        android:layout_width="fill_parent"
        android:layout_height="fill_parent"
        android:layout_centerInParent="true" >

        <ImageView
            android:id="@+id/radar_img"
            android:layout_width="300dp"
            android:layout_height="300dp"
            android:layout_centerInParent="true"
            android:src="@drawable/main_bottom_selecl_item"
            android:visibility="gone" />

        <ImageView
            android:id="@+id/radar_bttom_img"
            android:layout_width="300dp"
            android:layout_height="300dp"
            android:layout_centerInParent="true"
            android:src="@drawable/amain_setting_bg" />

        <ImageView
            android:id="@+id/radar_top_img"
            android:layout_width="300dp"
            android:layout_height="300dp"
            android:layout_centerInParent="true"
            android:src="@drawable/main_setting_bg"
            android:visibility="gone" />

        <RelativeLayout
            android:layout_width="wrap_content"
            android:layout_height="wrap_content"
            android:layout_centerInParent="true"
            android:layout_weight="1"
            android:background="@drawable/radar_button_scan" >

            <ImageView
                android:id="@+id/radar_imageing"
                android:layout_width="wrap_content"
                android:layout_height="wrap_content"
                android:layout_centerInParent="true"
                android:src="@drawable/radar_button_icon_scaning" />
        </RelativeLayout>
    </RelativeLayout>

</RelativeLayout>
二、
动画效果了解动画的都知道Android的常用动画有哪几总类型
Tweened Animations的分类
1、Alpha:淡入淡出效果
2、Scale:缩放效果
3、Rotate:旋转效果
4、Translate:移动效果
至于这搜索中用到是只有Scale(缩放效果)和Alpha(淡入淡出效果)
圆中心放大的动画
AnimationSet animationSet = new AnimationSet(true);
        //居中位置形状由0.3倍变化到1.0倍
        ScaleAnimation sa = new ScaleAnimation(0.3f, 1.0f, 0.3f, 1.0f,
                ScaleAnimation.RELATIVE_TO_SELF, 0.5f,
                ScaleAnimation.RELATIVE_TO_SELF, 0.5f);
        sa.setDuration(900);//动画时间
        sa.setFillAfter(true);
        sa.setRepeatCount(0);
        sa.setInterpolator(new LinearInterpolator());//匀速变化
        animationSet.addAnimation(sa);
上面就是中间的圆形从小变大的动画效果
下面则是中心图标旋转动画下拍过
这个可以用来当作ProgressBar使用 只需要一张图片就可以旋转
调用方法
Animation operatingAnim = AnimationUtils
                .loadAnimation(this, R.anim.sss);
        LinearInterpolator lin = new LinearInterpolator();
        operatingAnim.setInterpolator(lin);
findViewById(R.id.radar_imageing).startAnimation(operatingAnim); <rotate
android:duration="1500"
android:fromDegrees="0"
android:pivotX="50%"
android:pivotY="50%"
android:repeatCount="-1"
android:repeatMode="restart"
android:toDegrees="360" >
</rotate>
其中最外层圆环实现效果雷同上面的放大缩放效果在加上一个渐变动画代码如下
   /**
     * 最外围环形动画
     *
     * @return
     */
    private AnimationSet getAnimAnnular() {
        AnimationSet animationSet = new AnimationSet(true);
        ScaleAnimation sa = new ScaleAnimation(1.0f, 1.5f, 1.0f, 1.5f,
                ScaleAnimation.RELATIVE_TO_SELF, 0.5f,
                ScaleAnimation.RELATIVE_TO_SELF, 0.5f);
        // 透明度变化
        animationSet.addAnimation(new AlphaAnimation(1.0f, 0.1f));
        animationSet.setDuration(400);
        sa.setDuration(500);
        sa.setFillAfter(true);
        sa.setRepeatCount(0);
        sa.setInterpolator(new LinearInterpolator());
        animationSet.addAnimation(sa);
        return animationSet;
    }
动画效果就是上面了 只是要规划好动画展示的时间和持续时间就能实现完全的旋转
三、动画展现步骤
ps动画时间的我只是初略的估算了一下,请根据可以根据自己的理解规划动画的时间
1:先是灰色形状圆形的动画 播放,延时400ms播放中间透明白色圆形的动画展现
private void startcircularAnima() {
        grayAnimal = playHeartbeatAnimation();
        radarbttom.startAnimation(grayAnimal);
        new Handler().postDelayed(new Runnable() {
            @Override
            public void run() {
                startwhiteAnimal();
            }
        }, 400);
        new Handler().postDelayed(new Runnable() {
            @Override
            public void run() {
                startannularAnimat();
            }
        }, 600);
    }
2:白色圆形动画播放完毕则重复
    private void startwhiteAnimal() {
        AnimationSet whiteAnimal = playHeartbeatAnimation();
        whiteAnimal.setRepeatCount(0);
        whiteAnimal.setDuration(700);
        radartop.setVisibility(View.VISIBLE);
        radartop.startAnimation(whiteAnimal);
        whiteAnimal.setAnimationListener(new AnimationListener() {
            @Override
            public void onAnimationStart(Animation animation) {
            }

            @Override
            public void onAnimationRepeat(Animation animation) {
            }

            @Override
            public void onAnimationEnd(Animation animation) {
                mAnnularImg.setVisibility(View.GONE);
                radartop.setVisibility(View.GONE);
                startcircularAnima();
            }
        });

    }
private void startannularAnimat() {
mAnnularImg.setVisibility(View.VISIBLE);
AnimationSet annularAnimat = getAnimAnnular();
annularAnimat.setAnimationListener(new AnimationListener() {
@Override
public void onAnimationStart(Animation animation) {
}
@Override
public void onAnimationRepeat(Animation animation) {
// TODO Auto-generated method stub
}
@Override
public void onAnimationEnd(Animation animation) {
mAnnularImg.setVisibility(View.GONE);
}
});
mAnnularImg.startAnimation(annularAnimat);
}
这样重复播放动画类似的效果就实现了我写的比较初级,有什么改进的意见或者错误请指点指点
四
主要代码
MainActivity
package com.example.anima;
import android.os.Bundle;
import android.os.Handler;
import android.support.v7.app.ActionBarActivity;
import android.view.Menu;
import android.view.View;
import android.view.animation.AlphaAnimation;
import android.view.animation.Animation;
import android.view.animation.Animation.AnimationListener;
import android.view.animation.AnimationSet;
import android.view.animation.AnimationUtils;
import android.view.animation.LinearInterpolator;
import android.view.animation.ScaleAnimation;
import android.widget.ImageView;
public class MainActivity extends ActionBarActivity {
private ImageView radarbttom;
private ImageView radartop;
private ImageView mAnnularImg;
@Override
protected void onCreate(Bundle savedInstanceState) {
super.onCreate(savedInstanceState);
setContentView(R.layout.activity_main);
mAnnularImg = (ImageView) findViewById(R.id.radar_img);
radartop = (ImageView) findViewById(R.id.radar_top_img);
radarbttom = (ImageView) findViewById(R.id.radar_bttom_img);
startAnima();
startcircularAnima();
}
AnimationSet grayAnimal;
private void startannularAnimat() {
        mAnnularImg.setVisibility(View.VISIBLE);
        AnimationSet annularAnimat = getAnimAnnular();
        annularAnimat.setAnimationListener(new AnimationListener() {

            @Override
            public void onAnimationStart(Animation animation) {

            }

            @Override
            public void onAnimationRepeat(Animation animation) {
                // TODO Auto-generated method stub

            }

            @Override
            public void onAnimationEnd(Animation animation) {
                mAnnularImg.setVisibility(View.GONE);
            }
        });
        mAnnularImg.startAnimation(annularAnimat);
    }
private void startwhiteAnimal() {
AnimationSet whiteAnimal = playHeartbeatAnimation();
whiteAnimal.setRepeatCount(0);
whiteAnimal.setDuration(700);
radartop.setVisibility(View.VISIBLE);
radartop.startAnimation(whiteAnimal);
whiteAnimal.setAnimationListener(new AnimationListener() {
@Override
public void onAnimationStart(Animation animation) {
}
@Override
public void onAnimationRepeat(Animation animation) {
}
@Override
public void onAnimationEnd(Animation animation) {
mAnnularImg.setVisibility(View.GONE);
radartop.setVisibility(View.GONE);
startcircularAnima();
}
});
}
private void startcircularAnima() {
grayAnimal = playHeartbeatAnimation();
radarbttom.startAnimation(grayAnimal);
new Handler().postDelayed(new Runnable() {
@Override
public void run() {
startwhiteAnimal();
}
}, 400);
new Handler().postDelayed(new Runnable() {
@Override
public void run() {
startannularAnimat();
}
}, 600);
}
/**
* 打开界面
*/
private void startAnima() {
// 中心圆形的旋转动画
Animation operatingAnim = AnimationUtils
.loadAnimation(this, R.anim.sss);
LinearInterpolator lin = new LinearInterpolator();
operatingAnim.setInterpolator(lin);
findViewById(R.id.radar_imageing).startAnimation(operatingAnim);
}
@Override
public boolean onCreateOptionsMenu(Menu menu) {
// Inflate the menu; this adds items to the action bar if it is present.
getMenuInflater().inflate(R.menu.main, menu);
return true;
}
/**
* 两个圆环动画
*
* @return
*/
private AnimationSet playHeartbeatAnimation() {
AnimationSet animationSet = new AnimationSet(true);
ScaleAnimation sa = new ScaleAnimation(0.3f, 1.0f, 0.3f, 1.0f,
ScaleAnimation.RELATIVE_TO_SELF, 0.5f,
ScaleAnimation.RELATIVE_TO_SELF, 0.5f);
// animationSet.addAnimation(new AlphaAnimation(1.0f, 0.9f));
sa.setDuration(900);
sa.setFillAfter(true);
sa.setRepeatCount(0);
sa.setInterpolator(new LinearInterpolator());
animationSet.addAnimation(sa);
return animationSet;
}
/**
* 最外围环形动画
*
* @return
*/
private AnimationSet getAnimAnnular() {
AnimationSet animationSet = new AnimationSet(true);
ScaleAnimation sa = new ScaleAnimation(1.0f, 1.5f, 1.0f, 1.5f,
ScaleAnimation.RELATIVE_TO_SELF, 0.5f,
ScaleAnimation.RELATIVE_TO_SELF, 0.5f);
// 透明度变化
animationSet.addAnimation(new AlphaAnimation(1.0f, 0.1f));
animationSet.setDuration(400);
sa.setDuration(500);
sa.setFillAfter(true);
sa.setRepeatCount(0);
sa.setInterpolator(new LinearInterpolator());
animationSet.addAnimation(sa);
return animationSet;
}
}
布局文件
<RelativeLayout xmlns:android="http://schemas.android.com/apk/res/android"
    xmlns:tools="http://schemas.android.com/tools"
    android:layout_width="fill_parent"
    android:layout_height="fill_parent"
    android:background="#F2F2F2" >

    <RelativeLayout
        android:layout_width="fill_parent"
        android:layout_height="fill_parent"
        android:layout_centerInParent="true" >

        <ImageView
            android:id="@+id/radar_img"
            android:layout_width="300dp"
            android:layout_height="300dp"
            android:layout_centerInParent="true"
            android:src="@drawable/main_bottom_selecl_item"
            android:visibility="gone" />

        <ImageView
            android:id="@+id/radar_bttom_img"
            android:layout_width="300dp"
            android:layout_height="300dp"
            android:layout_centerInParent="true"
            android:src="@drawable/amain_setting_bg" />

        <ImageView
            android:id="@+id/radar_top_img"
            android:layout_width="300dp"
            android:layout_height="300dp"
            android:layout_centerInParent="true"
            android:src="@drawable/main_setting_bg"
            android:visibility="gone" />
        <RelativeLayout
            android:layout_width="wrap_content"
            android:layout_height="wrap_content"
            android:layout_centerInParent="true"
            android:layout_weight="1"
            android:background="@drawable/radar_button_scan" >

            <ImageView
                android:id="@+id/radar_imageing"
                android:layout_width="wrap_content"
                android:layout_height="wrap_content"
                android:layout_centerInParent="true"
                android:src="@drawable/radar_button_icon_scaning" />
        </RelativeLayout>
    </RelativeLayout>

</RelativeLayout>
代码下载地址
http://download.csdn.net/detail/shallcheek/8717163
转载请注明出处http://blog.csdn.net/shallcheek/article/details/45847209


 338
338


 被折叠的 条评论
为什么被折叠?


