


首先参考:
http://developer.android.com/training/custom-views/index.html
http://developer.android.com/training/custom-views/create-view.html
首先,一开始我做这个自定义的圆饼图只是因为我刚好在学如何写一个自定义的 View,然後画在 Canvas上。
但是後耒把这个圆联想到了最常见的圆饼图,所以就练习写了一个简单自定义的圆饼图控件。我想下一次还是
善用 git好了,这样对生手菜鸟如我之辈,应该会更友善些。
所以做一个超简单的自定义 View,我一开始是将 Drawable(这边采用 ShapeDrawable) 相关的资讯
设定好(比如说设定Paint画笔(?)的颜色 getPaint().setColor(),设定边界 setBounds()) 在 onDraw()调用
Drawable.draw(cvs),然後在 Activity
自定义View类名 xx = new 自定义View类名(this);
setContentView(xx);
就会在手机屏幕上画上你自定义 View的形状。
但是如果我想放在我的 xml 布局里,和其它的 TextView, Button等控件一块使用的话呢? 该怎麽搞?
所以我们先思考我们自定义的View让使用这个控件的人可以去设定什麽?圆饼图的大小?圆饼图的显示字体大小?颜色?
这些看起耒还蛮常见的,所以就拿这个耒当练习了。
我们先在项目里,我们刽建一个 /res/values/attrs.xml 档案,相对的设定我们的属性名(attr name),还有那个属性对应值的种类(format)
<resources>
    <declare-styleable name="SimplePieChart">
        <attr name="radius_length" format="integer" />
        <attr name="textSize" format="float" />
        <attr name="textColor" format="integer" />
    </declare-styleable>
</resources>xmlns:piechart="http://schemas.android.com/apk/res/com.example.piechart"
然後就可以在这个布局里使用自定义控件的自己的属性了(可以在自定义控件下输入"piechart:"後,用 alt+/键试试,看有哪些选项属性出耒)
虽然 android:layout_width, android:layout_height 的值不会对我们这里自定义的圆饼造成影响,但
还是得设上值,不然也是 crash。
<RelativeLayout xmlns:android="http://schemas.android.com/apk/res/android"
    xmlns:piechart="http://schemas.android.com/apk/res/com.example.piechart"
    xmlns:tools="http://schemas.android.com/tools"
    android:layout_width="match_parent"
    android:layout_height="match_parent"
    android:paddingBottom="@dimen/activity_vertical_margin"
    android:paddingLeft="@dimen/activity_horizontal_margin"
    android:paddingRight="@dimen/activity_horizontal_margin"
    android:paddingTop="@dimen/activity_vertical_margin"
    tools:context=".MainActivity" >


    <TextView
        android:id="@+id/tv"
        android:layout_width="wrap_content"
        android:layout_height="wrap_content"
        android:text="hello custom view" />


    <com.example.piechart.SimplePieChart
        android:id="@+id/pc"
        android:layout_below="@id/tv"
        android:layout_width="wrap_content"
        android:layout_height="wrap_content"
        piechart:radius_length="800"
        piechart:textSize ="30"
        piechart:textColor="0x33888332">
    </com.example.piechart.SimplePieChart>


</RelativeLayout>
所以我们如何自 xml 档内取得那些属性的值? 利用 public SimplePieChart(Context context, AttributeSet attrs) {} 这个 Constructor,再使用
TypedArray,去取得相对应属性的值,但是有一点需要注意的是:即使该自定义的View没有自定义的属性,如果要放到其它布局中,则这个 Constructor 还
是得放进 AttributeSet参数,不然还是会 crash。
package com.example.piechart;

import java.util.ArrayList;

import android.content.Context;
import android.content.res.TypedArray;
import android.graphics.Canvas;
import android.graphics.Paint;
import android.graphics.drawable.ShapeDrawable;
import android.graphics.drawable.shapes.ArcShape;
import android.util.AttributeSet;
import android.util.Log;
import android.view.View;

public class SimplePieChart extends View {

    private ArrayList<TypePair> mPertList;
    private Paint pnt;
    private float startAngle = 0;
    private int TotalForList = 0;
    private int pieWidth = 350;
    private int pieHeight = 350;
    private float pieChartTextSize = 18;
    private int pieChartTextColor = 0x000000;

    // even if you don't have any self-defined attribute, you still have to
    // make your constructor take AttributeSet argument, or it gonna crash
    public SimplePieChart(Context context, AttributeSet attrs) {
        super(context, attrs);
        TypedArray b = context.getTheme().obtainStyledAttributes(attrs, R.styleable.SimplePieChart, 0, 0);
        try {
        	// get your radius setting values from activity_main.xml
            pieWidth = b.getInteger(R.styleable.SimplePieChart_radius_length, 350);
            pieHeight = pieWidth;
            pieChartTextSize = b.getFloat(R.styleable.SimplePieChart_textSize, 18f);
            pieChartTextColor = b.getColor(R.styleable.SimplePieChart_textColor, 0x000000);
        } finally {
            b.recycle();
        }

        // initial info needed for each arc
        mPertList = new ArrayList<TypePair>();
        pnt = new Paint();
    }

    public void add(String type,float value, int color) {
        startAngle = 0;
        TotalForList += value;

        TypePair aType = new TypePair(type, value, color);
        mPertList.add(aType);

        // update drawable list
        for (int i = 0; i < mPertList.size(); i++)
        {
            float arcTotalDegree = (float) mPertList.get(i).typeTotal / TotalForList * 360;
            ShapeDrawable mDrawable = new ShapeDrawable(new ArcShape(startAngle, arcTotalDegree));

            Log.d("guang",
                    "i: " + i + ", startAngle:" + startAngle + ", angle:"
                            + (float) mPertList.get(i).typeTotal
                            / TotalForList * 360);

            // find where to display text within an arc
            // http://stackoverflow.com/questions/12882903/calculate-arc-center-point-knowing-its-start-and-end-degrees
            double trad = (startAngle + arcTotalDegree * 1 / 2) * (Math.PI / 180d); // = 5.1051
            int tvDisplayX = (int) (pieWidth * 1 / 2 * 3 / 4 * Math.cos(trad));
            int tvDisplayY = (int) (pieHeight * 1 / 2 * 3 / 4 * Math.sin(trad));

            mDrawable.getPaint().setColor(mPertList.get(i).typeColor);
            mDrawable.setBounds(0, 0, pieWidth, pieHeight);

            mPertList.get(i).typePortion = mDrawable;
            mPertList.get(i).textDisplayX = tvDisplayX;
            mPertList.get(i).textDisplayY = tvDisplayY;

            startAngle = startAngle + (float) mPertList.get(i).typeTotal / TotalForList * 360;
        }
    }

    public void onDraw(Canvas cvs) {
        pnt.setColor(pieChartTextColor);
        pnt.setTextSize(pieChartTextSize);
        pnt.setTextAlign(Paint.Align.CENTER);
        for (int i = 0; i < mPertList.size(); i++)
        {
            mPertList.get(i).typePortion.draw(cvs);

            cvs.drawText(mPertList.get(i).typeName, pieWidth / 2 + mPertList.get(i).textDisplayX,
                    pieHeight / 2 + mPertList.get(i).textDisplayY, pnt);

            Log.d("guang",
                    "i: " + i + ", tv display x:" + (pieWidth + mPertList.get(i).textDisplayX)
                            + ", tv display y:" + (pieHeight + mPertList.get(i).textDisplayY));
        }

    }

    private class TypePair {
    	String typeName;
        float typeTotal = 0;
        Integer typeColor = 0;
        ShapeDrawable typePortion;
        int textDisplayX = 0;
        int textDisplayY = 0;

        public TypePair(String name,float total, Integer color) {
            typeTotal = total;
            typeColor = color;
            typeName = name;
        }
    }

}
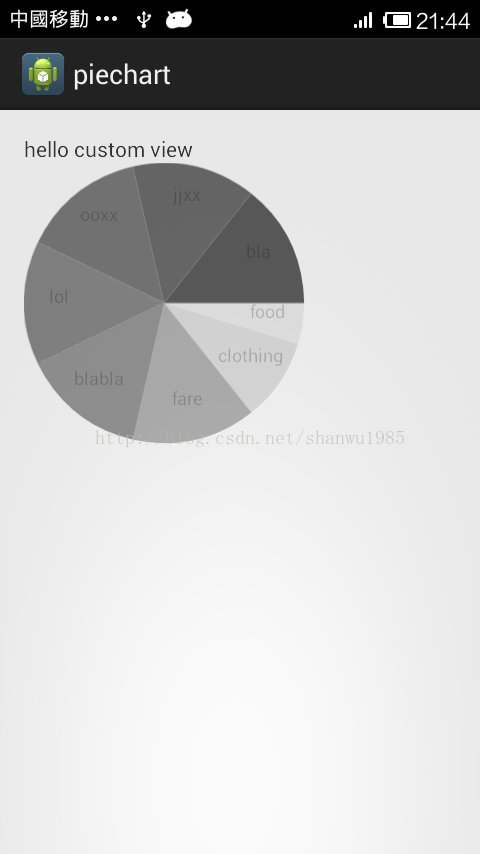
Screenshot:
最後,谢谢我的朋友的帮助(健刚、星天等等),没有你们,我估计不只这篇文章整理不出来,更会陷在自己产生的 bug中 Orz
github: https://github.com/shanwu/shanwu_coding_base/tree/SimplePieChartExample


 9380
9380


 被折叠的 条评论
为什么被折叠?
被折叠的 条评论
为什么被折叠?
 到【灌水乐园】发言


