


操作系统:Centos6.5
数据库:Oracle 12.1.0.2
一.软件介质准备:
Oracle database 12c(12.1.2.0) for Linux 64:
http://www.oracle.com/technetwork/database/enterprise-edition/downloads/database12c-linux-download-2240591.html

Enterprise Manager 13c(13.2.0.0) for Linux 64:
http://www.oracle.com/technetwork/oem/grid-control/downloads/oem-linux-64-3610092.html

Database Template for EM OMR:

http://www.oracle.com/technetwork/oem/enterprise-manager/downloads/db-templates-3233309.html

(根据自己的平台版本选择数据库模板,这里,我们选择“Linux x86-64”)
注意:这里也可以不用下载模板,自己手动安装一个数据库即可。
二、安装准备工作
以下包以Redhat为准,其他版本的操作系统以官方首次为准。
官方安装文档:https://docs.oracle.com/cd/E73210_01/EMBSC/GUID-059D95F7-0326-4E0D-9470-6675C1891BA9.htm#EMBSC131
1. Oracle Management Service 依赖如下包
For example, if you run the command on a 64-bit system, you should see something similar to the following:

glibc-common-2.3.4-2.43(x86_64)
glibc-devel-2.3.4-2.43(x86_64)
glibc-profile-2.3.4-2.43(x86_64)
glibc-headers-2.3.4-2.43(x86_64)
glibc-utils-2.3.4-2.43(x86_64)
glibc-2.3.4-2.43(x86_64)
2. Oracle Management Agent 依赖如下包|
make-3.81

binutils-2.20

gcc-4.4.4

libaio-0.3.107

glibc-common-2.12-1

libstdc++-4.4.4

libXtst-1.0.99 (x86_64)

sysstat-9.0.4

glibc-devel-2.12-1.7 (i686) (This is a 32-bit package)

glibc-devel-2.12-1.7 (x86_64) (This is a 64-bit package)

(Applicable only for Oracle Linux 6.2, which includes RH6.2 and UEK 6.2) glibc-2.12-1.47.0.2
3.修改系统参数
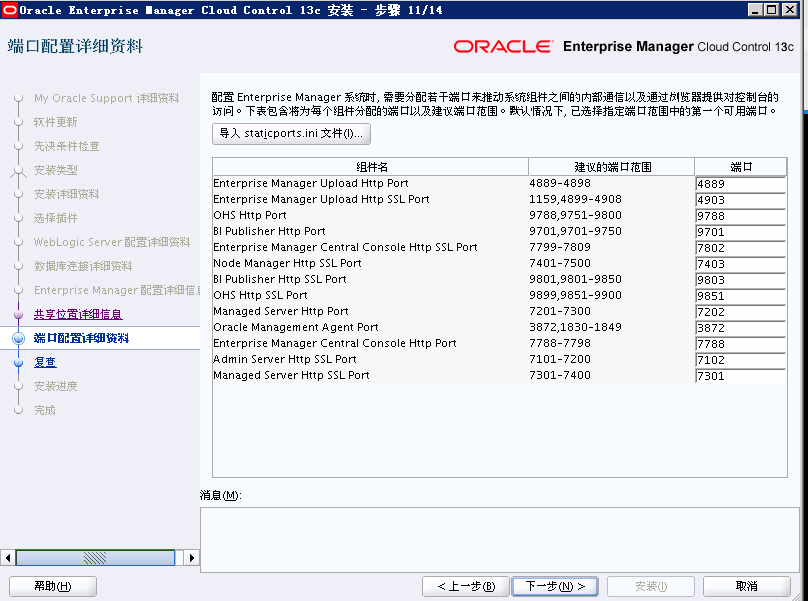
避免端口被占用,修改最小端口到11000。
[root@oracle 13c]# cat /proc/sys/net/ipv4/ip_local_port_range
9000	65500
[root@oracle 13c]# echo 11000 65000 > /proc/sys/net/ipv4/ip_local_port_range
[root@oracle 13c]# cat /proc/sys/net/ipv4/ip_local_port_range
11000	65000
修改/etc/sysctl.conf 文件,修改如下内容
[root@oracle 13c]# vi /etc/sysctl.conf

net.ipv4.ip_local_port_range = 11000 65000

[root@oracle 13c]#sysctl -p
然后重启网络。
[root@oracle 13c]# service network restart4.修改kernel.shmmax内核参数
如果OMS 和 Management Repository(database) 在不同的主机上,那么OMS的主机kernel.shmmax 参数设置为小于4G或者4294967295。 直接修改/etc/sysctl.conf 文件修改,然后运行sysctl –p 生效即可。
如果OMS和Management Repository(database) 在同一个主机上,那么kernel.shmmax 参数以Oracle 数据库文档要求的为准。
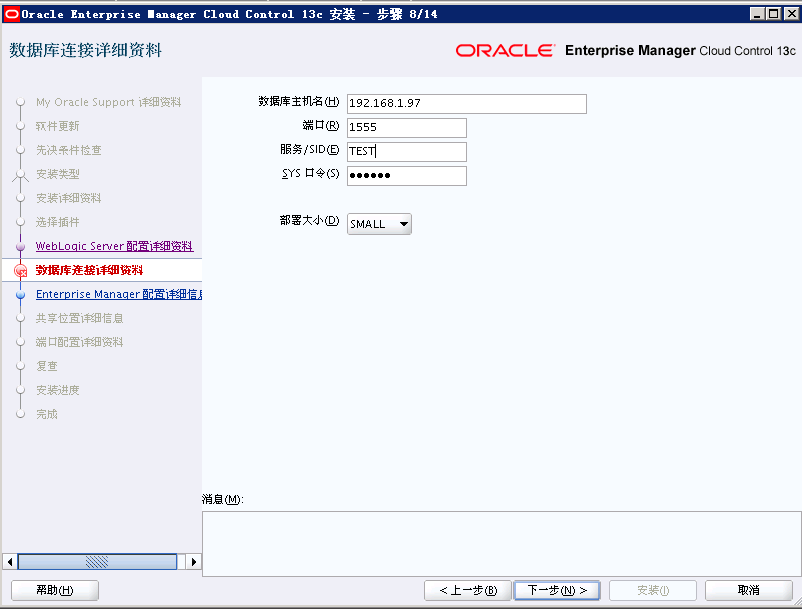
这里我们将OMS 和OMR都放在一台机器上。
5.按数据库并修改相应的参数:
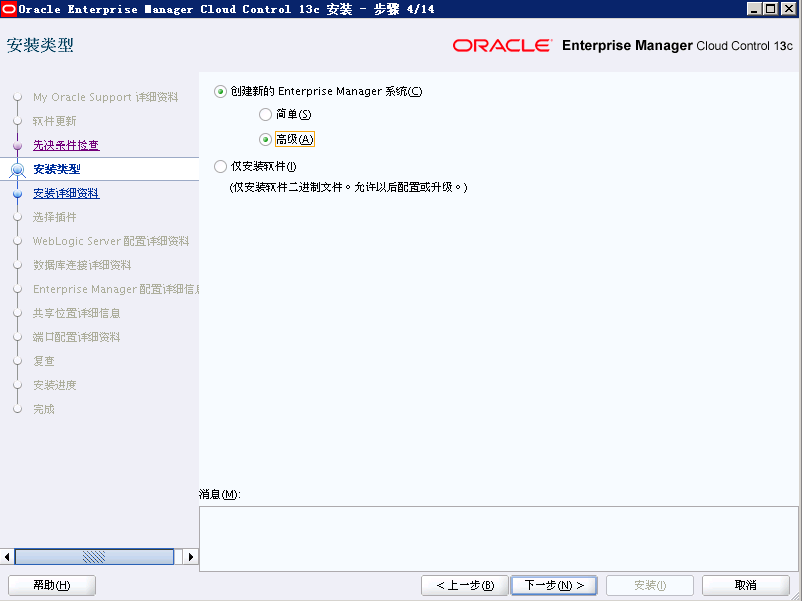
OEM 13c 只支持12.1.0.2.0 以上的数据库,所以需要先安装12的DB。具体安装过程这里就不再赘述。
注意:不要安装EM。
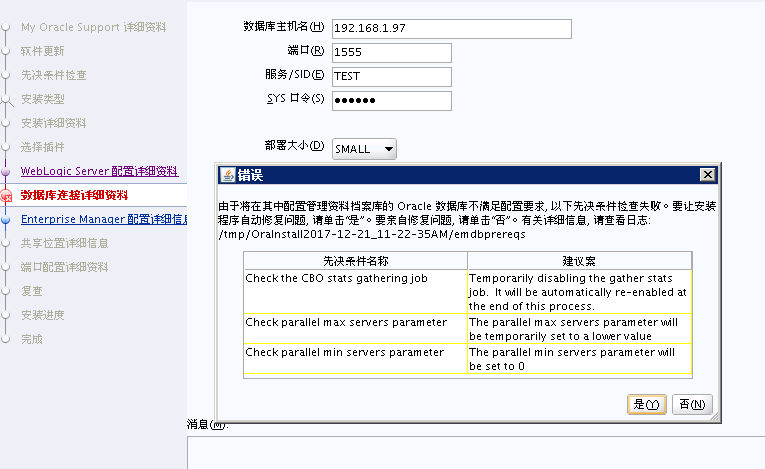
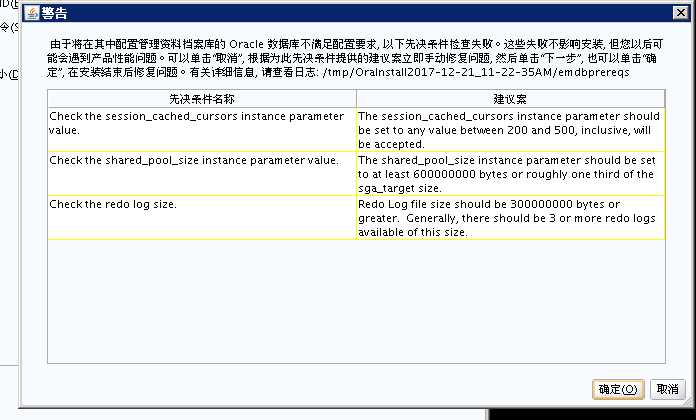
安装好数据库之后,要对相应的参数做一定的修改,否则会在安装的时候报错,具体的报错信息会在下面给出:
修改参数:
SQL> alter system set parallel_min_servers=0;
SQL> alter system set session_cached_cursors=400 scope=spfile;
SQL> alter system set log_buffer=8M scope=spfile;
SQL> alter system set memory_max_target=7G scope=spfile;
SQL> alter system set memory_target=7G scope=spfile;
SQL> alter system set open_cursors=600 scope=spfile;
SQL> alter system set pga_aggregate_target=2G scope=spfile;
SQL> alter system set processes=800 scope=spfile;
SQL> alter system set session_cached_cursors=400 scope=spfile;
SQL> alter system set sga_max_size=5G scope=spfile;
SQL> alter system set sga_target=5G scope=spfile;
SQL> alter system set shared_pool_size=1G scope=spfile;
修改online redo log 大小,以及至少4组redo log
修改之前
SQL> select group#,thread#,bytes/1024/1024 from v$log;

    GROUP#    THREAD# BYTES/1024/1024
---------- ---------- ---------------
	 1	    1		  50
	 2	    1		  50
	 3	    1		  50
	 4	    1		  50

SQL>
修改之后:
SQL> select group#,thread#,bytes/1024/1024 from v$log;

    GROUP#    THREAD# BYTES/1024/1024
---------- ---------- ---------------
	 1	    1		  300
	 2	    1		  300
	 3	    1		  300
	 4	    1		  300
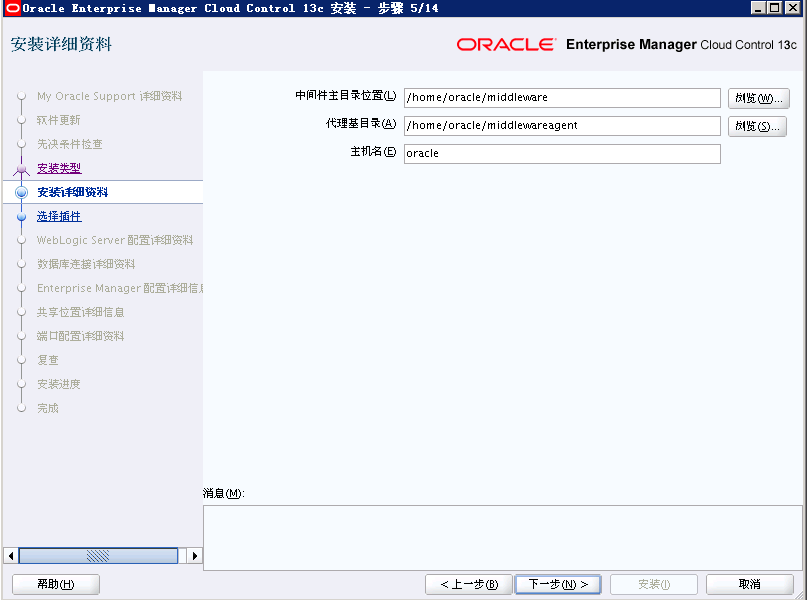
6.创建OEM安装目录
bishuo:/home/oracle@oracle>mkdir -p /home/oracle/middleware
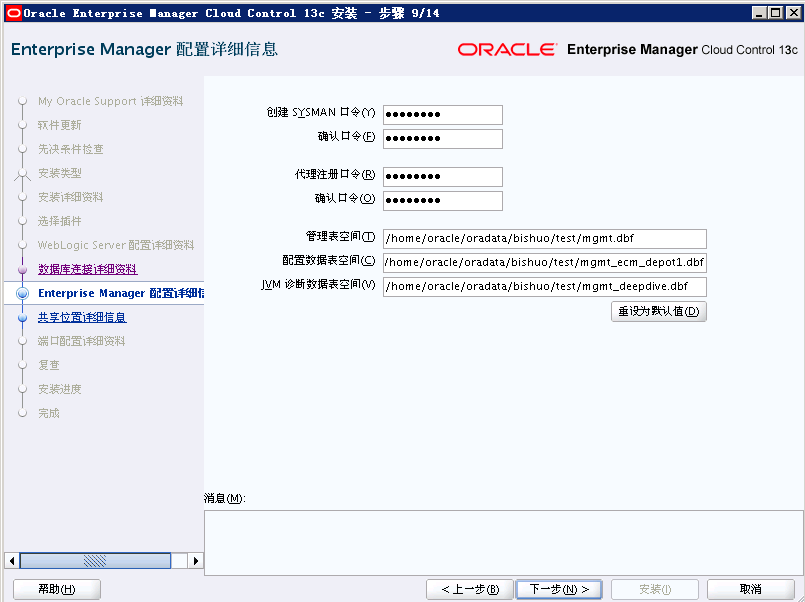
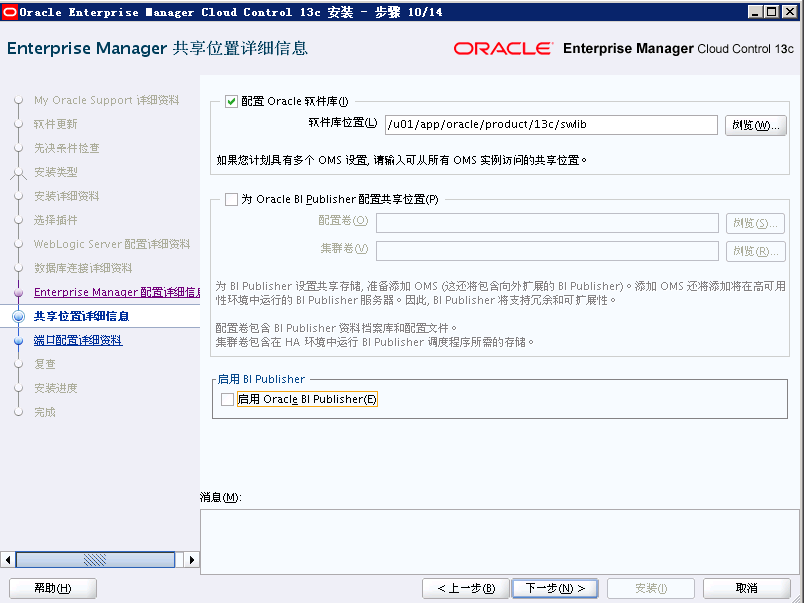
bishuo:/home/oracle@oracle>mkdir -p /home/oracle/middlewareagent三、安装 Enterprise Manager Cloud Control
bishuo:/home/oracle/software@oracle>chmod a+x em13200p1_linux64.bin
bishuo:/home/oracle/software@oracle>ll
总用量 8330984
-rw-r--r-- 1 oracle dba 2123211088 12月 21 09:32 em13200p1_linux64-2.zip
-rw-r--r-- 1 oracle dba 741526563 12月 21 09:32 em13200p1_linux64-3.zip
-rw------- 1 oracle dba 2084231936 12月 21 09:33 em13200p1_linux64-4.zip
-rw-r--r-- 1 oracle dba 109191154 12月 21 09:33 em13200p1_linux64-5.zip
-rw-r--r-- 1 oracle dba 2146696423 12月 21 09:34 em13200p1_linux64-6.zip
-rw-r--r-- 1 oracle dba 771426157 12月 21 09:34 em13200p1_linux64-7.zip
-rwxr-xr-x 1 oracle dba 554606940 12月 21 09:34 em13200p1_linux64.bin
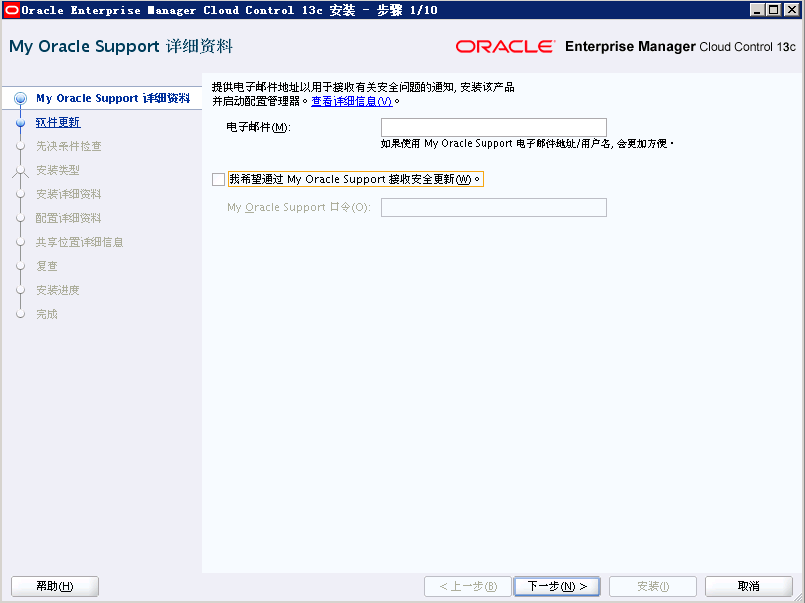
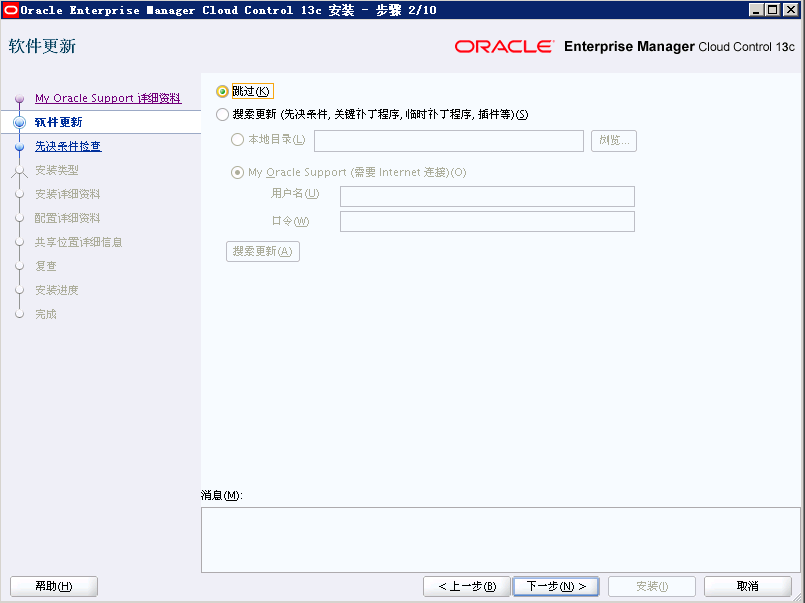
运行安装:
bishuo:/home/oracle/software@oracle>export DISPLAY=192.168.1.98:0.0
bishuo:/home/oracle/software@oracle>./em13200p1_linux64.bin
0%...............................................................................100%
启动程序日志文件为/tmp/OraInstall2017-12-21_11-22-35AM/launcher2017-12-21_11-22-35AM.log。
启动 Oracle Universal Installer
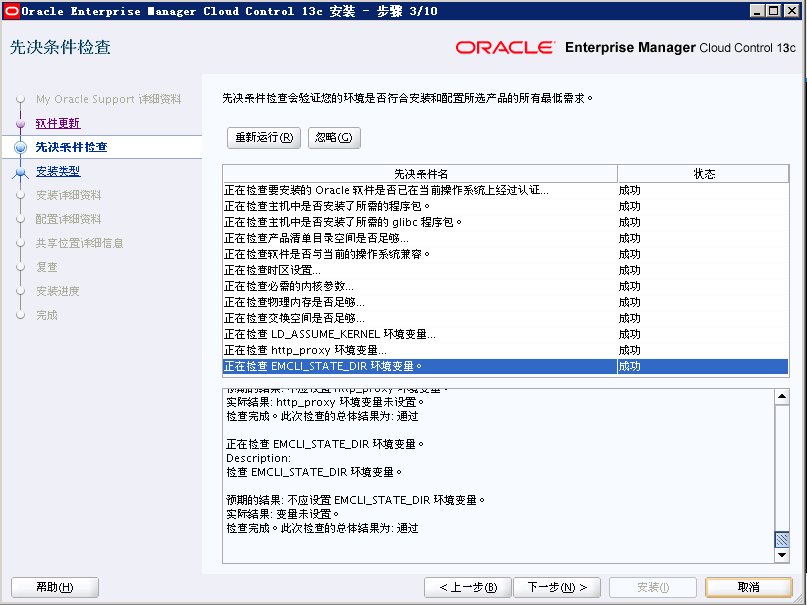
检查 CPU 速度是否大于 300 MHz。 实际为 2397.246 MHz 通过
检查监视器: 必须配置为至少显示 256 种颜色。 实际为16777216 通过
检查交换空间: 必须大于 512 MB。 实际为 7919 MB 通过
检查此平台是否需要 64 位 JVM。 实际为64 通过 (不需要 64 位)
......
上面有一步骤是修改数据库的参数和修改redo log 大小以及组数,如果不修改的话,则在在这一步骤会出现以下的报错信息:
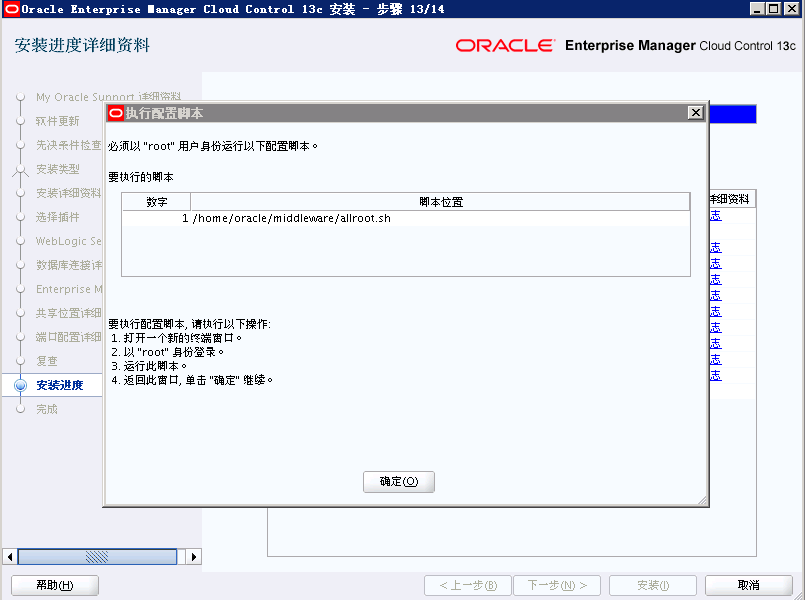
执行脚本:
[root@oracle u01]# /home/oracle/middleware/allroot.sh

Starting to execute allroot.sh .........

Starting to execute /home/oracle/middleware/root.sh ......
/etc exist

Creating /etc/oragchomelist file...
/home/oracle/middleware
Finished product-specific root actions.
/etc exist
Finished execution of  /home/oracle/middleware/root.sh ......


Starting to execute /home/oracle/middlewareagent/agent_13.2.0.0.0/root.sh ......
Finished product-specific root actions.
/etc exist
Finished execution of  /home/oracle/middlewareagent/agent_13.2.0.0.0/root.sh ......


 1171
1171


 被折叠的 条评论
为什么被折叠?
被折叠的 条评论
为什么被折叠?
 到【灌水乐园】发言


