


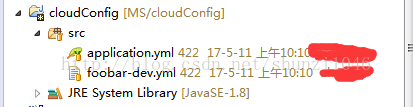
首先创建了svn的项目
然后是config-server;应用端的
pom.xml文件:
<?xml version="1.0" encoding="UTF-8"?>
<project xmlns="http://maven.apache.org/POM/4.0.0" xmlns:xsi="http://www.w3.org/2001/XMLSchema-instance"
  xsi:schemaLocation="http://maven.apache.org/POM/4.0.0 http://maven.apache.org/xsd/maven-4.0.0.xsd">
  <modelVersion>4.0.0</modelVersion>
  <groupId>com.itmuch.cloud</groupId>
  <artifactId>cloud-config-server</artifactId>
  <version>0.0.1-SNAPSHOT</version>
  <packaging>jar</packaging>

  <!-- 引入spring boot的依赖 -->
  <parent>
    <groupId>org.springframework.boot</groupId>
    <artifactId>spring-boot-starter-parent</artifactId>
    <version>1.4.3.RELEASE</version>
  </parent>

  <properties>
    <project.build.sourceEncoding>UTF-8</project.build.sourceEncoding>
    <java.version>1.8</java.version>
  </properties>

  <dependencies>
    <dependency>
      <groupId>org.springframework.cloud</groupId>
      <artifactId>spring-cloud-config-server</artifactId>
    </dependency>
    <dependency>
	    <groupId>org.springframework.cloud</groupId>
	    <artifactId>spring-cloud-starter-eureka</artifactId>
	</dependency>
	<dependency>
        <groupId>org.tmatesoft.svnkit</groupId>
        <artifactId>svnkit</artifactId>
    </dependency>
  </dependencies>

  <!-- 引入spring cloud的依赖 -->
  <dependencyManagement>
    <dependencies>
      <dependency>
        <groupId>org.springframework.cloud</groupId>
        <artifactId>spring-cloud-dependencies</artifactId>
        <version>Camden.SR4</version>
        <type>pom</type>
        <scope>import</scope>
      </dependency>
    </dependencies>
  </dependencyManagement>

  <!-- 添加spring-boot的maven插件 -->
  <build>
    <plugins>
      <plugin>
        <groupId>org.springframework.boot</groupId>
        <artifactId>spring-boot-maven-plugin</artifactId>
      </plugin>
    </plugins>
  </build>
</project>
接下来是application.yml:
server:
  port: 8761
spring:
  profiles:
    active: subversion
  application:
    name: cloud-config-server
  cloud:
    config:
      label: src
      enabled: true
      server:
        svn:
          uri: http://172.0.0.9/MS/MS/cloudConfig
#          default-label: cloudConfig
          username: xxx
          password: xxx
#      profile:
#        active: subversion

logging:
  levels:
    org.springframework.boot.env.PropertySourcesLoader: TRACE
    org.springframework.cloud.config.server: DEBUG

eureka:
  client:
    register-with-eureka: true #是否将eureka自身作为应用注册到eureka注册中心
    fetch-registry: false
    serviceUrl:
      defaultZone: http://172.1.1.8:9080/eureka/v2/
  instance:
    prefer-ip-address: true
package com.itmuch.cloud.study;

import org.springframework.boot.SpringApplication;
import org.springframework.boot.autoconfigure.SpringBootApplication;
import org.springframework.cloud.config.server.EnableConfigServer;
import org.springframework.cloud.netflix.eureka.EnableEurekaClient;

@SpringBootApplication
@EnableConfigServer
@EnableEurekaClient
public class ConfigServerApplication {
  public static void main(String[] args) {
    SpringApplication.run(ConfigServerApplication.class, args);
  }
}
+++++++++++++++++++++++++++++++++++++++++++++++++++++++++++++++
然后是config-client端:
pom.xml
<?xml version="1.0" encoding="UTF-8"?>
<project xmlns="http://maven.apache.org/POM/4.0.0" xmlns:xsi="http://www.w3.org/2001/XMLSchema-instance"
  xsi:schemaLocation="http://maven.apache.org/POM/4.0.0 http://maven.apache.org/xsd/maven-4.0.0.xsd">
  <modelVersion>4.0.0</modelVersion>
  <groupId>com.itmuch.cloud</groupId>
  <artifactId>cloud-config-client</artifactId>
  <version>0.0.1-SNAPSHOT</version>
  <packaging>jar</packaging>

  <!-- 引入spring boot的依赖 -->
  <parent>
    <groupId>org.springframework.boot</groupId>
    <artifactId>spring-boot-starter-parent</artifactId>
    <version>1.4.3.RELEASE</version>
  </parent>

  <properties>
    <project.build.sourceEncoding>UTF-8</project.build.sourceEncoding>
    <java.version>1.8</java.version>
  </properties>

  <dependencies>
    <dependency>
      <groupId>org.springframework.boot</groupId>
      <artifactId>spring-boot-starter-web</artifactId>
    </dependency>
    <dependency>
      <groupId>org.springframework.cloud</groupId>
      <artifactId>spring-cloud-starter-config</artifactId>
    </dependency>
  </dependencies>

  <!-- 引入spring cloud的依赖 -->
  <dependencyManagement>
    <dependencies>
      <dependency>
        <groupId>org.springframework.cloud</groupId>
        <artifactId>spring-cloud-dependencies</artifactId>
        <version>Camden.SR4</version>
        <type>pom</type>
        <scope>import</scope>
      </dependency>
    </dependencies>
  </dependencyManagement>

  <!-- 添加spring-boot的maven插件 -->
  <build>
    <plugins>
      <plugin>
        <groupId>org.springframework.boot</groupId>
        <artifactId>spring-boot-maven-plugin</artifactId>
      </plugin>
    </plugins>
  </build>
</project>
然后是bootstrap.yml
spring:
  cloud:
    config:
      uri: http://localhost:8761
      profile: dev
      label: src  # 当使用git存储时,默认就是master
  application:
name: foobarserver:
port: 8082
#profile: abcpackage com.itmuch.cloud.study;
import org.springframework.beans.factory.annotation.Value;
import org.springframework.web.bind.annotation.GetMapping;
import org.springframework.web.bind.annotation.RestController;
@RestController
public class ConfigClientController {
@Value("${profile}")
private String profile;
@GetMapping("/profile")
public String getProfile(){
return profile;
}
}
最后是启动类:
package com.itmuch.cloud.study;

import org.springframework.boot.SpringApplication;
import org.springframework.boot.autoconfigure.SpringBootApplication;

@SpringBootApplication
public class ConfigServerApplication {
  public static void main(String[] args) {
    SpringApplication.run(ConfigServerApplication.class, args);
  }
}
好了,我们试着访问:
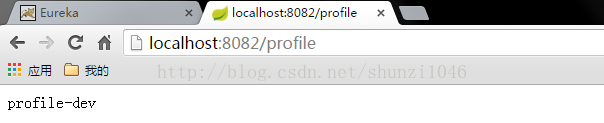
这个文件内容在我的svn的foobar-dev.yml中,说明我获取成功了


 3340
3340


 被折叠的 条评论
为什么被折叠?
被折叠的 条评论
为什么被折叠?
 到【灌水乐园】发言


