


一、什么是postgresql xc
Postgres-XC是基于PostgreSQL的SHARED NOTHING的分布式关系型数据库集群,它可以管理和处理分布在多个不同主机上的海量数据。对于Postgres-XC来说,一个实例实际上是由多个独立的 PostgreSQL 实例组成,它们分布在不同的物理(或虚拟)主机上协同工作,呈现给用户的是一个数据库实例的效果。每一个Coordinator都可以作为Postgres-XC系统的访问入口,负责处理客户端的连接及 SQL 命令、协调系统中的其他Coordinator和Datanode工作,Datanode负责管理和处理用户数据,而GTM则遵循关系型数据库的ACID特性提供保障。
二、系统环境
redhat6.5 linux 64 两台
软件包:pgxc-v1.0.4.tar.gz
192.168.11.65
GTM节点: gtm 6666
协调节点一: coord1 1921
协调节点二: coord1 1925
192.168.11.67
数据节点一: db1 15431
数据节点二: db2 15432
一个GTM节点,两个协调(Coordinator)节点,二个数据节点;这是第一次安装,为了操作简便,没有安装GTM-Standby,节点和 GTM-Proxy,这两个节点可以后期测试。
三、安装过程
创建用户 (两台都要操作)
[root@pg1 ~]# groupadd pgxc
[root@pg1 ~]# useradd pgxc -g pgxc
[root@pg1 ~]# passwd pgxc
Changing password for user pgxc.
New password:
BAD PASSWORD: it is based on a dictionary word
Retype new password:
passwd: all authentication tokens updated successfully.
安装 (两台都要操作)
[root@pg1 ~]mkdir /opt/pgxc/
[root@pg1 ~]chown -R pgxc:pgxc /opt/pgxc
[root@pg1~]tar zxvf pgxc-v1.0.4.tar.gz
[pgxc@pg1 ~]cd postgres-xc-1.04/
[pgxc@pg postgres-xc-1.04]./configure --prefix=/opt/pgxc --with-perl --with-python
[pgxc@pg postgres-xc-1.04]make
如果出现以下错误请用yum安装flex依赖包然后重新./configure
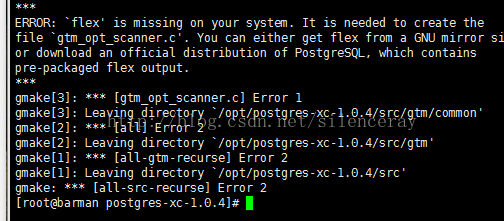
依赖包安装
yum install -y bison flex perl-ExtUtils-Embed readline-devel zlib-devel pam-devel libxml2-devel libxslt-devel openldap-devel python-devel gcc-c++ openssl-devel cmake
[pgxc@pg postgres-xc-1.04]make install
出现"All of PostgreSQL successfully made. Ready to install.",说明编译成功。
四、配置过程
创建存放路径
在192.168.11.65主机操作如下:
[root@pg1 ~]# mkdir /gtm
[root@pg1 ~]# mkdir -p /coordinator/cd1
[root@pg1 ~]# mkdir -p /coordinator/cd2
[root@pg1 ~]# chown -R pgxc:pgxc /gtm
[root@pg ~]# chown -R pgxc:pgxc /coordinator
在192.168.11.67主机操作如下:
[root@pg2 ~]# mkdir -p /datanode/dn1
[root@pg2 ~]# mkdir -p /datanode/dn2
[root@pg2 ~]# chown -R pgxc:pgxc /datanode
配置gtm节点的环境变量
在192.168.11.65主机上
[pgxc@pg1 ~]$ vi .bash_profile
export PGPORT=1921
export PGDATA=/coordinator/cd1
export LANG=en_US.utf8
export PGHOME=/opt/pgxc
export LD_LIBRARY_PATH=$PGHOME/lib:/lib64:/usr/lib64:/usr/local/lib64:/lib:/usr/lib:/usr/local/lib
export DATE=`date +"%Y%m%d%H%M"`
export PATH=$PGHOME/bin:$PATH:.
export MANPATH=$PGHOME/share/man:$MANPATH
alias rm='rm -i'
alias ll='ls -lh'
[pgxc@pg1 ~]$ source .bash_profile
[root@pg1 ~]# su - pgxc
[pgxc@pg1 ~]# initgtm -Z gtm -D /gtm
[pgxc@pg ~]# initdb -D /coordinator/cd1 --nodename coord1 -E UTF8 --locale=C -U pgxc -W
[pgxc@postgresql01 ~]# initdb -D /coordinator/cd2 --nodename coord2 -E UTF8 --locale=C -U pgxc -W
.配置参数
配置gtm
[pgxc@pg1 ~]$ cd /gtm/
[pgxc@pg1 gtm]$ vi gtm.conf
nodename = 'gtm'
listen_addresses = '*'
port = 6666
startup = ACT
配置coordinator coord1
[pgxc@pg1 ~]$ cd /coordinator/cd1/
[pgxc@pg1 cd1]$ vi postgresql.conf
# - Connection Settings -
listen_addresses = '*'
port = 1921
# - Where to Log -
log_destination = 'csvlog'
logging_collector = on
log_directory = 'pg_log'
log_filename = 'postgresql-%Y-%m-%d_%H%M%S.log'
log_truncate_on_rotation = on
log_rotation_age = 1d
log_rotation_size = 10MB
# GTM CONNECTION
gtm_host = '192.168.11.65' #本机的ip或者主机名或者localhost
gtm_port = 6666
pgxc_node_name = 'coord1' #节点的名字
# DATA NODES AND CONNECTION POOLING
pooler_port = 6667
max_pool_size = 100
配置 coord1 pg_hba.conf
host all all 192.168.0.0/24 trust
host all all 0.0.0.0/0 trust
配置coord2 的postgresql.conf
[pgxc@pg2 ~]$ cd /coordinator/cd2/
[pgxc@pg2 cd1]$ vi postgresql.conf
# - Connection Settings -
listen_addresses = '*'
port = 1925
# - Where to Log -
log_destination = 'csvlog'
logging_collector = on
log_directory = 'pg_log'
log_filename = 'postgresql-%Y-%m-%d_%H%M%S.log'
log_truncate_on_rotation = on
log_rotation_age = 1d
log_rotation_size = 10MB
# GTM CONNECTION
gtm_host = '192.168.11.65' #本机的ip或者主机名或者localhost
gtm_port = 6666
pgxc_node_name = 'coord2'
# DATA NODES AND CONNECTION POOLING
pooler_port = 6668
max_pool_size = 100
配置 coord1 pg_hba.conf
host all all 192.168.0.0/24 trust
host all all 0.0.0.0/0 trust
配置数据节点的环境变量(192.168.11.67)
[pgxc@pg2 ~]$ vi .bash_profile
export PGPORT=15431
export PGDATA=/datanode/dn1
export LANG=en_US.utf8
export PGHOME=/opt/pgxc
export LD_LIBRARY_PATH=$PGHOME/lib:/lib64:/usr/lib64:/usr/local/lib64:/lib:/usr/lib:/usr/local/lib
export DATE=`date +"%Y%m%d%H%M"`
export PATH=$PGHOME/bin:$PATH:.
export MANPATH=$PGHOME/share/man:$MANPATH
alias rm='rm -i'
alias ll='ls -lh'
[pgxc@pg2 ~]$ source .bash_profile
初始化数据节点(192.168.11.67)
[root@pg2 ~]# su - pgxc
[pgxc@pg2 ~]$ initdb -D /datanode/dn1 --nodename db1 -E UTF8 --local=C -U pgxc -W
[pgxc@pg2 ~]$ initdb -D /datanode/dn2 --nodename db2 -E UTF8 --local=C -U pgxc -W
修改数据节点一配置文件 postgresql.conf 参数
# - Connection Settings -
listen_addresses = '*'
port = 15431
# - Where to Log -
log_destination = 'csvlog'
logging_collector = on
log_directory = 'pg_log'
log_filename = 'postgresql-%Y-%m-%d_%H%M%S.log'
log_truncate_on_rotation = on
log_rotation_age = 1d
log_rotation_size = 10MB
# GTM CONNECTION
gtm_host = '192.168.11.65' #对应协调节点的ip
gtm_port = 6666
pgxc_node_name = 'db1' #数据节点的名字
# DATA NODES AND CONNECTION POOLING
pooler_port = 6667
max_pool_size = 100
修改数据节点一 pg_hba.conf ,增加以下
host all all 192.168.0.0/24 trust
host all all 0.0.0.0/0 trust
修改数据节点二配置文件 postgresql.conf 参数
# - Connection Settings -
listen_addresses = '*'
port = 15432
# - Where to Log -
log_destination = 'csvlog'
logging_collector = on
log_directory = 'pg_log'
log_filename = 'postgresql-%Y-%m-%d_%H%M%S.log'
log_truncate_on_rotation = on
log_rotation_age = 1d
log_rotation_size = 10MB
# GTM CONNECTION
gtm_host = '192.168.11.65' #对应协调节点的ip
gtm_port = 6666
pgxc_node_name = 'db2'
# DATA NODES AND CONNECTION POOLING
pooler_port = 6667
max_pool_size = 100
修改数据节点一 pg_hba.conf ,增加以下
host all all 192.168.0.0/24 trust
host all all 0.0.0.0/0 trust
启动 PostgreSQL-XC (192.168.11.65)
[pgxc@pg1 ~]$ gtm -D /gtm &
[1] 2811
查看状态
[pgxc@pg1 gtm]$ gtm_ctl status -Z gtm -D /gtm
gtm_ctl: server is running (PID: 2811)
"-D" "/gtm"
1 master
[pgxc@pg1 gtm]$ ps -ef | grep gtm
pgxc 2811 2277 0 08:12 pts/0 00:00:00 gtm -D /gtm
pgxc 2823 2277 0 08:13 pts/0 00:00:00 grep gtm
gtm 进程已经正常启动。
在192.168.11.67主机启动datanode
[pgxc@pg2 ~]$ pg_ctl start -D /datanode/dn1 -Z datanode
[pgxc@pg2 ~]$ pg_ctl start -D /datanode/dn2 -Z datanode
4.查看是否启动成功
[pgxc@pg2 ~]$ ps -ef | grep pgxc
[pgxc@pg dn1]$ ps -ef | grep pgxc
root 2255 2225 0 07:24 pts/0 00:00:00 su - pgxc
pgxc 2256 2255 0 07:24 pts/0 00:00:00 -bash
pgxc 2809 1 0 08:15 pts/0 00:00:00
/opt/pgxc/bin/postgres -X -D /datanode/dn1
pgxc 2810 2809 0 08:15 ? 00:00:00 postgres: logger process
pgxc 2812 2809 0 08:15 ? 00:00:00 postgres: writer process
pgxc 2813 2809 0 08:15 ? 00:00:00 postgres: wal writer process
pgxc 2814 2809 0 08:15 ? 00:00:00 postgres: autovacuum launcher process
pgxc 2815 2809 0 08:15 ? 00:00:00 postgres: stats collector process
pgxc 2821 1 1 08:15 pts/0 00:00:00
/opt/pgxc/bin/postgres -X -D /datanode/dn2
pgxc 2822 2821 0 08:15 ? 00:00:00 postgres: logger process
pgxc 2824 2821 0 08:15 ? 00:00:00 postgres: writer process
pgxc 2825 2821 0 08:15 ? 00:00:00 postgres: wal writer process
pgxc 2826 2821 0 08:15 ? 00:00:00 postgres: autovacuum launcher process
pgxc 2827 2821 0 08:15 ? 00:00:00 postgres: stats collector process
pgxc 2829 2256 1 08:15 pts/0 00:00:00 ps -ef
pgxc 2830 2256 0 08:15 pts/0 00:00:00 grep pgxc
在192.168.11.65主机启动coordinator
[pgxc@pg1 ~]$ pg_ctl start -D /coordinator/cd1 -Z coordinator
[pgxc@pg1 ~]$ pg_ctl start -D /coordinator/cd2 -Z coordinator
6.查看是否成功
[pgxc@pg1 ~]$ ps -ef | grep pgxc
[pgxc@pg1 gtm]$ ps -ef | grep pgxc
root 2276 2254 0 07:24 pts/0 00:00:00 su - pgxc
pgxc 2277 2276 0 07:24 pts/0 00:00:00 -bash
pgxc 2811 2277 0 08:12 pts/0 00:00:00
gtm -D /gtm
pgxc 2867 1 1 08:17 pts/0 00:00:00
/opt/pgxc/bin/postgres -C -D /coordinator/cd1
pgxc 2868 2867 0 08:17 ? 00:00:00 postgres: logger process
pgxc 2870 2867 0 08:17 ? 00:00:00
postgres: pooler process
pgxc 2871 2867 0 08:17 ? 00:00:00 postgres: writer process
pgxc 2872 2867 0 08:17 ? 00:00:00 postgres: wal writer process
pgxc 2873 2867 0 08:17 ? 00:00:00 postgres: autovacuum launcher process
pgxc 2874 2867 0 08:17 ? 00:00:00 postgres: stats collector process
pgxc 2879 1 1 08:17 pts/0 00:00:00
/opt/pgxc/bin/postgres -C -D /coordinator/cd2
pgxc 2880 2879 0 08:17 ? 00:00:00 postgres: logger process
pgxc 2882 2879 0 08:17 ? 00:00:00
postgres: pooler process
pgxc 2883 2879 0 08:17 ? 00:00:00 postgres: writer process
pgxc 2884 2879 0 08:17 ? 00:00:00 postgres: wal writer process
pgxc 2885 2879 0 08:17 ? 00:00:00 postgres: autovacuum launcher process
pgxc 2886 2879 0 08:17 ? 00:00:00 postgres: stats collector process
pgxc 2888 2277 1 08:18 pts/0 00:00:00 ps -ef
pgxc 2889 2277 0 08:18 pts/0 00:00:00 grep pgxc
coord1,coord2 节点分别多了个 pooler process 进程,pooler process 用来与数据节点进行通信的。
查看GTM,POOL连接
[root@pg1 gtm]$ netstat -anp | grep gtm
tcp 0 0 0.0.0.0:6666 0.0.0.0:* LISTEN 2811/gtm
tcp 0 0 :::6666 :::* LISTEN 2811/gtm
[root@pg1 ~]# ps -ef | grep pool
pgxc 2870 2867 0 08:17 ? 00:00:00 postgres: pooler process
pgxc 2882 2879 0 08:17 ? 00:00:00 postgres: pooler process
root 2941 2254 0 08:21 pts/0 00:00:00 grep pool
注册节点
在 coord1,cord2 上注册数据节点
先注册coord1上的节点
[pgxc@pg1 ~]$ psql -p 1921 postgres
psql (PGXC 1.0.4, based on PG 9.1.13)
Type "help" for help.
postgres=# select * from pgxc_node;
node_name | node_type | node_port | node_host | nodeis_primary | nodeis_preferred | node_id
-----------+-----------+-----------+---------------+----------------+------------------+-------------
coord1 | C | 5432 | localhost | f | f | 1885696643
postgres=# create node db1 with (type='datanode',host='192.168.11.67',port=15431,primary,preferred);
postgres=# create node db2 with(type='datanode',host='192.168.11.67',port=15432);
postgres=# create node coord2 with(type='coordinator',host='192.168.11.65',port=1925);
postgres=# select * from pgxc_node;
node_name | node_type | node_port | node_host | nodeis_primary | nodeis_preferred | node_id
-----------+-----------+-----------+---------------+----------------+------------------+-------------
coord1 | C | 5432 | localhost | f | f | 1885696643
db1 | D | 15431 | 192.168.11.67 | t | t | -2885965
db2 | D | 15432 | 192.168.11.67 | f | f | -79866771
coord2 | C | 1925 | 192.168.11.65 | f | f | -1197102633
postgres=# select pgxc_pool_reload();
pgxc_pool_reload
------------------
t
(1 row)
在coord2注册节点
[pgxc@pg1 ~]$ psql -p 1925 postgres
psql (PGXC 1.0.4, based on PG 9.1.13)
Type "help" for help.
postgres=# select * from pgxc_node;
node_name | node_type | node_port | node_host | nodeis_primary | nodeis_preferred | node_id
-----------+-----------+-----------+---------------+----------------+------------------+-------------
coord2 | C | 5432 | localhost | f | f | -1197102633
postgres=# create node db1 with(type='datanode',host='192.168.11.67',port=15431);
postgres=# create node db2 with(type='datanode',host='192.168.11.67',port=15432);
postgres=# create node coord2 with(type='coordinator',host='192.168.11.65',port=1925);
postgres=# select * from pgxc_node;
node_name | node_type | node_port | node_host | nodeis_primary | nodeis_preferred | node_id
-----------+-----------+-----------+---------------+----------------+------------------+-------------
coord2 | C | 5432 | localhost | f | f | -1197102633
db1 | D | 15431 | 192.168.11.67 | f | f | -2885965
db2 | D | 15432 | 192.168.11.67 | f | f | -79866771
coord1 | C | 1921 | 192.168.11.65 | f | f | 1885696643
(4 rows)
postgres=# select pgxc_pool_reload();
pgxc_pool_reload
------------------
t
(1 row)
到了这里, PostgreSQL-XC 安装完成,接下来验证下。
五、测试过程
在coord1上建一个数据库和表并插入数据
[pgxc@pg1 ~]$ psql -p 1921 postgres
psql (PGXC 1.0.4, based on PG 9.1.13)
Type "help" for help.
postgres=# \l
List of databases
Name | Owner | Encoding | Collate | Ctype | Access privileges
-----------+-------+----------+---------+-------+-------------------
postgres | pgxc | UTF8 | C | C |
template0 | pgxc | UTF8 | C | C | =c/pgxc +
| | | | | pgxc=CTc/pgxc
template1 | pgxc | UTF8 | C | C | =c/pgxc +
| | | | | pgxc=CTc/pgxc
(4 rows)
postgres=# CREATE DATABASE t;
CREATE DATABASE
postgres=# \l
List of databases
Name | Owner | Encoding | Collate | Ctype | Access privileges
-----------+-------+----------+---------+-------+-------------------
postgres | pgxc | UTF8 | C | C |
t | pgxc | UTF8 | C | C |
template0 | pgxc | UTF8 | C | C | =c/pgxc +
| | | | | pgxc=CTc/pgxc
template1 | pgxc | UTF8 | C | C | =c/pgxc +
| | | | | pgxc=CTc/pgxc
(4 rows)
postgres=# \c t
You are now connected to database "t" as user "pgxc".
t=# CREATE TABLE a (a int);
CREATE TABLE
t=# INSERT INTO a select generate_series(1,100);
INSERT 0 I00
coord2 上验证
[pgxc@pg1 ~]$ psql -p 1925 postgres
psql (PGXC 1.0.4, based on PG 9.1.13)
Type "help" for help.
postgres=# \l
List of databases
Name | Owner | Encoding | Collate | Ctype | Access privileges
-----------+-------+----------+---------+-------+-------------------
postgres | pgxc | UTF8 | C | C |
t | pgxc | UTF8 | C | C |
template0 | pgxc | UTF8 | C | C | =c/pgxc +
| | | | | pgxc=CTc/pgxc
template1 | pgxc | UTF8 | C | C | =c/pgxc +
| | | | | pgxc=CTc/pgxc
(4 rows)
postgres=# \t
Showing only tuples.
postgres=# \c t
You are now connected to database "t" as user "pgxc".
t=# SELECT count(*) from a;
count
-------
100
(1 row)
数据节点 db1 上验证(192.168.11.67)
[pgxc@pg2 dn1]$ psql -p 15432 postgres
psql (PGXC 1.0.4, based on PG 9.1.13)
Type "help" for help.
postgres=# \l
List of databases
Name | Owner | Encoding | Collate | Ctype | Access privileges
-----------+-------+----------+---------+-------+-------------------
postgres | pgxc | UTF8 | C | C |
t | pgxc | UTF8 | C | C |
template0 | pgxc | UTF8 | C | C | =c/pgxc +
| | | | | pgxc=CTc/pgxc
template1 | pgxc | UTF8 | C | C | =c/pgxc +
| | | | | pgxc=CTc/pgxc
(9 rows)
postgres=# \c t
You are now connected to database "t" as user "pgxc".
t=# select count (*) from a;
count
-------
58
(1 row)
数据节点 db2 上验证
[pgxc@pg2 dn1]$ psql -p 15431 postgres
psql (PGXC 1.0.4, based on PG 9.1.13)
Type "help" for help.
postgres=# \l
List of databases
Name | Owner | Encoding | Collate | Ctype | Access privileges
-----------+-------+----------+---------+-------+-------------------
postgres | pgxc | UTF8 | C | C |
t | pgxc | UTF8 | C | C |
template0 | pgxc | UTF8 | C | C | =c/pgxc +
| | | | | pgxc=CTc/pgxc
template1 | pgxc | UTF8 | C | C | =c/pgxc +
| | | | | pgxc=CTc/pgxc
(9 rows)
postgres=# \c t
You are now connected to database "t" as user "pgxc".
t=# select count (*) from a;
count
-------
42
(1 row)
表共有100条记录,数据节点一分布了 58 条,数据节点二分布了 52条,可见数据已经分片到数据节点上。
可能出现的ERROR
[pgxc@pg1 coord1]$ psql -p 1921 postgres
postgres=# create database test;
ERROR: Failed to get pooled connections
备注:如果在 coord1 节点上操作时,报 "ERROR: Failed to get pooled connections",可能的原因很多:
可能是节点没有注册好,这时要查看 pgxc_node 视图;
也有可能是 pg_hba.conf,防火墙,selinux 等问题,总之逐一排查。
[pgxc@pg1 coord1]$ psql -p 1921 postgres
postgres=# create database test;
postgresql xc ERROR: No Datanode defined in cluster
如果创建数据库的时候出现这个错误
说明你的节点没有注册好,或者是你只在coord1上注册了节点,没有在coord2上注册,注册完成后检查没问题后在创建数据库就没有问题了。
注册完节点后,如果节点注册出现问题想修改或者删除节点再重新创建,如下
修改节点
[pgxc@barman ~]$ psql -p 1921 postgres
psql (PGXC 1.0.4, based on PG 9.1.13)
Type "help" for help.
postgres=# alter node coord3 with (host='127.0.0.1',port=1921);
postgres=# select pgxc_pool_reload();
pgxc_pool_reload
------------------
t
(1 row)
删除重新创建节点:
[pgxc@barman ~]$ psql -p 1921 postgres
psql (PGXC 1.0.4, based on PG 9.1.13)
Type "help" for help.
postgres=# drop node db1;
postgres=# create node coord2 with(type='coordinator',host='192.168.11.65',port=1925);
postgres=# select pgxc_pool_reload();
pgxc_pool_reload
------------------
t
(1 row)
不管是修改还是删除重建完成后你都需要重新加载文件(select pgxc_pool_reload();),否则就出现错误。
结束语:安装过程还是比较简单的,主要是配置过程容易出错,一定要弄好ip地址的对应关系,并改好参数,配置完成后,启动后,查看进程,保证配置不出问题,如果出现错误,要按照报错逐一排查,大多数都是配置文件修改问题和注册节点问题。


 140
140


 被折叠的 条评论
为什么被折叠?
被折叠的 条评论
为什么被折叠?
 到【灌水乐园】发言


