要想完成一个APP,网络请求获取后台的数据基本上是必须的。无论是咋Android中还是在iOS中都是非常重要的部分ReactNative中当然也不例外。
React Native提供了和web标准一致的Fetch API,用于满足开发者访问网络的需求。如果你之前使用过XMLHttpRequest(即俗称的ajax)或是其他的网络API,那么Fetch用起来将会相当容易上手。这篇文档只会列出Fetch的基本用法,并不会讲述太多细节,你可以使用你喜欢的搜索引擎去搜索fetch api关键字以了解更多信息。
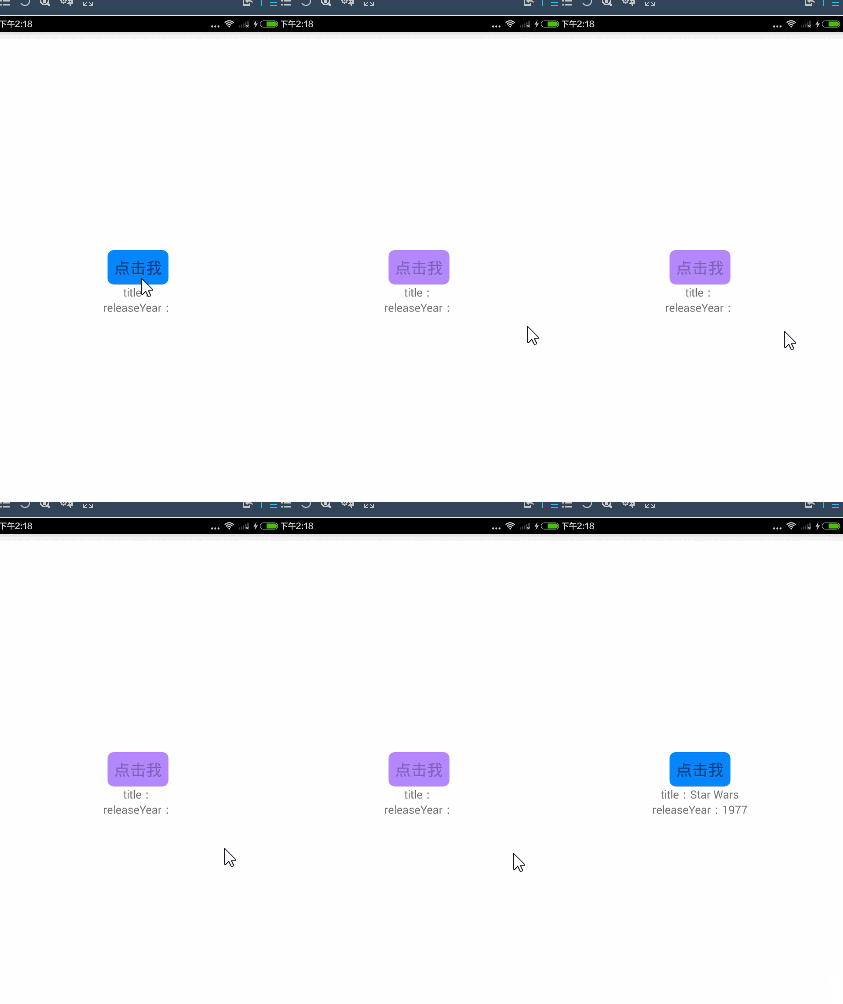
简单例子:点击按钮返回数据赋值给text
/**
 * Sample React Native App
 * https://github.com/facebook/react-native
 * @flow
 */

import React, { Component } from 'react';
import {
  AppRegistry,
  StyleSheet,
  Text,
  View,
  TouchableHighlight,
} from 'react-native';

class RnWidget extends Component {
  constructor(props){
    super(props)
    this.state={
      title : "",
      year : ""
    };
  }

    getMoviesFromApiAsync() {

     fetch('http://facebook.github.io/react-native/movies.json')
      .then((response) => response.json())
      .then((responseJson) => {
        this.setState({title : responseJson.movies[0].title
          ,year : responseJson.movies[0].releaseYear
        });
        console.log(responseJson);

      })
      .catch((error) => {
        console.error(error);
      });
  };

  render() {
    return (
    <View style={styles.container}>
        <TouchableHighlight
          underlayColor="rgb(181, 136, 254)"
          activeOpacity={0.5}
          style={{ borderRadius: 8,padding: 8,marginTop:5,backgroundColor:"#0588fe"}}
          onPress={this.getMoviesFromApiAsync.bind(this)}
          >
             <Text style={{fontSize:20}}>点击我</Text>
        </TouchableHighlight>
        <Text>title:{this.state.title}</Text>
        <Text>releaseYear:{this.state.year}</Text>

    </View>

    );
  }
}

const styles = StyleSheet.create({
  container: {
    flex: 1,
    justifyContent: 'center',
    alignItems: 'center',
    backgroundColor: '#ffffff',

  },

});
AppRegistry.registerComponent('RnWidget', () => RnWidget);
- 1
- 2
- 3
- 4
- 5
- 6
- 7
- 8
- 9
- 10
- 11
- 12
- 13
- 14
- 15
- 16
- 17
- 18
- 19
- 20
- 21
- 22
- 23
- 24
- 25
- 26
- 27
- 28
- 29
- 30
- 31
- 32
- 33
- 34
- 35
- 36
- 37
- 38
- 39
- 40
- 41
- 42
- 43
- 44
- 45
- 46
- 47
- 48
- 49
- 50
- 51
- 52
- 53
- 54
- 55
- 56
- 57
- 58
- 59
- 60
- 61
- 62
- 63
- 64
- 65
- 66
- 67
- 68
- 69
- 70
- 71
定义一个请求网络的方法getMoviesFromApiAsync()在TouchableHighlight的点击事件中调用。
例子中是将返回的数据保存在state中 请求完数据后更新state的值。更新的方式就是用this.setState()方法来赋值。一开始的时候遇到了一个问题 “Reactthis.setState is not a function”意思就是我们用的这个this对 它代表的是这个回掉本身不是我们构造方法中初始化的那个state。
解决方法:
(1)在点击给这个方法绑定this 在调用方法的地方 this.getMoviesFromApiAsync.bind(this) 调用bind(this)。
(2)在getMoviesFromApiAsync()方法中定义一个变量赋值为this 比如 var that = this;
然后再调用setState的地方 用that.setState();
效果图:

带参数的post请求:
定义一个方法在点击事件中调用
 getpicListAsync() {

     fetch('http://www.tngou.net/tnfs/api/list', {
     method: 'POST',
     headers: {
       'Accept': 'application/json',
       'Content-Type': 'application/json',
     },
     body: JSON.stringify({
     page: '1',
     rows: '10',
     })
     }).then((response) => response.json())
      .then((responseJson) => {
        this.setState({
          title : responseJson.tngou[0].title,
          img : "http://tnfs.tngou.net/image"+responseJson.tngou[0].img
        })
      })
      .catch((error) => {
        console.error(error);
      })
  };
- 1
- 2
- 3
- 4
- 5
- 6
- 7
- 8
- 9
- 10
- 11
- 12
- 13
- 14
- 15
- 16
- 17
- 18
- 19
- 20
- 21
- 22
- 23
- 1
- 2
- 3
- 4
- 5
- 6
- 7
- 8
- 9
- 10
- 11
- 12
- 13
- 14
- 15
- 16
- 17
- 18
- 19
- 20
- 21
- 22
- 23
<TouchableHighlight
          underlayColor="rgb(181, 136, 254)"
          activeOpacity={0.5}
          style={{ borderRadius: 8,padding: 8,marginTop:5,backgroundColor:"#0588fe"}}
          onPress={this.getpicListAsync.bind(this)}
          >
             <Text style={{fontSize:20}}>点我点我</Text>
        </TouchableHighlight>

        <Text>{this.state.img}</Text>
        <Image style={{width: 200, height: 200}}  source={ {uri: this.state.img}}/>
效果图:


 648
648


 被折叠的 条评论
为什么被折叠?


