


第一步:
在stm32f4xx.h中定义宏__FPU_PRESENT ; __FPU_USED
#define __CM4_REV                 0x0001  /*!< Core revision r0p1                            */
#define __MPU_PRESENT             1       /*!< STM32F4XX provides an MPU                     */
#define __NVIC_PRIO_BITS          4       /*!< STM32F4XX uses 4 Bits for the Priority Levels */
#define __Vendor_SysTickConfig    0       /*!< Set to 1 if different SysTick Config is used  */
#define __FPU_PRESENT             1       /*!< FPU present                                   */
#define __FPU_USED                1
第二步:
在stm32f4xx.h中增加头文件arm_math.h
#include "core_cm4.h"             /* Cortex-M4 processor and core peripherals */
#include "system_stm32f4xx.h"
#include <stdint.h>
#include "arm_math.h"
第三步:
在system_stm32f4xx.c的SystemInit()中添加如下代码:
void SystemInit(void)
{
  /* FPU settings ------------------------------------------------------------*/
  #if (__FPU_PRESENT == 1) && (__FPU_USED == 1)
    SCB->CPACR |= ((3UL << 10*2)|(3UL << 11*2));  /* set CP10 and CP11 Full Access */
  #endif
第四步:
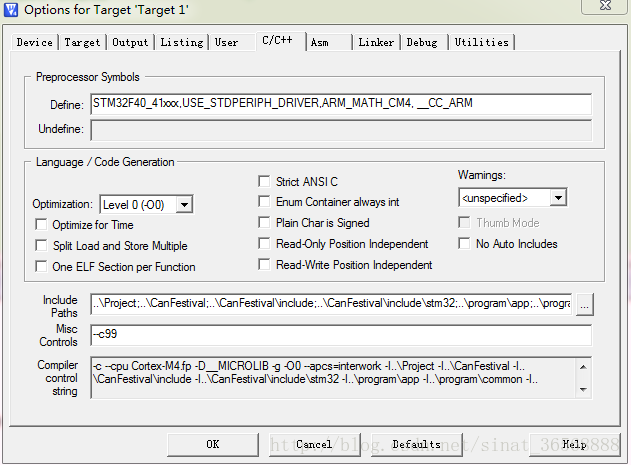
在配置的c++界面添加宏定义ARM_MATH_CM4, __CC_ARM
第五步 :
编译写个测试程序测试下代码
static void TaskProcess(void)
{
static uint8_t flag = 0;
static uint8_t eeprom_cmd = 1;
static uint16_t i = 0;
static float num_f = 0;
static float a = 3.1415926;
static float b = 87.6;
static float c = 76.987;
sd_card_test();
TIM_SetCounter(RUNTIMER_TIM, 0);
num_f = a * b / c;
printf("t %dus \r\n",TIM_GetCounter(RUNTIMER_TIM));
while(1);
while (1)
{
printf("Hello STM32");
}
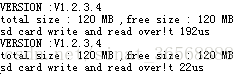
}定时器时钟为84M,不分频。
开启FPU运算时长为22×1/84 us;
不开启FPU运算时长为192×1/84 us;
可见开启FPU浮点运算乘除法快了8.7倍!!!


 796
796


 被折叠的 条评论
为什么被折叠?
被折叠的 条评论
为什么被折叠?
 到【灌水乐园】发言


