


背景
用idea搭建spring mvc环境,网上有很多教程,但是普遍都不是很详细,容易有遗漏。也没有太多解释原因。我自己总结了一个。并会附上一定的解释。
具体步骤
新建项目
我使用的版本是IntelliJ 15.0.3
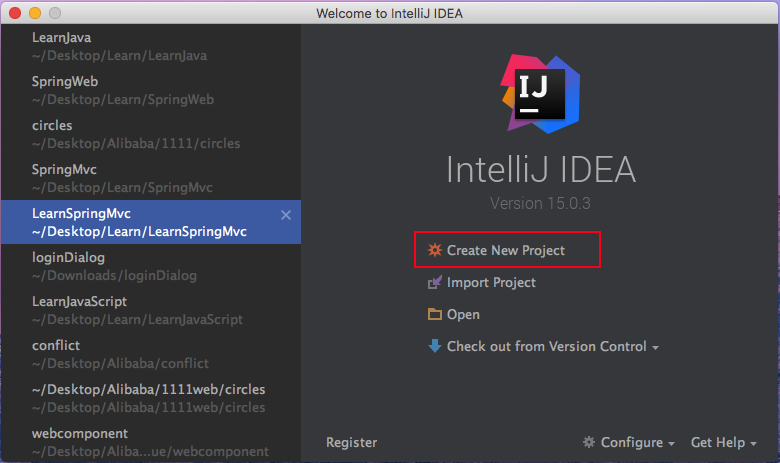
打开IntelliJ,新建项目
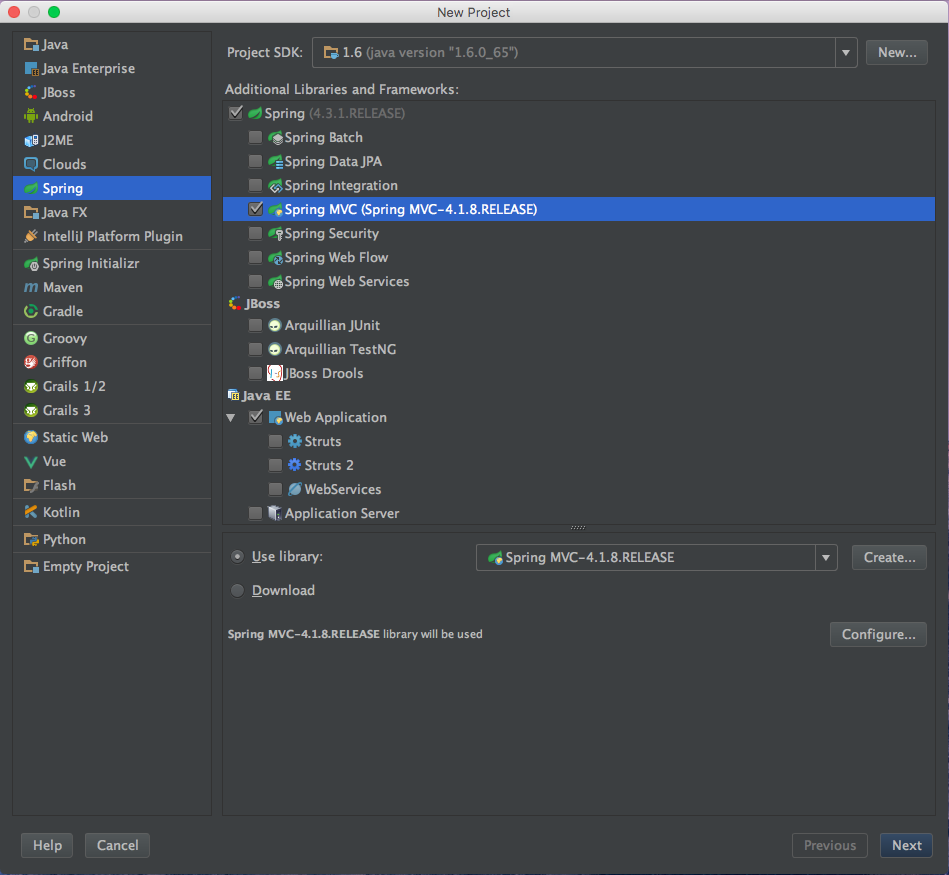
然后选择spring mvc
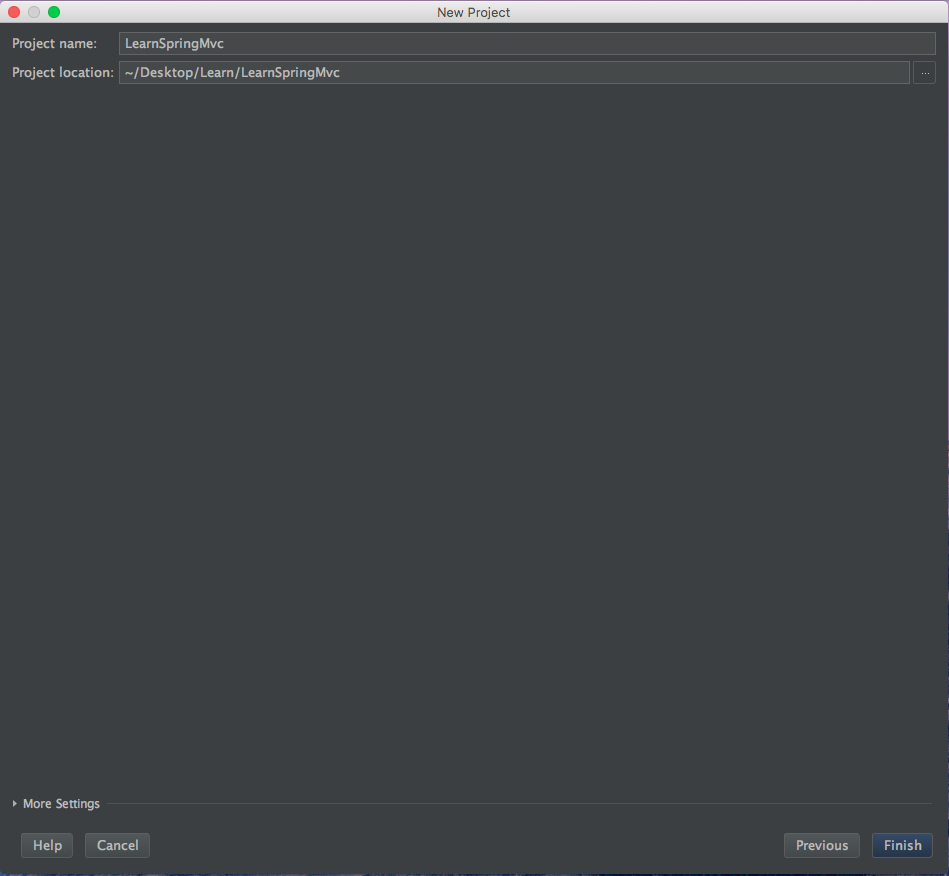
选择目录,这个可以自己随便选
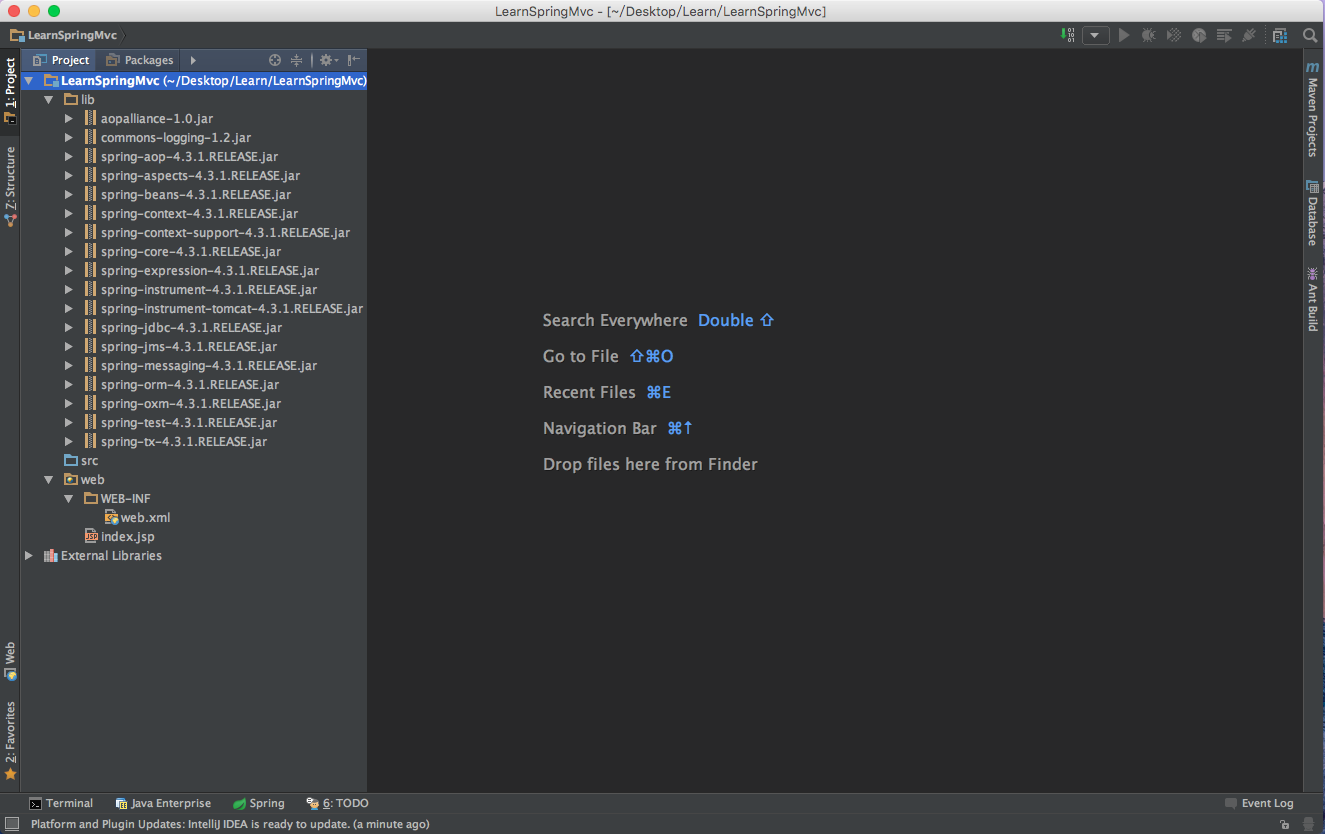
新建好之后,可以看到自带的lib文件夹,idea会自动配置常用的,不过一般来说,我们都是用maven来做管理。
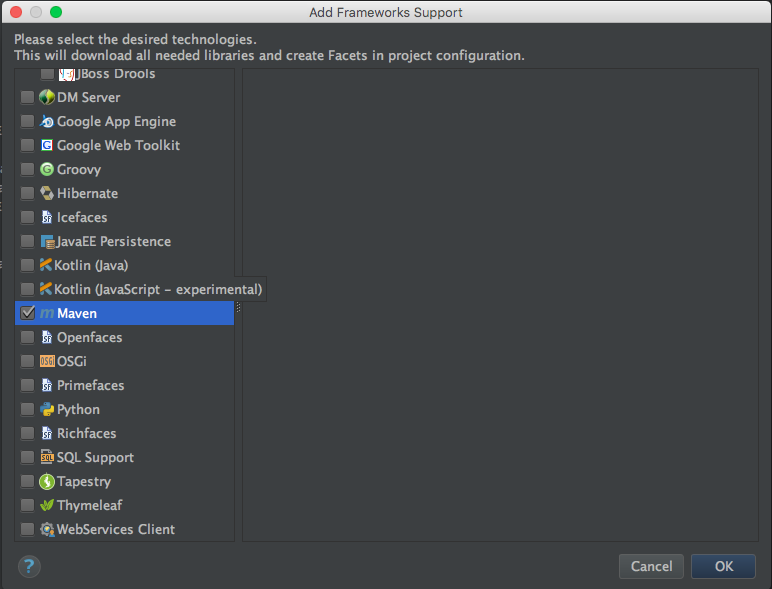
选中项目文件夹,呼出菜单,选择添加框架。
在弹出的菜单中选择maven
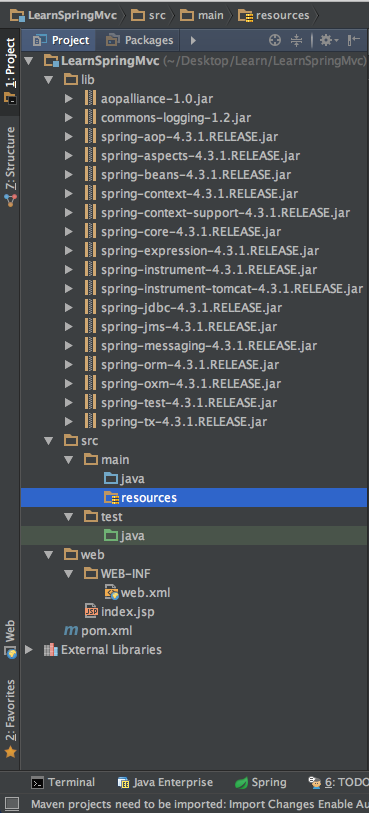
这个时候可以看到项目目录改变了,多了Java主目录和测试目录

配置pom文件
先配置pom文件
- 1
- 2
- 3
- 4
- 5
- 6
- 7
- 8
- 9
- 10
- 11
- 12
- 13
- 14
- 15
- 16
- 17
- 18
- 19
- 20
- 21
- 22
- 23
- 24
- 25
- 26
- 27
- 28
- 29
- 30
- 31
- 32
- 33
- 34
- 35
- 36
- 37
- 38
- 39
- 40
- 41
- 1
- 2
- 3
- 4
- 5
- 6
- 7
- 8
- 9
- 10
- 11
- 12
- 13
- 14
- 15
- 16
- 17
- 18
- 19
- 20
- 21
- 22
- 23
- 24
- 25
- 26
- 27
- 28
- 29
- 30
- 31
- 32
- 33
- 34
- 35
- 36
- 37
- 38
- 39
- 40
- 41
注意一定要使用war的打包方式
因为maven默认的打包方式不会放到/WEB-INF/lib里头,但是tomcat启动的时候找类会在WEB-INF/lib,如果不用war打包方式,会不停地抛
classNotFound异常的。
添加controller
添加controller类
- 1
- 2
- 3
- 4
- 5
- 6
- 7
- 8
- 9
- 10
- 11
- 1
- 2
- 3
- 4
- 5
- 6
- 7
- 8
- 9
- 10
- 11
使用controller注解,表示该类为MVC模型中的Controller层。
使用RequestMapping注解,表明该Controller的主进入目录。
method表示请求的方法,@ResponseBody表明返回是一段数据。
添加spring配置文件
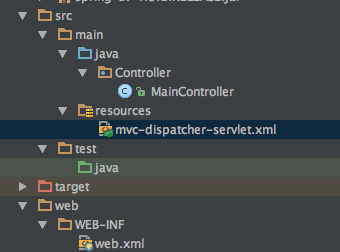
在resource目录中添加mvc-dispatcher-servlet.xml文件
- 1
- 2
- 3
- 4
- 5
- 6
- 7
- 8
- 1
- 2
- 3
- 4
- 5
- 6
- 7
- 8
很多教程中会有配置项目<’mvc:annotation-driven’/>说这个是启动bean扫描的驱动,其实<’context:component-scan base-package=”Controller”/’>就已经开启扫描了,扫描选择添加Controller注解的包就好了。
配置web.xml文件
- 1
- 2
- 3
- 4
- 5
- 6
- 7
- 8
- 9
- 10
- 11
- 12
- 13
- 14
- 15
- 16
- 17
- 18
- 19
- 20
- 21
- 22
- 23
- 24
- 25
- 1
- 2
- 3
- 4
- 5
- 6
- 7
- 8
- 9
- 10
- 11
- 12
- 13
- 14
- 15
- 16
- 17
- 18
- 19
- 20
- 21
- 22
- 23
- 24
- 25
servlet配置了spring的上下文,<’param-value’>指定spring配置文件。servlet-mapping 指定了spring mvc映射的目录。
目前的目录结构如下
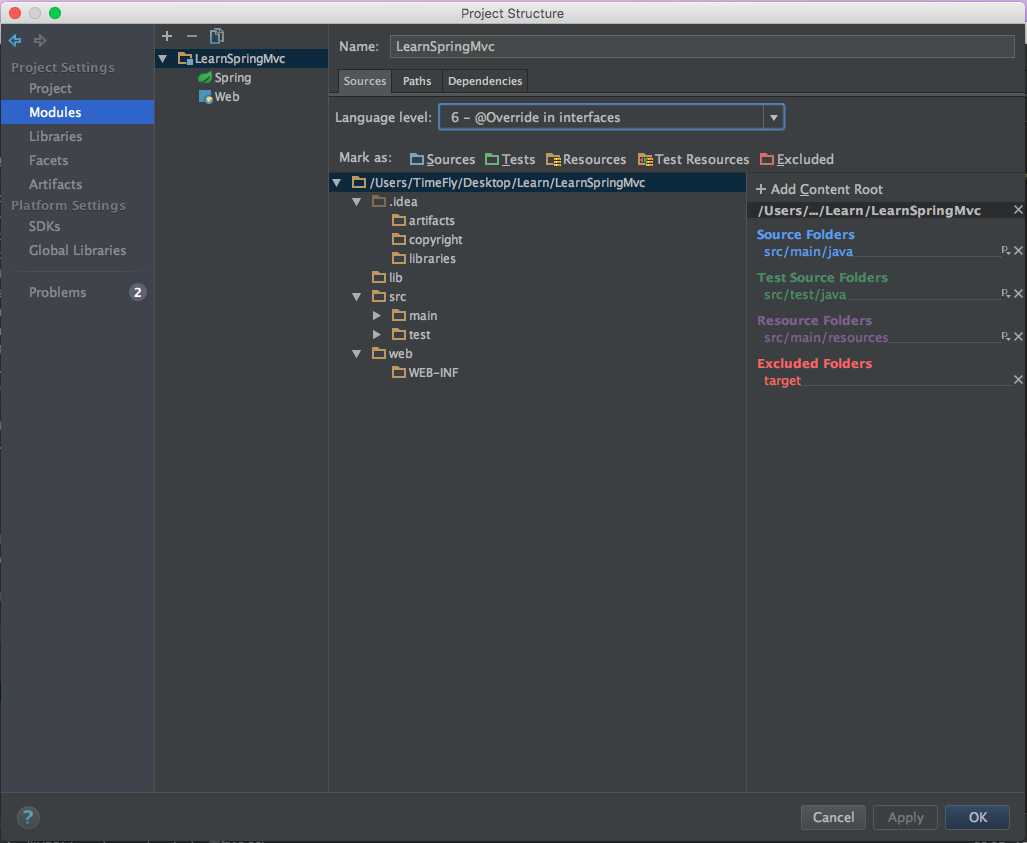
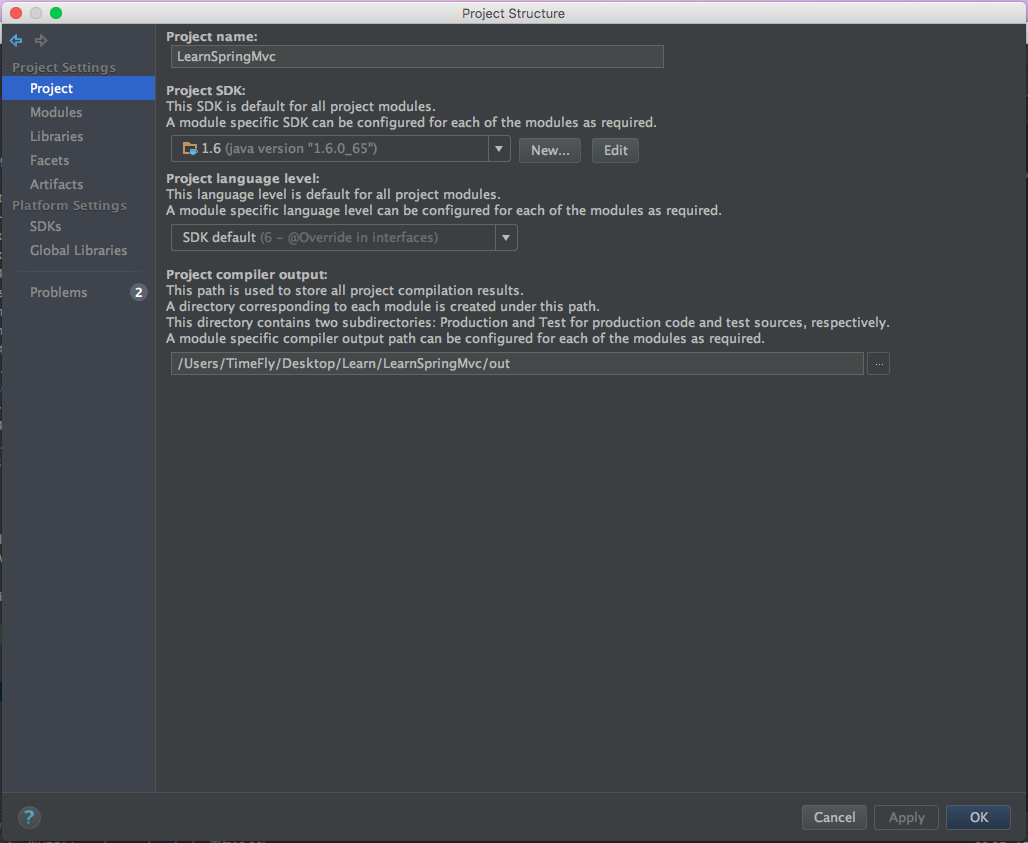
配置project
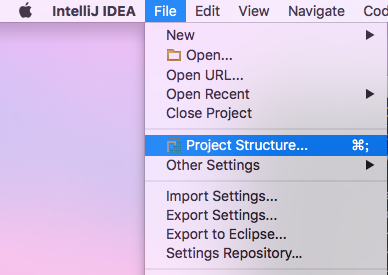
在file菜单中呼出project structure选项
在弹出的框中选择jdk的版本,我这里用的是java6
然后配置module,也选择6.0。
点击Problems,看看有没有什么问题,然后按推荐的fix就好了。
配置tomcat
下载tomcat
先上Apache Tomcat官网,下载tomcat,推荐使用tomcat7,下载之后cd到tomcat目录下的bin文件夹。因为一般来说mac下默认从zip中解压的文件都是没有运行权限的。所以给这里的catalina.sh附上运行权限。不过我一般比较懒,为了方便我会给bin上所有的文件都附上运行权限,一般本地开发无所谓的,如果商业化运作,就另当别论了。
- 1
- 1
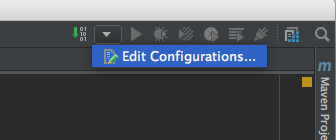
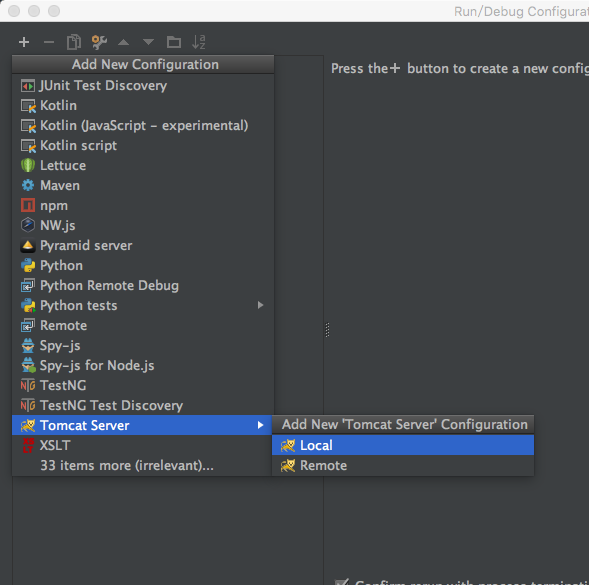
在idea中配置tomcat
在右上角打开运行配置
添加配置,选择tomcat local
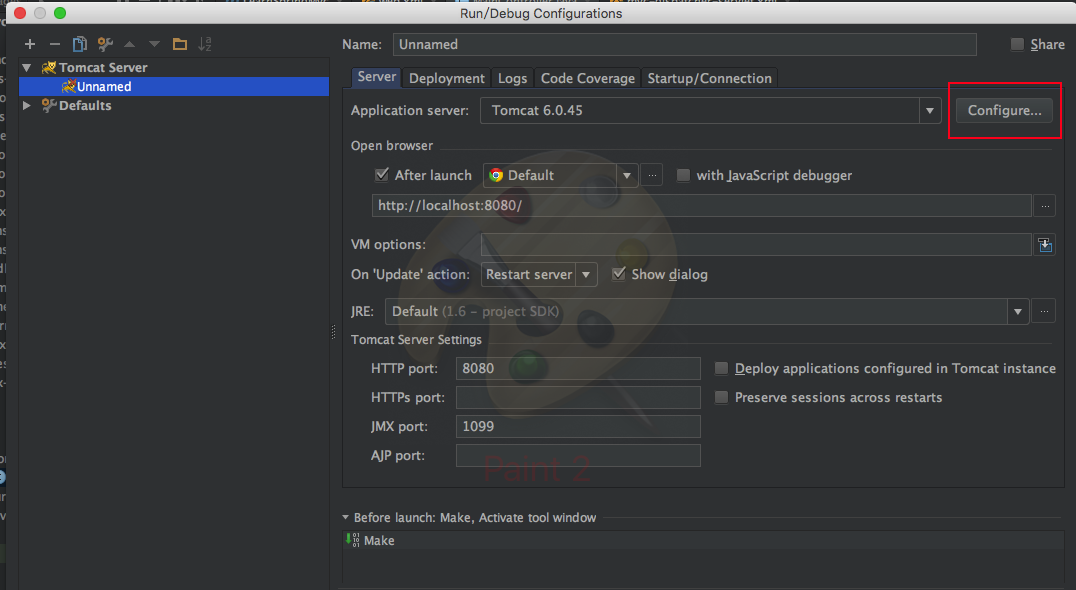
选择配置tomcat配置
选择下载tomcat的目录

我推荐使用7.
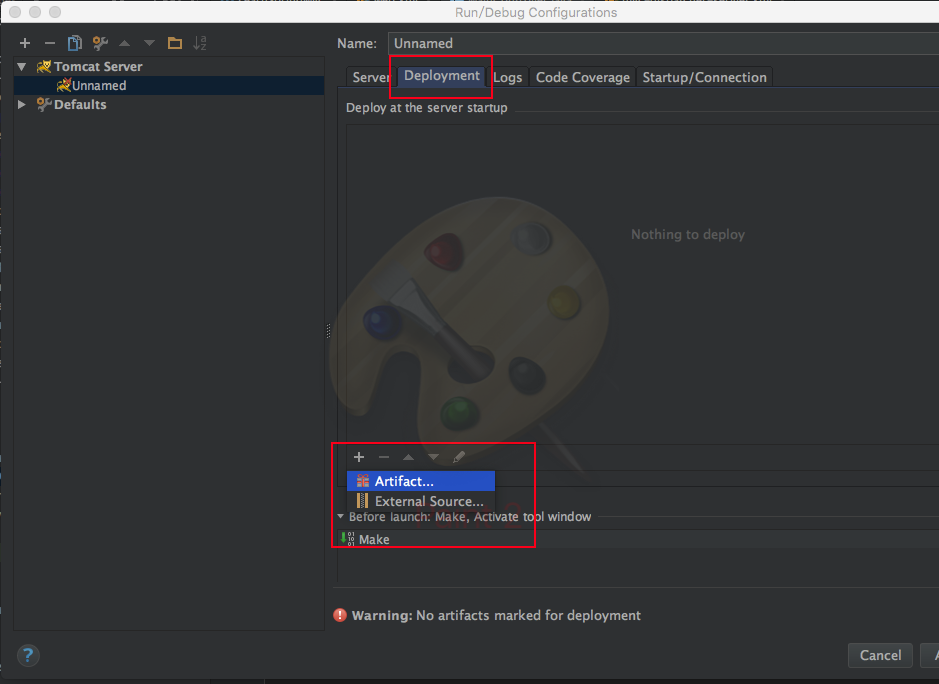
配置deployment
选择exploded,注意一定要是exploded的

关于打包的说明
一般来说tomcat会在项目的主目录下搜索web.xml文件,如果启动失败,可以检查target中是否有web.xml文件。如果没有
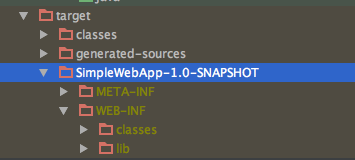
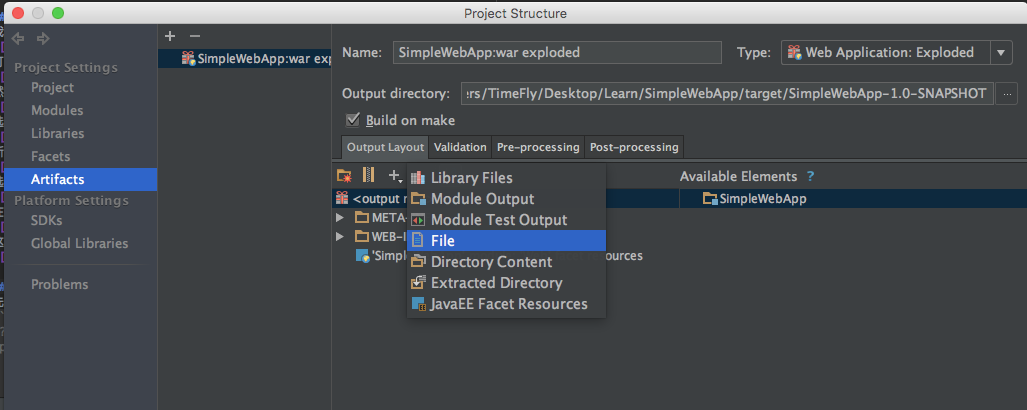
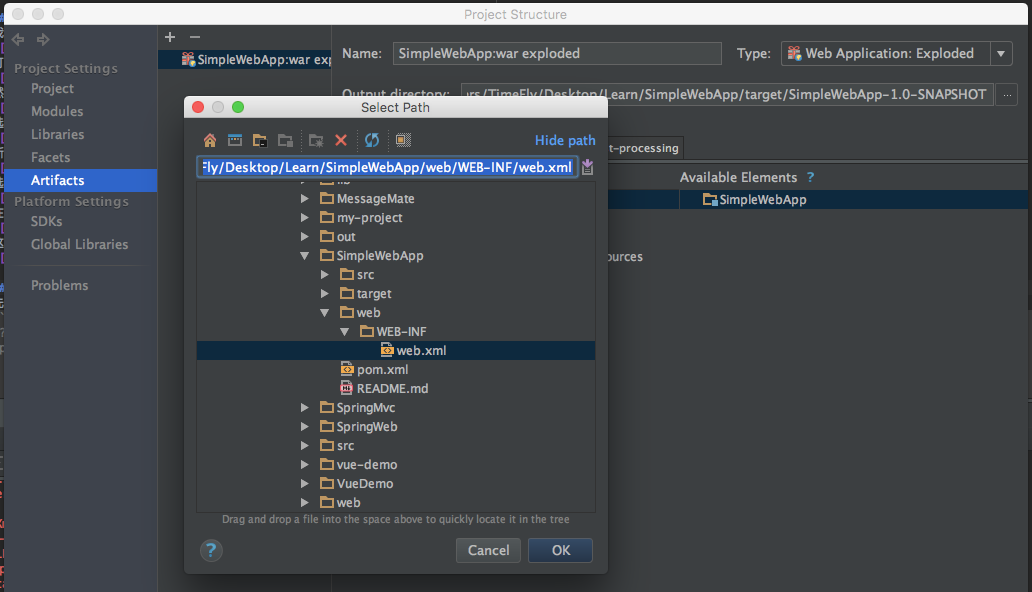
这个时候,可以进入Project Structure
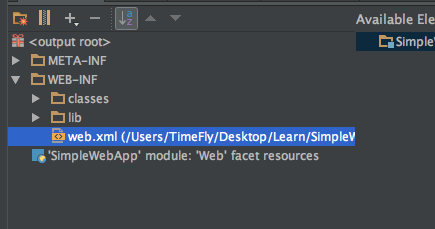
将web.xml引入到WEB-INF的目录下就好了
注意要在WEB-INF目录下,不要搞错了
运行
到此为止配置就算完成了,然后点击运行
这个时候浏览器打开以下链接
- 1
- 1
就可以看到运行结果test Web了。


 5577
5577

 被折叠的 条评论
为什么被折叠?
被折叠的 条评论
为什么被折叠?
 到【灌水乐园】发言


