


前言:
任何知识的学习都离不开三个步骤:
首先我们来解决第一个问题:什么是AIDL?
AIDL(Android Interface definition language),它是安卓内部进程通信的描述语言,与Java技术中的RMI有相似之处。与RMI不同的地方在于,安卓客户端访问Service时,并不是直接将Service对象返回给客户端,而是将service的代理对象(IBinder对象)通过onBind方法返回给客户端,因此,安卓的AIDL远程接口的实现类就是那个IBinder的实现类。
回答第二个问题:为什么要用AIDL呢?
在安卓中,当一个应用被执行时,它的一些操作是被限制的,比如内存访问,传感器访问,等等。每个应用执行在它自己的进程中,无法直接调用其他应用的资源,其实这有点沙箱的感觉,尽可能的保证应用的安全独立性。其实细心的发烧友可以发现,你打开QQ,微信客户端的时候,其实并不仅仅是一个进程,至少一个主进程和一个处理通信的进程。
最后一个问题,也是我们今天的主要内容,如何去使用AIDL?
MyIBinder.java:
好了,至此所有流程就完成了。
画了一个简图方便理解,可能有点丑 。
。
任何知识的学习都离不开三个步骤:
- what(是什么)
- why(为什么)
- how(怎么办)
带着这三个问题去学习AIDL,我想思路就会很明朗。
首先我们来解决第一个问题:什么是AIDL?
AIDL(Android Interface definition language),它是安卓内部进程通信的描述语言,与Java技术中的RMI有相似之处。与RMI不同的地方在于,安卓客户端访问Service时,并不是直接将Service对象返回给客户端,而是将service的代理对象(IBinder对象)通过onBind方法返回给客户端,因此,安卓的AIDL远程接口的实现类就是那个IBinder的实现类。
回答第二个问题:为什么要用AIDL呢?
在安卓中,当一个应用被执行时,它的一些操作是被限制的,比如内存访问,传感器访问,等等。每个应用执行在它自己的进程中,无法直接调用其他应用的资源,其实这有点沙箱的感觉,尽可能的保证应用的安全独立性。其实细心的发烧友可以发现,你打开QQ,微信客户端的时候,其实并不仅仅是一个进程,至少一个主进程和一个处理通信的进程。
最后一个问题,也是我们今天的主要内容,如何去使用AIDL?
- 创建AIDL文件(定义aidl接口)
- 实现远程service的stub
- AndroidManifest中注册service
- 客户端绑定service,并调用
好了,今天我们就用一个简单的计算两个数字和的例子来演示如何使用aidl跨进程通信。
首先,我们先来写我们的服务端,服务端很简单,就是一个负责处理的service和简单的aidl接口文件。在服务端新建一个包,这里需要注意的是,客户端的aidl文件存储的包名是和此处是一样的,不然会报Security错误的。
新建ICaculate.aidl文件:
package com.beyole.aidl;

interface ICaculate{
	int add(int a,int b);
}/*
* This file is auto-generated. DO NOT MODIFY.
* Original file: D:\\Java\\Android4\\beyoleaidlserver\\src\\com\\beyole\\aidl\\ICaculate.aidl
*/
package com.beyole.aidl;
public interface ICaculate extends android.os.IInterface
{
/** Local-side IPC implementation stub class. */
public static abstract class Stub extends android.os.Binder implements com.beyole.aidl.ICaculate
{
private static final java.lang.String DESCRIPTOR = "com.beyole.aidl.ICaculate";
/** Construct the stub at attach it to the interface. */
public Stub()
{
this.attachInterface(this, DESCRIPTOR);
}
/**
* Cast an IBinder object into an com.beyole.aidl.ICaculate interface,
* generating a proxy if needed.
*/
public static com.beyole.aidl.ICaculate asInterface(android.os.IBinder obj)
{
if ((obj==null)) {
return null;
}
android.os.IInterface iin = obj.queryLocalInterface(DESCRIPTOR);
if (((iin!=null)&&(iin instanceof com.beyole.aidl.ICaculate))) {
return ((com.beyole.aidl.ICaculate)iin);
}
return new com.beyole.aidl.ICaculate.Stub.Proxy(obj);
}
@Override public android.os.IBinder asBinder()
{
return this;
}
@Override public boolean onTransact(int code, android.os.Parcel data, android.os.Parcel reply, int flags) throws android.os.RemoteException
{
switch (code)
{
case INTERFACE_TRANSACTION:
{
reply.writeString(DESCRIPTOR);
return true;
}
case TRANSACTION_add:
{
data.enforceInterface(DESCRIPTOR);
int _arg0;
_arg0 = data.readInt();
int _arg1;
_arg1 = data.readInt();
int _result = this.add(_arg0, _arg1);
reply.writeNoException();
reply.writeInt(_result);
return true;
}
}
return super.onTransact(code, data, reply, flags);
}
private static class Proxy implements com.beyole.aidl.ICaculate
{
private android.os.IBinder mRemote;
Proxy(android.os.IBinder remote)
{
mRemote = remote;
}
@Override public android.os.IBinder asBinder()
{
return mRemote;
}
public java.lang.String getInterfaceDescriptor()
{
return DESCRIPTOR;
}
@Override public int add(int a, int b) throws android.os.RemoteException
{
android.os.Parcel _data = android.os.Parcel.obtain();
android.os.Parcel _reply = android.os.Parcel.obtain();
int _result;
try {
_data.writeInterfaceToken(DESCRIPTOR);
_data.writeInt(a);
_data.writeInt(b);
mRemote.transact(Stub.TRANSACTION_add, _data, _reply, 0);
_reply.readException();
_result = _reply.readInt();
}
finally {
_reply.recycle();
_data.recycle();
}
return _result;
}
}
static final int TRANSACTION_add = (android.os.IBinder.FIRST_CALL_TRANSACTION + 0);
}
public int add(int a, int b) throws android.os.RemoteException;
}
好,我们来写service,也是我们服务端最重要的部分。
CaculateService.java:
package com.beyole.service;

import com.beyole.aidl.ICaculate;

import android.app.Service;
import android.content.Intent;
import android.os.IBinder;

public class CaculateService extends Service {

	private ICaculate.Stub myBinder = new MyIBinder();

	@Override
	public void onCreate() {
		super.onCreate();
	}

	@Override
	public void onDestroy() {
		super.onDestroy();
	}

	@Override
	public int onStartCommand(Intent intent, int flags, int startId) {
		return super.onStartCommand(intent, flags, startId);
	}

	@Override
	public IBinder onBind(Intent intent) {
		return myBinder;
	}

}
MyIBinder.java:
package com.beyole.service;

import android.os.RemoteException;

import com.beyole.aidl.*;

public class MyIBinder extends ICaculate.Stub {

	@Override
	public int add(int a, int b) throws RemoteException {
		return (a + b);
	}

}
 <application
        android:allowBackup="true"
        android:icon="@drawable/ic_launcher"
        android:label="@string/app_name"
        android:theme="@style/AppTheme" >
        <service android:name="com.beyole.service.CaculateService" >
            <intent-filter>
                <action android:name="com.beyole.service.calc" />

                <category android:name="android.intent.category.DEFAULT" />
            </intent-filter>
        </service>
    </application>
客户端第一步,我们需要把我们在服务端写的aidl文件拿过来,上面也有说,一定要放在同样名称的包下。这里我就不贴aidl的代码了,和上面的一样哦。
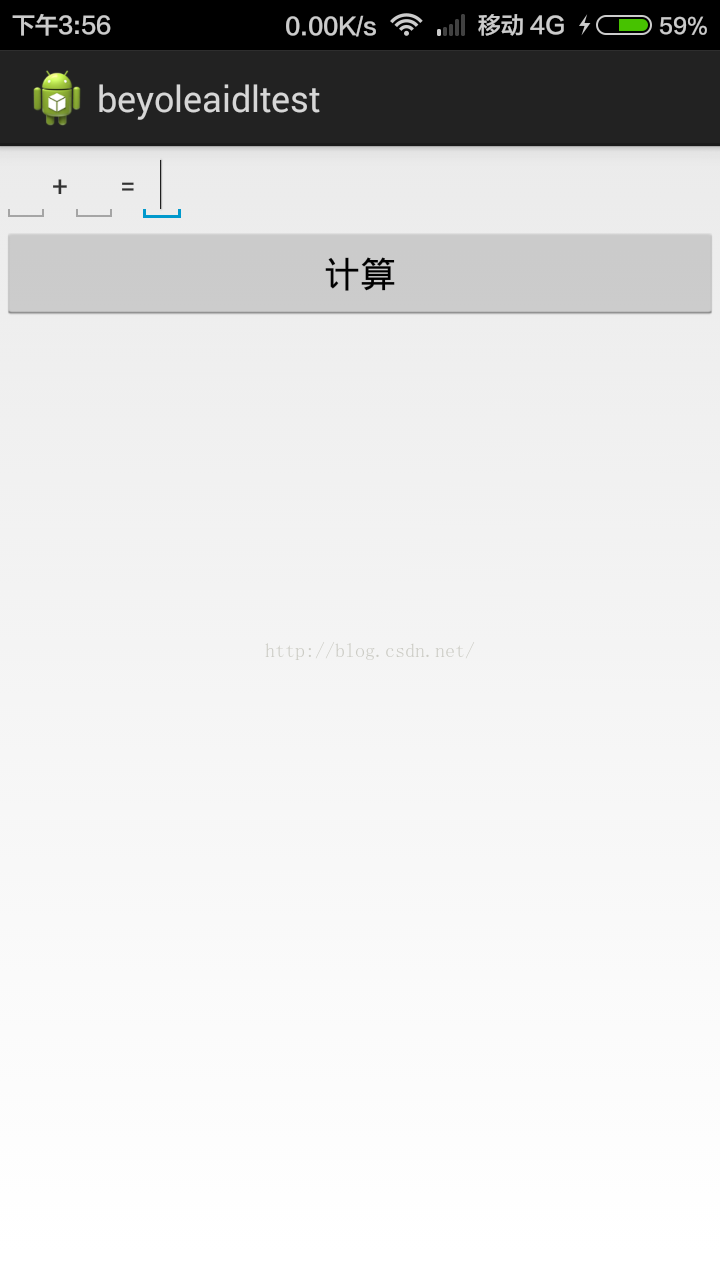
客户端的主界面效果是这样的
就是三个edittext,然后计算button,贴下布局文件:
activity_main.xml:
<LinearLayout xmlns:android="http://schemas.android.com/apk/res/android"
    xmlns:tools="http://schemas.android.com/tools"
    android:layout_width="match_parent"
    android:layout_height="match_parent"
    android:orientation="vertical" >

    <LinearLayout
        android:layout_width="match_parent"
        android:layout_height="wrap_content"
        android:orientation="horizontal" >

        <EditText
            android:id="@+id/id_edt1"
            android:layout_width="wrap_content"
            android:layout_height="wrap_content"
            android:layout_alignParentBottom="true"
            android:maxLength="20" />

        <TextView
            android:layout_width="wrap_content"
            android:layout_height="wrap_content"
            android:layout_gravity="center_vertical"
            android:gravity="center"
            android:text="+" />

        <EditText
            android:id="@+id/id_edt2"
            android:layout_width="wrap_content"
            android:layout_height="wrap_content"
            android:layout_alignParentBottom="true"
            android:maxLength="20" />

        <TextView
            android:layout_width="wrap_content"
            android:layout_height="wrap_content"
            android:layout_gravity="center_vertical"
            android:gravity="center"
            android:text="=" />

        <EditText
            android:id="@+id/id_edt"
            android:layout_width="wrap_content"
            android:layout_height="wrap_content"
            android:layout_alignParentBottom="true"
            android:maxLength="20" />
    </LinearLayout>

    <Button

        android:id="@+id/id_btn"
        android:layout_width="match_parent"
        android:layout_height="wrap_content"
        android:text="计算" />

</LinearLayout>
我们在客户端MainActivity.java的处理:
MainActivity.java:
package com.example.beyoleaidltest;

import android.app.Activity;
import android.app.Service;
import android.content.ComponentName;
import android.content.Intent;
import android.content.ServiceConnection;
import android.os.Bundle;
import android.os.IBinder;
import android.os.RemoteException;
import android.view.View;
import android.view.View.OnClickListener;
import android.widget.Button;
import android.widget.EditText;
import android.widget.Toast;

import com.beyole.aidl.ICaculate;

public class MainActivity extends Activity {

	private ICaculate caculate;
	private Button btn;
	private EditText editText, editText2, editText3;
	private MyServiceConnection connection = new MyServiceConnection();

	@Override
	protected void onCreate(Bundle savedInstanceState) {
		super.onCreate(savedInstanceState);
		setContentView(R.layout.activity_main);
		btn = (Button) findViewById(R.id.id_btn);
		editText = (EditText) findViewById(R.id.id_edt);
		editText2 = (EditText) findViewById(R.id.id_edt1);
		editText3 = (EditText) findViewById(R.id.id_edt2);
		btn.setOnClickListener(new OnClickListener() {

			@Override
			public void onClick(View v) {
				try {
					editText.setText(caculate.add(Integer.parseInt(editText2.getText().toString()), Integer.parseInt(editText3.getText().toString())) + "");
				} catch (Exception e) {
					e.printStackTrace();
				}
			}
		});
	}

	private class MyServiceConnection implements ServiceConnection {

		@Override
		public void onServiceConnected(ComponentName name, IBinder service) {
			Toast.makeText(MainActivity.this, "Service Connected!", Toast.LENGTH_SHORT).show();
			caculate = ICaculate.Stub.asInterface(service);
		}

		@Override
		public void onServiceDisconnected(ComponentName name) {
			Toast.makeText(MainActivity.this, "Service Disconnected!", Toast.LENGTH_SHORT).show();
			caculate = null;
		}

	}

	@Override
	protected void onStart() {
		super.onStart();
		Intent intent = new Intent();
		intent.setAction("com.beyole.service.calc");
		bindService(intent, connection, Service.BIND_AUTO_CREATE);
	}

	@Override
	protected void onDestroy() {
		super.onDestroy();
		unbindService(connection);
	}

}
public void onServiceConnected(ComponentName name, IBinder service)public void onServiceDisconnected(ComponentName name)caculate = ICaculate.Stub.asInterface(service);
至于service的绑定是在MainActivity的onStart周期中进行绑定。
     Intent intent = new Intent();
     intent.setAction("com.beyole.service.calc");
bindService(intent, connection, Service.BIND_AUTO_CREATE);unbindService(connection);btn.setOnClickListener(new OnClickListener() {
@Override
public void onClick(View v) {
try {
editText.setText(caculate.add(Integer.parseInt(editText2.getText().toString()), Integer.parseInt(editText3.getText().toString())) + "");
} catch (Exception e) {
e.printStackTrace();
}
}
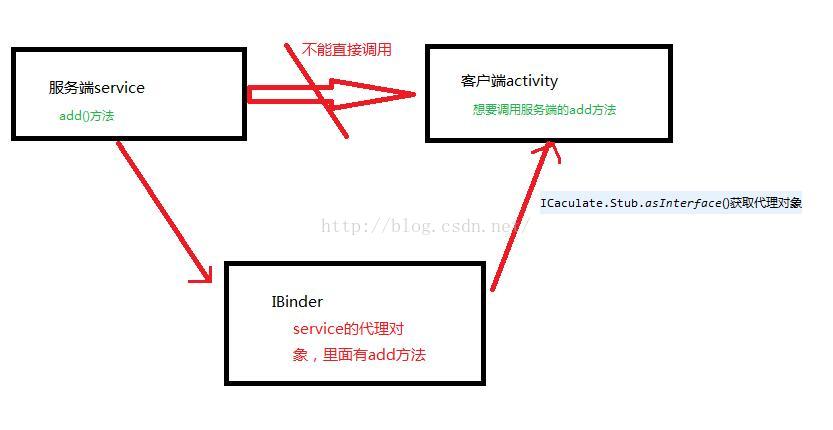
});好了,至此所有流程就完成了。
画了一个简图方便理解,可能有点丑
。
后语:
嗯,到这里我们的项目就算是结束了。大家有没有觉得不是很难(不敢说简单)。
csdn下载地址:http://download.csdn.net/detail/smarticeberg/9471539
嗯,到这里我们的项目就算是结束了。大家有没有觉得不是很难(不敢说简单)。
csdn下载地址:http://download.csdn.net/detail/smarticeberg/9471539
题外话:
android交流群:279031247(广告勿入)
新浪微博:SmartIceberg


 2973
2973


 被折叠的 条评论
为什么被折叠?
被折叠的 条评论
为什么被折叠?
 到【灌水乐园】发言


