


Maven+springboot+阿里大于短信验证服务
纠结点:Maven库没有sdk,需要解决
Maven打包找不到相关类,需要解决
ps:最近好久没有写点东西了,项目太紧,今天来一篇
一、本文简介
在工作当中的项目中,我遇到过这种情况,公司架构选型SpringBoot ,这是个基于Maven构建的项目,
需要集成阿里大鱼短信系统,然后暴露REST风格的API接口出去。本文重点讲解。
二、开发准备
阿里大于,是阿里的通讯产品之一,提供短信验证码服务。
1、需要注册阿里大鱼账户、充值、设置,这一块不多讲,官网有文档。
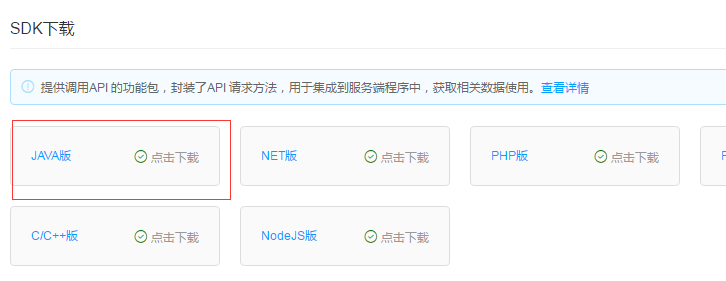
2、下载官网开发包(SDK)
3、官方给的demo例子(先参考下,主要看我的Demo)
TaobaoClient client = new DefaultTaobaoClient(url, appkey, secret);
AlibabaAliqinFcSmsNumSendRequest req = new AlibabaAliqinFcSmsNumSendRequest();
req.setExtend("123456");
req.setSmsType("normal");
req.setSmsFreeSignName("阿里大于");
req.setSmsParamString("{\"code\":\"1234\",\"product\":\"alidayu\"}");
req.setRecNum("13000000000");
req.setSmsTemplateCode("SMS_585014");
AlibabaAliqinFcSmsNumSendResponse rsp = client.execute(req);
System.out.println(rsp.getBody());
三、正式开发
部分同学可能使用的框架不是springboot ,没关系,举一反三,这个不影响,主要看实现。
1、创建Maven项目
不多讲!
2、阿里大鱼SDK工具包配置
阿里大鱼的sdk在maven库中,无法找到,所以,我们要加入本地的jar.这一步骤,我们需要完成该配置
2.1、下载阿里大鱼SDK
在官网就可以下载,下载完以后,解压后我们看见:

我们接下来需要做的,就是将本地的这两个文件,加入本地仓库
2.2、将SDK加入本地Maven仓库
Windows系统命令行讲解如下:(备注:如果linux系统下,要做一个pom.xml文件引导)
(groupid,artifactId,version都是随便填)
mvn install:install-file
-DgroupId=taobao
-DartifactId=taobao
-Dversion=1.0 //版本号
-Dpackaging=jar //类型
-Dfile=d:\****.jar //jar包名
相当与在pom.xml中添加了
<dependency>
<groupId>taobao</groupId>
<artifactId>taobao</artifactId>
<version>1.0</version>
</dependency>
运行命令行(按照自己实际情况修改,都在一行上面):
mvn install:install-file -DgroupId=taobao -DartifactId=taobao -Dversion=1.0 -Dpackaging=jar -Dfile=d:\******.jar
完了你就可以看到,你的maven库中会有你刚刚添加的包 了(解压后应该是两个包,同样的方法)
(16.10.08国庆重大更新)ps:上面代码刚开始写博客的时候,写错了一些符号,坑了好多朋友,修改过来了,
(16.12.2日重大更新)如果打包不成功的同学,也不用浪费时间了,
我有直接打包好的maven包,链接:https://pan.baidu.com/s/1skR2lFf,
解压后加入到本地maven库中 , 直接可以在pom.xml加入一下代码
 View Code
如果设置失败,请联系WeChat: wixf150
2.3、需要在maven中加入配置插件(这一步非必选)
<!-- 解决本地jar植入的插件 -->
            <plugin>
                <artifactId>maven-compiler-plugin</artifactId>
                <configuration>
                    <source>1.6</source>
                    <target>1.6</target>
                    <encoding>UTF-8</encoding>
                    <compilerArguments>
                        <extdirs>src\main\webapp\WEB-INF\lib</extdirs>
                    </compilerArguments>
                </configuration>
            </plugin>
3、加入SpringBoot需要的依赖
springboot pom.xml.完整的代码如下:
<project xmlns="http://maven.apache.org/POM/4.0.0" xmlns:xsi="http://www.w3.org/2001/XMLSchema-instance"
    xsi:schemaLocation="http://maven.apache.org/POM/4.0.0 http://maven.apache.org/xsd/maven-4.0.0.xsd">
    <modelVersion>4.0.0</modelVersion>
    <groupId>cc-hyh-demo</groupId>
    <artifactId>cc.hyh.demo</artifactId>
    <version>0.0.1-SNAPSHOT</version>
    <!-- parent依赖 -->
    <parent>
        <groupId>org.springframework.boot</groupId>
        <artifactId>spring-boot-starter-parent</artifactId>
        <version>1.3.6.RELEASE</version>
    </parent>

    <build>
        <sourceDirectory>src/main/java</sourceDirectory>
        <plugins>
            <!-- 打包插件 -->
            <plugin>
                <groupId>org.springframework.boot</groupId>
                <artifactId>spring-boot-maven-plugin</artifactId>
                <executions>
                    <execution>
                        <goals>
                            <goal>repackage</goal>
                        </goals>
                    </execution>
                </executions>
                <configuration>
                    <source>1.6</source>
                    <target>1.6</target>
                    <encoding>UTF-8</encoding>

                </configuration>
            </plugin>
            <!-- 解决本地jar植入的插件 -->
            <plugin>
                <artifactId>maven-compiler-plugin</artifactId>
                <configuration>
                    <source>1.6</source>
                    <target>1.6</target>
                    <encoding>UTF-8</encoding>
                    <compilerArguments>
                        <extdirs>src\main\webapp\WEB-INF\lib</extdirs>
                    </compilerArguments>
                </configuration>
            </plugin>
        </plugins>
    </build>
    <dependencies>
        <!-- 阿里云 短信 依赖 -->
        <dependency>
            <groupId>taobao</groupId>
            <artifactId>taobao</artifactId>
            <version>1.0</version>
        </dependency>
        <dependency>
            <groupId>taobao</groupId>
            <artifactId>taobao</artifactId>
            <version>1.0</version>
        </dependency>
        <!-- springboot 依赖 -->
        <dependency>
            <groupId>org.springframework.boot</groupId>
            <artifactId>spring-boot-starter-web</artifactId>
        </dependency>
        <dependency>
            <groupId>org.springframework.boot</groupId>
            <artifactId>spring-boot-starter-tomcat</artifactId>
            <scope>provided</scope>
        </dependency>
    </dependencies>
</project>
注意:阿里短信的包,是我自己做到本地库中的,不要照搬。
4、主要的服务类
其他次要的代码省略。主要实现发送验证码代码:
package cc.dayu.service;

import java.util.Date;

public class DaYuService {

    public Info requestSmsCode(String phone) {
     //这个只是我项目中的标识,忽略
        Info in = new Info();
     //阿里大鱼URL
        String url = "http://gw.api.taobao.com/router/rest";
     //我自己随机生成了六位数验证码,自己去实现
        String code = RandomUtil.createRandomVcode();
     //以下才是重点  三个参数,一个url阿里大鱼的服务地址,其他两个去阿里大鱼后端查看自己的相应的参数
        TaobaoClient client = new DefaultTaobaoClient(url, "23334143",
                "23gyfruy38hf83yh7y8u98j9u9j9i9");
        // String json="{\"code\":\"1234\",\"product\":\"某某电子商务验证\"}";
        AlibabaAliqinFcSmsNumSendRequest req = new AlibabaAliqinFcSmsNumSendRequest();
        req.setExtend("1");
        //必须填写normal
     req.setSmsType("normal");
     //你应用的名字
        req.setSmsFreeSignName("XXXX");
    //电话号码
        req.setRecNum(phone);
    //模板
        req.setSmsTemplateCode("SMS_8926569");
    //模板中的参数,按照实际情况去
        req.setSmsParamString("{msg:'" + code + "'}");

        try {
            AlibabaAliqinFcSmsNumSendResponse rsp = client.execute(req);
            // 这里是我设置的一个保存验证码 机制。按照实际需求,自行设计
            UserSms userSms = new UserSms();
            userSms.setPhone(phone);
            userSms.setCode(code);
            userSms.setTime(new Date());
            sms.addSms(userSms);
            in.setStatus("发送成功");
        } catch (ApiException e) {
            // TODO Auto-generated catch block
            // e.printStackTrace();
            in.setStatus("发送失败");
        }

        return in;
    }
}
四、交流方式
其实对于Maven项目添加阿里大鱼这样的Demo,主要的问题在于,如何将阿里大鱼jar加入maven,并且能打包成功,

转发请注明出处(原创):http://www.cnblogs.com/hyhnet/p/5775473.html
访问独立博客获得更好用户体验:http://www.hanyahong.com


 267
267


 被折叠的 条评论
为什么被折叠?
被折叠的 条评论
为什么被折叠?
 到【灌水乐园】发言


