


对于非Maven的web项目,有时候我们想不时常通过打war包、拷贝war包、启动tomcat来运行项目、这时候我们可以通过以下方式来进行配置:
1.1:创建web工程。工程结构如下:
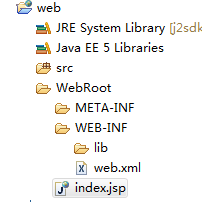
1.2、其中index.jsp的内容如下:
| <%@ page language="java" import="java.util.*" pageEncoding="utf-8"%> <% String path = request.getContextPath(); String basePath = request.getScheme()+"://"+request.getServerName()+":"+request.getServerPort()+path+"/"; %>
<!DOCTYPE HTML PUBLIC "-//W3C//DTD HTML 4.01 Transitional//EN"> <html> <head> <base href="<%=basePath%>">
<title>My JSP 'index.jsp' starting page</title> <meta http-equiv="pragma" content="no-cache"> <meta http-equiv="cache-control" content="no-cache"> <meta http-equiv="expires" content="0"> <meta http-equiv="keywords" content="keyword1,keyword2,keyword3"> <meta http-equiv="description" content="This is my page"> <!-- <link rel="stylesheet" type="text/css" href="styles.css"> --> </head>
<body> 测试一下 <br> </body> </html> |
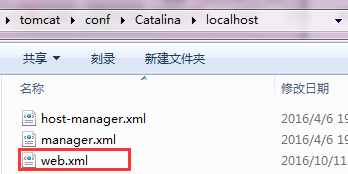
1.3进入tomcat下的\conf\Catalina\localhost,创建一个web.xml,这个名称可以随便起。
编写内容如下:
内容:
| <Context path="/web" reloadable="true" docBase="E:\workspace\CMSWORKSPACE\web\ WebRoot "/> |
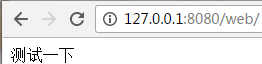
注意:docBase后面一定要加上WebRoot,在浏览器上输入:http://127.0.0.1:8080/web/
以上可以参考:http://www.cnblogs.com/xiohao/p/3689832.html
2:针对maven项目,若想让项目也能够自动化部署到tomcat中,需要通过maven自动化部署项目到tomcat中,配置方式:
2.1:第一步:配置tomcat访问权限配置是tomcat安装目录下conf文件夹中的tomcat-user.xml文件中配置,
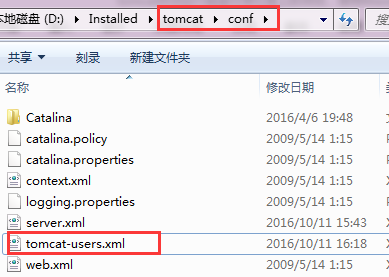
具体配置如下:
| <?xml version='1.0' encoding='utf-8'?> <!-- Licensed to the Apache Software Foundation (ASF) under one or more contributor license agreements. See the NOTICE file distributed with this work for additional information regarding copyright ownership. The ASF licenses this file to You under the Apache License, Version 2.0 (the "License"); you may not use this file except in compliance with the License. You may obtain a copy of the License at
http://www.apache.org/licenses/LICENSE-2.0
Unless required by applicable law or agreed to in writing, software distributed under the License is distributed on an "AS IS" BASIS, WITHOUT WARRANTIES OR CONDITIONS OF ANY KIND, either express or implied. See the License for the specific language governing permissions and limitations under the License. --> <tomcat-users> <role rolename="admin"/> <role rolename="manager"/> <role rolename="manager-gui"/> <role rolename="manager-script"/> <user username="admin" password="admin" roles="admin,manager,manager-gui,manager-script"/> </tomcat-users> |
2.2:在maven配置文件中配置tomcatserver
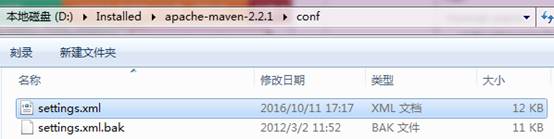
安装过maven的朋友们应该都知道maven的配置文件,找到maven的settings.xml配置文件,找到servers,然后配置tomcatserver,具体配置如下:
内容:
| <servers> <!-- server | Specifies the authentication information to use when connecting to a particular server, identified by | a unique name within the system (referred to by the 'id' attribute below). | | NOTE: You should either specify username/password OR privateKey/passphrase, since these pairings are | used together. | --> <server> <id>tomcat</id> <username>admin</username> <password>admin</password> </server> </servers > |
2.3:项目的pom.xml中配置tomcat-maven-plugin插件:
打开项目下的pom.xml配置文件,找到plugins标签,我们需要在那里配置tomcat-maven-plugin插件,从网上搜索了一些配置方法,发现有两种不同的配置,分界点是根据tomcat的版本来区分的,tomcat7需要使用新版本,新版本的groupId由org.codehaus.mojo改为org.apache.tomcat.maven,新版本同时也支持tomcat6,接下来的配置我就使用了新版本的配置,具体参考:
| <build> <plugins> <plugin> <artifactId>maven-compiler-plugin</artifactId> <version>2.0.2</version> <configuration> <source>1.5</source> <target>1.5</target> <fork>true</fork> <meminitial>128m</meminitial> <maxmem>512m</maxmem> <encoding>UTF-8</encoding> </configuration> </plugin> <plugin> <artifactId>maven-eclipse-plugin</artifactId> <version>2.5.1</version> <configuration> <additionalProjectnatures> <projectnature> org.springframework.ide.eclipse.core.springnature </projectnature> </additionalProjectnatures> <additionalBuildcommands> <buildcommand> org.springframework.ide.eclipse.core.springbuilder </buildcommand> </additionalBuildcommands> <downloadSources>false</downloadSources> <downloadJavadocs>false</downloadJavadocs> <wtpversion>1.5</wtpversion> </configuration> </plugin> <!-- 要加上下面的一句,否则执行:mvn package -Dmaven.test.skip=true的时候会报错 --> <plugin> <artifactId>maven-war-plugin</artifactId> <version>2.1.1</version> </plugin> <plugin> <groupId>org.apache.tomcat.maven</groupId> <artifactId>tomcat6-maven-plugin</artifactId> <version>2.0</version> <configuration> <url>http://127.0.0.1:8080/manager</url> <server>tomcat</server> <username>admin</username> <password>admin</password> <!-- <update>true</update> --> <path>/app-tpl-webapp</path> </configuration> </plugin> </plugins> </build> |
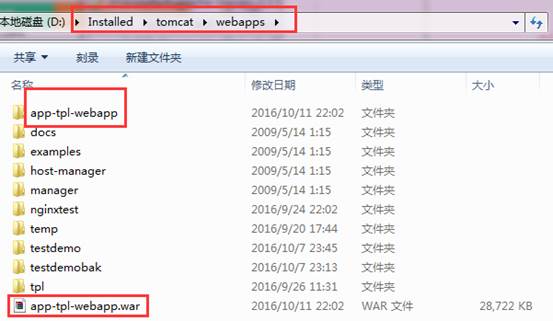
注意:这里的path的值就是最后发布后的文件名称。
| Tomcat6的url配置必须为http://localhost:8080/manager 后面不能加html或者text,不然报403错误。 Tomcat7的url配置必须为http://127.0.0.1:8080/manager/text text不能替换为html,不然报403错误。 |
配置参见:http://portlandgo.blog.163.com/blog/static/218936024201433032857104/
最后进入上面pom.xml所在位置,打开所属pom.xml下的cmd命令行窗口,在命令中输入:mvn tomcat6:redeploy
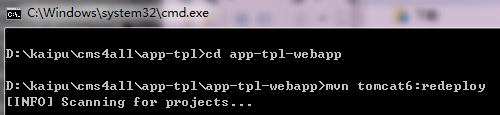
最后发现:
其它参考网站:http://www.cnblogs.com/xyb930826/p/5725340.html
其它参考内容:http://www.cnblogs.com/AloneSword/p/4100072.html
Maven已经是Java的项目管理标配,如何在JavaEE开发使用Maven调用Web应用,是很多同学关心的问题。本文将介绍,Maven如何介绍Tomcat插件。
Maven Tomcat插件现在主要有两个版本,tomcat-maven-plugin和tomcat7-maven-plugin,使用方式基本相同。
tomcat-maven-plugin 插件官网:http://mojo.codehaus.org/tomcat-maven-plugin/plugin-info.html。
tomcat7-maven-plugin 插件官网:http://tomcat.apache.org/maven-plugin.html。
tomcat-maven-plugin 插件使用
配置
在pom.xm 加入以下xml。
<plugin>
<groupId>org.codehaus.mojo</groupId>
<artifactId>tomcat-maven-plugin</artifactId>
<version>1.1</version>
<configuration>
<path>/wp</path>
<port>8080</port>
<uriEncoding>UTF-8</uriEncoding>
<url>http://localhost:8080/manager/html</url>
<server>tomcat6</server>
</configuration>
</plugin>
简要说明一下:
path 是访问应用的路径
port 是tomcat 的端口号
uriEncoding URL按UTF-8进行编码,这样就解决了中文参数乱码。
Server指定tomcat名称。
配置就这么简单,基本搞掂,下面看看如何使用。
插件运行
如果Eclipse安装了Maven插件,选 择pom.xml文件,击右键——>选择 Run As——> Maven build 。
如果是第一次运行,会弹出下面对话框。在Goals框加加入以下命令: tomcat:run
这样Tomcat 插件就可以运行。
下面介绍几个常用的Goal
| 命令 | 描述 |
| tomcat:deploy | 部署一个web war包 |
| tomcat:reload | 重新加载web war包 |
| tomcat:start | 启动tomcat |
| tomcat:stop | 停止tomcat |
| tomcat:undeploy | 停止一个war包 |
| tomcat:run | 启动嵌入式tomcat ,并运行当前项目 |
tomcat7-maven-plugin 使用
配置
两个插件使用方法基本一样,同样需要在pom.xml引用该插件,需要增加以下配置
<plugin>
<groupId>org.apache.tomcat.maven</groupId>
<artifactId>tomcat7-maven-plugin</artifactId>
<version>2.1</version>
<configuration>
<port>9090</port>
<path>/mgr</path>
<uriEncoding>UTF-8</uriEncoding>
<finalName>mgr</finalName>
<server>tomcat7</server>
</configuration>
</plugin>
具体配置一样。
插件使用
在这里要注意一下,该插件命名方式有些不同,比如启动tomcat,对应的目标命令是: tomcat7:run ,同样,其它命令也是这样,需要更改为:tomcat7:<插件执行点>
OK,配置就这么简单,如果需要在tomcat 跟踪联调,可以用Dubug 方式启动maven命令。如下图


 479
479


 被折叠的 条评论
为什么被折叠?
被折叠的 条评论
为什么被折叠?
 到【灌水乐园】发言


