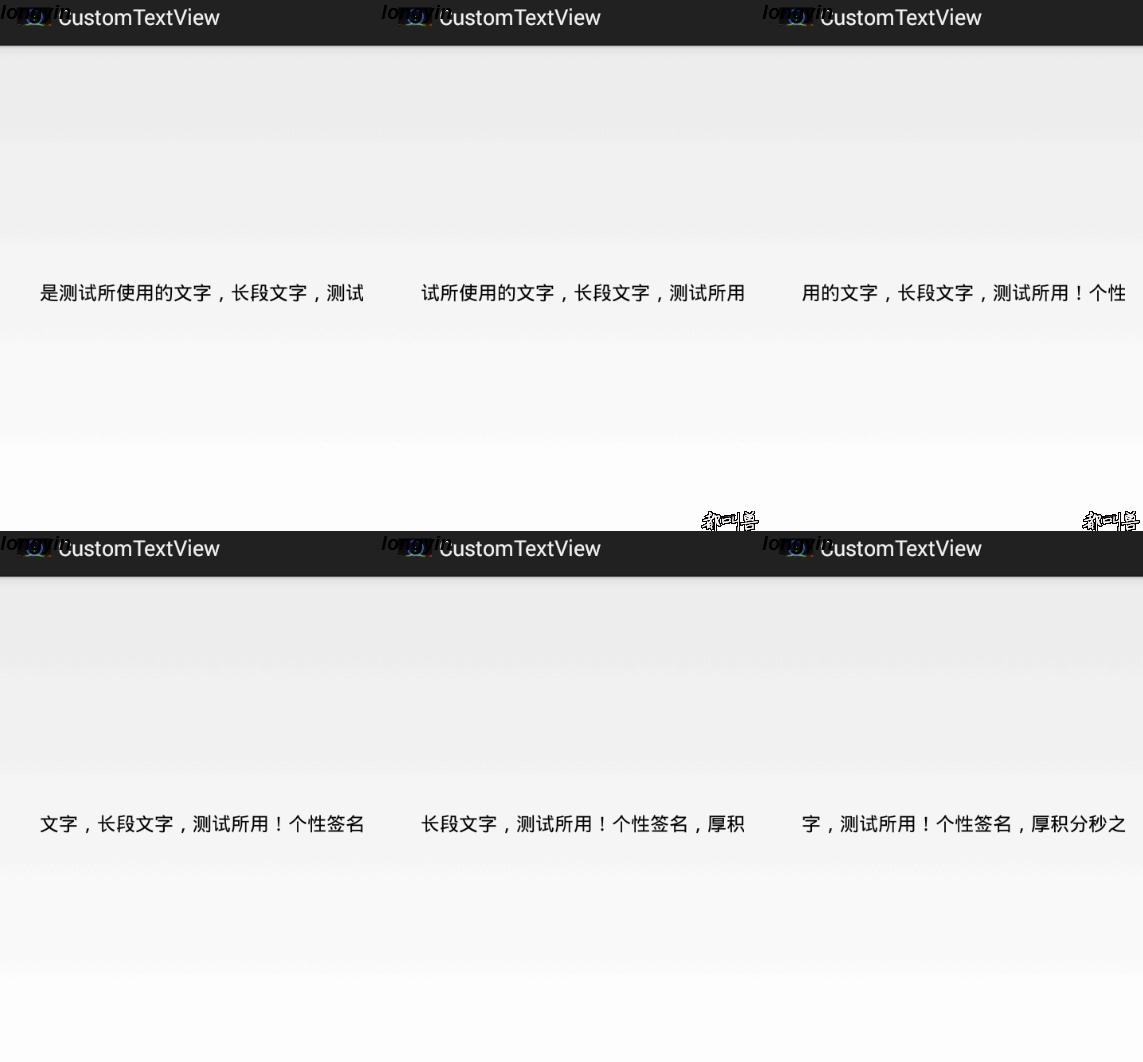
自定义UI是高手必经之路,本人目前也在加紧学习中,本篇博文中实现的事自定义TextView实现文本内容的滚动显示,在文本内容超出textview所能显示的区域之后,超出部分没有办法显示,为了能够显示,所以自定义一个属性,实现文本内容的滚动显示。(最后有源码下载)
废话不多说,先给出结果图:
相信大家一看结果图就明白了吧。
就是实现这种效果。比较简单。下面一一道来~~
因为在这个自定义组件中,使用到了滚动间隔时间,所以需要增加一个自定义属性,那么如何增加自定义属性呢?
首先在values文件夹下面,创建一个attr.xml文件(如果已经有了就不需要创建了),在attr.xml中增加如下的内容:
<?xml version="1.0" encoding="utf-8"?>
<resources>
    <attr name="duration" format="integer"/>
    <declare-styleable name="customTextView">
        <attr name="duration" />
    </declare-styleable>
</resources>
这样我们就完成了声明自定义的属性duration。并且,指定了该属性的类型integer类型。
(这里的format值有几种形式:string,color,demension,integer,enum,reference,float,boolean,fraction,flag等,都很简单,几个特殊的我在这里说一下:enum类型,相当于android:grivity属相的值,值是从固定的几个值中选择的。
reference类型,就是android:src属性的值类型,需要引用R.drawable.xx)
定义了属性之后,就要使用了,怎么使用呢?下面给出布局文件来使用:
<RelativeLayout xmlns:android="http://schemas.android.com/apk/res/android"
    xmlns:tools="http://schemas.android.com/tools"
    xmlns:yin="http://schemas.android.com/apk/res/com.yin.customtextview"
    android:layout_width="match_parent"
    android:layout_height="match_parent"
    android:paddingBottom="@dimen/activity_vertical_margin"
    android:paddingLeft="@dimen/activity_horizontal_margin"
    android:paddingRight="@dimen/activity_horizontal_margin"
    android:paddingTop="@dimen/activity_vertical_margin"
    tools:context="com.yin.customtextview.MainActivity" >

    <com.yin.customtextview.CustomTextView
        android:layout_width="wrap_content"
        android:layout_height="wrap_content"
        android:text="@string/hello_world"
        android:textSize="16sp"
        android:lines="1"
        yin:duration="1000"
        android:layout_centerInParent="true" />

</RelativeLayout>
这就是上面的图片的界面的布局文件,里面比较特殊的是这句代码:
xmlns:yin=”http://schemas.android.com/apk/res/com.yin.customtextview”
这是自定义的,yin是自定义的,自己想如何定义名字都是可以的,后面的值http://schemas.android.com/apk/res/com.yin.customtextview中前面部分是固定的,http://schemas.android.com/apk/res/xxx,xxx部分是项目的包名packagename,这样定义之后,就可以在下面的自定义组件中使用了。例如上面的布局文件中:yin:duration=”1000”
下面给出主界面的代码:
public class MainActivity extends Activity {

    @Override
    protected void onCreate(Bundle savedInstanceState) {
        super.onCreate(savedInstanceState);
        setContentView(R.layout.activity_main);
    }
}
非常简单吧,其实主要的是自定义的CustomTextView,代码如下:
public class CustomTextView extends TextView {

    private int duration;
    private Timer timer;
    private String text;
    private String textc;
    private int i = 0;
    public CustomTextView(Context context) {
        super(context);
        init(context,null,0);
    }

    public CustomTextView(Context context, AttributeSet attrs) {
        super(context, attrs);
        init(context, attrs, 0);
    }

    public CustomTextView(Context context, AttributeSet attrs, int defStyle) {
        super(context, attrs, defStyle);
        init(context, attrs, defStyle);
    }
    private void init(Context context,AttributeSet attrs, int defStyle){
        TypedArray typedArray = context.getTheme().obtainStyledAttributes(attrs,
                R.styleable.customTextView, defStyle, 0);
        int j = typedArray.getIndexCount();
        for (int i = 0; i < j; i++) {
            int k = typedArray.getIndex(i);
            switch (k) {
            case R.styleable.customTextView_duration:
                duration = typedArray.getInt(k, 0);
                break;
            default:
                break;
            }
        }
        typedArray.recycle();//清除设置,否则上次的定义值可能会影响本次的效果
    }

    @Override
    protected void onAttachedToWindow() {
        super.onAttachedToWindow();
        text = getText().toString();
        timer = new Timer();
        TimerTask task = new TimerTask() {
            @Override
            public void run() {
                textc = text.substring(i, text.length());
                i++;
                if (i>=text.length()) {
                    i=0;
                }
                postInvalidate();
            }
        };
        timer.schedule(task, 100, duration);
    }

    @Override
    protected void onDraw(Canvas canvas) {
        if (textc != null) {
            canvas.drawText(textc, getBaseline(), getBaseline(), getPaint());
        }
    }

    @Override
    public boolean isInEditMode() {
        return false;
    }

    //脱离Window,定时器取消
    @Override
    protected void onDetachedFromWindow() {
        super.onDetachedFromWindow();
        timer.cancel();
    }
}
整个自定义TextView组件还是比较简单的,主要使用了一个定时器,在初始化时候,定义定时器并启动,每个duration时间,执行一次,这样就实现了文本内容的滚动显示。
各位朋友,给留个言,顶一下呗~~~^_^


 2329
2329


 被折叠的 条评论
为什么被折叠?


