


之前记录过OC版实现3D Touch功能的小小演示,最近无事整整swift,也弄个swift版的3D Touoch。。。
上代码。

一、3D Touch重按主屏icon出现快捷标签有两种添加方式:
1.静态添加,在工程中的
info.plist文件中添加,这种方式添加的标签安装后就能显示

2.动态添加,通过代码动态添加快速入口。这种方式添加的标签,必须先运行一次App才会出现。
func application(application: UIApplication, didFinishLaunchingWithOptions launchOptions: [NSObject: AnyObject]?) -> Bool {
        // Override point for customization after application launch.
        self.window?.frame = UIScreen.mainScreen().bounds
        self.window?.makeKeyAndVisible()

        UIApplication.sharedApplication().statusBarStyle = UIStatusBarStyle.LightContent

        self.window = UIWindow(frame: UIScreen.mainScreen().bounds)
        self.window?.makeKeyWindow()

        self.configShortCutItems()

        self.window?.rootViewController = McUITabBarController()

        return true
    }
func configShortCutItems()
{
//动态添加方式
let icon1 = UIApplicationShortcutIcon(type: .Play)
let item1 = UIMutableApplicationShortcutItem(type: "777", localizedTitle: "标题", localizedSubtitle: "副标题", icon: icon1, userInfo: nil)
let icon2 = UIApplicationShortcutIcon(type: .Add)
let item2 = UIMutableApplicationShortcutItem(type: "888", localizedTitle: "标题", localizedSubtitle: "副标题", icon: icon2, userInfo: nil)
let icon3 = UIApplicationShortcutIcon(templateImageName: "shareIcon")
let item3 = UIMutableApplicationShortcutItem(type: "999", localizedTitle: "自定义图片", localizedSubtitle: nil, icon: icon3, userInfo: nil)
UIApplication.sharedApplication().shortcutItems = [item1,item2,item3]
}
需要说明一点,主屏呼出的快捷标签,静态和动态添加的共只能有四个。
3D Touch在appdelegate.swift代理方法:
//pragma mark - 3D Touch
    func application(application: UIApplication, performActionForShortcutItem shortcutItem: UIApplicationShortcutItem, completionHandler: (Bool) -> Void) {
        switch shortcutItem.type {
        case "666":
            print("静态添加")
        case "777":
            print("动态代码添加一")
        case "888":
            print("动态代码添加二")
        case "999":
            print("自定义图片")
        default:
            print("")
        }
    }
二、3D Touch 的peek和pop功能在tableView上的简单实现
话不多说,直接上代码
1.peek预览
DDDTouchVC.swift
3D Touch的代理控制器需要实现 UIViewControllerPreviewingDelegate 协议
import UIKit

class DDDTouchVC: McBaseViewController,UITableViewDataSource,UITableViewDelegate,UIViewControllerPreviewingDelegate {

    static let cellIdentifer = "myCell"
    var tableView: UITableView?
    var isCan3DTouch = true
    var itemArray : Array = [Dictionary<String,String>]()

    override func viewDidLoad() {
        super.viewDidLoad()

        // Do any additional setup after loading the view.
        self.setCustomTitle("3D Touch")
        self.initData()
        self.initSubView()
        if traitCollection.forceTouchCapability == UIForceTouchCapability.Available {

            self.isCan3DTouch = true
        }
        else {
            self.isCan3DTouch = false
        }
    }

    func initData()
    {
        let dic1 = ["m":"http://a.hiphotos.baidu.com/image/h%3D360/sign=1698b41ebb389b5027ffe654b535e5f1/a686c9177f3e6709e974ebff39c79f3df8dc55bd.jpg"]
        let dic2 = ["mm":"http://b.hiphotos.baidu.com/image/h%3D360/sign=ff34dff8bd389b5027ffe654b537e5f1/a686c9177f3e670900d880193fc79f3df9dc5578.jpg"]
        let dic3 = ["mmm":"http://a.hiphotos.baidu.com/image/h%3D360/sign=f527ab2f4b540923b5696578a259d1dc/dcc451da81cb39dbce6b325ad2160924ab183016.jpg"]
        let dic4 = ["mmmm":"http://d.hiphotos.baidu.com/image/h%3D360/sign=81d5d22779f40ad10ae4c1e5672d1151/d439b6003af33a8762fee505c45c10385343b51a.jpg"]
        let dic5 = ["mmmmm":"http://d.hiphotos.baidu.com/image/h%3D200/sign=8d3a52a04ded2e73e3e9812cb701a16d/f7246b600c33874450b89258560fd9f9d72aa091.jpg"]
        let dic6 = ["mmmmmm":"http://h.hiphotos.baidu.com/image/h%3D360/sign=e53dee25d5ca7bcb627bc1298e086b3f/a2cc7cd98d1001e9ae32c3e9ba0e7bec55e797ce.jpg"]
        let dic7 = ["mmmmm":"http://g.hiphotos.baidu.com/image/h%3D360/sign=8cb0e6191a178a82d13c79a6c602737f/6c224f4a20a446230761b9b79c22720e0df3d7bf.jpg"]
        let dic8 = ["mmmm":"http://a.hiphotos.baidu.com/image/h%3D360/sign=80285822f9f2b211fb2e8348fa806511/bd315c6034a85edf1da1c0724b540923dd5475b5.jpg"]
        let dic9 = ["mmm":"http://e.hiphotos.baidu.com/image/h%3D360/sign=708629f379cb0a469a228d3f5b62f63e/7dd98d1001e939015d4a463779ec54e736d1966b.jpg"]
        let dic10 = ["mm":"http://h.hiphotos.baidu.com/image/h%3D360/sign=95102c30bc096b639e1958563c338733/3801213fb80e7beccbb1e8fe2d2eb9389b506b42.jpg"]
        let dic11 = ["m":"http://a.hiphotos.baidu.com/image/h%3D360/sign=cbd227bf8e5494ee9822091f1df5e0e1/c2cec3fdfc039245ee84470f8594a4c27d1e25f8.jpg"]
        let dic12 = ["mm":"http://e.hiphotos.baidu.com/image/h%3D360/sign=87824d652adda3cc14e4be2631e83905/b03533fa828ba61e64671cd54534970a314e59bb.jpg"]
        itemArray.append(dic1)
        itemArray.append(dic2)
        itemArray.append(dic3)
        itemArray.append(dic4)
        itemArray.append(dic5)
        itemArray.append(dic6)
        itemArray.append(dic7)
        itemArray.append(dic8)
        itemArray.append(dic9)
        itemArray.append(dic10)
        itemArray.append(dic11)
        itemArray.append(dic12)
    }

    func initSubView()
    {
        self.tableView = UITableView(frame: CGRectMake(0, 0, McConstant.screenWidth, McConstant.screenHeight), style: UITableViewStyle.Plain)
        self.tableView?.backgroundColor = UIColor.clearColor()
        self.tableView?.dataSource = self
        self.tableView?.delegate = self
        self.view.addSubview(self.tableView!)
    }

    override func didReceiveMemoryWarning() {
        super.didReceiveMemoryWarning()
        // Dispose of any resources that can be recreated.
    }

    func tableView(tableView: UITableView, numberOfRowsInSection section: Int) -> Int {
        return itemArray.count
    }

    func tableView(tableView: UITableView, cellForRowAtIndexPath indexPath: NSIndexPath) -> UITableViewCell {
        var cell = tableView.dequeueReusableCellWithIdentifier(ModuleOneVC.cellIdentifer)
        if cell == nil {
            cell = UITableViewCell(style: UITableViewCellStyle.Default, reuseIdentifier: ModuleOneVC.cellIdentifer)
            if self.isCan3DTouch {
                //注册3D Touch
                registerForPreviewingWithDelegate(self, sourceView: (cell?.contentView)!)
            }
        }
        let dic = itemArray[indexPath.row]
        cell?.textLabel?.text = Array(dic.keys)[0]
        cell?.textLabel?.textColor = UIColor.blackColor()
        cell?.backgroundColor = UIColor.clearColor()
        return cell!
    }

    func tableView(tableView: UITableView, heightForRowAtIndexPath indexPath: NSIndexPath) -> CGFloat {
        return 50
    }

    func tableView(tableView: UITableView, didSelectRowAtIndexPath indexPath: NSIndexPath) {
        tableView.deselectRowAtIndexPath(indexPath, animated: true)
        let dic = itemArray[indexPath.row]
        self.navigationController?.pushViewController(DDDTouchPeekVC(imgUrl: Array(dic.values)[0]), animated: true)

    }

    //mark -UIViewControllerPreviewingDelegate 3D Touch代理方法
    func previewingContext(previewingContext: UIViewControllerPreviewing, viewControllerForLocation location: CGPoint) -> UIViewController? {
        let indexPath = self.tableView?.indexPathForCell(previewingContext.sourceView.superview as! UITableViewCell)
        let dic = itemArray[indexPath!.row]
        let peekVC = DDDTouchPeekVC(imgUrl: Array(dic.values)[0])
        peekVC.preferredContentSize = CGSizeMake(0, 400)
        return peekVC
    }

    func previewingContext(previewingContext: UIViewControllerPreviewing, commitViewController viewControllerToCommit: UIViewController) {
        self.navigationController?.pushViewController(viewControllerToCommit, animated: true)
    }

}
2.pop界面控制器
DDDTouchPeekVC.swift
import UIKit
class DDDTouchPeekVC: McBaseViewController {
var etag:String?
var potoView:UIImageView?
var imageUrl:String?
init(imgUrl:String){
super.init(nibName: nil, bundle: nil)
self.imageUrl = imgUrl
}
required init?(coder aDecoder: NSCoder) {
fatalError("init(coder:) has not been implemented")
}
override func viewDidLoad() {
super.viewDidLoad()
// Do any additional setup after loading the view.
self.setCustomTitle("3D TouchPeekVC")
self.initSubView()
self.initData()
}
override func didReceiveMemoryWarning() {
super.didReceiveMemoryWarning()
// Dispose of any resources that can be recreated.
}
func initData()
{
let url = NSURL.init(string: imageUrl!)
let request = NSURLRequest(URL: url!)
let task = NSURLSession.sharedSession().dataTaskWithRequest(request) { (dataa, response, error) in
dispatch_async(dispatch_get_main_queue(), {
//
self.potoView?.image = UIImage(data: dataa!)
})
}
task.resume()
}
func initSubView(){
let titleView = UILabel(frame: CGRectMake(0, 0, McConstant.screenWidth, 64))
titleView.backgroundColor = UIColor(red: 52/255, green: 222/255, blue: 136/255, alpha: 1).colorWithAlphaComponent(0.8)
titleView.textAlignment = NSTextAlignment.Center
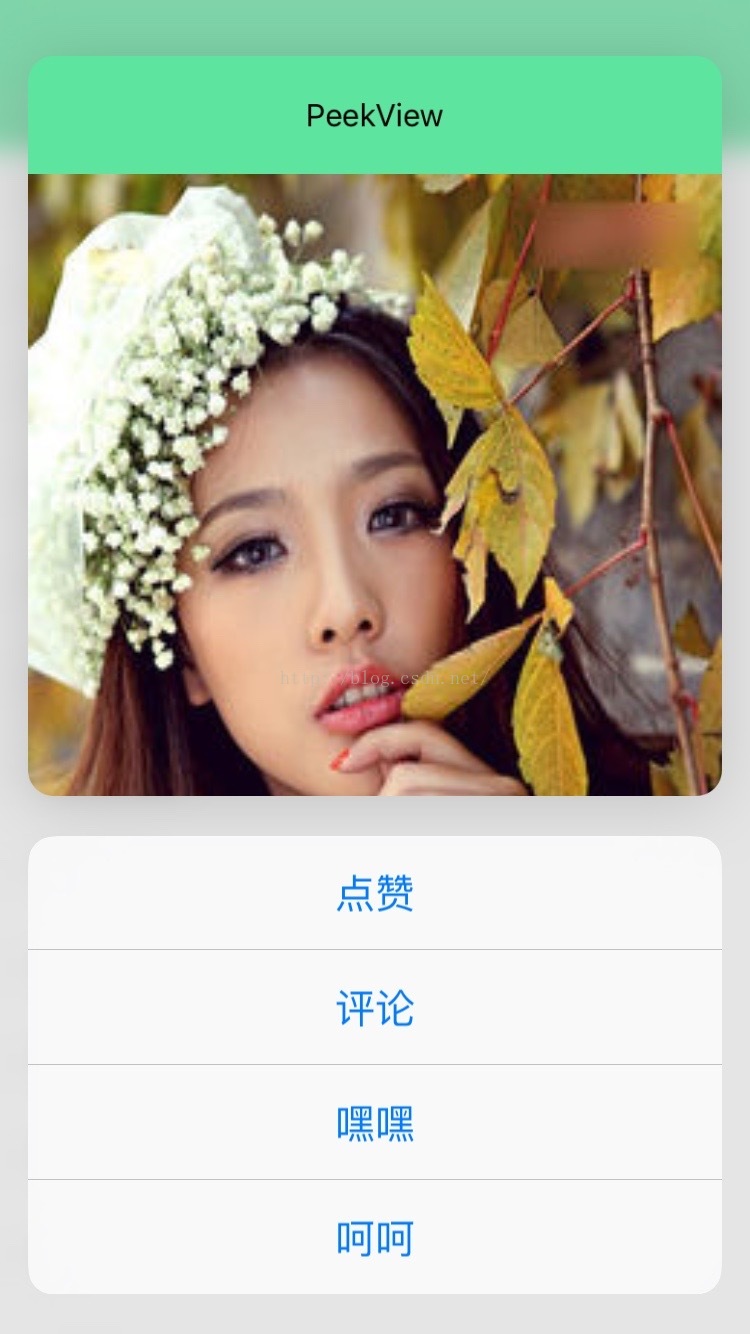
titleView.text = "PeekView"
self.view.addSubview(titleView)
self.potoView = UIImageView(frame: CGRect(x: 0, y: 64, width: McConstant.screenWidth, height: McConstant.screenHeight-60))
self.potoView?.contentMode = UIViewContentMode.ScaleToFill
self.view.addSubview(self.potoView!)
}
//pragma mark - 底部预览界面选项
override func previewActionItems() -> [UIPreviewActionItem] {
//
let action1 = UIPreviewAction(title: "点赞", style: .Default) { (action, previewViewController) in
//
}
let action2 = UIPreviewAction(title: "评论", style: .Default) { (action, previewViewController) in
//
}
let action3 = UIPreviewAction(title: "嘿嘿", style: .Default) { (action, previewViewController) in
//
}
let action4 = UIPreviewAction(title: "呵呵", style: .Default) { (action, previewViewController) in
//
}
let actionItems = [action1,action2,action3,action4]
return actionItems
}
}
至此,3D Touch功能在tableView上列表的简单功能就完成了, 这边是peek 、pop展示的是加载一张百度连接的图片。匆忙而就,写得不详细,如有错误,谅解。。。
上效果图


 1037
1037


 被折叠的 条评论
为什么被折叠?
被折叠的 条评论
为什么被折叠?
 到【灌水乐园】发言


