


这一篇总结zookeeper的安装,这一篇安装的介绍是为了以后使用zookeeper做铺垫!
一:单机版的zookeeper安装
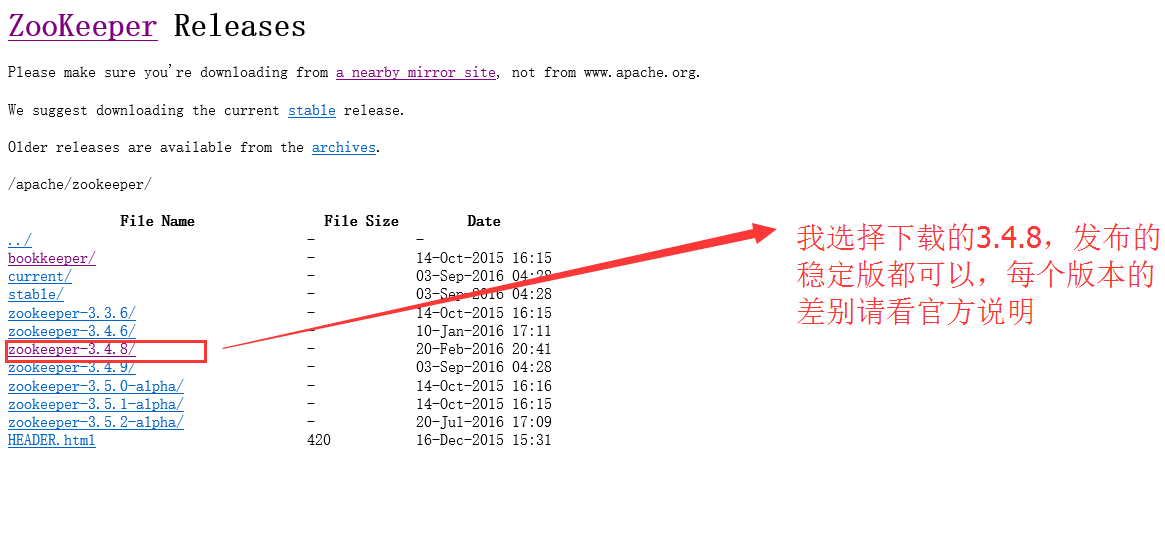
要安装zookeeper,那么首先要现在安装包,下载的地址:http://mirrors.hust.edu.cn/apache/zookeeper/
安装的文档:http://zookeeper.apache.org/doc/trunk/zookeeperStarted.html
1.zookeeper在Windows下的安装和使用
(1):进入下载页面:(下载zip文件,下载地址:http://download.csdn.net/detail/u010648555/9683505)
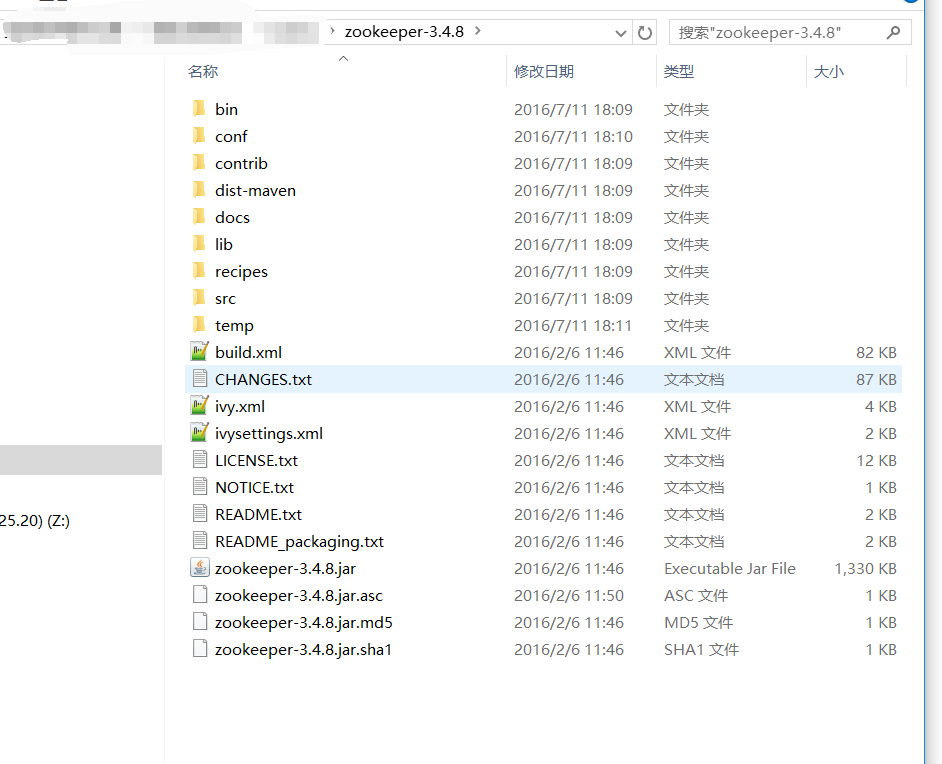
(2):下载安装包完成之后,在对应的位置,解压安装包,如下是我解压后的内容:
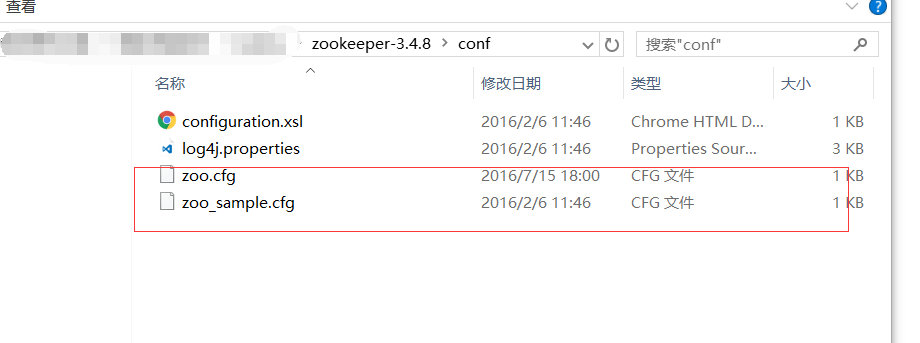
(3):修改conf目录下的zoo_sample.cfg文件(我一般会复制一份,修改名称为zoo.cfg,保留原始的zoo_sample.cfg文件),为什么修改conf下文件名称为zoo.cfg,请看官方文档说明!
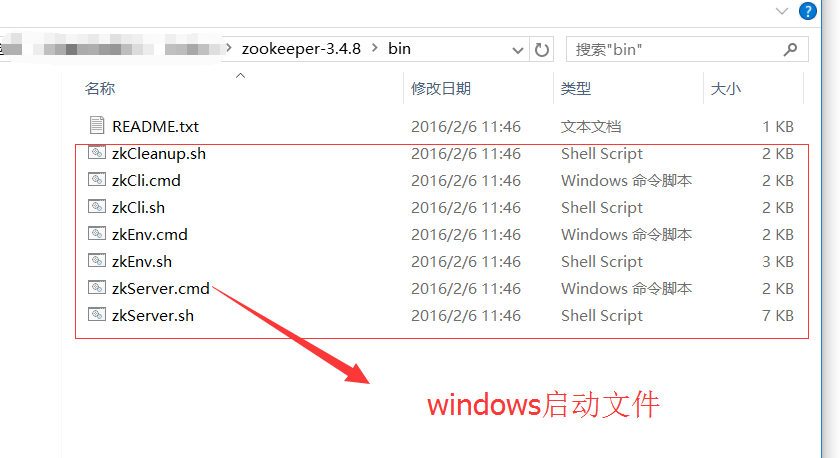
(4):bin目录下为zookeeper的一下命令,例如启动服务,关闭服务等!
(5):启动zookeeper服务,进入到zookeeper解压的目录的bin下,使用下面命令
zkServer.cmd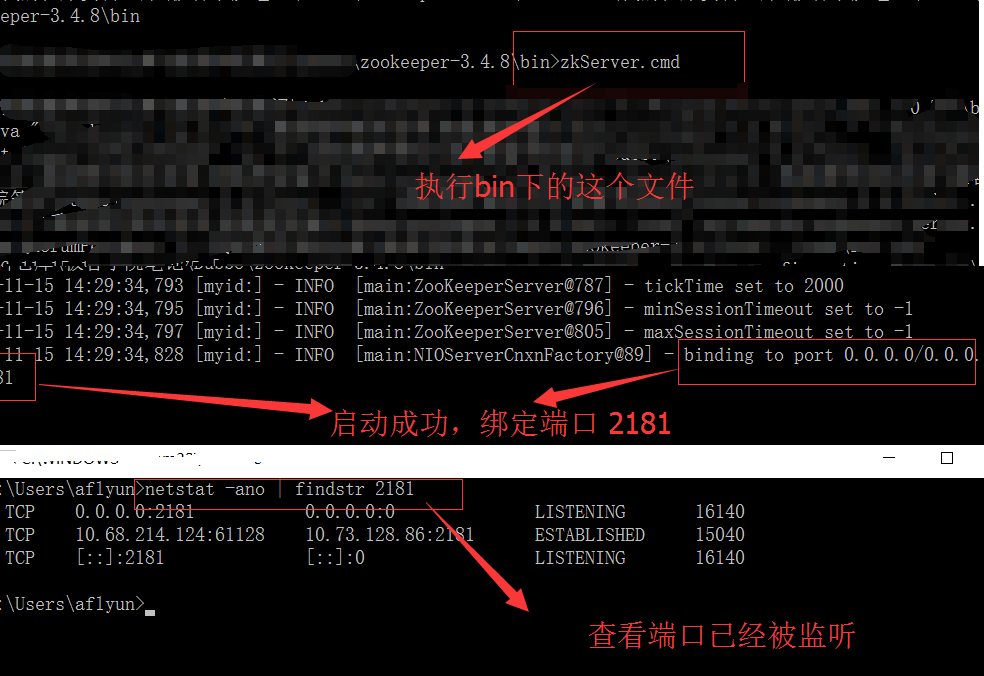
要断开服务,关闭dos窗口,或者使用Ctrl+c。
2.zookeeper在Linux下的安装和使用
在Linux系统下安装zookeeper,我使用的是centos 6.3 32位,我使用xshell远程连接VMware。
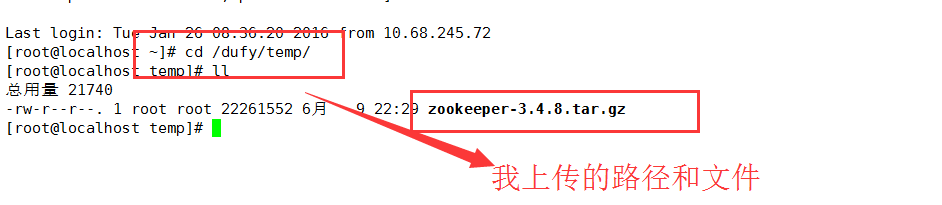
(1):下载安装包,如上下载地址,下载安装包为zookeeper-3.4.8.tar.gz
(2):将安装包上传到服务器上,在当前目录下,进行解压,解压的命令为:
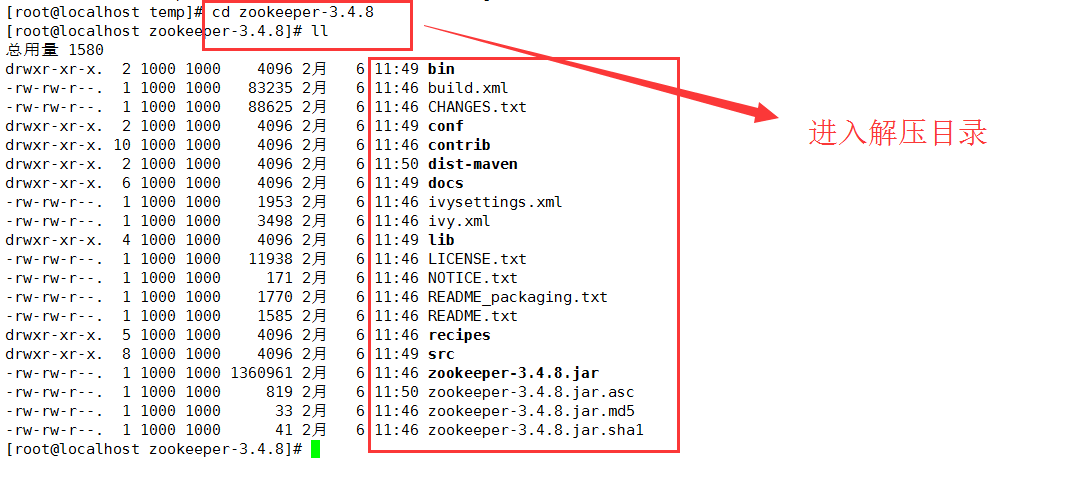
tar -zxvf zookeeper-3.4.8.tar.gz(3):解压之后,进入解压的目录如下:
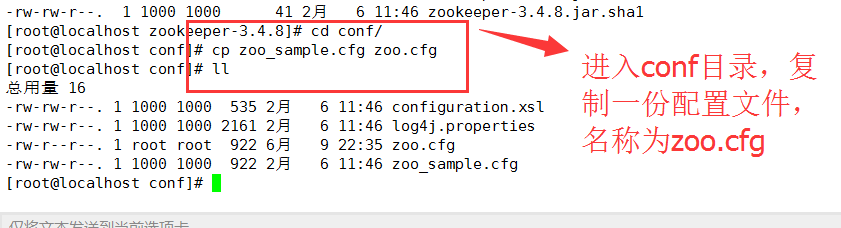
修改conf目录下的zoo_sample.cfg文件(我一般会复制一份,修改名称为zoo.cfg,保留原始的zoo_sample.cfg文件),为什么修改conf下文件名称为zoo.cfg,请看官方文档说明!
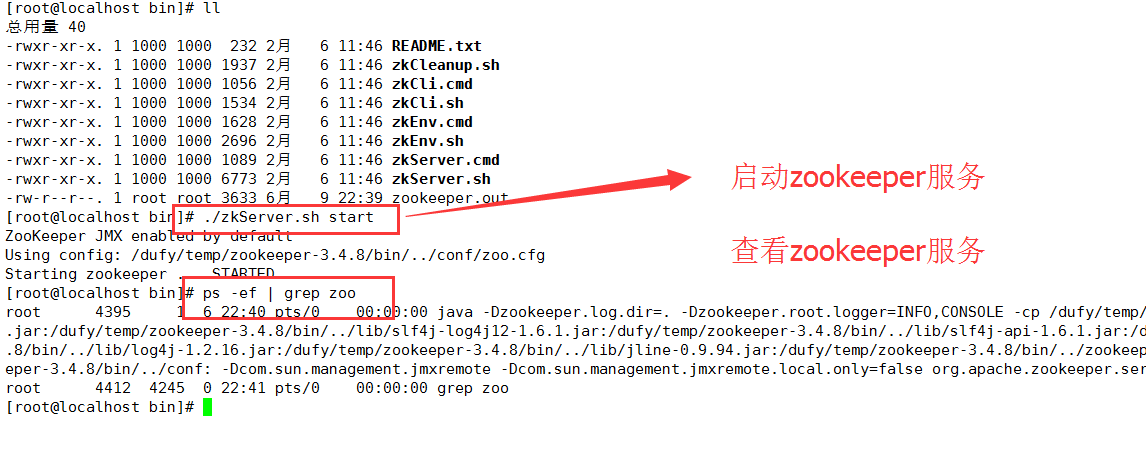
(4):启动zookeeper的服务,重新回到bin目录下,执行下面命令
zkService.sh start然后查看端口是否监听,端口监听,启动正常!
(5):关闭服务

二:集群环境中zookeeper的安装和配置
开通建立集群主机的相关网络策略
10.254.201.120、10.254.201.121、10.254.201.122在各个主机上安装zookeeper,参考上面单台zookeeper的安装过程
修改 zoo.cfg
# The number of milliseconds of each tick
tickTime=2000
# The number of ticks that the initial
# synchronization phase can take
initLimit=10
# The number of ticks that can pass between
# sending a request and getting an acknowledgement
syncLimit=5
# the directory where the snapshot is stored.
# do not use /tmp for storage, /tmp here is just
# example sakes.
dataDir=/interactive/zookeeper/data
dataLogDir=/interactive/zookeeper/dataLog
# the port at which the clients will connect
# zookeeper 的端口
clientPort=19181
# the maximum number of client connections.
# increase this if you need to handle more clients
#maxClientCnxns=60
#
# Be sure to read the maintenance section of the
# administrator guide before turning on autopurge.
#
# http://zookeeper.apache.org/doc/current/zookeeperAdmin.html#sc_maintenance
#
# The number of snapshots to retain in dataDir
#autopurge.snapRetainCount=3
# Purge task interval in hours
# Set to "0" to disable auto purge feature
#autopurge.purgeInterval=1
server.1=10.254.201.120:19191:19192
server.2=10.254.201.121:19191:19192
server.3=10.254.201.122:19191:19192
其中主要增加了下面集群的配置信息,
如上面配置中:
server.1=10.254.201.120:19191:19192
server.2=10.254.201.121:19191:19192
server.3=10.254.201.122:19191:19192
- 10.254.201.120、10.254.201.121、10.254.201.123是集群主机ip。
16191端口为zookeeper相互通信端口,16192位通信备用端口
- 在10.254.201.120的 /zookeeper、data目录下 增加myid文件。其他主机类似操作
touch myid
vim myid
在myid中输入 1
[dufy@dufy data]$ cat myid
1
[dufy@dufy data]$
myid里面的值,为zoo.cfg中server. 后面配置的值, 例如上面配置中10.254.201.120的myid里面的值就为1,指定的就是第一台主机!
- 依次启动zookeeper即可
注意事项:
- 当启动第一个zookeeper的时候,日志会报错,原因是找不到另外2个zookeeper,属于正常情况,可以继续启动另外2个,当3个都正常启动起来后,就会没有错误了
- zookeeper依次启动后,不会是第一个启动的位主,它是随机选定的,所以可以不用担心主从问题,状态可以查看
sh zkServer.sh status
三:zookeeper配置文件讲解
zoo.cfg 配置文件的说明
# The number of milliseconds of each tick
# zk中的一个时间单元。zk中所有的时间都是以这个时间单元为基础,进行整数倍配置的。例如,session最小超时时间是2*tickTime
tickTime=2000
# The number of ticks that the initial
# synchronization phase can take
#Follower在启动过程中,会从Leader同步所有最新数据,然后确定自己能够对外服务的起始状态。Leader允许F在initLimit时间内完成这#个工作。通常情况下,我们不用太在意这个参数的设置。如果ZK集群的数据量确实很大了,F在启动的时候,从Leader上同步数据的时间#也会相应变长,因此在这种情况下,有必要适当调大这个参数了。(No Java system property)
initLimit=10
# The number of ticks that can pass between
# sending a request and getting an acknowledgement
#在运行过程中,Leader负责与ZK集群中所有机器进行通信,例如通过一些心跳检测机制,来检测机器的存活状态。如果L发出心跳包在syn#cLimit之后,还没有从F那里收到响应,那么就认为这个F已经不在线了。注意:不要把这个参数设置得过大,否则可能会掩盖一些问题。#(No Java system property)
syncLimit=5
# the directory where the snapshot is stored.
# do not use /tmp for storage, /tmp here is just
# example sakes.
#存储快照文件snapshot的目录。默认情况下,事务日志也会存储在这里。建议同时配置参数dataLogDir, #事务日志的写性能直接影响zk性能
dataDir=/tmp/zookeeper
# the port at which the clients will connect
#客户端连接server的端口,即对外服务端口,一般设置为2181吧。
clientPort=2181
# the maximum number of client connections.
# increase this if you need to handle more clients
#单个客户端与单台服务器之间的连接数的限制,是ip级别的,默认是60,如果设置为0,那么表明不作任何限制。
#maxClientCnxns=60
#
# Be sure to read the maintenance section of the
# administrator guide before turning on autopurge.
#
# http://zookeeper.apache.org/doc/current/zookeeperAdmin.html#sc_maintenance
#
# The number of snapshots to retain in dataDir
#在上文中已经提到,3.4.0及之后版本,ZK提供了自动清理事务日志和快照文件的功能,这个参数指定了清理频率,单位是小时,需要配##置一个1或更大的整数,默认是0,表示不开启自动清理功能
#autopurge.snapRetainCount=3
# Purge task interval in hours
# Set to "0" to disable auto purge feature
#这个参数和上面的参数搭配使用,这个参数指定了需要保留的文件数目。默认是保留3个
#autopurge.purgeInterval=1
好多技术,是要总结起来的,要不学过很多细节就会忘记,那么在去查资料又会浪费很多时间,何不在学习的时候,及时总结下来!
如果您觉得这篇博文对你有帮助,请点赞或者喜欢,让更多的人看到,谢谢!
如果帅气(美丽)、睿智(聪颖),和我一样简单善良的你看到本篇博文中存在问题,请指出,我虚心接受你让我成长的批评,谢谢阅读!
祝你今天开心愉快!
欢迎访问我的csdn博客,我们一同成长!
不管做什么,只要坚持下去就会看到不一样!在路上,不卑不亢!


 8646
8646


 被折叠的 条评论
为什么被折叠?
被折叠的 条评论
为什么被折叠?
 到【灌水乐园】发言


