


什么是 Retrofit ?
Retrofit是Square开发的一个Android和Java的REST客户端库。这个库非常简单并且具有很多特性,相比其他的网络库,更容易让初学者快速掌握。它可以处理GET、POST、PUT、DELETE…等请求,还可以使用picasso加载图片。
常用注解
Retrofit 2.0底层依赖OkHttp实现,也就是说Retrofit本质上就是对OkHttp的更进一步封装。Retrofit和其它Http库最大区别在于通过大范围使用注解简化Http请求。
Retrofit使用注解来描述HTTP请求:
- URL参数的替换和query参数的支持
- 对象转化为请求体(如:JSON,protocol buffers等)
- 多重请求体和文件上传
Retrofit中的注解大体分为以下几类:用于标注请求方式的注解、用于标记请求头的注解、用于标记请求参数的注解。其实,任何一种Http库都提供了相关的支持,无非在retrofit中是用注解来简化。
请求方法注解
该类型的注解用于标注不同的http请求方式,主要有以下几种:
| 注解 | 说明 |
|---|---|
| @GET | 表明这是get请求 |
| @POST | 表明这是post请求 |
| @PUT | 表明这是put请求 |
| @DELETE | 表明这是delete请求 |
| @PATCH | 表明这是一个patch请求,该请求是对put请求的补充,用于更新局部资源 |
| @HEAD | 表明这是一个head请求 |
| @OPTIONS | 表明这是一个option请求 |
| @HTTP | 通用注解,可以替换以上所有的注解,其拥有三个属性:method,path,hasBody |
这里不再对其使用做什么说明,官网的示例已经写的非常不错。平时开发中我们也只用到了get和post,这是件很悲伤的事情,实际上这些请求方法各自有各自的使用场景。
最容易混淆的是put,post,patch这三者,简单的说,post表示新增,put可以理解为完整替换,而patch则是更新资源。顺便来看看官方定义:
- POST to create a new resource when the client cannot predict the identity on the origin server (think a new order)
- PUT to override the definition of a specified resource with what is passed in from the client
- PATCH to override a portion of a specified resource in a predictable and effectively transactional way (if the entire patch cannot be performed, the server should not do any part of it)
接下来我们来重点说说@HTTP:
@HTTP注解很少用到,这里用个简单的例子来说明下:我们当前存在获取验证码的请求:
- 1
- 2
- 1
- 2
用@HTTP代替后:
- 1
- 2
- 1
- 2
请求头注解
该类型的注解用于为请求添加请求头。
| 注解 | 说明 |
|---|---|
| @Headers | 用于添加固定请求头,可以同时添加多个。通过该注解添加的请求头不会相互覆盖,而是共同存在 |
| @Header | 作为方法的参数传入,用于添加不固定值的Header,该注解会更新已有的请求头 |
首先来看@Headers的示例:
- 1
- 2
- 3
- 4
- 5
- 6
- 7
- 8
- 9
- 10
- 11
- 12
- 1
- 2
- 3
- 4
- 5
- 6
- 7
- 8
- 9
- 10
- 11
- 12
接下来来看@Header的示例:
- 1
- 2
- 1
- 2
可以看出@Header是以方法参数形势传入的,想必你现在能理解@Headers和@Header之间的区别了。
请求和响应格式注解
该类型的注解用于标注请求和响应的格式。
| 名称 | 说明 |
|---|---|
| @FormUrlEncoded | 表示请求发送编码表单数据,每个键值对需要使用@Field注解 |
| @Multipart | 表示请求发送multipart数据,需要配合使用@Part |
| @Streaming | 表示响应用字节流的形式返回.如果没使用该注解,默认会把数据全部载入到内存中.该注解在在下载大文件的特别有用 |
请求参数类注解
该类型的注解用来标注请求参数的格式,有些需要结合上面请求和响应格式的注解一起使用。
| 名称 | 说明 |
|---|---|
| @Body | 多用于post请求发送非表单数据,比如想要以post方式传递json格式数据 |
| @Filed | 多用于post请求中表单字段,Filed和FieldMap需要FormUrlEncoded结合使用 |
| @FiledMap | 和@Filed作用一致,用于不确定表单参数 |
| @Part | 用于表单字段,Part和PartMap与Multipart注解结合使用,适合文件上传的情况 |
| @PartMap | 用于表单字段,默认接受的类型是Map |
@Headers
- 1
- 2
- 3
- 1
- 2
- 3
当然@Header也支持同时设置多个:
- 1
- 2
- 3
- 4
- 5
- 6
- 1
- 2
- 3
- 4
- 5
- 6
@Header
- 1
- 2
- 1
- 2
@Body
根据转换方式将实例对象转换为相应的字符串作为请求参数传递。比如在很多情况下,你可能需要以post的方式上传json格式的数据。那么该怎么来做呢?
我们以一个登录接口为例,该接口接受以下格式的json数据:
{“password”:”abc123456”,”username”:”18611990521”}
首先建立请求实体,为了区别其他实体,通常来说约定以Post为后缀.
- 1
- 2
- 3
- 4
- 5
- 6
- 7
- 8
- 9
- 10
- 1
- 2
- 3
- 4
- 5
- 6
- 7
- 8
- 9
- 10
然后定义该请求api:
- 1
- 2
- 1
- 2
retrofit默认采用json转化器,因此在我们发送数据的时候会将LogintPost对象映射成json数据,这样发送出的数据就是json格式的。另外,如果你不确定这种转化行为,可以强制指定retrofit使用Gson转换器:
- 1
- 2
- 3
- 4
- 1
- 2
- 3
- 4
更详细的内容参照retrofit官网,另外关于retrofit的转换器我会在另一节中进行详细的分析。
@Filed & @FiledMap
@Filed通常多用于Post请求中以表单的形势上传数据,这对任何开发者来说应该都是很常见的。
- 1
- 2
- 1
- 2
@FileMap和@Filed的用途相似,但是它用于不确定表单参数个数的情况下。
@Part & @PartMap
多用于Post请求实现文件上传功能。关于这两者的具体使用参考下文的文件上传。
在这里我们来解释一下@Filed和@Part的区别。
两者都可以用于Post提交,但是最大的不同在于@Part标志上文的内容可以是富媒体形势,比如上传一张图片,上传一段音乐,即它多用于字节流传输。而@Filed则相对简单些,通常是字符串键值对。
@Path
关于@Path没什么好说,官网解释已经足够清楚了。这里着重提示:
{占位符}和PATH只用在URL的path部分,url中的参数使用Query和QueryMap 代替,保证接口定义的简洁
异步VS同步
任何一个任务都可以被分为异步任务或者同步任务,和其它大多数的请求框架一样,retrofit也分为同步请求和异步请求。在retrofit是实现这两者非常简单:
同步调用
同步请求需要借助retrofit提供的execute()方法实现。
- 1
- 2
- 3
- 4
- 5
- 6
- 7
- 8
- 9
- 10
- 11
- 12
- 1
- 2
- 3
- 4
- 5
- 6
- 7
- 8
- 9
- 10
- 11
- 12
以上的代码会阻塞线程,因此你不能在安卓的主线程中调用,不然会面临NetworkOnMainThreadException。如果你想调用execute方法,请在后台线程执行。
异步调用
异步请求需要借助retrofit提供的enqueue()方法实现。(从这个方法名中你可以看出之该方法实现的是将请求加入请求队列)。像async-http一样,同样你需要在enqueue()方法中为其最终结果提供相应的回调,以实现结果的处理。
public void get() {
    Retrofit retrofit = new Retrofit.Builder().baseUrl("https://api.github.com/").build();
    GitHubApi api = retrofit.create(GitHubApi.class);

    Call<ResponseBody> call = api.contributorsBySimpleGetCall(mUserName, mRepo);
    call.enqueue(new Callback<ResponseBody>() {
        @Override
        public void onResponse(Call<ResponseBody> call, Response<ResponseBody> response) {
            //处理请求成功

        }

        @Override
        public void onFailure(Call<ResponseBody> call, Throwable t) {
            //处理请求失败
        }
    });
}
不难发现retrofit中实现同步和异步是如此的方便,仅仅通过提供请求的不同执行方法(execute()和enqueue())便可成功的实现的请求执行方式和请求类型的解耦,实在是棒极了。
到目前为止,使用retrofit的多是在android上,此时我们关注多事异步请求,毕竟Android中并不允许你在主线程去做一些耗时任务。
无论是同步请求还是异步请求,我们都希望这两种请求是可控的,通常来说是分为三个方面:开始请求,结束请求以及查询请求的执行状态。上面的同步请求和异步请求属于开始请求这方面,那么结束请求和查询请求呢?
我们发现无论是同步请求还是异步请求,返回给我们的都是Call接口的实例。我们稍微看一下该接口:
- 1
- 2
- 3
- 4
- 5
- 6
- 7
- 8
- 9
- 10
- 11
- 12
- 13
- 14
- 15
- 16
- 17
- 18
- 19
- 20
- 21
- 22
- 1
- 2
- 3
- 4
- 5
- 6
- 7
- 8
- 9
- 10
- 11
- 12
- 13
- 14
- 15
- 16
- 17
- 18
- 19
- 20
- 21
- 22
通过上面的代码不难看出,Call接口提供了我们上面所说的执行请求,查询请求状态以及结束请求。
移除请求
看完上面的Call对象之后,我们知道要想取消一个请求(无论异步还是同步),则只需要在响应的Call对象上调用其cancel()对象即可。
- 1
- 2
- 3
- 4
- 5
- 6
- 7
- 8
- 9
- 10
- 11
- 12
- 13
- 14
- 15
- 16
- 17
- 18
- 1
- 2
- 3
- 4
- 5
- 6
- 7
- 8
- 9
- 10
- 11
- 12
- 13
- 14
- 15
- 16
- 17
- 18
多次请求
个别情况下我们可能需要一个请求执行多次。但是我们在retrofit中,call对象只能被调用一次,这时候该怎么办?
这时候我们可以利用Call接口中提供的clone()方法实现多次请求。
- 1
- 2
- 3
- 4
- 5
- 6
- 7
- 8
- 9
- 10
- 11
- 12
- 13
- 14
- 15
- 16
- 17
- 18
- 19
- 20
- 21
- 22
- 23
- 24
- 25
- 26
- 27
- 28
- 1
- 2
- 3
- 4
- 5
- 6
- 7
- 8
- 9
- 10
- 11
- 12
- 13
- 14
- 15
- 16
- 17
- 18
- 19
- 20
- 21
- 22
- 23
- 24
- 25
- 26
- 27
- 28
关于请求
上面我们简单的介绍了retrofit中注解,但是我并不准备像入门教程一样去举例说明。这里我们只对大家经常有困惑的地方做说明:
提交json格式数据
很多情况下,我们需要上传json格式的数据。比如当我们注册新用户的时候,因为用户注册时的数据相对较多,并可能以后会变化,这时候,服务端可能要求我们上传json格式的数据。此时就要@Body注解来实现。
首先定义请求实体RegisterPost:
- 1
- 2
- 3
- 4
- 5
- 6
- 1
- 2
- 3
- 4
- 5
- 6
接下来定义请求方法:
- 1
- 2
- 1
- 2
这样我们就能够上传json格式的数据了。
上传文件
retrofit中的实现文件上传也是非常简单的。这里我们以图片上传为例。
单张图片上传
retrofit 2.0的上传和以前略有不同,需要借助@Multipart注解、@Part和MultipartBody实现。
首先定义上传接口
- 1
- 2
- 3
- 1
- 2
- 3
然后来看看如何调用该方法。和调用其他请求稍有不同,这里我们需要构建MultipartBody对象:
- 1
- 2
- 3
- 4
- 5
- 6
- 1
- 2
- 3
- 4
- 5
- 6
这样,我们就可以方便的进行上传图片了。
多张图片上传
如果有很多张图片要上传,我们总不能一张一张的来吧?好吧,我们来看看如果进行多文件(图片)上传。
在retrofit中提供了@PartMap注解,借助该对象,我们可以实现多文件的上传。同样我们来看看具体文件的定义
- 1
- 2
- 3
- 1
- 2
- 3
和单文件上传的唯一区别就是将@Part注解换成了@PartMap注解。这意味我们可以以Map的形式进行多文件上传。具体如何调用相信你已经明白。
图文混传
无论是多文件上传还是单文件上传,本质上个都是借助@Multipart注解和MultipartBody来实现的。
这和其他网络请求框架的实现原理并无本质区别,但retrofit在图文上传方面得天独厚的优势。比如我们在注册时候既要传用户文本信息又要上传图片,结合上面的用户注册来做说明:
- 1
- 2
- 3
- 1
- 2
- 3
该注册接口实现了用户注册信息和用户头像的同时上传,其调用无非就是结合我们上文提到的json数据上传以及单张图上传。
文件下载
很多时候,我们可能需要暂时下载文件,但是又不希望引入其他的下载库,那么如何retrofit实现下载呢?同样,我们还是以下载图片为例
首先定义api接口如下:
- 1
- 2
- 1
- 2
关键就是获取到ResponseBody对象。我们来看获取到ResponseBody之后的处理:
- 1
- 2
- 3
- 4
- 5
- 1
- 2
- 3
- 4
- 5
不难发现这里的关键就是通过ResponseBody对象获取字节流,最后将其保存下来即可。实现下载就是这么简单。
这里需要注意的是如果下载的文件较大,比如在10m以上,那么强烈建议你使用@Streaming进行注解,否则将会出现IO异常.
- 1
- 2
- 3
- 4
- 1
- 2
- 3
- 4
拦截器Interceptors使用
熟悉OkHttp的童鞋对Interceptors一定不会陌生。而Retrofit 2.0 底层强制依赖okHttp,所以可以使用okHttp的拦截器Interceptors 来对所有请求进行再处理。同样来说,我们经常使用拦截器实现以下功能:
- 设置通用Header
- 设置通用请求参数
- 拦截响应
- 统一输出日志
- 实现缓存
下面我们以上各自使用的场景给出相应的代码说明:
设置通用Header
在App api接口设计中,我们往往需要客户端在请求方法时,携带appid,appkey,timestamp,signature及version等header。你可能会问前边不提到的@Headers不也同样可以做到这事情么?在方法很少的情况下,或者个别请求方法需要的情况下使用@Headers来添加当然可以,但是如果要为所有请求方法都添加还是借助拦截器使用更为方便。直接看代码:
- 1
- 2
- 3
- 4
- 5
- 6
- 7
- 8
- 9
- 10
- 11
- 12
- 13
- 14
- 15
- 16
- 17
- 18
- 19
- 20
- 21
- 1
- 2
- 3
- 4
- 5
- 6
- 7
- 8
- 9
- 10
- 11
- 12
- 13
- 14
- 15
- 16
- 17
- 18
- 19
- 20
- 21
你会发现在设置header的时候,我们有两种方法可选择:addHeader()和header()。切莫混淆两者之间的区别:
使用addHeader()不会覆盖之前设置的header,若使用header()则会覆盖之前的header
统一输出请求日志
在开发调试阶段,我们希望看到每个请求的详细信息,在release时关闭这些消息。
得益于retrofit和okhttp的良好设计,可以方便的通过添加Log拦截器来实现,这里我们使用到OkHttp中的HttpLoggingInterceptor拦截器。
在retrofit 2.0中要使用日志拦截器,首先添加依赖:
- 1
- 1
然后创建日志拦截器
- 1
- 2
- 3
- 4
- 5
- 1
- 2
- 3
- 4
- 5
拦截服务器响应
通常来说,我们多利用拦截器来实现对请求的拦截。但是在很多的情况下我们需要从响应中获取响应的Headers中获取指定的header,比如在有些功能中我们需要服务端会给出我们某个活动的起始时间,需要我们客户端来判断当然活动是否可以执行。这时候,我们显然不能利用客户端本地的时间(有条原则叫做永远不要相信客户端的时间),这时候就需要服务端在将服务器的时间传给我们。为了方便,通常时间服务器的时间戳放在每个响应Header当中。
那么我们该怎么拿到这个时间戳呢?拦截器可以非常容易的帮助我们解决这个问题。这里我们假设服务器在任何一个响应的Header中都添加了time,我们要做的就是通过拦截器来获取到Header,具体见代码:
- 1
- 2
- 3
- 4
- 5
- 6
- 7
- 8
- 9
- 10
- 11
- 12
- 13
- 14
- 15
- 1
- 2
- 3
- 4
- 5
- 6
- 7
- 8
- 9
- 10
- 11
- 12
- 13
- 14
- 15
通过上面的响应拦截器实现了从响应中获取服务器返回的time,就是这么简单。
设置通用请求参数
在实际项目中,各个客户端往往需要向服务端传送一些固定的参数,通常来说有两种方案:
- 可以将这个公共的请求参数放到请求Header中
- 也可以将其放在请求参数中
如何添加到header中我们已经介绍过了,现在来看看如何添加公共请求参数。添加公共请求参数和添加公共Header实现原理一致,都是借助拦截器来实现,这里我们同样直接来看代码:
- 1
- 2
- 3
- 4
- 5
- 6
- 7
- 8
- 9
- 10
- 11
- 12
- 13
- 14
- 15
- 16
- 1
- 2
- 3
- 4
- 5
- 6
- 7
- 8
- 9
- 10
- 11
- 12
- 13
- 14
- 15
- 16
建议:如果需要添加统一的请求参数,最好将其放在请求头当中。
使用拦截器
上面我们介绍在实际开发中4中常用的拦截器,可以发现有了这些拦截器,我们可以很容易处理公共聚焦点。至于拦截器的使用,就是直接将响应的拦截器设置给OkHttpClient客户端即可,以添加日志拦截器为例:
- 1
- 2
- 3
- 4
- 5
- 1
- 2
- 3
- 4
- 5
客户端请求策略
任何一个Http请求库都少不了失败重试及请求超时的设置。来看一下retrofit中如何设置:
失败重试
retrofit通过okHttpClient来设置失败时自动重试,其使用也非常简单:
- 1
- 2
- 3
- 1
- 2
- 3
设置请求超时
当然,retrofit作为一个完善的网络请求框架也少不了这方面的设置。
- 1
- 2
- 3
- 4
- 5
- 6
- 1
- 2
- 3
- 4
- 5
- 6
添加缓存支持
在上面拦截器的使用中,我i门已经介绍了4种拦截器的使用,现在我们来介绍如何使用拦截器来实现HTTP缓存。Http缓存原理在本文中并不做重点解释。
ok,现在来看看Retrofit中如何配置使用缓存。
设置缓存的的两种方式
在retrofit中可以通过两种方式设置缓存:
- 通过添加 @Headers(“Cache-Control: max-age=120”) 进行设置。添加了Cache-Control 的请求,retrofit 会默认缓存该请求的返回数据。
- 通过Interceptors实现缓存。
这两者实现原理一致,但是适用场景不同。通常是使用Interceptors来设置通用缓存策略,而通过@Header针对某个请求单独设置缓存策略。另外,一定要记住,retrofit 2.0底层依赖OkHttp实现,这也就意味着retrofit缓存的实现同样是借助OkHttp来的。另外,无论你是决定使用那种形势的缓存,首先要为OkHttpClient设置Cache,否则缓存不会生效(retrofit并为设置默认缓存目录),Cache的设置你将在下文看到。
下面我们来具体看看,如何通过@Headers为某个方法设置缓存时间
- 1
- 2
- 3
- 1
- 2
- 3
这样我们就通过@Headers快速的为该api添加了缓存控制。120s内,缓存都是生效状态,即无论有网无网都读取缓存。
现在我们再来看一下如何利用拦截器来实现缓存:
首先创建缓存拦截器:
- 1
- 2
- 3
- 4
- 5
- 6
- 7
- 8
- 9
- 10
- 11
- 1
- 2
- 3
- 4
- 5
- 6
- 7
- 8
- 9
- 10
- 11
和其它的拦截器使用一样,将其设置到OkHttpClient即可,但此时设置缓存拦截器使用的addNetworkInterceptor()方法。凡是使用该设置了该缓存拦截器的OkHttpClient都具备了缓存功能,具体代码如下:
- 1
- 2
- 3
- 4
- 5
- 6
- 7
- 8
- 1
- 2
- 3
- 4
- 5
- 6
- 7
- 8
实际开发中往往要求,有网的情况下直接从网络中获取数据,无网络的情况下才走缓存,那么此时上面的缓存拦截器就不是适用了,那这该怎么做呢?
在解决这个问题之前首先我们解决大家的一个疑惑:通过addNetworkInterceptor()和通过addInterceptor()添加的拦截器有什么不同呢?
简单来说,addNetworkInterfacetor()添加的是网络拦截器(Network Interfacetor),它会在request和response时分别被调用一次;addInterceptor()添加的是应用拦截器(Application Interceptor),他只会在response被调用一次。OkHttp中对此做了更加详细的解释[OkHttp拦截器详解]
我们将上面的缓存问题再明确一下:在无网络的情况下读取缓存,有网络的情况下根据缓存的过期时间重新请求,根据需求,我们创建以下拦截器:
- 1
- 2
- 3
- 4
- 5
- 6
- 7
- 8
- 9
- 10
- 11
- 12
- 13
- 14
- 15
- 16
- 17
- 18
- 19
- 20
- 21
- 22
- 23
- 24
- 25
- 26
- 27
- 28
- 29
- 1
- 2
- 3
- 4
- 5
- 6
- 7
- 8
- 9
- 10
- 11
- 12
- 13
- 14
- 15
- 16
- 17
- 18
- 19
- 20
- 21
- 22
- 23
- 24
- 25
- 26
- 27
- 28
- 29
接下来,将该请求设置到OkHttpClient,此时我们的网络拦截器和应用拦截器都添加的是上面同一个拦截器:
- 1
- 2
- 3
- 4
- 5
- 6
- 7
- 8
- 1
- 2
- 3
- 4
- 5
- 6
- 7
- 8
实际上,缓存策略应该由服务器指定,但是在有些情况下服务器并不支持缓存策略,这就要求我们客户端自行设置缓存策略。以上的代码假设服务端不支持缓存策略,因此器缓存策略完全由客户端通过重写request和response来实现。
不出意外,在进行一些网络请求后,我们就可以在缓存目前下看到许多的缓存文件。每一个请求的缓存文件都分为两部分,非别是以.0结尾的请求和以.1结尾的响应数据。到这里,关于缓存的部门我们就说完了。我们可能会问,必须要基于retrofit来实现缓存么?如果,以后我更换网络框架(尽管可能性非常小),这岂不是要出大问题?如果你此顾虑,完全可以自行实现一套缓存框架,其原理本质上也非常相似:基于LRU算法。你可能不了解LRU算法,但是LRUCache和LRUDiskCache想必是耳熟能详的,对此我不画蛇添足了。
如果你想了解更多,请参考: Retrofit实现持久化Cookie的三种方案
转换器Converter
Retrofit可以将服务器的json结果会自动解析成定义好了的Data Access Object(DAO)。
如果你想接收json 结果并解析成DAO,你必须把Gson Converter 作为一个独立的依赖添加进来。
- 1
- 1
然后使用addConverterFactory把它添加进来。
- 1
- 2
- 3
- 4
- 1
- 2
- 3
- 4
这里是Square提供的官方Converter modules列表。选择一个最满足你需求的。
- 1
- 2
- 3
- 4
- 5
- 6
- 7
- 1
- 2
- 3
- 4
- 5
- 6
- 7
你也可以通过实现Converter.Factory接口来创建一个自定义的converter 。
我比较赞同这种新的模式。它让Retrofit对自己要做的事情看起来更清晰。
自定义Gson对象
为了以防你需要调整json里面的一些格式,比如,Date Format。你可以创建一个Gson 对象并把它传递给GsonConverterFactory.create()。
- 1
- 2
- 3
- 4
- 5
- 6
- 7
- 8
- 1
- 2
- 3
- 4
- 5
- 6
- 7
- 8
与RxJava一起使用
在Retrofit中使用RxJava,你的项目依赖中必须包含两个modules:
- 1
- 2
- 1
- 2
Sync Gradle并在Retrofit Builder链表中如下调用addCallAdapterFactory:
- 1
- 2
- 3
- 4
- 5
- 1
- 2
- 3
- 4
- 5
你的Service接口现在可以作为Observable返回了!
- 1
- 2
- 3
- 4
- 5
- 6
- 7
- 8
- 9
- 1
- 2
- 3
- 4
- 5
- 6
- 7
- 8
- 9
你可以完全像RxJava那样使用它,如果你想让subscribe部分的代码在主线程被调用,需要把observeOn(AndroidSchedulers.mainThread())添加到链表中。
- 1
- 2
- 3
- 4
- 5
- 6
- 7
- 8
- 9
- 10
- 11
- 12
- 13
- 14
- 15
- 16
- 17
- 18
- 19
- 20
- 21
- 22
- 23
- 24
- 25
- 26
- 27
- 28
- 29
- 30
- 1
- 2
- 3
- 4
- 5
- 6
- 7
- 8
- 9
- 10
- 11
- 12
- 13
- 14
- 15
- 16
- 17
- 18
- 19
- 20
- 21
- 22
- 23
- 24
- 25
- 26
- 27
- 28
- 29
- 30
新的URL定义方式
Retrofit 2.0使用了新的URL定义方式。Base URL与@Url 不是简单的组合在一起而是和”“的处理方式一致。
对于 Retrofit 2.0中新的URL定义方式,这里是我的建议:
-
Base URL: 总是以 /结尾
-
@Url: 不要以 / 开头
比如
- 1
- 2
- 3
- 4
- 5
- 6
- 7
- 8
- 9
- 10
- 11
- 12
- 13
- 14
- 15
- 1
- 2
- 3
- 4
- 5
- 6
- 7
- 8
- 9
- 10
- 11
- 12
- 13
- 14
- 15
以上代码中的loadUsers会从 http://api.stay4it.com/user/list获取数据。
而且在Retrofit 2.0中我们还可以在@Url里面定义完整的URL:
- 1
- 2
- 3
- 4
- 5
- 6
- 1
- 2
- 3
- 4
- 5
- 6
这种情况下Base URL会被忽略。
混淆
如果你的工程中使用了代码混淆,那么你的配置中需要添加一下的几行
- 1
- 2
- 3
- 4
- 1
- 2
- 3
- 4
实战演练
配置
在build.gradle中添加
- 1
- 2
- 3
- 4
- 5
- 6
- 7
- 8
- 9
- 10
- 11
- 12
- 13
- 14
- 15
- 1
- 2
- 3
- 4
- 5
- 6
- 7
- 8
- 9
- 10
- 11
- 12
- 13
- 14
- 15
说明:
Retrofit默认依赖于okhttp,所以需要集成okhttp。
API返回的数据为JSON格式,在此我使用的是Gson对返回数据解析.请使用最新版的Gson 。
接口
这里我们调试借助百度名人名言API
该接口的API主机地址为:http://apistore.baidu.com;
需要访问的接口:avatardata/mingrenmingyan/lookup;
需要一个key等于apikey的Header和一个keyword等于名人名言的查询关键字,而且该请求为GET请求.
接口返回json格式:
- 1
- 2
- 3
- 4
- 5
- 6
- 7
- 8
- 9
- 10
- 11
- 12
- 13
- 14
- 15
- 16
- 17
- 18
- 19
- 20
- 21
- 22
- 23
- 24
- 25
- 26
- 27
- 28
- 29
- 30
- 31
- 32
- 33
- 34
- 35
- 36
- 37
- 38
- 39
- 40
- 41
- 42
- 43
- 44
- 45
- 46
- 47
- 1
- 2
- 3
- 4
- 5
- 6
- 7
- 8
- 9
- 10
- 11
- 12
- 13
- 14
- 15
- 16
- 17
- 18
- 19
- 20
- 21
- 22
- 23
- 24
- 25
- 26
- 27
- 28
- 29
- 30
- 31
- 32
- 33
- 34
- 35
- 36
- 37
- 38
- 39
- 40
- 41
- 42
- 43
- 44
- 45
- 46
- 47
定义实体类
我们根据上面API返回的json数据来创建一个Famous数据对象,我们可以利用AndroidStudio插件 GsonFormat 快速方便的将json数据转为Java 对象。
Famous.java
- 1
- 2
- 3
- 4
- 5
- 6
- 7
- 8
- 9
- 10
- 11
- 12
- 13
- 14
- 15
- 1
- 2
- 3
- 4
- 5
- 6
- 7
- 8
- 9
- 10
- 11
- 12
- 13
- 14
- 15
注意:如果你的字段有跟json不一样的,要在字段上面加注解@SerializedName,@SerializedName是指定Json格式中的Key名。
如上面的错误码字段,你就像定义为code,而服务器返回的是error_code,这个时候就应该这么写:
- 1
- 2
- 1
- 2
使用
首先定义
- 1
- 2
- 3
- 4
- 5
- 6
- 7
- 8
- 9
- 10
- 11
- 12
- 13
- 14
- 15
- 16
- 17
- 18
- 19
- 20
- 21
- 22
- 23
- 24
- 25
- 26
- 27
- 28
- 29
- 30
- 31
- 32
- 33
- 34
- 35
- 1
- 2
- 3
- 4
- 5
- 6
- 7
- 8
- 9
- 10
- 11
- 12
- 13
- 14
- 15
- 16
- 17
- 18
- 19
- 20
- 21
- 22
- 23
- 24
- 25
- 26
- 27
- 28
- 29
- 30
- 31
- 32
- 33
- 34
- 35
定义FamousApi
- 1
- 2
- 3
- 4
- 5
- 6
- 7
- 8
- 9
- 10
- 11
- 12
- 13
- 14
- 15
- 16
- 17
- 18
- 1
- 2
- 3
- 4
- 5
- 6
- 7
- 8
- 9
- 10
- 11
- 12
- 13
- 14
- 15
- 16
- 17
- 18
最终使用:
- 1
- 2
- 3
- 4
- 5
- 6
- 7
- 8
- 9
- 10
- 11
- 12
- 13
- 14
- 15
- 16
- 17
- 18
- 19
- 1
- 2
- 3
- 4
- 5
- 6
- 7
- 8
- 9
- 10
- 11
- 12
- 13
- 14
- 15
- 16
- 17
- 18
- 19
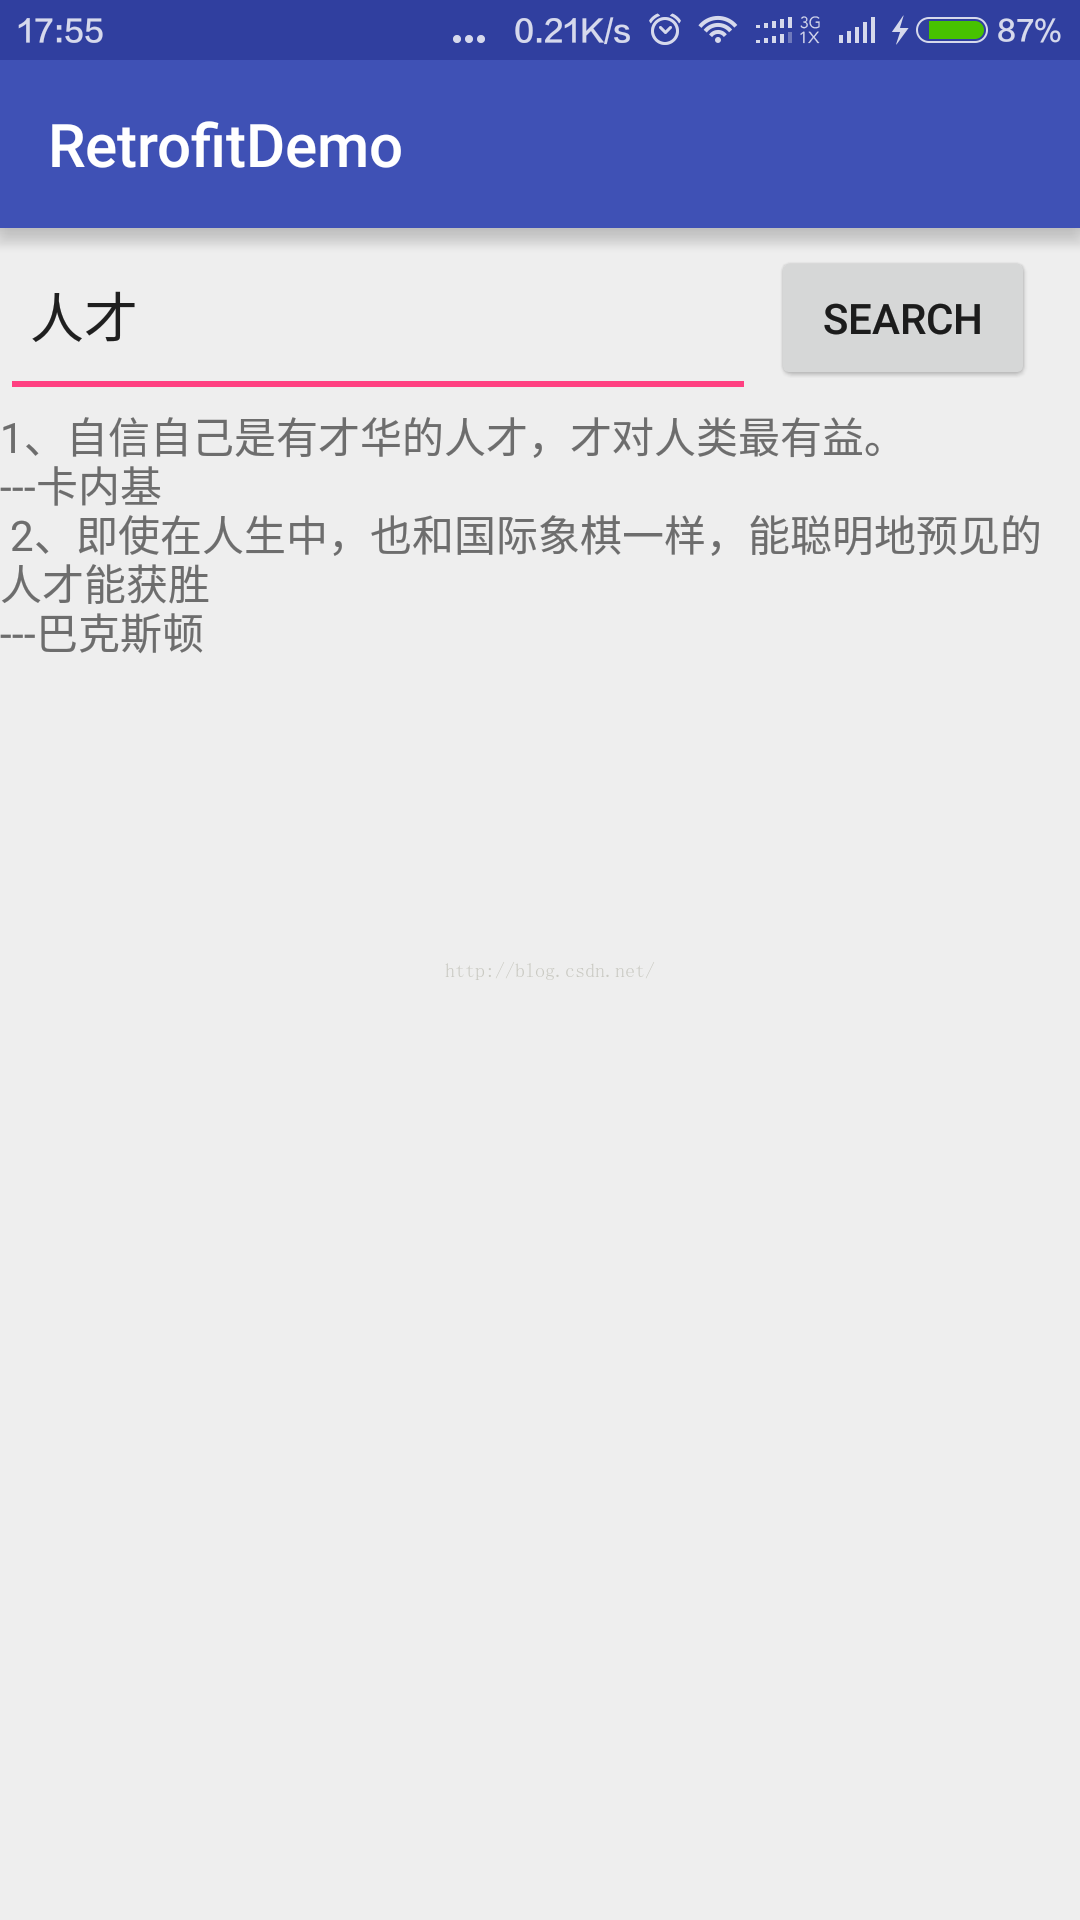
如下效果:


 3万+
3万+


 被折叠的 条评论
为什么被折叠?
被折叠的 条评论
为什么被折叠?
 到【灌水乐园】发言


