


在APP开发中,经常会用到通过通知栏显示通知消息,这都是通过Notification和RemoteViews实现,下面介绍一下Notification常见的使用方法和一些注意事项:
1.使用默认的Notification样式:
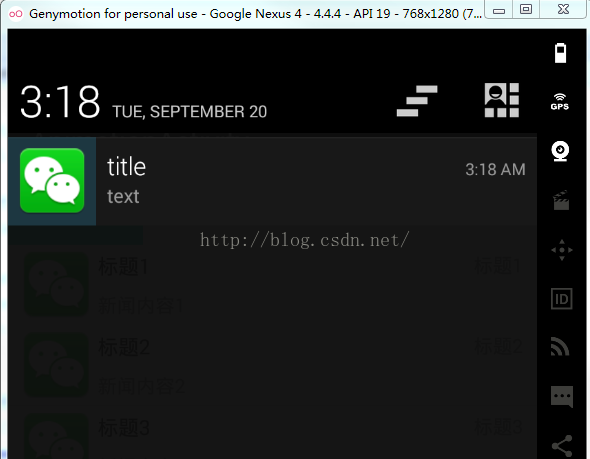
这是采用默认样式实现通知栏的截图,默认样式具体实现代码如下(老的API中部分方法被放弃使用,这里采用新的API实现):
<span style="white-space:pre"> </span>Notification note = new Notification();
Notification.Builder notification = new Notification.Builder(AnimationActivity.this);
//设置通知信息显示时的小图标
notification.setSmallIcon(R.mipmap.wechat_icon);
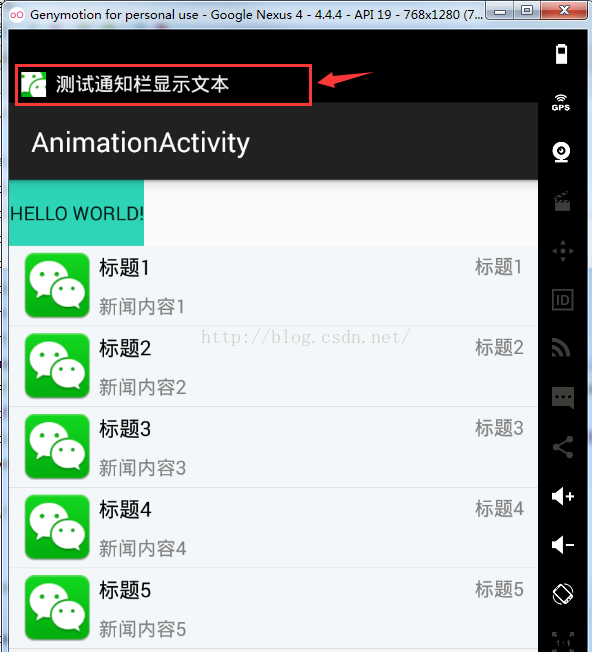
//设置通知提醒文本
notification.setTicker("测试通知栏显示文本");
//设置时间为当前时间,自定义的时候可以根据需要是否设置这项
notification.setWhen(System.currentTimeMillis());
//设置要跳转的intent
Intent intent = new Intent(AnimationActivity.this, WeChatDemoActivity.class);
intent.setFlags(Intent.FLAG_ACTIVITY_SINGLE_TOP);
//通过PendingIntent设置要跳转的Intent
PendingIntent pendingIntent = PendingIntent.getActivity(AnimationActivity.this,<span style="white-space:pre"> </span>0,intent,PendingIntent.FLAG_UPDATE_CURRENT);
//通过build()方法获取Notification对象,
// setContentTitle和setContentText分别表示任务栏下拉后显示的通知内容的标题和文本
note = notification.setContentIntent(pendingIntent).setContentTitle("title").<span style="white-space:pre"> </span>setContentText("text").build();
//设置标志为点击跳转后通知信息自动取消显示
note.flags = Notification.FLAG_AUTO_CANCEL;
//通过NotificationManager显示通知信息
NotificationManager manager = <span style="white-space:pre"> </span>(NotificationManager) getSystemService(Context.NOTIFICATION_SERVICE);
manager.notify(1,note);setSmallIcon和setTicker的作用和显示位置如下图箭头指向所示:
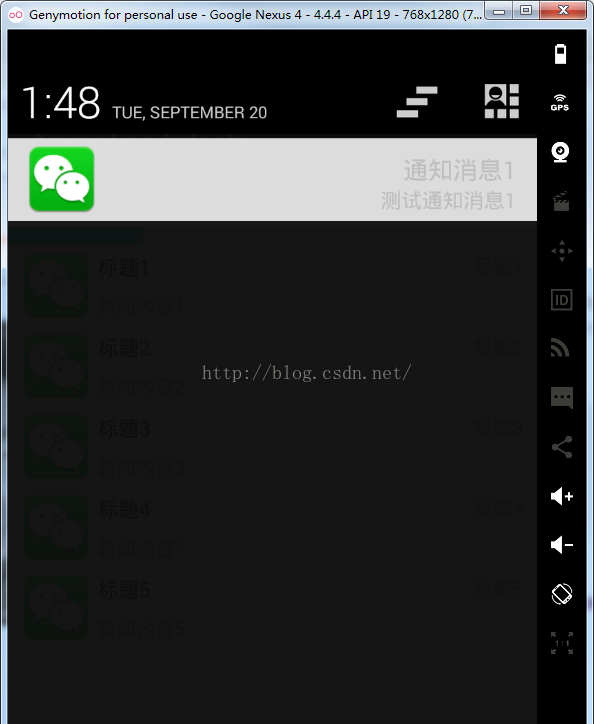
2.使用自定义的Notification样式
使用自定义的样式需要用到RemoteViews来加载布局文件,而给自定义布局中的控件添加单击事件也需要用到RemoteViews来设置,具体效果图如下:
用到的布局文件很简单,如下:
<?xml version="1.0" encoding="utf-8"?>
<RelativeLayout xmlns:android="http://schemas.android.com/apk/res/android"
    android:layout_width="match_parent"
    android:layout_height="100dp"
    android:background="@color/gainsboro">

    <ImageView
        android:id="@+id/noti_icon"
        android:layout_width="wrap_content"
        android:layout_height="wrap_content"
        android:src="@mipmap/wechat_icon"
        android:layout_centerVertical="true"
        android:layout_marginLeft="15dp"/>
    <LinearLayout
        android:layout_width="wrap_content"
        android:layout_height="match_parent"
        android:layout_alignParentRight="true"
        android:orientation="vertical"
        android:layout_marginRight="15dp">

        <TextView
            android:id="@+id/noti_title"
            android:layout_width="wrap_content"
            android:layout_height="wrap_content"
            android:textSize="18sp"
            android:layout_marginTop="10dp"
            android:layout_gravity="right"/>
        <TextView
            android:id="@+id/noti_context"
            android:layout_width="wrap_content"
            android:layout_height="wrap_content"
            android:textSize="15dp"
            android:layout_gravity="right"/>
    </LinearLayout>

</RelativeLayout>
Notification notification = new Notification();
notification.icon = R.mipmap.icon29;
notification.tickerText = "自定义布局通知";
notification.flags = Notification.FLAG_AUTO_CANCEL;

RemoteViews remoteViews = new RemoteViews(getPackageName(),R.layout.layout_notification);
remoteViews.setTextViewText(R.id.noti_title, "通知消息1");
remoteViews.setTextViewText(R.id.noti_context, "测试通知消息1");
remoteViews.setImageViewResource(R.id.noti_icon, R.mipmap.wechat_icon);

Intent intent1 = new Intent();
intent1.setAction("com.test.receiver");
PendingIntent pendingIntent1 = PendingIntent.getBroadcast(AnimationActivity.this,0,
<span style="white-space:pre"> </span>intent1,PendingIntent.FLAG_UPDATE_CURRENT);
remoteViews.setOnClickPendingIntent(R.id.noti_title,pendingIntent1);
notification.contentView = remoteViews;
notification.bigContentView = remoteViews;
Intent intent = new Intent(AnimationActivity.this,WeChatDemoActivity.class);
PendingIntent pendingIntent = PendingIntent.getActivity(AnimationActivity.this,<span style="white-space:pre"> </span>0x123,intent,PendingIntent.FLAG_UPDATE_CURRENT);
notification.contentIntent = pendingIntent;NotificationManager manager = (NotificationManager)getSystemService(Context.NOTIFICATION_SERVICE);
manager.notify(2,notification);
3.Notification的点击事件
Notification的点击事件分为两种,一种是直接点击Notification,另一种是自定义的时候对布局中的控件添加点击事件,下面分别介绍一下两种点击事件:
A:直接点击Notification
直接点击Notification需要用到Intent和PendingIntent,比如点击跳转到一个Acitivity
<span style="white-space:pre">	</span>Intent intent = new Intent(AnimationActivity.this, WeChatDemoActivity.class);
        intent.setFlags(Intent.FLAG_ACTIVITY_SINGLE_TOP);
        //通过PendingIntent设置要跳转的Intent
        PendingIntent pendingIntent = PendingIntent.getActivity(AnimationActivity.this,0,
<span style="white-space:pre"> </span>intent,PendingIntent.FLAG_UPDATE_CURRENT);
//通过build()方法获取Notification对象,
// setContentTitle和setContentText分别表示任务栏下拉后显示的通知内容的标题和文本
note = notification.setContentIntent(pendingIntent).setContentTitle("title").<span style="white-space:pre"> </span>setContentText("text").build();B.对布局中的控件添加点击事件
对布局中的控件添加点击事件或者更新自定义布局中的View不仅要用到Intent和
PendingIntent,还需要用到RemoteVIews。在更新RemoteViews时,无法直接访问里面
的View,而必须通过RemoteViews所提供的一系列方法来更新View。比如设置TextView
的文本,要采用如下方式:remoteViews.setTextViewText(R.id.noti_title,"通知消息1");
其中setTextViewText的两个参数分别为TextView的Id和要设置的文本。
而设置ImageView的图片也不能直接访问ImageView,必须通过如下方式:
remoteViews.setImageVIewResource(R.id.noti_icon,R.mipmap.wechat_icon);
setImageViewResource的两个参数分别为ImageView的Id和要设置的图片资源的id。如果
要给一个控件加单击事件,则要使用PendingIntent并通过setOnClickPendingIntent方法来
实现,比如:
remoteViews.setOnClickPendingIntent(R.id.noti_title,pendingIntent1); 这个方法的两个参
数分别为添加单击事件控件的id和要实现的意图。这些代码的具体实现在上面的代码中都
有体现。
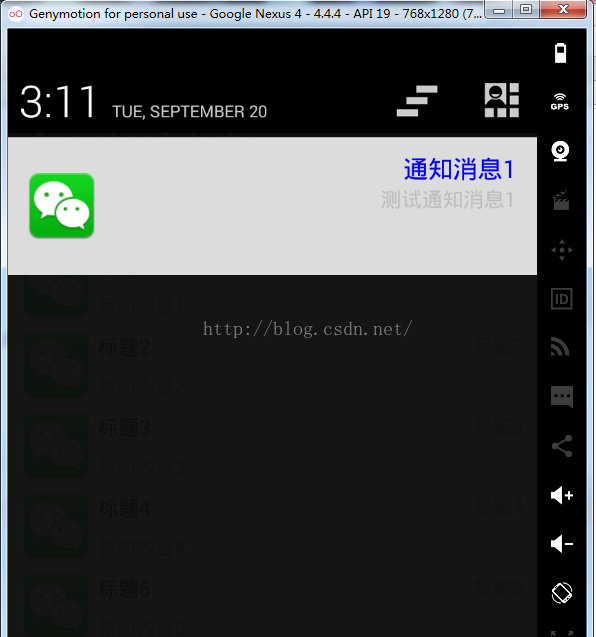
4.点击事件的具体实现
在上面第2部分的代码中给一个TextView添加了单击事件,点击后让字体颜色变为
蓝色,因为PendingIntent只支持三种特定意图:启动Activity,启动Service和发送广播
,所以这里更新Textview的颜色通过发送广播的方式来实现。首先定义一个动态注册的
广播,具体代码如下:
@Override
    protected void onStart() {
        super.onStart();
        IntentFilter filter = new IntentFilter();
        filter.addAction("com.test.receiver");
        registerReceiver(broadcastReceiver,filter);
    }

    private BroadcastReceiver broadcastReceiver = new BroadcastReceiver() {
        @Override
        public void onReceive(Context context, Intent intent) {
            remoteViews.setTextColor(R.id.noti_title, Color.BLUE);
            manager.notify(2,notification);
        }
    };
然后在给具体的控件设置发送广播的意图,具体的代码在第2部分的代码中已有体现
,我这里把remoteViews设为了全局变量,而上面第2部分的代码中为了看的明白设置的
是局部变量,这个自己改一下就可以了。最后不要忘了调用NotificationManager的notify
方法更新View,否则没有效果。


 393
393


 被折叠的 条评论
为什么被折叠?
被折叠的 条评论
为什么被折叠?
 到【灌水乐园】发言


