


可以使用注解进行ehcache的添加,这样的话我们可以将ehcache与工程进行结合,我们来看一下具体需要使用那些配置。
Ø Jar包引入
首先我们添加一个spring与ehcache的融合的配置文件,我这里命名为application_spring_ehcache.xml文件。
需要添加jar包是:
spring-context.3.2.9.RELEASE.jar
spring-webmvc3.2.9.RELEASE.jar
ehcache-spring-annotations1.2.0.jar
spring-context-support4.2.6.RELEASE.jar
页面显示使用el表达式:
jstl 1.2.jar
standard 1.1.2.jar
Ø 配置文件的配置
application_spring_ehcache.xml:
<span style="font-family:Microsoft YaHei;font-size:14px;"><?xml version="1.0" encoding="UTF-8"?>
<beans xmlns="http://www.springframework.org/schema/beans"
       xmlns:xsi="http://www.w3.org/2001/XMLSchema-instance"
       xmlns:context="http://www.springframework.org/schema/context"
       xmlns:cache="http://www.springframework.org/schema/cache" xmlns:mvc="http://www.springframework.org/schema/mvc"
       xsi:schemaLocation="http://www.springframework.org/schema/beans
        http://www.springframework.org/schema/beans/spring-beans-3.0.xsd
        http://www.springframework.org/schema/context
        http://www.springframework.org/schema/context/spring-context-3.0.xsd
        http://www.springframework.org/schema/cache
        http://www.springframework.org/schema/cache/spring-cache-3.2.xsd http://www.springframework.org/schema/mvc http://www.springframework.org/schema/mvc/spring-mvc.xsd">
    <!--支持缓存注解-->
    <cache:annotation-driven cache-manager="cacheManager"/>
    <context:component-scan base-package="ehcache.*" />
    <!-- 一些@RequestMapping 请求和一些转换 -->
    <mvc:annotation-driven />

    <!-- 前后缀 -->
    <bean class="org.springframework.web.servlet.view.InternalResourceViewResolver">
        <property name="prefix" value="/"/>
        <property name="suffix" value=".jsp"/>
    </bean>
    <!--  静态资源访问 的两种方式  -->
    <!-- <mvc:default-servlet-handler/>   -->
    <!--<mvc:resources location="/*" mapping="/**" />-->
    <mvc:view-controller path="/" view-name="forward:/index.jsp"/>
    <!-- Spring自己的基于java.util.concurrent.ConcurrentHashMap实现的缓存管理器(该功能是从Spring3.1开始提供的) -->
    <!--
    <bean id="cacheManager" class="org.springframework.cache.support.SimpleCacheManager">
        <property name="caches">
            <set>
                <bean name="myCache" class="org.springframework.cache.concurrent.ConcurrentMapCacheFactoryBean"/>
            </set>
        </property>
    </bean>
     -->
    <!-- 若只想使用Spring自身提供的缓存器,则注释掉下面的两个关于Ehcache配置的bean,并启用上面的SimpleCacheManager即可 -->
    <!-- Spring提供的基于的Ehcache实现的缓存管理器 -->
    <!--  缓存  属性-->
    <bean id="cacheManagerFactory" class="org.springframework.cache.ehcache.EhCacheManagerFactoryBean">
        <property name="configLocation" value="classpath:/ehcache.xml" />
    </bean>

    <bean id="cacheManager" class="org.springframework.cache.ehcache.EhCacheCacheManager">
        <property name="cacheManager"  ref="cacheManagerFactory"/>
</bean>
</beans>
</span>
ehcache.xml文件的配置
<span style="font-family:Microsoft YaHei;font-size:14px;"><ehcache xmlns:xsi="http://www.w3.org/2001/XMLSchema-instance" xsi:noNamespaceSchemaLocation="../config/ehcache.xsd">
    <!--当内存缓存中对象数量超过maxElementsInMemory时,将缓存对象写到磁盘缓存中(需对象实现序列化接口)。-->
    <diskStore path="java.io.tmpdir"/>
    <!--:用来配置磁盘缓存使用的物理路径,Ehcache磁盘缓存使用的文件后缀名是*.data和*.index。-->
    <defaultCache
            maxElementsInMemory="10000"
            eternal="false"
            timeToIdleSeconds="120"
            timeToLiveSeconds="120"
            maxElementsOnDisk="10000000"
            diskExpiryThreadIntervalSeconds="120"
            memoryStoreEvictionPolicy="LRU">
        <persistence strategy="localTempSwap"/>
</defaultCache>
<cache name="myCache"
           eternal="false"
           maxElementsInMemory="100"
           overflowToDisk="false"
           diskPersistent="false"
           timeToIdleSeconds="0"
           timeToLiveSeconds="300"
           memoryStoreEvictionPolicy="LRU" />
</ehcache>
</span>
web.xml文件的配置
<span style="font-family:Microsoft YaHei;font-size:14px;"><!DOCTYPE web-app PUBLIC
 "-//Sun Microsystems, Inc.//DTD Web Application 2.3//EN"
 "http://java.sun.com/dtd/web-app_2_3.dtd" >

<web-app>
  <display-name>Archetype Created Web Application</display-name>


  <servlet>
    <servlet-name>SpringMVC</servlet-name>
    <servlet-class>org.springframework.web.servlet.DispatcherServlet</servlet-class>
    <init-param>
      <param-name>contextConfigLocation</param-name>
      <!--启动的类加载文件-->
      <param-value>classpath:application_spring_cache.xml</param-value>
    </init-param>
    <load-on-startup>1</load-on-startup>
  </servlet>
  <servlet-mapping>
    <servlet-name>SpringMVC</servlet-name>
    <url-pattern>/</url-pattern>
  </servlet-mapping>
</web-app>
</span>
Ø 演示示例
创建一个service
<span style="font-family:Microsoft YaHei;font-size:14px;">@Service
public class UserServices {

//     没有与数据库相连,直接定义一个map存储我们需要的数据
    private Map<String, String> usersData = new ConcurrentHashMap<String, String>();

    public UserServices(){
        System.out.println("用户数据初始化..开始");
        usersData.put("2", "娜娜的测试");
        usersData.put("3", "娜娜带你开启我们的ehcache的学习之旅吧");
        System.out.println("用户数据初始化..完毕");
    }

    //将查询到的数据缓存到myCache中,并使用方法名称加上参数中的userNo作为缓存的key
    //通常更新操作只需刷新缓存中的某个值,所以为了准确的清除特定的缓存,故定义了这个唯一的key,从而不会影响其它缓存值
    @Cacheable(value="myCache", key="'get'+#userNo")
    public String get(String userNo){
        System.out.println("数据库中查到的用户号[" + userNo + "]相应的用户名为[" + usersData.get(userNo) + "]");
        return usersData.get(userNo);
    }

    @CacheEvict(value="myCache", key="'get'+#userNo")
    public void update(String userNo){
        System.out.println("更新缓存中的用户号[" + userNo + "]相应的用户名为[" + usersData.get(userNo) + "]的缓存");
    }
    //allEntries为true表示清除value中的全部缓存,默认为false
    @CacheEvict(value="myCache", allEntries=true)
    public void removeAll(){
        System.out.println("我们要清除缓存中的所有数据啦");
    }
}</span>
创建一个controller
<span style="font-family:Microsoft YaHei;font-size:14px;">@Controller
@RequestMapping("/cacheTest")
public class UserController {
@Resource
private UserServices userService;
@Resource
private TestService testService;
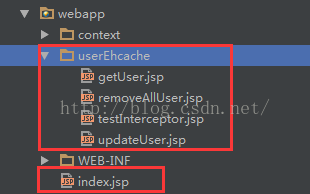
String root = "userEhcache";
@RequestMapping(value = "/get/{userNo}", method = RequestMethod.GET)
public String get( @PathVariable String userNo, Model model ) {
String username = userService.get(userNo);
model.addAttribute("username", username);
return root + "/" + "getUser";
}
@RequestMapping(value = "/update/{userNo}", method = RequestMethod.GET)
public String update( @PathVariable String userNo, Model model ) {
userService.update(userNo);
model.addAttribute("userNo", userNo);
return root + "/" + "updateUser";
}
@RequestMapping(value = "/removeAll", method = RequestMethod.GET)
public String removeAll() {
userService.removeAll();
return root + "/" + "removeAllUser";
}</span>页面
因为页面的显示需要用到el表达式,需要引入el表达式的jar包,因为每个页面都要是使用,故而进行了封装:
context目录下面的mytag.jsp:
<span style="font-family:Microsoft YaHei;font-size:14px;"><%@ taglib uri="http://java.sun.com/jstl/core_rt" prefix="c"%>
<%@ taglib uri="http://java.sun.com/jstl/fmt_rt" prefix="fmt"%>
<%@ taglib uri="http://java.sun.com/jsp/jstl/functions" prefix="fn"%>
<%@ page isELIgnored="false" %></span><span style="font-family:Microsoft YaHei;font-size:14px;"><%@ page contentType="text/html;charset=UTF-8" language="java" %>
<html>
<head>
<title>Ehcache缓存测试</title>
</head>
<body>
查看<a href="<%=request.getContextPath()%>/cacheTest/get/2" target="_blank">1号</a>用户名
<br/>
<br/>
查看<a href="<%=request.getContextPath()%>/cacheTest/get/3" target="_blank">2号</a>用户名
<br/>
<br/>
更新<a href="<%=request.getContextPath()%>/cacheTest/update/3" target="_blank">2号</a>用户名
<br/>
<br/>
移除<a href="<%=request.getContextPath()%>/cacheTest/removeAll" target="_blank">全部</a>用户名</span>检验是不是从缓存中读取的数据,只要看我们控制台的输出日志即可,如果是从数据库中读取的那么就会在控制台打印出来日志,如果是从缓存中取出来,那么就不会从数据库中读取了,没有日志打出来,我们这里没有连接数据库,而是模拟从数据库取出的数据,效果是一样的。
Ø 使用缓存的好处
使用缓存的好处是可以大大的提高我们的访问效率,在具体设定内的时间内,只要是从缓存中存在,那么就会优先使用缓存中的数据,如果缓存中的数据被更新了,那么就会从数据库中从新查询,查询完毕后会再次存入缓存,这样的话可以保证我们获取到的数据都是实时更新的。
关于ehcache配置文件中的参数详解,网上很多这里不做详解,讲解完使用spring注解实现的示例后,我们再来讲解一下与使用拦截器与spring的集合,也就是对于方法的拦截,这样的话当访问同一个方法的时候,我们看看是不是已经查询过这个方法的数据,从而可以提供我们效果,不与数据库接触,直接返回我们的数据


 248
248


 被折叠的 条评论
为什么被折叠?
被折叠的 条评论
为什么被折叠?
 到【灌水乐园】发言


