


1.开发准备
在官网上下载最新的Smack开发包,我下载的是smack4.1.4版本的,导入相应的jar包即可开始开发工作
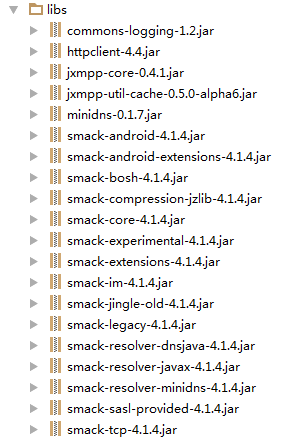
注意:导入Smack4.1.x包后,需要导入额外的第三方jar包
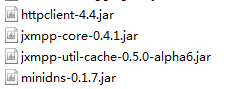
第三方jar包下载地址:
2.Openfire服务连接(连接服务器)
public class XMPPUtil {

    //openfire服务器地址
    private static String host = "222.195.xxx.xxx";
    private static int port = 5222;
    //openfire服务器名称
    private static String serviceName = "openfireName";

    //连接服务器
    public static XMPPTCPConnection getXMPPConnection(Context ctx) {

        SmackConfiguration.DEBUG = true;
        XMPPTCPConnectionConfiguration.Builder configBuilder = XMPPTCPConnectionConfiguration.builder();
        //设置服务器IP地址
        configBuilder.setHost(host);
        //设置服务器端口
        configBuilder.setPort(port);
        //设置服务器名称
        configBuilder.setServiceName(serviceName);
        //设置开启调试
        configBuilder.setDebuggerEnabled(true);
        //设置开启压缩,可以节省流量
        configBuilder.setCompressionEnabled(true);

        //SSL认证
        try {
            SSLContext sc = SSLContext.getInstance("TLS");
            MemorizingTrustManager mtm = new MemorizingTrustManager(ctx);
            sc.init(null, new X509TrustManager[]{mtm}, new java.security.SecureRandom());
            configBuilder.setCustomSSLContext(sc);
            configBuilder.setHostnameVerifier(
                    mtm.wrapHostnameVerifier(new org.apache.http.conn.ssl.StrictHostnameVerifier()));
        } catch (NoSuchAlgorithmException|KeyManagementException e) {
            e.printStackTrace();
        }

        XMPPTCPConnection connection = new XMPPTCPConnection(configBuilder.build());

        connection.addConnectionListener(new ConnectionListener() {
            @Override
            public void connected(XMPPConnection xmppConnection) {
                Log.e("connect","connected");
            }

            @Override
            public void authenticated(XMPPConnection xmppConnection, boolean b) {
                Log.e("connect","authenticated");
            }

            @Override
            public void connectionClosed() {
                Log.e("connect","connectionClosed");
            }

            @Override
            public void connectionClosedOnError(Exception e) {
                Log.e("connect","connectionClosedOnError");
            }

            @Override
            public void reconnectionSuccessful() {
                Log.e("connect","reconnectionSuccessful");
            }

            @Override
            public void reconnectingIn(int i) {
                Log.e("connect","reconnectionIn: "+i);
            }

            @Override
            public void reconnectionFailed(Exception e) {
                Log.e("connect","reconnectionFailed");
            }
        });

        try {
            connection.connect();
        } catch (SmackException | IOException | XMPPException e) {
            e.printStackTrace();
            return null;
        }
        return connection;
    }
}
代码中的SSL认证可以参考:openfire之SSL认证
3.登录openfire服务器
public static boolean login(Context ctx, String username, String password) {
        XMPPTCPConnection connection = getXMPPConnection(ctx);
        if (connection == null)
        {
            Log.e("login","connection == null");
            return false;
        }
        try {
            connection.login(username, password);
            return true;
        } catch (XMPPException|SmackException|IOException e) {
            e.printStackTrace();
            Log.e("login","login failure");
            return false;
        }
    }
4.用户注册
    public Boolean registerUser(String username,String password)
    {
        try {
            XMPPTCPConnection connection = XMPPUtil.getXMPPConnection(this);
            if (connection == null)
            {
                try {
                    connection.connect();
                } catch (SmackException | IOException | XMPPException e) {
                    e.printStackTrace();
                }
                Log.e("connect","连接服务器失败!");
            }

            AccountManager.getInstance(connection).createAccount(username,password);
            finish();
            return true;
        }
        catch (SmackException.NoResponseException | XMPPException.XMPPErrorException |
                SmackException.NotConnectedException e)
        {
            Log.e("register", "注册失败!");
            return false;
        }
    }
5.修改账号密码
 protected boolean isConnected()
    {
        if (connection == null)
        {
            return false;
        }
        if (!connection.isConnected())
        {
            try {
                connection.connect();
                return true;
            } catch (SmackException e) {
                e.printStackTrace();
            } catch (IOException e) {
                e.printStackTrace();
            } catch (XMPPException e) {
                e.printStackTrace();
            }
        }
        return true;
    }
/**
* 修改密码
* @param newpassword 新密码
* @return
*/
public boolean changePassword(String newpassword) {
if(!isConnected()) {
return false;
}
try {
AccountManager.getInstance(connection).changePassword(newpassword);
return true;
} catch (NoResponseException | XMPPErrorException | NotConnectedException e) {
Log.e(TAG, "密码修改失败", e);
return false;
}
}


 819
819


 被折叠的 条评论
为什么被折叠?
被折叠的 条评论
为什么被折叠?
 到【灌水乐园】发言


