


The JPCT-Bones can be used forrendering Skeleton Model and the workflow can be described as follow:

So, for this tutorial, thewhole pipeline ofModel Creation, Exportand Render via 3ds Max & Bones will be described and i will teach you step bystep to :
· create a simple Skeleton Model;
· export to specified file whichBones knows;
· rendering in Android Projectof Bones;
Ok , here we go ~
Platform you need:
· Engine: Bones
· Model Creation: 3ds Max 2013
· Plugin: OgreMax(http://www.ogremax.com/downloads)
Create Model and Bones
Createa new file;
Select the “Create” tab > “Geometry”> “Cylinder”;
Drawa cylinder, lets say with 6 height segments Also check “Generate Mapping Coords”;

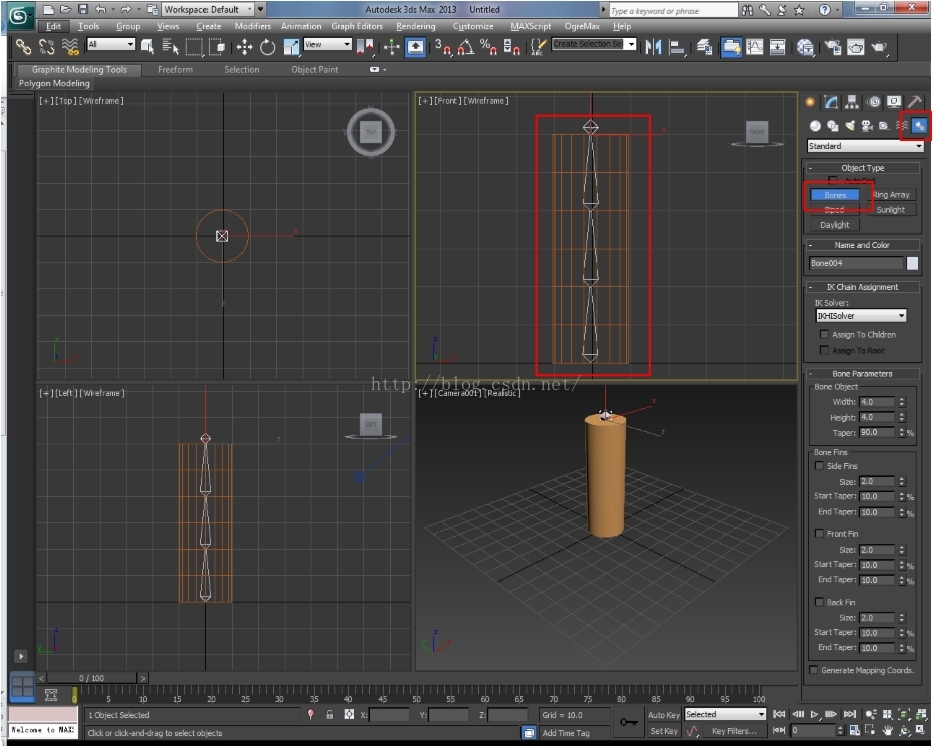
Click“Create” tab > “Systems” > “Bones”;
Addsome bones in the center of the cylinder;
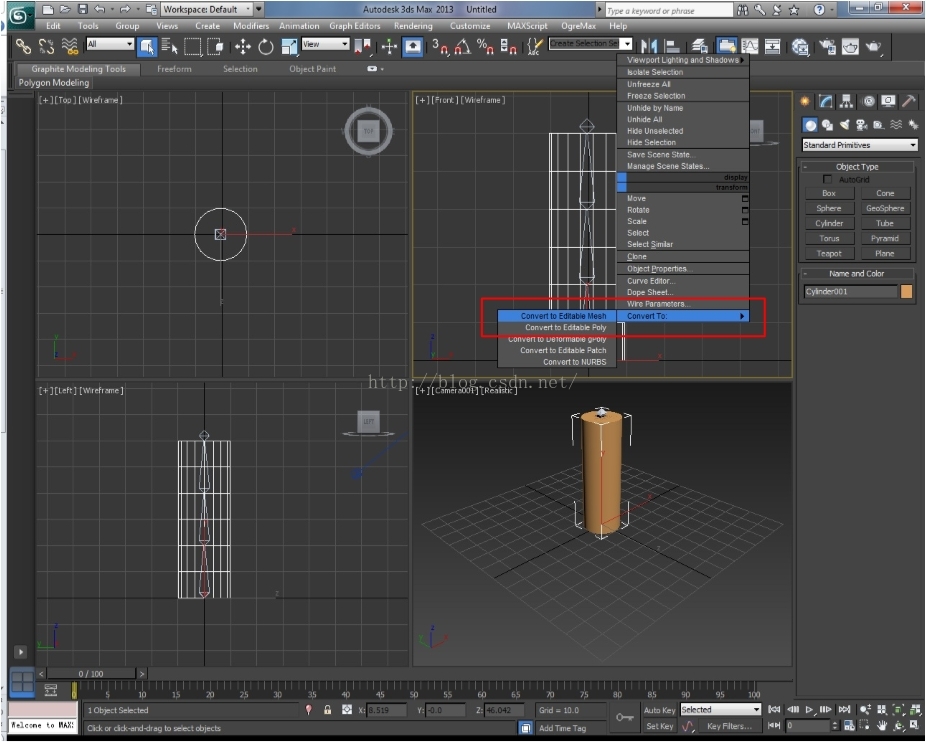
Selectthe cylinder, right click it and click “Convert To:” > “Convert to EditableMesh” to prevent issues with OgreMax;
Click the “Modify” tab > “ModifierList” and add the “Skin” modifier
Beneath“Bones:” click “Add” and select all of your bones(You may also edit the envelopes, but for a small test the default settings are ok);
Create the animation
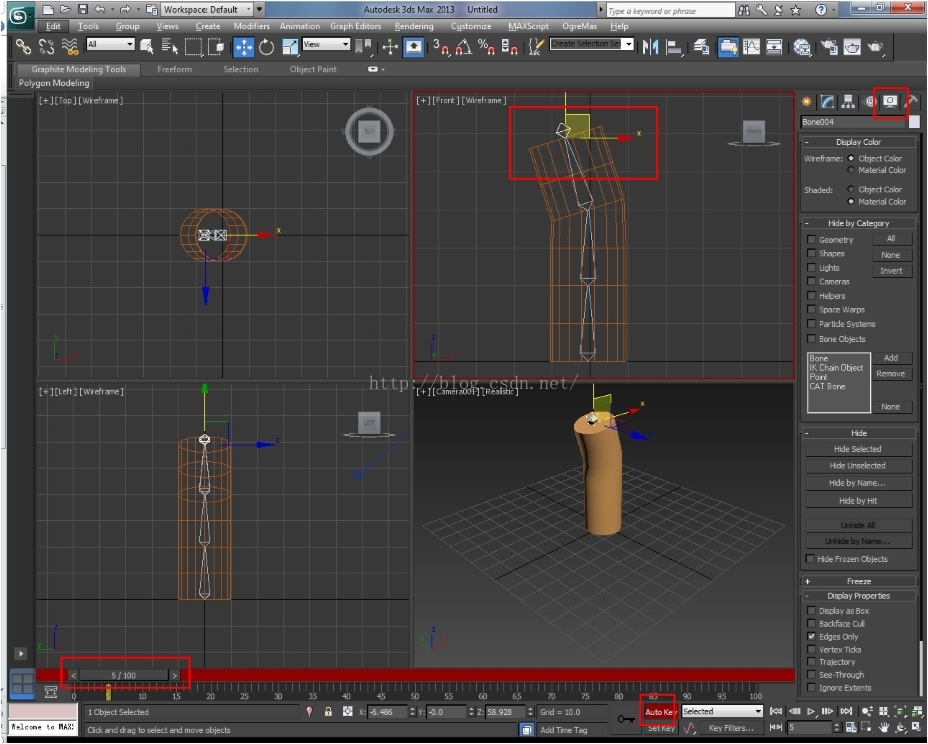
Selectthe cylinder, and click “Display” tab > “Freeze Selected” so it is easier to select thebones during animation;
enable the “Auto Key” mode;
Thefirst key frame will be created automatically. Move the animation track sliderto frame 5;
Move the selected bones a bit. Thecylinder mesh will be deformed. Because you are in the “Auto Key” mode, a keyframe will be created;
Createsome additional key frames. You may also select more bones and move or rotatethem. I’ve created 25 frames ;
After creating the animation,disable the “Auto Key” mode;
OgreMax settings and export
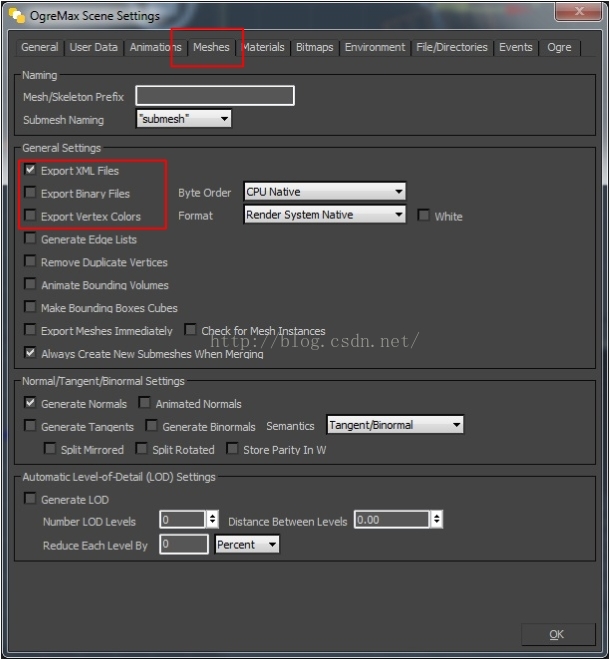
Openthe “OgreMax” > “Scene Settings” dialog from the menu;
Inthe “Meshes” tab, enable “Export XML Files” and disable “Export Binary Files” and“Export Vertex Colors” as well;
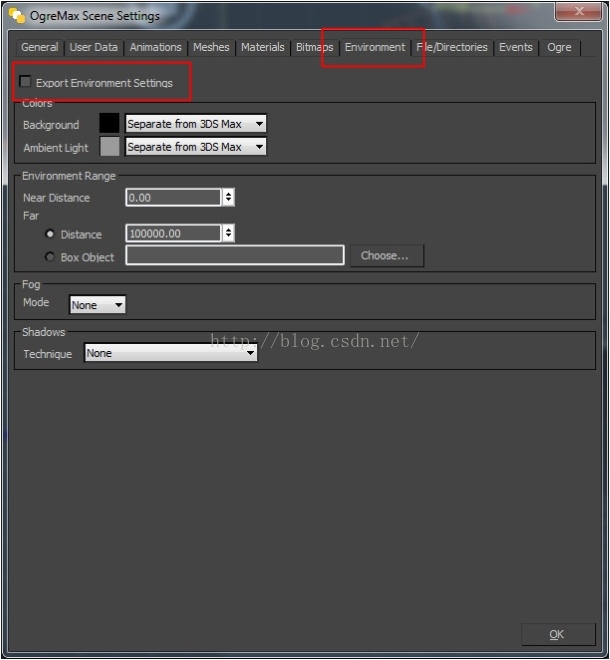
Clickthe “Environment” tab and uncheck “Export Environment Settings”;
Otherwisethe JME importer will throw a NullPointerException;
Whilehaving the cylinder selected, open the “OgreMax”> “Object Settings” dialogfrom the menu;
Openthe “Mesh Animations” tab and select type “Skeleton”, “Export Skeleton” : “Yes”;
Below “Mesh Animations” hit the “Add…”button;
Assign a name to the track, maybe “Cylinder”.The track type must be “Skin. Set the right “Start/End Frames” for youranimation;
Hitok and you will see the animation in the table. ( You may add additionalanimations by selecting other frame ranges, if desired );
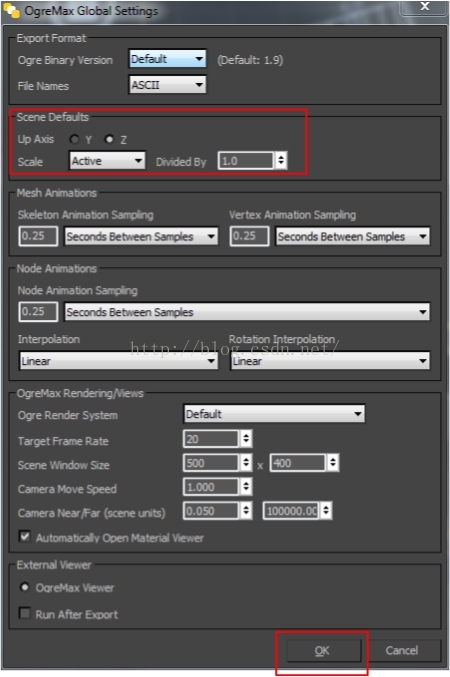
Whilehaving the cylinder selected, open the“OgreMax”> “GlobalSettings” dialog from the menu;
Haveto check the Up Axis to Z , (this will avoidthe model lie down on the Markfor AugmentedReality Application.);

Finishing all setting above, click “OgreMax” > “Export” >”Export Scene” to exportxxxxxx.scene;
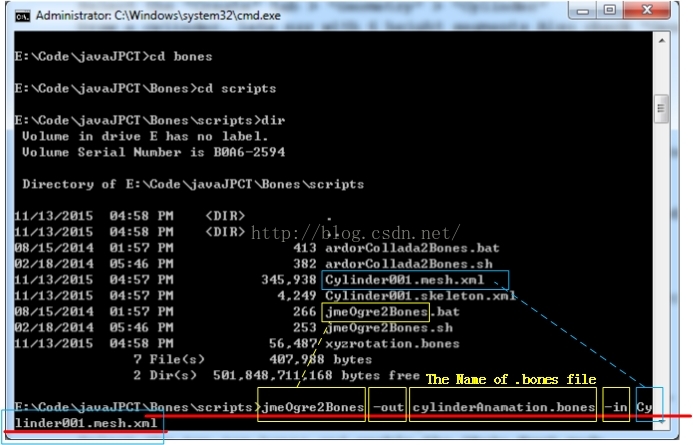
And then , You'll get a xxxxxx.mesh.xmland xxxxxx.skelten.xml file, pass them to “./Bones/script/”;
Usage the command line to runthe function to transfer this two file to the file that the bones knows :
Usage(or you can refer the cut pic as follow):
jmeOgreImporter-outxxxxxx.bones-inxxxxxx.mesh.xml
Rendering
You can test your model( xxxxxx.bones) with the LoadBonesFormatSample program in Bones's examples.


 3155
3155


 被折叠的 条评论
为什么被折叠?
被折叠的 条评论
为什么被折叠?
 到【灌水乐园】发言


