


作者:夏至 欢迎转载,也请保留这段申明,谢谢
1. ScrollView(竖直滚动条)
有没有发现,我们以前的学习都是用在一个手机屏幕框里的,没有上下滑动的?如果我们增加内容好像会被覆盖?没错,这次我们就来解决这个问题,让你像浏览网页一样,刷刷刷。。。。
当然,我们还要增加两个按键,一个返回顶部,一个跳到底部。这样是不是就像网页一样了。这里的布局,我们要说一下,因为linearlayout是包裹在scrollview里面的。这点要注意一下。
<?xml version="1.0" encoding="utf-8"?>
<ScrollView xmlns:android="http://schemas.android.com/apk/res/android"
            android:layout_width="match_parent"
            android:layout_height="match_parent"
            android:id="@+id/scrollView">
    <LinearLayout
        android:layout_width="match_parent"
        android:layout_height="match_parent"
        android:orientation="vertical" >
        <Button
            android:id="@+id/bottom"
            android:layout_width="match_parent"
            android:layout_height="wrap_content"
            android:textSize="24sp"
            android:text="跳到底部"
            />
        <TextView
            android:layout_width="match_parent"
            android:layout_height="wrap_content"
            android:text="实现翻滚效果"
            android:textSize="24sp"
            />
        <ImageView
            android:layout_width="wrap_content"
            android:layout_height="wrap_content"

            android:src="@drawable/image1"
            />
        <ImageView
            android:layout_width="wrap_content"
            android:layout_height="wrap_content"
            android:scaleType="fitCenter"
            android:src="@drawable/image2"
            />
        <ImageView
            android:layout_width="wrap_content"
            android:layout_height="wrap_content"
            android:scaleType="fitCenter"
            android:src="@drawable/shaorui"
            />
        <ImageView
            android:layout_width="wrap_content"
            android:layout_height="wrap_content"
            android:scaleType="fitCenter"
            android:src="@drawable/start"
            />
        <ImageView
            android:layout_width="wrap_content"
            android:layout_height="wrap_content"
            android:scaleType="fitCenter"
            android:src="@drawable/stop"
            />
        <Button
            android:id="@+id/top"
            android:layout_width="match_parent"
            android:layout_height="wrap_content"
            android:textSize="24sp"
            android:text="回到顶部"
            />
    </LinearLayout>
</ScrollView>
如果用eclipse的话,可以新建一个xml文件,让它是scrollview即可,如果是studio的话,就老老实实的写吧。
好,接下来就是写主活动的程序了。这里的scrollview有连个方法可用。
我们可以直接利用ScrollView给我们提供的:fullScroll()方法:
- scrollView.fullScroll(ScrollView.FOCUS_DOWN);滚动到底部
- scrollView.fullScroll(ScrollView.FOCUS_UP);滚动到顶部
public class MainActivity extends AppCompatActivity implements View.OnClickListener {
private ScrollView scrollView;
@Override
protected void onCreate(Bundle savedInstanceState) {
super.onCreate(savedInstanceState);
setContentView(R.layout.linearlayout);
Button top = (Button) findViewById(R.id.top);
Button bottom = (Button) findViewById(R.id.bottom);
scrollView = (ScrollView) findViewById(R.id.scrollView);
top.setOnClickListener(this);
bottom.setOnClickListener(this);
}
@Override
public void onClick(View v) {
switch (v.getId()) {
case R.id.top:
scrollView.fullScroll(ScrollView.FOCUS_UP);
break;
case R.id.bottom:
scrollView.fullScroll(ScrollView.FOCUS_DOWN);
break;
}
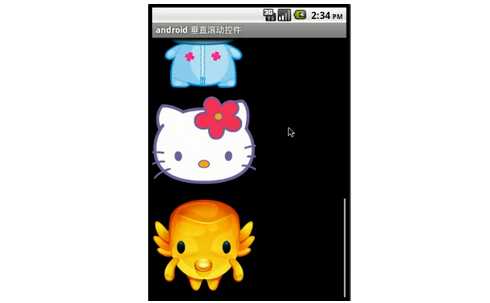
}效果如图:

2. HorizontalScrollView(水平滚动条)
这里再扩充一下水平方向的。HorizontalScrollView,再把linearlayout 的方向改成水平,其他的都不变.
<HorizontalScrollView
    xmlns:android="http://schemas.android.com/apk/res/android"
    android:layout_width="match_parent"
    android:layout_height="wrap_content"
    android:id="@+id/scrollView">
    <LinearLayout
    android:layout_width="match_parent"
    android:layout_height="match_parent"
    android:orientation="horizontal" >
     .....
当然了,MainActivity那里我们也要修改一下。就是把ScrollView 全部替换 HorizontalScrollView 即可:
public class MainActivity extends AppCompatActivity implements View.OnClickListener {
    private HorizontalScrollView horizontalScrollView;
    @Override
    protected void onCreate(Bundle savedInstanceState) {
        super.onCreate(savedInstanceState);
        setContentView(R.layout.linearlayout);
        Button top = (Button) findViewById(R.id.top);
        Button bottom = (Button) findViewById(R.id.bottom);
        horizontalScrollView = (HorizontalScrollView) findViewById(R.id.scrollView);
        top.setOnClickListener(this);
        bottom.setOnClickListener(this);
    }
    @Override
    public void onClick(View v) {
        switch (v.getId()) {
            case R.id.top:
                horizontalScrollView.fullScroll(HorizontalScrollView.FOCUS_UP);
                break;
            case R.id.bottom:
                horizontalScrollView.fullScroll(HorizontalScrollView.FOCUS_DOWN);
                break;
        }
    }
效果如图:

当然,效果也是丑得不要不要的,自行修改布局把。
如有错误,欢迎指出,如果喜欢,欢迎收藏!


 1842
1842

 被折叠的 条评论
为什么被折叠?
被折叠的 条评论
为什么被折叠?
 到【灌水乐园】发言


