


上篇我们简要介绍了Core Data的框架,我们对Core Data有了一个基本的认识,这些都是理论上的,下面我们做一个Demo,执行一些简单的增、删、改、查等操作。
首先我们新建一个Project,在创建的时候勾选"Use Core Data"复选框,
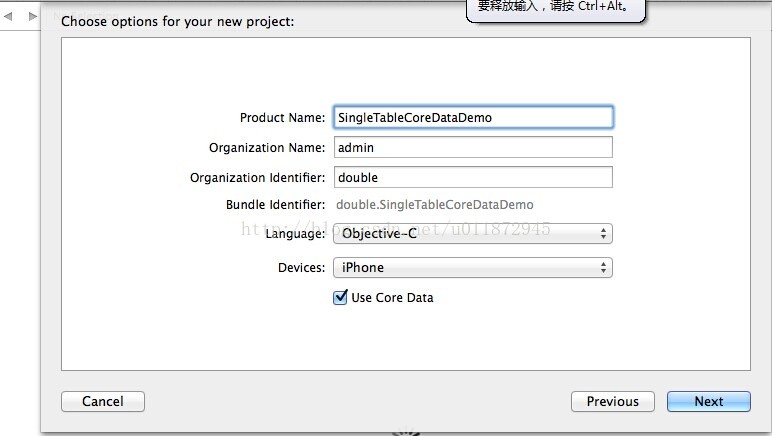
创建完成以后如下:
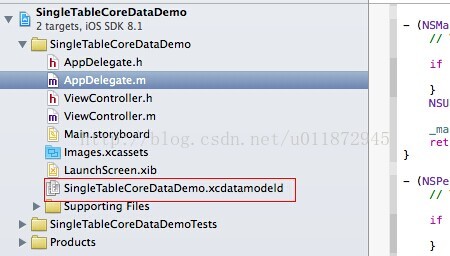
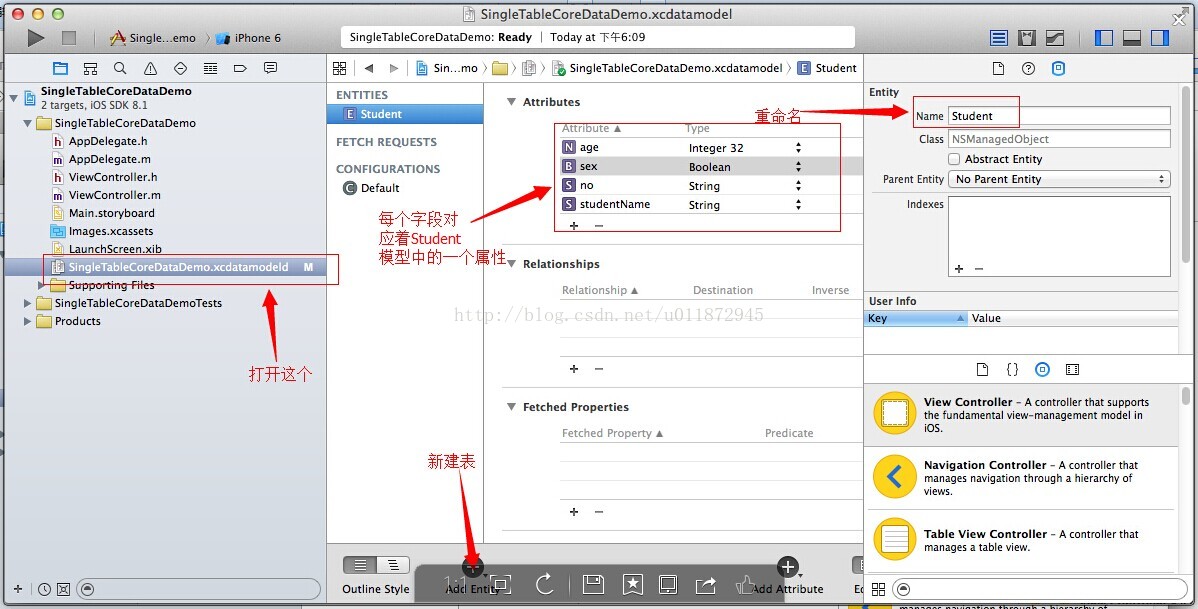
系统自动为我们创建了一个与工程同名的Data Model,打开该Model,新建一个Entity,设置Entity的Name,添加Entity的Attributes,如下图:
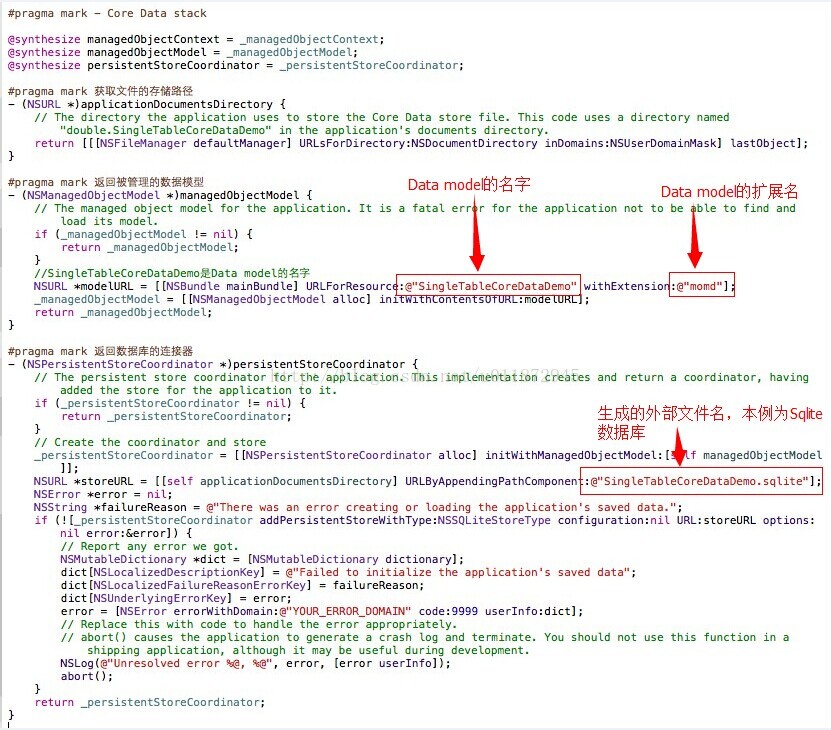
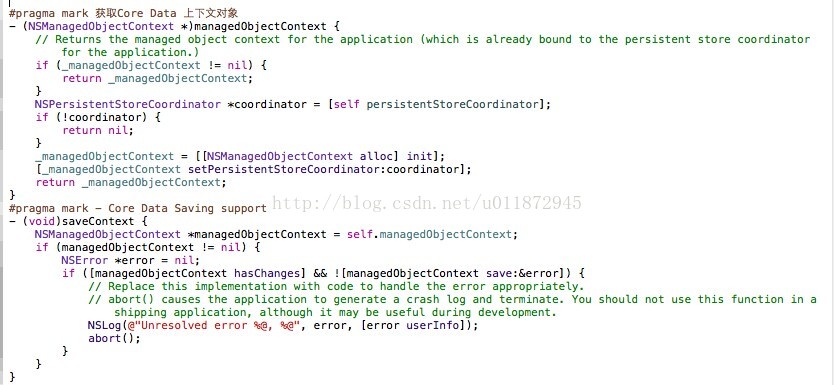
由于我们在创建Project的时候勾选了"Use Core Data",所以系统已经自动为我们生成了Core Date增、删、改、查的对象,首先我们看看系统自动创建好的Core Data对象,对象说明看注释,截图如下:
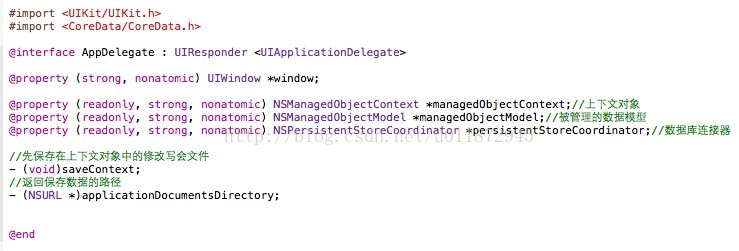
下面我们需要做的就是完成对数据的增、删、改、查,首先我们新建一个Student类,字段参照我们创建的Student Entity中的Attributes,代码如下:
#import <Foundation/Foundation.h>

@interface Student : NSObject

@property(nonatomic,strong)NSString *no;
@property(nonatomic,strong)NSString *studentName;
@property(nonatomic,retain)NSNumber *age;
@property(nonatomic,retain)NSNumber *sex;

@end
#import "Student.h"
@implementation Student
@synthesize age;
@synthesize no;
@synthesize studentName;
@synthesize sex;
@end
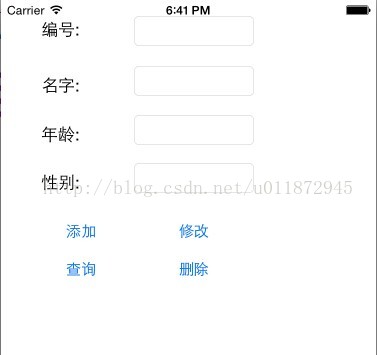
然后我们在界面上添加四个方法,分别是数据的添加、修改、删除、查询,代码如下:
添加数据:
#pragma mark 保存数据
-(BOOL)SaveData:(Student *)stu{
    BOOL result = YES;
    NSManagedObjectContext *context =[self managedObjectContext];
    Student *student =[NSEntityDescription insertNewObjectForEntityForName:TableName inManagedObjectContext:context];

    student.no =stu.no;
    student.age = stu.age;
    student.studentName = stu.studentName;
    student.sex = stu.sex;

    NSError *error = nil;
    if([context save:&error]){
        result = YES;
        NSLog(@"保存数据成功");
    }else{
        result = NO;
        NSLog(@"保存数据失败");
    }

    return result;
}
-(BOOL)UpdateData:(NSString *)no StudentName:(NSString *)newName{
    BOOL result = YES;

    NSManagedObjectContext *context =[self managedObjectContext];

    NSPredicate *predicate =[NSPredicate predicateWithFormat:@" no like[cd] '123'"];

    NSFetchRequest *fetchRequest =[[NSFetchRequest alloc] init];
    NSEntityDescription *entity =[NSEntityDescription entityForName:TableName inManagedObjectContext:context];
    [fetchRequest setEntity:entity];
    [fetchRequest setPredicate:predicate];

    NSError *error = nil;
    NSArray *resultArr =[context executeFetchRequest:fetchRequest error:&error];
    for(Student *stu in resultArr){
        stu.studentName = newName;
    }
    if([context save:&error]){
        result = YES;
        NSLog(@"更新成功");

    }else{
        result = NO;
        NSLog(@"更新失败");
    }
    return result;
}
删除数据:
-(BOOL)DeleteData:(NSString *)no{
    BOOL result =  YES;

    NSManagedObjectContext *context =[self managedObjectContext];
    NSEntityDescription *entity =[NSEntityDescription entityForName:TableName inManagedObjectContext:context];
    NSPredicate *predicate =[NSPredicate predicateWithFormat:@"no like[cd] '%@'",no];
    NSFetchRequest *fetchRequest =[[NSFetchRequest alloc] init];
    //[fetchRequest setIncludesPropertyValues:NO];

    [fetchRequest setEntity:entity];
    [fetchRequest setPredicate:predicate];

    NSError *error = nil;

    NSArray *array =[context executeFetchRequest:fetchRequest error:&error];
    if(!error && array && [array count])
    {
        for(NSManagedObject *obj in array){
            [context deleteObject:obj];
        }
        if([context save:&error]){
            result = YES;
        }else{
            result = NO;
        }
    }
    return result;
}
查询:
-(NSArray *)SelectData:(int)pagesize RecordOffset:(int)currentPage{
    NSManagedObjectContext *context =[self managedObjectContext];
    NSFetchRequest *fetchRequest =[[NSFetchRequest alloc] init];
    [fetchRequest setFetchLimit:pagesize];
    [fetchRequest setFetchOffset:currentPage];

    NSEntityDescription *entity =[NSEntityDescription entityForName:TableName inManagedObjectContext:context];
    [fetchRequest setEntity:entity];
    NSError *error = nil;
    NSArray *array =[context executeFetchRequest:fetchRequest error:&error];
    return array;
}
参考:
1、https://developer.apple.com/library/mac/documentation/Cocoa/Conceptual/CoreData/Articles/cdTechnologyOverview.html#//apple_ref/doc/uid/TP40009296-SW1
2、https://developer.apple.com/library/mac/documentation/Cocoa/Conceptual/Predicates/Articles/pCreating.html


 1450
1450


 被折叠的 条评论
为什么被折叠?
被折叠的 条评论
为什么被折叠?
 到【灌水乐园】发言


