


关于卷积的理论这里就不啰嗦了。最近初步学习图像处理,使用java写了点对图像进项卷积操作的代码,实验的过程中感觉颇为惊奇,原来觉得高深的图像的锐化、浮雕、边缘检测等技术,使用简单的卷积就可以轻松实现。
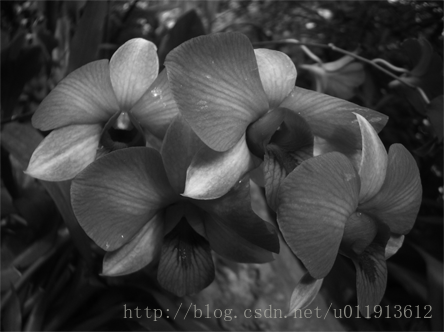
我首先将一副彩色的图像使用photoshop将其转换为灰度的raw格式,这简化了程序。转化后的图像如图所示:
接下来要对该图像做卷积操作,下面的类中只有一个静态方法,它能对raw格式灰度图像数据做卷积操作:
public class Convolution {
    public static byte[][] valide(byte[][] src,int[][] filter){
        if(src[0].length<filter[0].length || src.length<filter.length){
            return null;
        }
        if(filter.length%2==0 || filter[0].length%2==0){
            return null;
        }
        int[][]tem = new int[filter.length][filter[0].length];
        int valideWidth = src[0].length - filter[0].length+1;
        int valideheight = src.length - filter.length+1;
        byte[][] valide = new byte[valideheight][valideWidth];
        for(int i=0;i<valideheight;i++){
            for(int j=0;j<valideWidth;j++){
                for(int y=0;y<filter.length;y++){
                    for(int z=0;z<filter[0].length;z++){
                        tem[y][z] =(src[i+y][j+z]&0xff)*(filter[y][z]);
                    }
                }
                int kk=0;
                for(int y=0;y<filter.length;y++){
                    for(int z=0;z<filter[0].length;z++){
                        kk += tem[y][z];
                    }
                }
                if(kk<0)kk=0;
                if(kk>255)kk=255;
                valide[i][j]=(byte) kk;
            }
        }
        return valide;
    }
}
接下来,是一个测试程序。测试程序中,读一个raw格式的灰度图,然后将其转换为二维的数据格式,接下来对图像做卷积操作,也就是调用Convolution 中的valide方法。注意这里使用的是valide,因此不需要处理边缘,处理后的图像比原图像减小卷积核大小-1。
import java.io.File;
import java.io.FileInputStream;
import java.io.FileNotFoundException;
import java.io.FileOutputStream;
import java.io.IOException;
import java.util.Random;

public class Test {

    public static void main(String[] args) {

        // TODO Auto-generated method stub
        //int[][] ttt = {{-1,-1,0},{-1,0,1},{0,1,1}}; //浮雕
        //int[][] ttt = {{1,1,1},{1,-7,1},{1,1,1}};   //强调边缘
        //int[][] ttt = {{0,0,0},{0,1,0},{0,0,0}};     //啥也不做
        //int[][] ttt = {{-1,-1,-1},{-1,8,-1},{-1,-1,-1}};   //边缘检测
        int[][] ttt = {{-1,-1,-1,-1,-1},{-1,-1,-1,-1,-1},{-1,-1,24,-1,-1},{-1,-1,-1,-1,-1},{-1,-1,-1,-1,-1}};
        byte [] raw = new byte[444*332];
        FileInputStream in;
        try {
            in = new FileInputStream("flower444x332.raw");
            in.read(raw);
            in.close();
        } catch (FileNotFoundException e) {
            // TODO Auto-generated catch block
            e.printStackTrace();
        } catch (IOException e) {
            // TODO Auto-generated catch block
            e.printStackTrace();
        }


        byte[][] image = new byte[332][444];
        for(int i=0;i<image.length;i++){
            for(int j=0;j<image[0].length;j++){
                image[i][j] = raw[i*image[0].length+j];
            }
        }

        byte[][] valide = Convolution.valide(image, ttt);
        for(int i=0;i<valide.length;i++){
            for(int j=0;j<valide[0].length;j++){
                if(j==valide[0].length-1)
                    System.out.println((valide[i][j]&0xff));
                else
                    System.out.print((valide[i][j]&0xff)+"  ");
            }
        }

        File file = new File("flower"+valide[0].length+"x"+valide.length+".raw");
        if(file.exists())file.delete();
        if(!file.exists()){
            try {
                file.createNewFile();
            } catch (IOException e) {
                // TODO Auto-generated catch block
                e.printStackTrace();
            }
        }
        try {
            FileOutputStream out = new FileOutputStream(file,true);
            for(int i=0;i<valide.length;i++){
                out.write(valide[i]);
            }
            out.close();

        } catch (FileNotFoundException e) {
            // TODO Auto-generated catch block
            e.printStackTrace();
        } catch (IOException e) {
            // TODO Auto-generated catch block
            e.printStackTrace();
        }
    }

}
下面是对几个卷积核的尝试,非常有趣。
首先,啥也不做,用来初步检验程序
int[][] ttt = {{0,0,0},{0,1,0},{0,0,0}}; //啥也不做
可以看到图像并没有变化。
第一:浮雕
int[][] ttt = {{-1,-1,0},{-1,0,1},{0,1,1}}; //浮雕
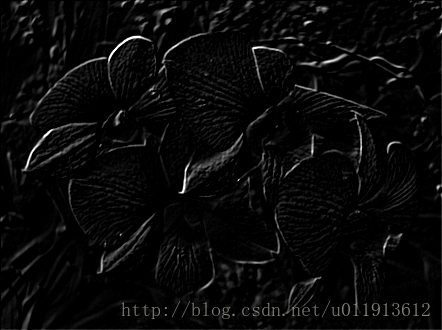
使用浮雕卷积核处理过后,图像明显有了浮雕的特征。
第二、强调边缘
int[][] ttt = {{1,1,1},{1,-7,1},{1,1,1}}; //强调边缘
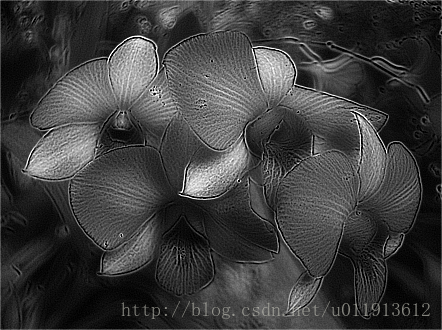
边缘被加强了。
第三、边缘检测(3x3卷积核)
int[][] ttt = {{-1,-1,-1},{-1,8,-1},{-1,-1,-1}}; //边缘检测
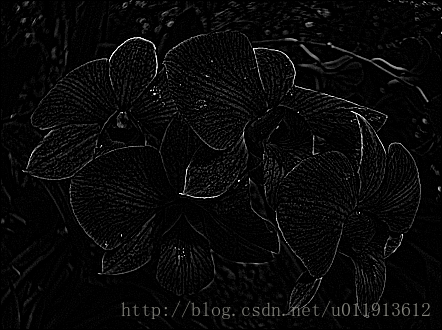
检测到了图像的轮廓。
第四、边缘检测(5x5卷积核)
int[][] ttt = {{-1,-1,-1,-1,-1},{-1,-1,-1,-1,-1},{-1,-1,24,-1,-1},{-1,-1,-1,-1,-1},{-1,-1,-1,-1,-1}};
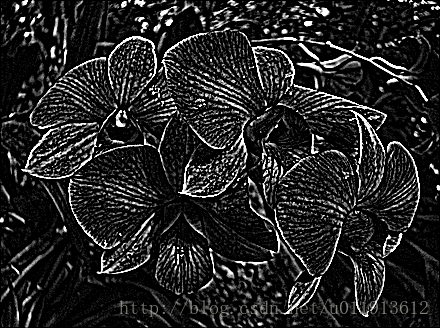
至此,感兴趣的可以自己尝试其他的卷积核。


 887
887


 被折叠的 条评论
为什么被折叠?
被折叠的 条评论
为什么被折叠?
 到【灌水乐园】发言


