


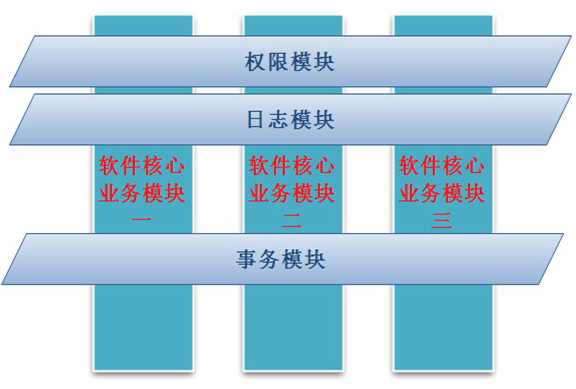
AOP(Aspect Oriented Programming)面向切面编程,通过预编译方式和运行期动态代理实现程序功能的横向多模块统一控制的一种技术。AOP是OOP的补充,是spring框架中的一个重要内容。利用AOP可以对业务逻辑的各个部分进行隔离,从而使得业务逻辑各部分之间的耦合度降低,提高程序的可重用性,同时提高了开发的效率。AOP可以分为静态织入与动态织入,静态织入即在编译前将需织入内容写入目标模块中,这样成本非常高。动态织入则不需要改变目标模块。Spring框架实现了AOP,使用注解配置完成AOP比使用XML配置要更加方便与直观。上一篇随笔中已经详细讲了代理模式。
一、基于XML配置的Spring AOP
在讲注解实现AOP功能前先用前面学习过的使用xml配置Spring AOP功能,这样是为了对比以便更好的理解。
1.1、新建一个Maven项目,添加引用,项目的pom.xml文件如下:
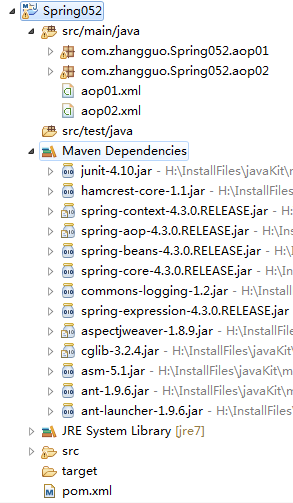

<project xmlns="http://maven.apache.org/POM/4.0.0" xmlns:xsi="http://www.w3.org/2001/XMLSchema-instance"
  xsi:schemaLocation="http://maven.apache.org/POM/4.0.0 http://maven.apache.org/xsd/maven-4.0.0.xsd">
  <modelVersion>4.0.0</modelVersion>

  <groupId>com.zhangguo</groupId>
  <artifactId>Spring052</artifactId>
  <version>0.0.1-SNAPSHOT</version>
  <packaging>jar</packaging>

  <name>Spring052</name>
  <url>http://maven.apache.org</url>

  <properties>
        <project.build.sourceEncoding>UTF-8</project.build.sourceEncoding>
        <spring.version>4.3.0.RELEASE</spring.version>
    </properties>
    <dependencies>
        <dependency>
            <groupId>junit</groupId>
            <artifactId>junit</artifactId>
            <scope>test</scope>
            <version>4.10</version>
        </dependency>
        <dependency>
            <groupId>org.springframework</groupId>
            <artifactId>spring-context</artifactId>
            <version>${spring.version}</version>
        </dependency>
        <dependency>
            <groupId>org.aspectj</groupId>
            <artifactId>aspectjweaver</artifactId>
            <version>1.8.9</version>
        </dependency>
        <dependency>
            <groupId>cglib</groupId>
            <artifactId>cglib</artifactId>
            <version>3.2.4</version>
        </dependency>
    </dependencies>
</project>
1.2、创建要被代理的Math类,代码如下:
package com.zhangguo.Spring052.aop01;

/**
 * 被代理的目标类
 */
public class Math{
    //加
    public int add(int n1,int n2){
        int result=n1+n2;
        System.out.println(n1+"+"+n2+"="+result);
        return result;
    }

    //减
    public int sub(int n1,int n2){
        int result=n1-n2;
        System.out.println(n1+"-"+n2+"="+result);
        return result;
    }

    //乘
    public int mut(int n1,int n2){
        int result=n1*n2;
        System.out.println(n1+"X"+n2+"="+result);
        return result;
    }

    //除
    public int div(int n1,int n2){
        int result=n1/n2;
        System.out.println(n1+"/"+n2+"="+result);
        return result;
    }
}
1.3、编辑AOP中需要使用到的通知类Advices.Java代码如下:
package com.zhangguo.Spring052.aop01;

import org.aspectj.lang.JoinPoint;

/**
 * 通知类,横切逻辑
 *
 */
public class Advices {

    public void before(JoinPoint jp){
        System.out.println("----------前置通知----------");
        System.out.println(jp.getSignature().getName());
    }

    public void after(JoinPoint jp){
        System.out.println("----------最终通知----------");
    }
}
1.4、配置容器初始化时需要的XML文件,aop01.xml文件内容如下:
<?xml version="1.0" encoding="UTF-8"?>
<beans xmlns="http://www.springframework.org/schema/beans"
    xmlns:xsi="http://www.w3.org/2001/XMLSchema-instance"
    xmlns:p="http://www.springframework.org/schema/p"
    xmlns:aop="http://www.springframework.org/schema/aop"
    xsi:schemaLocation="http://www.springframework.org/schema/beans
        http://www.springframework.org/schema/beans/spring-beans.xsd
        http://www.springframework.org/schema/aop
        http://www.springframework.org/schema/aop/spring-aop-4.3.xsd">

    <!-- 被代理对象 -->
    <bean id="math" class="com.zhangguo.Spring052.aop01.Math"></bean>

    <!-- 通知 -->
    <bean id="advices" class="com.zhangguo.Spring052.aop01.Advices"></bean>

    <!-- aop配置 -->
    <aop:config proxy-target-class="true">
        <!--切面 -->
        <aop:aspect ref="advices">
            <!-- 切点 -->
            <aop:pointcut expression="execution(* com.zhangguo.Spring052.aop01.Math.*(..))" id="pointcut1"/>
            <!--连接通知方法与切点 -->
            <aop:before method="before" pointcut-ref="pointcut1"/>
            <aop:after method="after" pointcut-ref="pointcut1"/>
        </aop:aspect>
    </aop:config>

</beans>
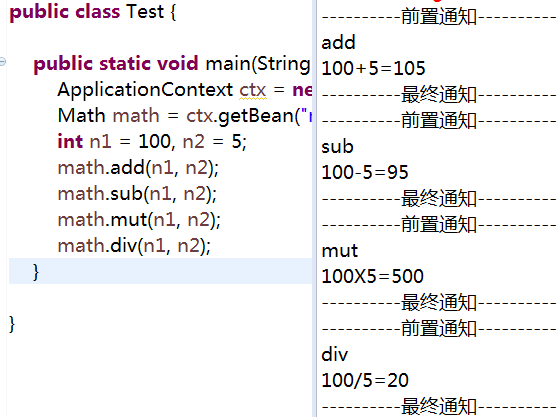
1.5、测试代码Test.java如下:
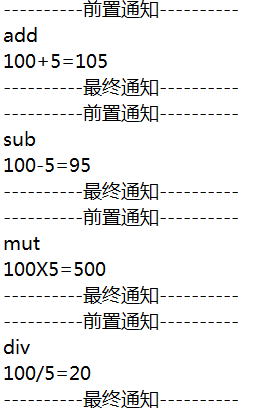
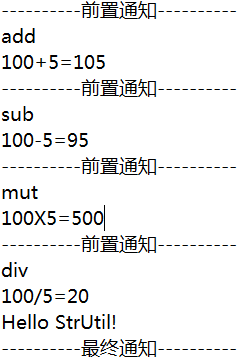
package com.zhangguo.Spring052.aop01;

import org.springframework.context.ApplicationContext;
import org.springframework.context.support.ClassPathXmlApplicationContext;

public class Test {

    public static void main(String[] args) {
        ApplicationContext ctx = new ClassPathXmlApplicationContext("aop01.xml");
        Math math = ctx.getBean("math", Math.class);
        int n1 = 100, n2 = 5;
        math.add(n1, n2);
        math.sub(n1, n2);
        math.mut(n1, n2);
        math.div(n1, n2);
    }

}
运行结果:
二、使用注解配置AOP
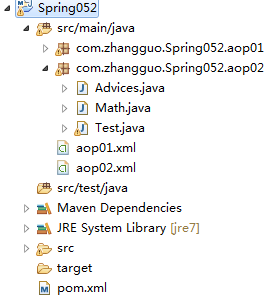
2.1、在上一个示例中修改被代理的类Math,为了实现IOC扫描在Math类上注解了@Service并命名bean为math。相当于上一个示例中在xml配置文件中增加了一个bean,<!-- 被代理对象 --><bean id="math" class="com.zhangguo.Spring052.aop01.Math"></bean>,Math类的代码如下:
package com.zhangguo.Spring052.aop02;

import org.springframework.stereotype.Service;

/**
 * 被代理的目标类
 */
@Service("math")
public class Math{
    //加
    public int add(int n1,int n2){
        int result=n1+n2;
        System.out.println(n1+"+"+n2+"="+result);
        return result;
    }

    //减
    public int sub(int n1,int n2){
        int result=n1-n2;
        System.out.println(n1+"-"+n2+"="+result);
        return result;
    }

    //乘
    public int mut(int n1,int n2){
        int result=n1*n2;
        System.out.println(n1+"X"+n2+"="+result);
        return result;
    }

    //除
    public int div(int n1,int n2){
        int result=n1/n2;
        System.out.println(n1+"/"+n2+"="+result);
        return result;
    }
}
2.2、修改通知类Advices,代码中有3个注解,@Component表示该类的实例会被Spring IOC容器管理;@Aspect表示声明一个切面;@Before表示before为前置通知,通过参数execution声明一个切点,Advices.java代码如下所示:
package com.zhangguo.Spring052.aop02;

import org.aspectj.lang.JoinPoint;
import org.aspectj.lang.annotation.After;
import org.aspectj.lang.annotation.Aspect;
import org.aspectj.lang.annotation.Before;
import org.springframework.stereotype.Component;

/**
 * 通知类,横切逻辑
 *
 */
@Component
@Aspect
public class Advices {
    @Before("execution(* com.zhangguo.Spring052.aop02.Math.*(..))")
    public void before(JoinPoint jp){
        System.out.println("----------前置通知----------");
        System.out.println(jp.getSignature().getName());
    }

    @After("execution(* com.zhangguo.Spring052.aop02.Math.*(..))")
    public void after(JoinPoint jp){
        System.out.println("----------最终通知----------");
    }
}
上面的代码与下面的配置基本等同
    <!-- 通知 -->
    <bean id="advices" class="com.zhangguo.Spring052.aop01.Advices"></bean>

    <!-- aop配置 -->
    <aop:config proxy-target-class="true">
        <!--切面 -->
        <aop:aspect ref="advices">
            <!-- 切点 -->
            <aop:pointcut expression="execution(* com.zhangguo.Spring052.aop01.Math.*(..))" id="pointcut1"/>
            <!--连接通知方法与切点 -->
            <aop:before method="before" pointcut-ref="pointcut1"/>
            <aop:after method="after" pointcut-ref="pointcut1"/>
        </aop:aspect>
    </aop:config>
2.3、新增配置文件aop02.xml,在配置IOC的基础上增加了aop:aspectj-autoproxy节点,Spring框架会自动为与AspectJ切面配置的Bean创建代理,proxy-target-class="true"属性表示被代理的目标对象是一个类,而非实现了接口的类,主要是为了选择不同的代理方式。
<?xml version="1.0" encoding="UTF-8"?>
<beans xmlns="http://www.springframework.org/schema/beans"
    xmlns:xsi="http://www.w3.org/2001/XMLSchema-instance"
    xmlns:p="http://www.springframework.org/schema/p"
    xmlns:aop="http://www.springframework.org/schema/aop"
    xmlns:context="http://www.springframework.org/schema/context"
    xsi:schemaLocation="http://www.springframework.org/schema/beans
        http://www.springframework.org/schema/beans/spring-beans.xsd
        http://www.springframework.org/schema/context
        http://www.springframework.org/schema/context/spring-context-4.3.xsd
        http://www.springframework.org/schema/aop
        http://www.springframework.org/schema/aop/spring-aop-4.3.xsd">
        <context:component-scan base-package="com.zhangguo.Spring052.aop02">
        </context:component-scan>
        <aop:aspectj-autoproxy proxy-target-class="true"></aop:aspectj-autoproxy>
</beans>
2.4、测试运行代码Test.java如下:
package com.zhangguo.Spring052.aop02;

import org.springframework.context.ApplicationContext;
import org.springframework.context.support.ClassPathXmlApplicationContext;

public class Test {

    public static void main(String[] args) {
        ApplicationContext ctx = new ClassPathXmlApplicationContext("aop02.xml");
        Math math = ctx.getBean("math", Math.class);
        int n1 = 100, n2 = 5;
        math.add(n1, n2);
        math.sub(n1, n2);
        math.mut(n1, n2);
        math.div(n1, n2);
    }

}
运行结果:
三、AspectJ切点函数
切点函数可以定位到准确的横切逻辑位置,在前面的示例中我们只使用过execution(* com.zhangguo.Spring052.aop02.Math.*(..)),execution就是一个切点函数,但该函数只什么方法一级,如果我们要织入的范围是类或某个注解则execution就不那么好用了,其实一共有9个切点函数,有不同的针对性。
@AspectJ使用AspectJ专门的切点表达式描述切面,Spring所支持的AspectJ表达式可分为四类:
方法切点函数:通过描述目标类方法信息定义连接点。
方法参数切点函数:通过描述目标类方法入参信息定义连接点。
目标类切点函数:通过描述目标类类型信息定义连接点。
代理类切点函数:通过描述代理类信息定义连接点。
常见的AspectJ表达式函数:
execution():满足匹配模式字符串的所有目标类方法的连接点
@annotation():任何标注了指定注解的目标方法链接点
args():目标类方法运行时参数的类型指定连接点
@args():目标类方法参数中是否有指定特定注解的连接点
within():匹配指定的包的所有连接点
target():匹配指定目标类的所有方法
@within():匹配目标对象拥有指定注解的类的所有方法
@target():匹配当前目标对象类型的执行方法,其中目标对象持有指定的注解
this():匹配当前AOP代理对象类型的所有执行方法
最常用的是:execution(<修饰符模式>?<返回类型模式><方法名模式>(<参数模式>)<异常模式>?)切点函数,可以满足多数需求。
为了展示各切点函数的功能现在新增一个类StrUtil,类如下:
package com.zhangguo.Spring052.aop03;

import org.springframework.stereotype.Component;

@Component("strUtil")
public class StrUtil {
    public void show(){
        System.out.println("Hello StrUtil!");
    }
}
测试代码如下:
package com.zhangguo.Spring052.aop03;

import org.springframework.context.ApplicationContext;
import org.springframework.context.support.ClassPathXmlApplicationContext;

public class Test {

    public static void main(String[] args) {
        ApplicationContext ctx = new ClassPathXmlApplicationContext("aop03.xml");
        IMath math = ctx.getBean("math", Math.class);
        int n1 = 100, n2 = 5;
        math.add(n1, n2);
        math.sub(n1, n2);
        math.mut(n1, n2);
        math.div(n1, n2);

        StrUtil strUtil=ctx.getBean("strUtil",StrUtil.class);
        strUtil.show();
    }

}
3.1、切点函数execution,通知与切面的定义如下:
package com.zhangguo.Spring052.aop03;

import org.aspectj.lang.JoinPoint;
import org.aspectj.lang.annotation.After;
import org.aspectj.lang.annotation.Aspect;
import org.aspectj.lang.annotation.Before;
import org.springframework.stereotype.Component;

/**
 * 通知类,横切逻辑
 *
 */
@Component
@Aspect
public class Advices {
    @Before("execution(* com.zhangguo.Spring052.aop03.Math.*(..))")
    public void before(JoinPoint jp){
        System.out.println("----------前置通知----------");
        System.out.println(jp.getSignature().getName());
    }

    //execution切点函数
    //com.zhangguo.Spring052.aop03包下所有类的所有方法被切入
    @After("execution(* com.zhangguo.Spring052.aop03.*.*(..))")
    public void after(JoinPoint jp){
        System.out.println("----------最终通知----------");
    }
}
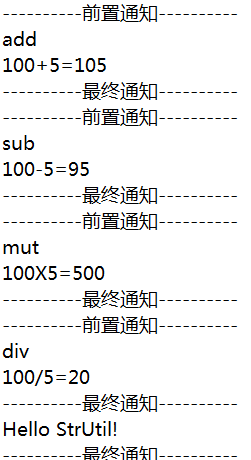
运行结果如下:
execution(<修饰符模式>?<返回类型模式><方法名模式>(<参数模式>)<异常模式>?)
3.2、切点函数within
    //within切点函数
    //com.zhangguo.Spring052.aop03包下所有类的所有方法被切入
    @After("within(com.zhangguo.Spring052.aop03.*)")
    public void after(JoinPoint jp){
        System.out.println("----------最终通知----------");
    }
3.3、this切点函数
    //this切点函数
    //实现了IMath接口的代理对象的任意连接点
    @After("this(com.zhangguo.Spring052.aop03.IMath)")
    public void after(JoinPoint jp){
        System.out.println("----------最终通知----------");
    }
3.4、args切点函数
    //args切点函数
    //要求方法有两个int类型的参考才会被织入横切逻辑
    @After("args(int,int)")
    public void after(JoinPoint jp){
        System.out.println("----------最终通知----------");
    }
如果参数类型不是基本数据类型则需要包名。
3.5、@annotation切点函数
先自定义一个可以注解在方法上的注解
package com.zhangguo.Spring052.aop03;

import java.lang.annotation.Documented;
import java.lang.annotation.ElementType;
import java.lang.annotation.Retention;
import java.lang.annotation.RetentionPolicy;
import java.lang.annotation.Target;

@Target({ElementType.METHOD})
@Retention(RetentionPolicy.RUNTIME)
@Documented
public @interface MyAnno {
}
    //@annotation切点函数
    //要求方法必须被注解com.zhangguo.Spring052.aop03.MyAnno才会被织入横切逻辑
    @After("@annotation(com.zhangguo.Spring052.aop03.MyAnno)")
    public void after(JoinPoint jp){
        System.out.println("----------最终通知----------");
    }
package com.zhangguo.Spring052.aop03;

import org.springframework.stereotype.Component;

@Component("strUtil")
public class StrUtil {
    @MyAnno
    public void show(){
        System.out.println("Hello StrUtil!");
    }
}
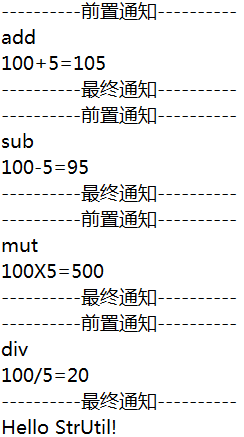
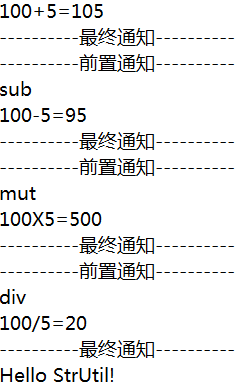
运行结果:
其它带@的切点函数都是针对注解的
四、AspectJ通知注解
AspectJ通知注解共有6个,常用5个,引介少用一些。
先解决定义切点复用的问题,如下代码所示,切点函数的内容完全一样:
package com.zhangguo.Spring052.aop04;

import org.aspectj.lang.JoinPoint;
import org.aspectj.lang.annotation.After;
import org.aspectj.lang.annotation.Aspect;
import org.aspectj.lang.annotation.Before;
import org.springframework.stereotype.Component;

/**
 * 通知类,横切逻辑
 *
 */
@Component
@Aspect
public class Advices {
    @Before("execution(* com.zhangguo.Spring052.aop04.Math.*(..))")
    public void before(JoinPoint jp){
        System.out.println("----------前置通知----------");
        System.out.println(jp.getSignature().getName());
    }

    @After("execution(* com.zhangguo.Spring052.aop04.Math.*(..))")
    public void after(JoinPoint jp){
        System.out.println("----------最终通知----------");
    }
}
可以先定义一个切点然后复用,如下所示:
package com.zhangguo.Spring052.aop04;

import org.aspectj.lang.JoinPoint;
import org.aspectj.lang.annotation.After;
import org.aspectj.lang.annotation.Aspect;
import org.aspectj.lang.annotation.Before;
import org.aspectj.lang.annotation.Pointcut;
import org.springframework.stereotype.Component;

/**
 * 通知类,横切逻辑
 */
@Component
@Aspect
public class Advices {
    //切点
    @Pointcut("execution(* com.zhangguo.Spring052.aop04.Math.*(..))")
    public void pointcut(){
    }

    @Before("pointcut()")
    public void before(JoinPoint jp){
        System.out.println("----------前置通知----------");
        System.out.println(jp.getSignature().getName());
    }

    @After("pointcut()")
    public void after(JoinPoint jp){
        System.out.println("----------最终通知----------");
    }
}
修改Advices.java文件,增加各种通知类型如下:
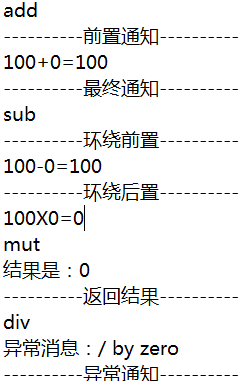
package com.zhangguo.Spring052.aop04;

import org.aspectj.lang.JoinPoint;
import org.aspectj.lang.ProceedingJoinPoint;
import org.aspectj.lang.annotation.After;
import org.aspectj.lang.annotation.AfterReturning;
import org.aspectj.lang.annotation.AfterThrowing;
import org.aspectj.lang.annotation.Around;
import org.aspectj.lang.annotation.Aspect;
import org.aspectj.lang.annotation.Before;
import org.aspectj.lang.annotation.Pointcut;
import org.springframework.stereotype.Component;

/**
 * 通知类,横切逻辑
 */
@Component
@Aspect
public class Advices {
    //切点
    @Pointcut("execution(* com.zhangguo.Spring052.aop04.Math.a*(..))")
    public void pointcut(){
    }

    //前置通知
    @Before("pointcut()")
    public void before(JoinPoint jp){
        System.out.println(jp.getSignature().getName());
        System.out.println("----------前置通知----------");
    }

    //最终通知
    @After("pointcut()")
    public void after(JoinPoint jp){
        System.out.println("----------最终通知----------");
    }

    //环绕通知
    @Around("execution(* com.zhangguo.Spring052.aop04.Math.s*(..))")
    public Object around(ProceedingJoinPoint pjp) throws Throwable{
        System.out.println(pjp.getSignature().getName());
        System.out.println("----------环绕前置----------");
        Object result=pjp.proceed();
        System.out.println("----------环绕后置----------");
        return result;
    }

    //返回结果通知
    @AfterReturning(pointcut="execution(* com.zhangguo.Spring052.aop04.Math.m*(..))",returning="result")
    public void afterReturning(JoinPoint jp,Object result){
        System.out.println(jp.getSignature().getName());
        System.out.println("结果是:"+result);
        System.out.println("----------返回结果----------");
    }

    //异常后通知
    @AfterThrowing(pointcut="execution(* com.zhangguo.Spring052.aop04.Math.d*(..))",throwing="exp")
    public void afterThrowing(JoinPoint jp,Exception exp){
        System.out.println(jp.getSignature().getName());
        System.out.println("异常消息:"+exp.getMessage());
        System.out.println("----------异常通知----------");
    }
}
运行结果:
五、零配置实现Spring IoC与AOP
为了实现零配置在原有示例的基础上我们新增一个类User,如下所示:
package com.zhangguo.Spring052.aop05;

public class User {
    public void show(){
        System.out.println("一个用户对象");
    }
}
该类并未注解,容器不会自动管理。因为没有xml配置文件,则使用一个作为配置信息,ApplicationCfg.java文件如下:
package com.zhangguo.Spring052.aop05;

import org.springframework.context.annotation.Bean;
import org.springframework.context.annotation.ComponentScan;
import org.springframework.context.annotation.Configuration;
import org.springframework.context.annotation.EnableAspectJAutoProxy;

@Configuration  //用于表示当前类为容器的配置类,类似<beans/>
@ComponentScan(basePackages="com.zhangguo.Spring052.aop05")  //扫描的范围,相当于xml配置的结点<context:component-scan/>
@EnableAspectJAutoProxy(proxyTargetClass=true)  //自动代理,相当于<aop:aspectj-autoproxy proxy-target-class="true"></aop:aspectj-autoproxy>
public class ApplicationCfg {
    //在配置中声明一个bean,相当于<bean id=getUser class="com.zhangguo.Spring052.aop05.User"/>
    @Bean
    public User getUser(){
        return new User();
    }
}
该类的每一部分内容基本都与xml 配置有一对一的关系,请看注释,这样做要比写xml方便,但不便发布后修改。测试代码如下:
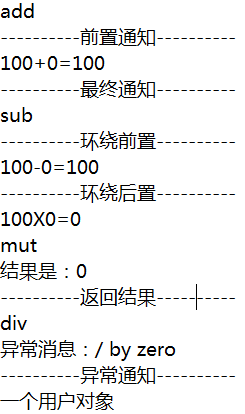
package com.zhangguo.Spring052.aop05;

import org.springframework.context.ApplicationContext;
import org.springframework.context.annotation.AnnotationConfigApplicationContext;
import org.springframework.context.support.ClassPathXmlApplicationContext;

public class Test {

    public static void main(String[] args) {
        // 通过类初始化容器
        ApplicationContext ctx = new AnnotationConfigApplicationContext(ApplicationCfg.class);
        Math math = ctx.getBean("math", Math.class);
        int n1 = 100, n2 = 0;
        math.add(n1, n2);
        math.sub(n1, n2);
        math.mut(n1, n2);
        try {
            math.div(n1, n2);
        } catch (Exception e) {
        }

        User user=ctx.getBean("getUser",User.class);
        user.show();
    }

}
advices.java 同上,没有任何变化,运行结果如下:


 2913
2913


 被折叠的 条评论
为什么被折叠?
被折叠的 条评论
为什么被折叠?
 到【灌水乐园】发言


