


首先,那么如果朋友你只是来找截屏接口使用在你的项目中的,那么你就不用继续往下看了。。。
基于上班时间较忙,另外个人觉得还是将这个截屏流程分析和使用分开总结比较好,于是决定分两篇文章来讲解。好了,那么上一篇文章主要是从源码角度分析讲解了Android系统截屏流程,这篇文章将结合上一篇文章总结如何在应用层进行截屏,还没看过从源码角度分析讲解Android系统截屏流程的同学建议先移步Android如何在应用层进行截屏及截屏源码分析(上) 作个具体的了解。
其实针对应用层要去使用这个截屏操作接口,再不修改平台源码的情况下基本上等于无法做到截屏操作。下面是博主的探索过程:
1、直接使用framework层代码接口实现截屏操作
2、间接使用,通过发送模拟按键实现截屏操作
3、在上层java代码使用adb shell指令实现截屏操作
其中第1步和第2步是根据截屏源码分析想到的,这两步无法实现截屏,第3步是再网上看到别人的,可以实现截屏操作,但是这个操作有个缺陷,就是一定要确保Android机是被root过的,这样子等于没用。
还有朋友说通过利用SDK提供的View.getDrawingCache()方法去实现截屏,我想说这个接口只是用来拿到view的缩略图而已,这种不叫截屏。
第一种情况:直接使用framework层代码接口实现截屏操作
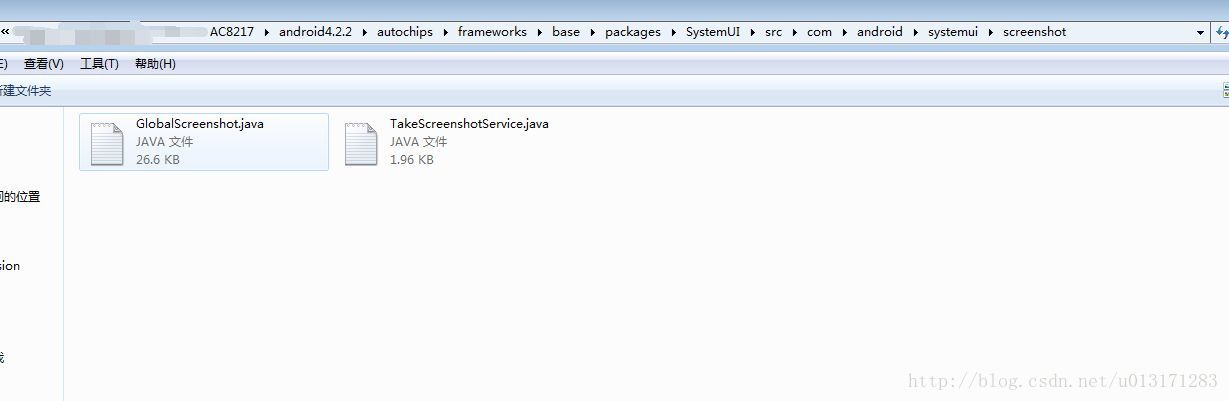
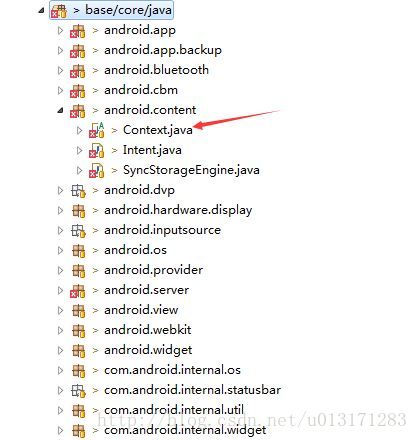
在上一篇文章中已经提到按键的接收是在PhoneWindowManager中实现的,然后再接收到按键之后最终截屏操作是通过下面两个类启动截屏操作:
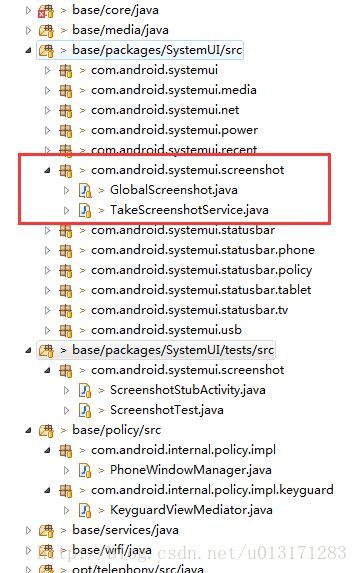
这两个类实际上是系统SystemUI中的接口:
好了那么我们直接拿来其中关键代码使用试试看:
那么我先用间接方式,通过启动这个TakeScreenshotService,然后传入相关需要的参数:
/************************测试方法二framework SystemUI**************************/
    final Object mScreenshotLock = new Object();
    ServiceConnection mScreenshotConnection = null;

    final Runnable mScreenshotTimeout = new Runnable() {
        @Override
        public void run() {
            synchronized (mScreenshotLock) {
                if (mScreenshotConnection != null) {
                    MainActivity.this.unbindService(mScreenshotConnection);
                    mScreenshotConnection = null;
                }
            }
        }
    };

    // Assume this is called from the Handler thread.
    private void takeScreenshot1() {
        synchronized (mScreenshotLock) {
            if (mScreenshotConnection != null) {
                return;
            }
            ComponentName cn = new ComponentName("com.android.systemui",
                    "com.android.systemui.screenshot.TakeScreenshotService");
            Intent intent = new Intent();
            intent.setComponent(cn);ServiceConnection conn = new ServiceConnection() {
                @Override
                public void onServiceConnected(ComponentName name, IBinder service) {
                    synchronized (mScreenshotLock) {
                        if (mScreenshotConnection != this) {
                            return;
                        }
                        Messenger messenger = new Messenger(service);
                        Message msg = Message.obtain(null, 1);
                        final ServiceConnection myConn = this;
//                      Handler h = new Handler(mHandler.getLooper()) {
//                          @Override
//                          public void handleMessage(Message msg) {
//                              synchronized (mScreenshotLock) {
//                                  if (mScreenshotConnection == myConn) {
//                                      MainActivity.this.unbindService(mScreenshotConnection);
//                                      mScreenshotConnection = null;
//                                      mHandler.removeCallbacks(mScreenshotTimeout);
//                                  }
//                              }
//                          }
//                      };
//                      msg.replyTo = new Messenger(h);
                        msg.replyTo = new Messenger(new Handler());
//                      msg.arg1 = msg.arg2 = 0;
                        msg.arg1 = 1;
                        msg.arg2 = 1;
                        try {
                            messenger.send(msg);
                        } catch (RemoteException e) {
                        }
                    }
                }

                @Override
                public void onServiceDisconnected(ComponentName name) {
                }
            };

//          mContext.bindServiceAsUser(intent, conn, Context.BIND_AUTO_CREATE, UserHandle.USER_CURRENT);
//          mContext.bindServiceAsUser(intent, conn, Context.BIND_AUTO_CREATE, -2);
            if (mContext.bindService(intent, conn, Context.BIND_AUTO_CREATE)) {
                mScreenshotConnection = conn;
//              mHandler.postDelayed(mScreenshotTimeout, 10000);

            }
        }
    }
实际上上面的代码无法成功绑定开启这个TakeScreenshotService,启动这个Service在framework SystemUI这边是mContext.bindService传入4个参数,最后一个参数为UserHandle.USER_CURRENT,这个常量值为-2,但是通过上层调用的context根本没有这个传4个参数的bindService方法,笔者进去这个Android.jar中看了看,发现这个Android.jar的context中传入4个参数的bindService方法是bindServiceAsUser,但是这个方法是不能被调用的,这里真是够坑的,上层context和framework层的context既然是不一样的接口,两者就传4个参数的bindService方法区别如下:
上层:
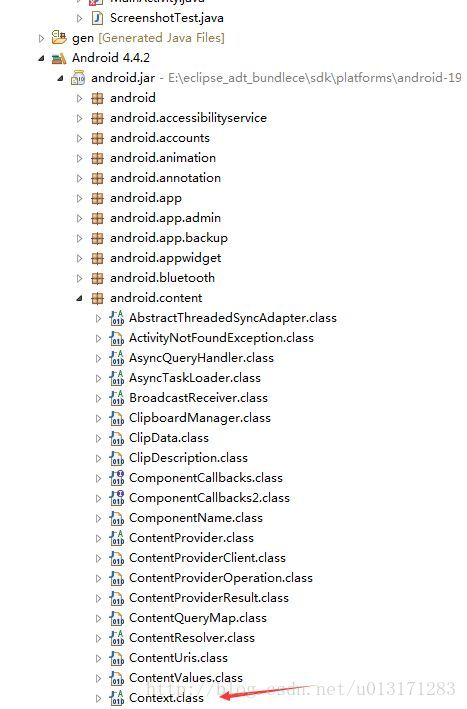
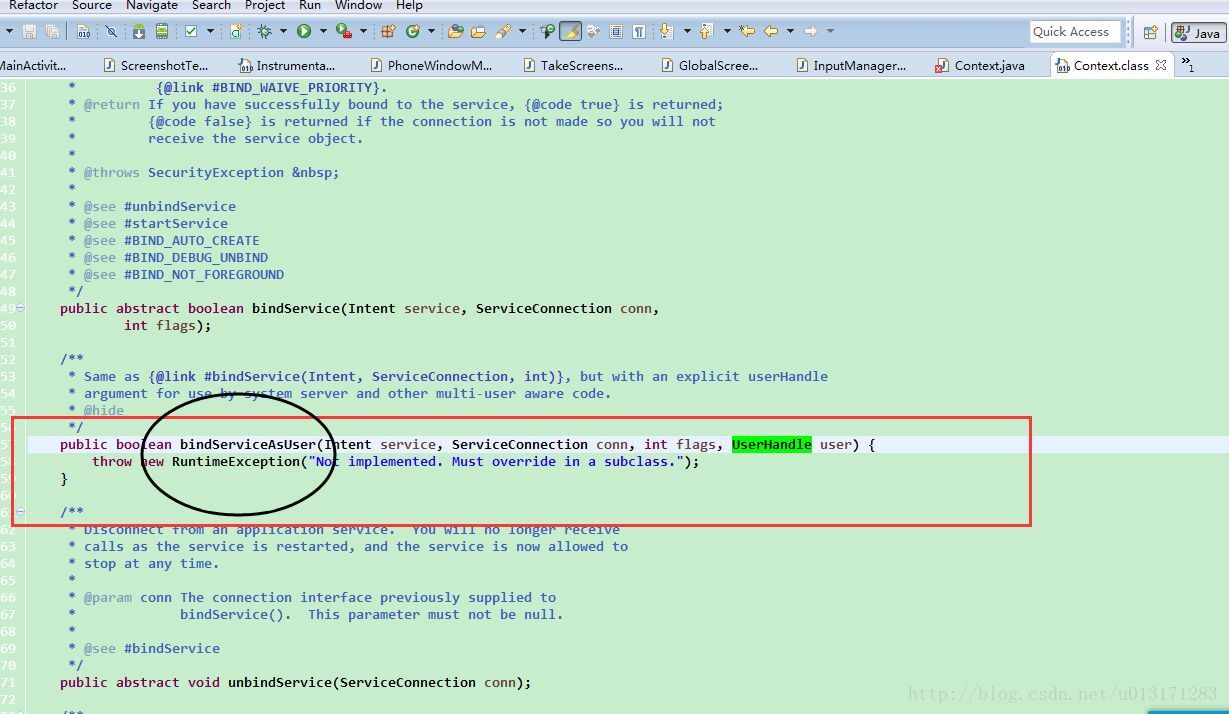
framework层:

既然无法间接绑定SystemUI这个TakeScreenshotService,那么我们不如直接使用GlobalScreenshot这个类好了,貌似也不行,因为截屏代码Surface.screenshot((int) dims[0], (int) dims[1]);这个screenshot方法是被Google隐藏掉的,我们更加不能使用了,这一步只能放弃。
接下来看看第2步:
记得博主个人在上一篇文章中有提到过要记住PhoneWindowManager的dispatchUnhandledKey方法红色圈圈包装KeyEvent event部分代码,如下:
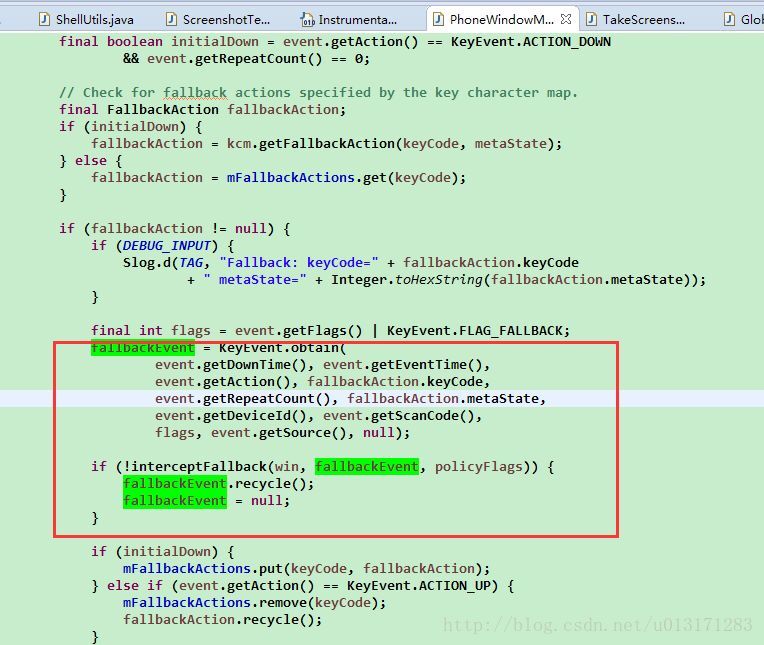
那么为什么要粗略的记住这部分代码呢,因为在systemUI截屏测试代码那里有通过模拟按键发送来测试截屏操作。这个测试包如下:
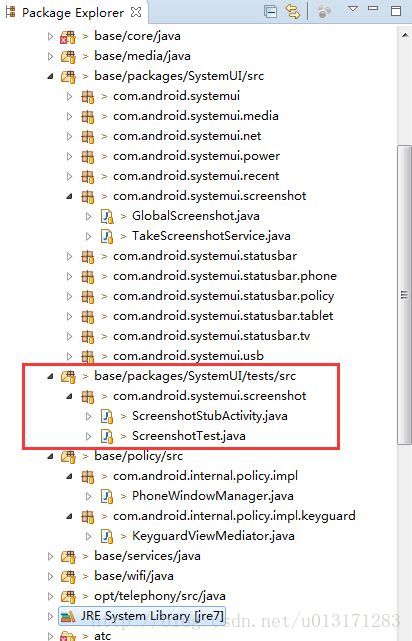
博主在个人探索的例子中有将这两个类添加到demo中,有兴趣的同学可以下载自行研究,这边主要关键代码如下:
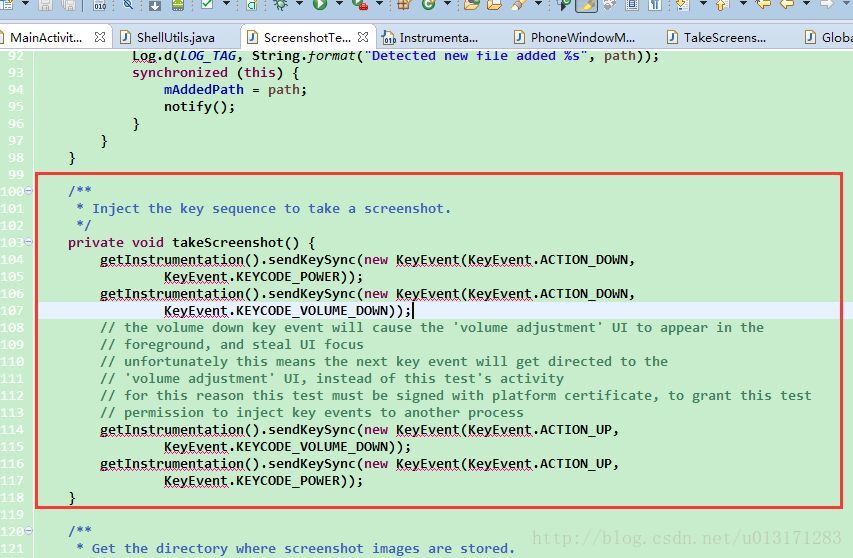
其实这边是作了模拟按键发送操作来实现截屏操作测试效果,我们跟一下代码看看什么情况。在takeScreenshot()方法中getInstrumentation()这个方法返回一个package android.app;包下的Instrumentation类,我们看看这个Instrumentation这个类下的sendKeySync方法,如下:
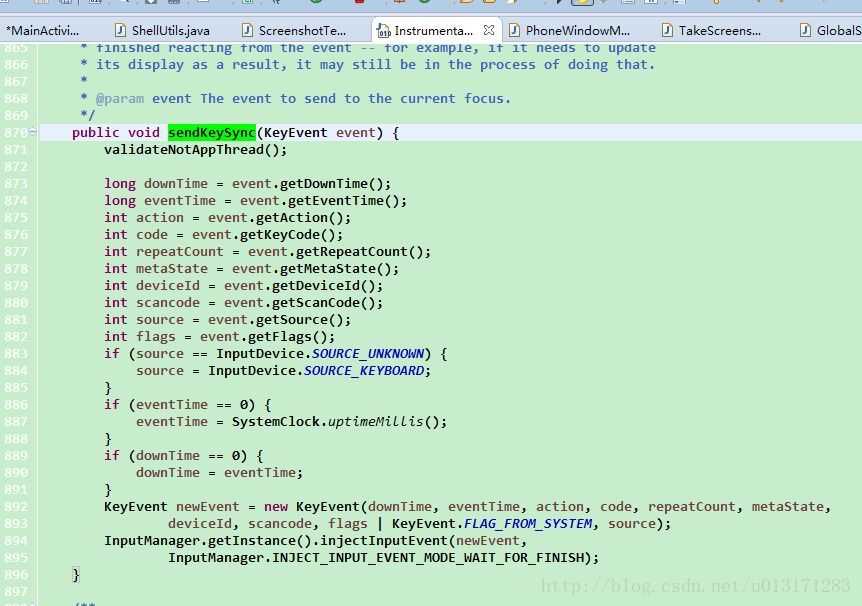
这里就是再包装一个KeyEvent event跟上面红色圈圈部分代码是不是很相似呢,最后通过InputManager的injectInputEvent方法发送一个按键指令操作来实现截屏。
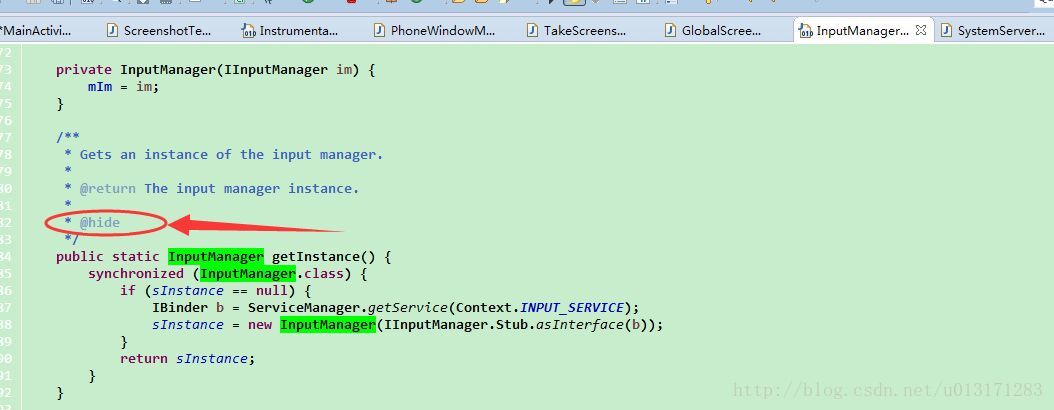
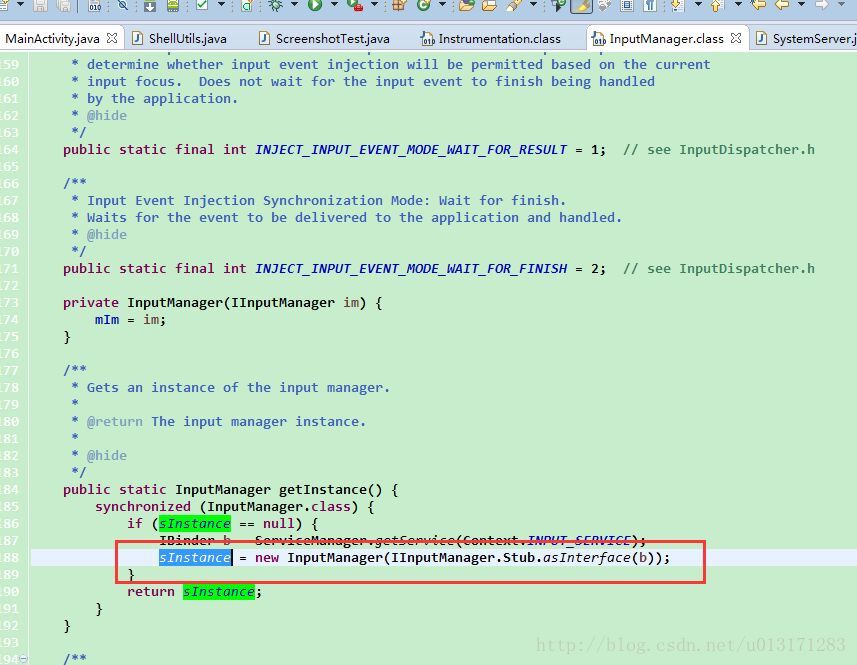
那么我们直接将Instrumentation下的sendKeySync方法拷贝到我们的demo示例中,这个 InputManager.getInstance()是拿不到InputManager这个实例的,因为它被@了一个hide,看来也是被Google隐藏掉的接口。
那么我们这边只能通过java的反射机制来使用InputManager这个接口了,下面是反射InputManager接口调用injectInputEvent这个方法的关键代码,如下:
injectInputEvent(new KeyEvent(KeyEvent.ACTION_DOWN, KeyEvent.KEYCODE_POWER));
        injectInputEvent(new KeyEvent(KeyEvent.ACTION_DOWN, KeyEvent.KEYCODE_VOLUME_DOWN));
        injectInputEvent(new KeyEvent(KeyEvent.ACTION_UP, KeyEvent.KEYCODE_VOLUME_DOWN));
        injectInputEvent(new KeyEvent(KeyEvent.ACTION_UP, KeyEvent.KEYCODE_POWER));

private void injectInputEvent(KeyEvent event) {
        try {
            getInjectInputEvent().invoke(getInputManager(), event, 2);
        } catch (IllegalAccessException | InvocationTargetException | NoSuchMethodException e) {
            e.printStackTrace();
        }
    }

    private static Method getInjectInputEvent() throws NoSuchMethodException {
        Class<InputManager> cl = InputManager.class;
        Method method = cl.getDeclaredMethod("injectInputEvent", InputEvent.class, int.class);
        method.setAccessible(true);
        return method;
    }

    private static InputManager getInputManager() throws NoSuchMethodException, InvocationTargetException, IllegalAccessException {
        Class<InputManager> cl = InputManager.class;
        Method method = cl.getDeclaredMethod("getInstance");
        method.setAccessible(true);
        return (InputManager) method.invoke(cl);
    }
博主个人测试了一下,还是不能做到截屏。那么先跟一下代码,看看InputManager中injectInputEvent方法实现:
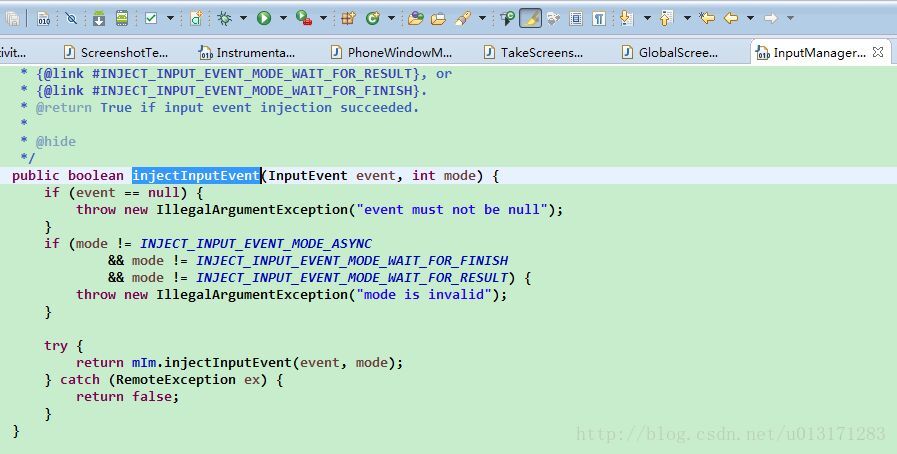
这里最后是用IInputManager的injectInputEvent方法:
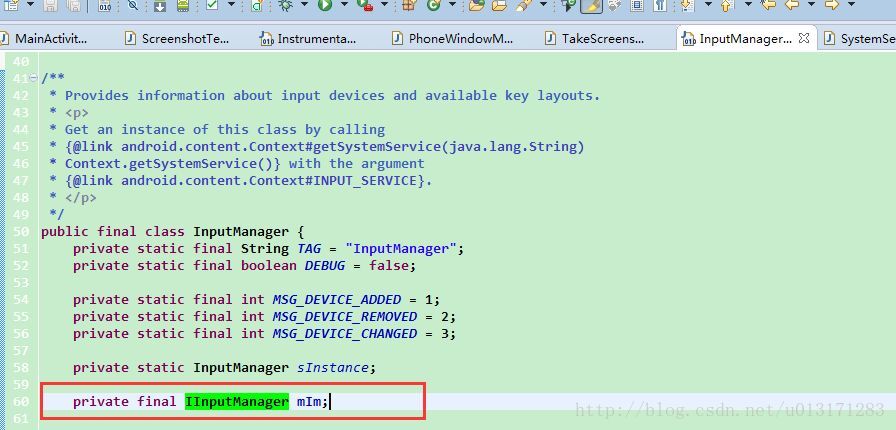
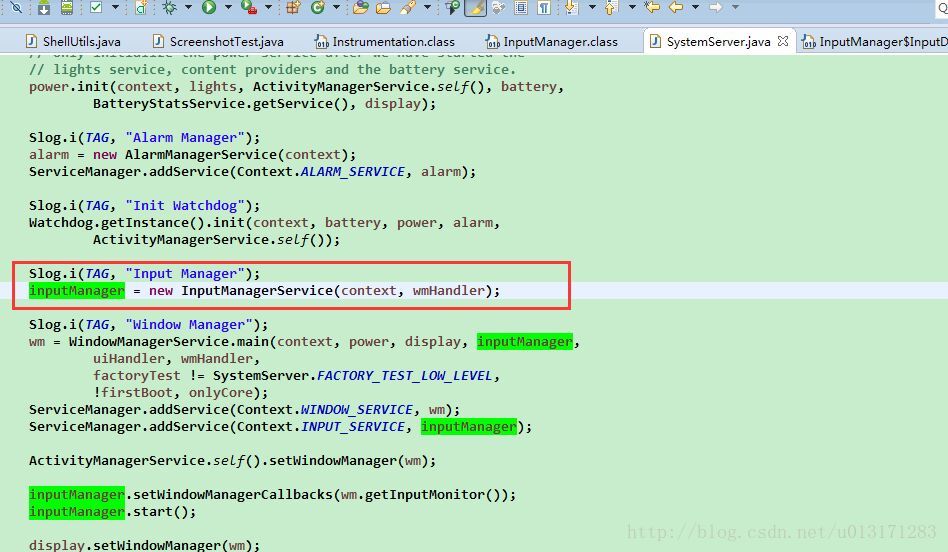
看上面红色圈中部分就能知道这个IInputManager是个framework层的.aidl文件接口,再其它地方被一个类继承去实现的,如果对关于framework层服务使用不是很了解的同学请移步至Android开发如何定制framework层服务 作个具体的了解再来看看会有比较好的效果,那么我们直接在SystemServer查找这个接口,如下图:
@Override // Binder call
public boolean injectInputEvent(InputEvent event, int mode) {
if (event == null) {
throw new IllegalArgumentException("event must not be null");
}
if (mode != InputManager.INJECT_INPUT_EVENT_MODE_ASYNC
&& mode != InputManager.INJECT_INPUT_EVENT_MODE_WAIT_FOR_FINISH
&& mode != InputManager.INJECT_INPUT_EVENT_MODE_WAIT_FOR_RESULT) {
throw new IllegalArgumentException("mode is invalid");
}
final int pid = Binder.getCallingPid();
final int uid = Binder.getCallingUid();
final long ident = Binder.clearCallingIdentity();
final int result;
try {
result = nativeInjectInputEvent(mPtr, event, pid, uid, mode,
INJECTION_TIMEOUT_MILLIS, WindowManagerPolicy.FLAG_DISABLE_KEY_REPEAT);
} finally {
Binder.restoreCallingIdentity(ident);
}
switch (result) {
case INPUT_EVENT_INJECTION_PERMISSION_DENIED:
Slog.w(TAG, "Input event injection from pid " + pid + " permission denied.");
throw new SecurityException(
"Injecting to another application requires INJECT_EVENTS permission");
case INPUT_EVENT_INJECTION_SUCCEEDED:
return true;
case INPUT_EVENT_INJECTION_TIMED_OUT:
Slog.w(TAG, "Input event injection from pid " + pid + " timed out.");
return false;
case INPUT_EVENT_INJECTION_FAILED:
default:
Slog.w(TAG, "Input event injection from pid " + pid + " failed.");
return false;
}
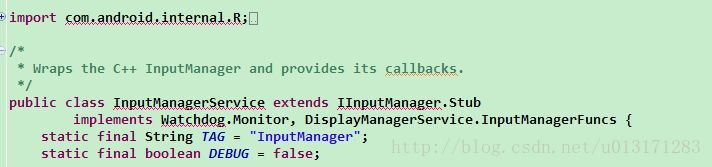
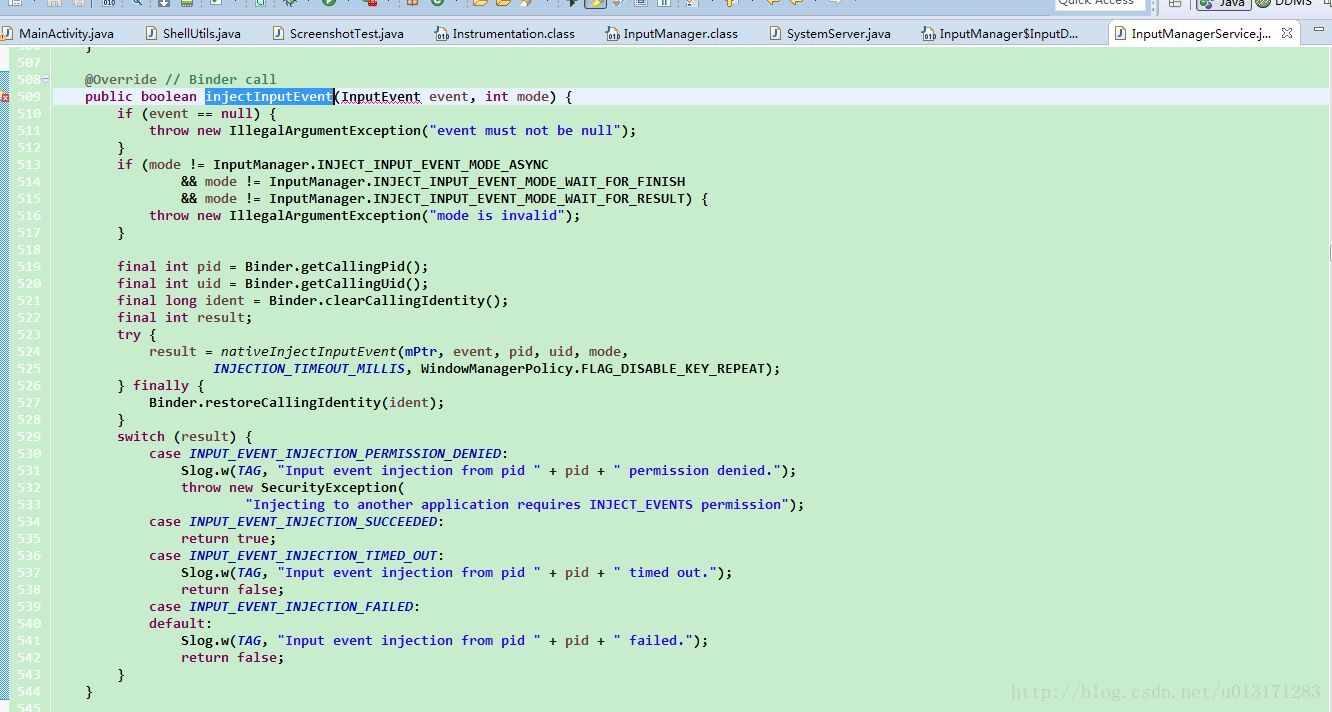
}那么果然InputManagerService extends 了这个IInputManager.Stub,InputManagerService 然后被添加到SystemServer中作为Android的一项服务来启动的,我们看看InputManagerService的injectInputEvent方法,该方法最终是通过我们之前封装好的InputEvent event传入到本地方法nativeInjectInputEvent通过jni去处理返回一个结果result,通过测试博主这边不管传入什么按键值都是走到这里
case INPUT_EVENT_INJECTION_FAILED:
default:
                Slog.w(TAG, "Input event injection from pid " + pid + " failed.");
                return false;
至此也不能再继续往下研究了,如果有已经解决的同学请转告博主一声,感激不尽。
那么接着最后一步第3步:
这一步没什么好说的了,你要先root你的Android机,然后通过以下代码即可实现截屏<实际上博主这边再某些机器上通过这个ShellUtils工具类并不能实现截屏操作,可能是Android机定制方式不同导致root机制又不同,关于root方面又是一方面的知识体系了,个人不太了解>:
关键代码如下:
ShellUtils.java
**
 * ShellUtils
 * <ul>
 * <strong>Check root</strong>
 * <li>{@link ShellUtils#checkRootPermission()}</li>
 * </ul>
 * <ul>
 * <strong>Execte command</strong>
 * <li>{@link ShellUtils#execCommand(String, boolean)}</li>
 * <li>{@link ShellUtils#execCommand(String, boolean, boolean)}</li>
 * <li>{@link ShellUtils#execCommand(List, boolean)}</li>
 * <li>{@link ShellUtils#execCommand(List, boolean, boolean)}</li>
 * <li>{@link ShellUtils#execCommand(String[], boolean)}</li>
 * <li>{@link ShellUtils#execCommand(String[], boolean, boolean)}</li>
 * </ul>
 *
 * @author <a href="http://www.trinea.cn" target="_blank">Trinea</a> 2013-5-16
 */
public class ShellUtils {

    public static final String COMMAND_SU       = "su";
    public static final String COMMAND_SH       = "sh";
    public static final String COMMAND_EXIT     = "exit\n";
    public static final String COMMAND_LINE_END = "\n";

    private ShellUtils() {
        throw new AssertionError();
    }

    /**
     * check whether has root permission
     *
     * @return
     */
    public static boolean checkRootPermission() {
        return execCommand("echo root", true, false).result == 0;
    }

    /**
     * execute shell command, default return result msg
     *
     * @param command command
     * @param isRoot whether need to run with root
     * @return
     * @see ShellUtils#execCommand(String[], boolean, boolean)
     */
    public static CommandResult execCommand(String command, boolean isRoot) {
        return execCommand(new String[] {command}, isRoot, true);
    } /**
     * execute shell commands, default return result msg
     *
     * @param commands command list
     * @param isRoot whether need to run with root
     * @return
     * @see ShellUtils#execCommand(String[], boolean, boolean)
     */
    public static CommandResult execCommand(List<String> commands, boolean isRoot) {
        return execCommand(commands == null ? null : commands.toArray(new String[] {}), isRoot, true);
    }

    /**
     * execute shell commands, default return result msg
     *
     * @param commands command array
     * @param isRoot whether need to run with root
     * @return
     * @see ShellUtils#execCommand(String[], boolean, boolean)
     */
    public static CommandResult execCommand(String[] commands, boolean isRoot) {
        return execCommand(commands, isRoot, true);
    }

    /**
     * execute shell command
     *
     * @param command command
     * @param isRoot whether need to run with root
     * @param isNeedResultMsg whether need result msg
     * @return
     * @see ShellUtils#execCommand(String[], boolean, boolean)
     */
    public static CommandResult execCommand(String command, boolean isRoot, boolean isNeedResultMsg) {
        return execCommand(new String[] {command}, isRoot, isNeedResultMsg);
    }

    /**
     * execute shell commands
     *
     * @param commands command list
     * @param isRoot whether need to run with root
     * @param isNeedResultMsg whether need result msg
     * @return
     * @see ShellUtils#execCommand(String[], boolean, boolean)
     */
    public static CommandResult execCommand(List<String> commands, boolean isRoot, boolean isNeedResultMsg) {
        return execCommand(commands == null ? null : commands.toArray(new String[] {}), isRoot, isNeedResultMsg);
    }

    /**
     * execute shell commands
     *
     * @param commands command array
     * @param isRoot whether need to run with root
     * @param isNeedResultMsg whether need result msg
     * @return <ul>
     *         <li>if isNeedResultMsg is false, {@link CommandResult#successMsg} is null and
     *         {@link CommandResult#errorMsg} is null.</li>
     *         <li>if {@link CommandResult#result} is -1, there maybe some excepiton.</li>
     *         </ul>
     */
     public static CommandResult execCommand(String[] commands, boolean isRoot, boolean isNeedResultMsg) {
        int result = -1;
        if (commands == null || commands.length == 0) {
            return new CommandResult(result, null, null);
        }

        Process process = null;
        BufferedReader successResult = null;
        BufferedReader errorResult = null;
        StringBuilder successMsg = null;
        StringBuilder errorMsg = null;

        DataOutputStream os = null;
        try {
            process = Runtime.getRuntime().exec(isRoot ? COMMAND_SU : COMMAND_SH);
            os = new DataOutputStream(process.getOutputStream());
            for (String command : commands) {
                if (command == null) {
                    continue;
                }

                // donnot use os.writeBytes(commmand), avoid chinese charset error
                os.write(command.getBytes());
                os.writeBytes(COMMAND_LINE_END);
                os.flush();
            }
            os.writeBytes(COMMAND_EXIT);
            os.flush();

            result = process.waitFor();
             // get command result
            if (isNeedResultMsg) {
                successMsg = new StringBuilder();
                errorMsg = new StringBuilder();
                successResult = new BufferedReader(new InputStreamReader(process.getInputStream()));
                errorResult = new BufferedReader(new InputStreamReader(process.getErrorStream()));
                String s;
                while ((s = successResult.readLine()) != null) {
                    successMsg.append(s);
                }
                while ((s = errorResult.readLine()) != null) {
                    errorMsg.append(s);
                }
            }
        } catch (IOException e) {
            e.printStackTrace();
        } catch (Exception e) {
            e.printStackTrace();
        } finally {
            try {
                if (os != null) {
                    os.close();
                }
                 if (successResult != null) {
                    successResult.close();
                }
                if (errorResult != null) {
                    errorResult.close();
                }
            } catch (IOException e) {
                e.printStackTrace();
            }

            if (process != null) {
                process.destroy();
            }
        }
        return new CommandResult(result, successMsg == null ? null : successMsg.toString(), errorMsg == null ? null
                : errorMsg.toString());
    }
     /**
     * result of command
     * <ul>
     * <li>{@link CommandResult#result} means result of command, 0 means normal, else means error, same to excute in
     * linux shell</li>
     * <li>{@link CommandResult#successMsg} means success message of command result</li>
     * <li>{@link CommandResult#errorMsg} means error message of command result</li>
     * </ul>
     *
     * @author <a href="http://www.trinea.cn" target="_blank">Trinea</a> 2013-5-16
     */
    public static class CommandResult {

        /** result of command **/
        public int    result;
        /** success message of command result **/
        public String successMsg;
        /** error message of command result **/
        public String errorMsg;

        public CommandResult(int result) {
            this.result = result;
        }

        public CommandResult(int result, String successMsg, String errorMsg) {
            this.result = result;
            this.successMsg = successMsg;
            this.errorMsg = errorMsg;
        }
    }
}
使用方式:
/************************测试方法三shell command**************************/
//  adb shell /system/bin/screencap -p /storage/emulated/0/JumpX/screenshot.png
    private void takeScreenshot2() {
        new Thread(new Runnable() {
            @Override
            public void run() {
                Log.d("asir:", "root权限:" + ShellUtils.checkRootPermission());
                Log.d("asir:", "root权限:" + isRoot());
                String command[] = new String[] { "su", "-p",
                        "/system/bin/screencap " + "/storage/Asir_screenshot.png" };
                ShellUtils.CommandResult commandResult = ShellUtils.execCommand(command, true, true);
                Log.d("asir:", "截屏结果:" + commandResult.errorMsg);
            }
        }).start();
    }


 1084
1084


 被折叠的 条评论
为什么被折叠?
被折叠的 条评论
为什么被折叠?
 到【灌水乐园】发言


