


我们将使用cocos2d-x制作一个简单的射击游戏。
本文所用的制作环境是cocos2d x 2.0.4,VS2010。
参考资料:
1、本文的原型其实是来自cocos2d-2.0-x-2.0.4官方下载的安装软件,解压缩后可以看到该例子,即在根目录下的Samples示例文件夹里面的SimpleGame。
2、博客无幻的SimpleGame制作的文章,这里是传送门: http://blog.csdn.net/akof1314/article/details/8268882
我这里只是把他们横版的游戏变成竖版,取消白色游戏背景改为用图片背景,而图片素材则换成微信飞机的图片。将原本走掉1个就结束的游戏规则改为如果超过3个敌机跑到屏幕下方里,则游戏结束。飞机的速度和显示时间也稍做了调整。此外本文修改了以上两文中子弹路径算法的一个细微的小错漏,详情请看下文关于子弹路径的算法。
下面我们直接进入主题。制作方法如下:
1、创建工程。新建Cocos2d-win32工程,工程名为"Star Fighter",去除"Box2D"选项(该项目不需要用),勾选"Simple Audio Engine in Cocos Denshion"选项;
2、编译运行,查看HelloWorld是否正常显示。可以看到如下图所示:
3、下载本游戏所需的资源,将资源放置"Resources"目录下;

4、设置游戏屏幕尺寸。
打开main.cpp文件设置分辨率,
找到 setFrameSize函数把其括号里的数据,设置成你要的分辨率,用于开发。
市场上装有Andriod系统的手机分辨率常用的主要为240*320、320*480、480*800三种。
修改后的main.cpp文件代码为:
eglView->setFrameSize(320, 480); //本文采用(320, 480);像素开发。
5、设置游戏背景,最简单的方法是将原本HelloWorldScene.cpp里面的HelloWorld.png文件名,直接替换为我们的背景图片bg_01.jpg。
我们可以看到修改后的代码为:
        // 添加背景Add a splash screen, show the cocos2d splash image.
        CCSprite* pSprite = CCSprite::create("bg_01.jpg");
        CC_BREAK_IF(! pSprite);

        // 设置坐标位置Place the sprite on the center of the screen
        pSprite->setPosition(ccp(size.width/2, size.height/2));

        // 添加到图层显示出来Add the sprite to HelloWorld layer as a child layer.
        this->addChild(pSprite, 0);
cocos2d中图片的添加也是通过添加精灵实现的,由这里我们学会了cocos2d添加精灵的方法。
6、添加显示游戏名字。最简单的方法是将原本HelloWorldScene.cpp里面显示的Hello World文字,直接替换为我们的"Star Fighter",及修改字体的大小。
        //  添加游戏名字 Add a label shows "Star Fighter".

        // Create a label and initialize with string "Hello World".
        CCLabelTTF* pLabel = CCLabelTTF::create("Star Fighter", "Arial", 36);
        CC_BREAK_IF(! pLabel);

        // Get window size and place the label upper.
        CCSize size = CCDirector::sharedDirector()->getWinSize();
        pLabel->setPosition(ccp(size.width / 2, size.height - 50));

        // Add the label to HelloWorld layer as a child layer.
        this->addChild(pLabel, 1);//第二个数字是渲染的顺序
7、添加玩家player,让玩家位于下方屏幕的中间,在刚刚的HelloWorldScene.cpp文件的init函数里面,(仿照添加背景的代码)添加如下的代码:
         //添加玩家player精灵
	CCSize winSize = CCDirector::sharedDirector()->getWinSize();
	CCSprite *player = CCSprite::create("player.png");
	player->setPosition(ccp(winSize.width / 2, 50));//设置坐标位置,注意(x,y)的值
this->addChild(player, 2); 8、把HelloWorldScene.cpp文件的init函数里面,我们不需要用到的以下这段删掉。
// add a "close" icon to exit the progress. it's an autorelease object
CCMenuItemImage *pCloseItem = CCMenuItemImage::create(
"CloseNormal.png",
"CloseSelected.png",
this,
menu_selector(HelloWorld::menuCloseCallback));
pCloseItem->setPosition(ccp(origin.x + visibleSize.width - pCloseItem->getContentSize().width/2 ,
origin.y + pCloseItem->getContentSize().height/2));
// create menu, it's an autorelease object
CCMenu* pMenu = CCMenu::create(pCloseItem, NULL);
pMenu->setPosition(CCPointZero);
this->addChild(pMenu, 1);
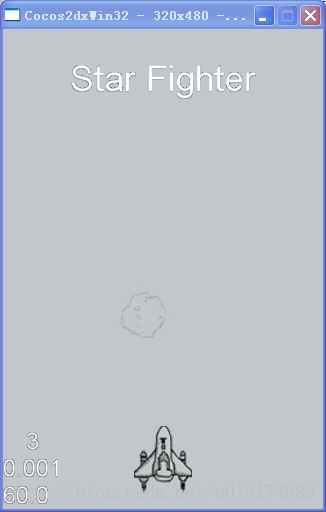
9、运行编译程序,可以看到以下画面。
10.接下来添加敌机,并且让它可以移动。我们在屏幕上方中间创建,建立动作让它们向下移动。
我们在HelloWorldScene.h头文件中添加函数声明void addMonster();
然后在HelloWorldScene.cpp中增加addMonster方法,代码如下:
void HelloWorld::addMonster()
{
	CCSprite *monster = CCSprite::create("Monster1.png");

	//使敌人敌机从上面出现时,左右显示是完整的,并在屏幕上方随机产生
	//如果其他游戏敌人是Y轴出现,可以把以下的X统一改为Y即可
	CCSize winSize = CCDirector::sharedDirector()->getWinSize();
	int minX = monster->getContentSize().width / 2;
   	int maxX = winSize.width - monster->getContentSize().width / 2;
   	int rangeX = maxX - minX;
   	int actualX = (rand() % rangeX) + minX;//随机位置产生敌人

	//设置敌机坐标 并显示出来
	monster->setPosition(ccp(actualX,winSize.height + monster->getContentSize().height / 2));
    	this->addChild(monster);

	//使用随机函数控制飞机速度。改下面数字可以调整飞机速度,控制游戏难度,当然敌机、子弹的触碰区域大小等也会影响游戏难度。
	int minDuration = 2.0;
   	int maxDuration = 5.0;
	int rangeDuration = maxDuration - minDuration;
   	int actualDuration = (rand() % rangeDuration) + minDuration;

	//控制敌机的结束坐标,即当整个飞机离开屏幕(注意默认锚点是图片的中心位置)
	CCMoveTo *actionMove = CCMoveTo::create(actualDuration, ccp(actualX,-monster->getContentSize().height / 2));

	CCCallFuncN *actionMoveDone = CCCallFuncN::create(this, callfuncN_selector(HelloWorld::spriteMoveFinished));
         monster->runAction(CCSequence::create(actionMove, actionMoveDone, NULL));

}
在屏幕上方以随机的位置添加敌机精灵,注意计算精灵X轴的位置坐标(因为默认描点在中心,不能让敌机截断只有一部分)。
然后通过随机函数控制的敌机运动总时间,让敌机从上方移动到下方,
移动到离开边界后,调用回调函数spriteMoveFinished,进行删除精灵对象。
这里调用的回调函数,我们尚未对其进行声明和定义。
下面我们先在HelloWorldScene.h头文件中添加函数声明void spriteMoveFinished(CCNode *sender);
然后在HelloWorldScene.cpp中增加函数spriteMoveFinished的定义,代码如下:
|
1
2 3 4 5 |
|
void HelloWorld::spriteMoveFinished(CCNode *sender) //回调函数spriteMoveFinished,进行删除精灵对象
{ CCSprite *sprite = (CCSprite*)sender; this->removeChild(sprite, true); } |
|
1
|
|
this->schedule(schedule_selector(HelloWorld::gameLogic),
1.
0);
|
增加gameLogic方法函数,在HelloWorldScene.h头文件中添加函数声明void gameLogic( float dt );
在HelloWorldScene.cpp中增加代码如下:
 最低0.47元/天 解锁文章


 2711
2711


 被折叠的 条评论
为什么被折叠?
被折叠的 条评论
为什么被折叠?
 到【灌水乐园】发言


