


Struts2、Spring4、Hibernate4整合 超详细教程
Struts2、Spring4、Hibernate4整合实例-下载
项目目的:
整合使用最新版本的三大框架(即Struts2、Spring4和Hibernate4)搭建项目架构原型。
项目架构原型:Struts2 + Spring4.0+ Hibernate4.2.4。
项目特色:同时使用了Struts2、Spring4、Hibernate4、log4j等库或框架,搭建一个最基本的项目原型。
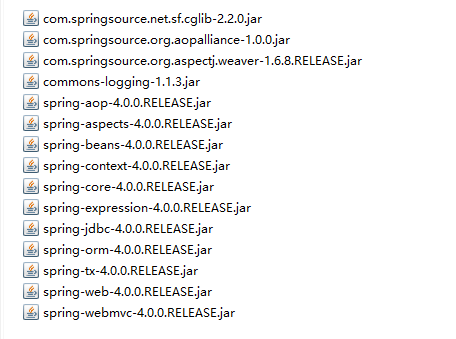
加入 Spring
加入Spring 所需 jar 包
配置 web.xml 文件
<?xml version="1.0" encoding="UTF-8"?>
<web-app xmlns:xsi="http://www.w3.org/2001/XMLSchema-instance"
    xmlns="http://java.sun.com/xml/ns/javaee"
    xsi:schemaLocation="http://java.sun.com/xml/ns/javaee http://java.sun.com/xml/ns/javaee/web-app_2_5.xsd"
    id="WebApp_ID" version="2.5">

    <context-param>
        <param-name>contextConfigLocation</param-name>
        <param-value>classpath:applicationContext*.xml</param-value>
    </context-param>

    <listener>
        <listener-class>org.springframework.web.context.ContextLoaderListener</listener-class>
    </listener>


</web-app>- 加入 Spring 的配置文件[ applicationContext.xml ]
<?xml version="1.0" encoding="UTF-8"?>
<beans xmlns="http://www.springframework.org/schema/beans"
    xmlns:xsi="http://www.w3.org/2001/XMLSchema-instance"
    xmlns:aop="http://www.springframework.org/schema/aop"
    xmlns:context="http://www.springframework.org/schema/context"
    xmlns:tx="http://www.springframework.org/schema/tx"
    xsi:schemaLocation="http://www.springframework.org/schema/beans http://www.springframework.org/schema/beans/spring-beans.xsd
        http://www.springframework.org/schema/aop http://www.springframework.org/schema/aop/spring-aop-4.0.xsd
        http://www.springframework.org/schema/context http://www.springframework.org/schema/context/spring-context-4.0.xsd
        http://www.springframework.org/schema/tx http://www.springframework.org/schema/tx/spring-tx-4.0.xsd">

</beans>
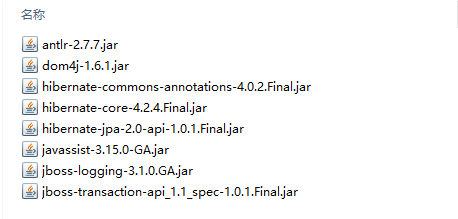
加入Hibernate
- 加入Hibernate所需jar包
- 加入 hibernate.cfg.xml 文件, 在其中配置 hibernate 的基本属性
<?xml version="1.0" encoding="UTF-8"?>
<!DOCTYPE hibernate-configuration PUBLIC
        "-//Hibernate/Hibernate Configuration DTD 3.0//EN"
        "http://hibernate.sourceforge.net/hibernate-configuration-3.0.dtd">
<hibernate-configuration>
    <session-factory>
        <!-- 配置 hibernate 的基本属性 -->

        <!-- 方言 -->
        <property name="hibernate.dialect">org.hibernate.dialect.MySQL5InnoDBDialect</property>

        <!-- 是否显示及格式化 SQL -->
        <property name="hibernate.show_sql">true</property>
        <property name="hibernate.format_sql">true</property>

        <!-- 生成数据表的策略 -->
        <property name="hibernate.hbm2ddl.auto">update</property>

        <!-- 二级缓存相关 -->
        <!--  ....... -->
    </session-factory>

</hibernate-configuration>- 和 Spring 进行整合
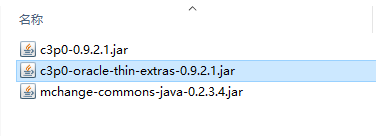
加入 c3p0 和 MySQL 的驱动

新建db.properties
jdbc.user=root
jdbc.password=1230
jdbc.driverClass=com.mysql.jdbc.Driver
jdbc.jdbcUrl=jdbc:mysql://localhost:3306/test?useUnicode=true&characterEncoding=utf-8

jdbc.initPoolSize=5
jdbc.maxPoolSize=10
在 Spring 的配置文件中配置: 数据源, SessionFactory, 声明式事务
<?xml version="1.0" encoding="UTF-8"?>
<beans xmlns="http://www.springframework.org/schema/beans"
    xmlns:xsi="http://www.w3.org/2001/XMLSchema-instance"
    xmlns:aop="http://www.springframework.org/schema/aop"
    xmlns:context="http://www.springframework.org/schema/context"
    xmlns:tx="http://www.springframework.org/schema/tx"
    xsi:schemaLocation="http://www.springframework.org/schema/beans http://www.springframework.org/schema/beans/spring-beans.xsd
        http://www.springframework.org/schema/aop http://www.springframework.org/schema/aop/spring-aop-4.0.xsd
        http://www.springframework.org/schema/context http://www.springframework.org/schema/context/spring-context-4.0.xsd
        http://www.springframework.org/schema/tx http://www.springframework.org/schema/tx/spring-tx-4.0.xsd">


    <context:annotation-config />
    <context:component-scan base-package="com" />

    <!-- 导入资源文件 -->
    <context:property-placeholder location="classpath:db.properties"/>

    <!-- 配置 C3P0 数据源 -->
    <bean id="dataSource" class="com.mchange.v2.c3p0.ComboPooledDataSource">
        <property name="user" value="${jdbc.user}"></property>
        <property name="password" value="${jdbc.password}"></property>
        <property name="driverClass" value="${jdbc.driverClass}"></property>
        <property name="jdbcUrl" value="${jdbc.jdbcUrl}"></property>

        <property name="initialPoolSize" value="${jdbc.initPoolSize}"></property>
        <property name="maxPoolSize" value="${jdbc.maxPoolSize}"></property>
    </bean>

    <!-- 配置 SessionFactory -->
    <bean id="sessionFactory" class="org.springframework.orm.hibernate4.LocalSessionFactoryBean">
        <property name="dataSource" ref="dataSource"></property>
        <property name="configLocation" value="classpath:hibernate.cfg.xml"></property>
        <property name="mappingLocations" value="classpath:com/entities/*.hbm.xml"></property>
    </bean>

    <!-- 配置 Spring 的声明式事务 -->
    <!-- 1. 配置 hibernate 的事务管理器 -->
    <bean id="transactionManager" class="org.springframework.orm.hibernate4.HibernateTransactionManager">
        <property name="sessionFactory" ref="sessionFactory"></property>
    </bean>

    <!-- 2. 配置事务属性 -->
    <tx:advice id="txAdvice" transaction-manager="transactionManager">
        <tx:attributes>
            <tx:method name="get*" read-only="true"/>
            <tx:method name="lastNameIsValid" read-only="true"/>
            <tx:method name="*"/>
        </tx:attributes>
    </tx:advice>

    <!-- 3. 配置事务切入点, 再把事务属性和事务切入点关联起来 -->
    <aop:config>
        <aop:pointcut expression="execution(* com.service.*.*(..))" id="txPointcut"/>
        <aop:advisor advice-ref="txAdvice" pointcut-ref="txPointcut"/>
    </aop:config>

</beans>
- 小测试
新建实体类Test.java
package com.entities;

import javax.persistence.Entity;
import javax.persistence.GeneratedValue;
import javax.persistence.GenerationType;
import javax.persistence.Id;
import javax.persistence.Table;

@Entity
@Table(name = "test")
public class Test {

    @Id
    @GeneratedValue(strategy = GenerationType.IDENTITY)
    private long id;//主键
    private String name;


    public long getId() {
        return id;
    }
    public void setId(long id) {
        this.id = id;
    }
    public String getName() {
        return name;
    }
    public void setName(String name) {
        this.name = name;
    }

}
hibernate.cfg.xml 添加
   <session-factory>
        <!-- 以上 ...-->
        <mapping class="com.entities.Test"></mapping>
    </session-factory>
如果成功,数据库内自动生成Test表
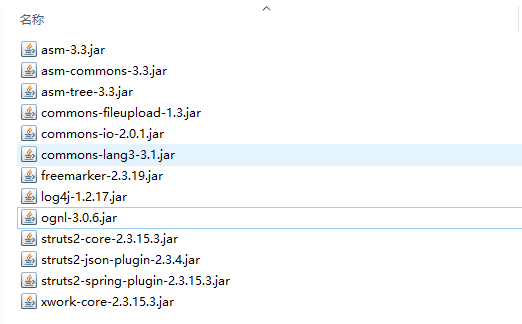
加入 Struts2
加入 jar 包: 若有重复的 jar 包, 则需要删除版本较低的.
- 在 web.xml 文件中配置 Struts2 的 Filter
    <!-- 配置 Struts2 的 Filter -->
    <filter>
        <filter-name>struts2</filter-name>
        <filter-class>org.apache.struts2.dispatcher.ng.filter.StrutsPrepareAndExecuteFilter</filter-class>
    </filter>

    <filter-mapping>
        <filter-name>struts2</filter-name>
        <url-pattern>/*</url-pattern>
</filter-mapping>- 加入 Struts2 的配置文件,新建struts.xml
<?xml version="1.0" encoding="UTF-8" ?>
<!DOCTYPE struts PUBLIC
    "-//Apache Software Foundation//DTD Struts Configuration 2.3//EN"
    "http://struts.apache.org/dtds/struts-2.3.dtd">

<struts>

    <package name="default" namespace="/" extends="struts-default">

            <action name="test">
                <result>index.jsp</result>
            </action>

    </package>

</struts>
- 测试 在浏览器输入http://localhost:8080/S2S4H4/test 若无异常,整个框架搭建完毕


 601
601


 被折叠的 条评论
为什么被折叠?
被折叠的 条评论
为什么被折叠?
 到【灌水乐园】发言


