


Android UiAutomator & UiAutomatorViewer 自动化测试
有了这个强大的工具,在提测之前,能对自己写的APP流程的测试个千八百遍,也是极好的。
UiAutomator语法基于JAVA和AndroidAPI,用法与ApplicationTestCase类型,但功能远远超过它。
下面我们来举个栗子:
1.新建项目并引入依赖
第一步:在build.gradle中添加依赖
 //添加uiautomator测试依赖的包
    androidTestCompile 'com.android.support.test.uiautomator:uiautomator-v18:2.1.1'
同步
完整build.gradle如下
apply plugin: 'com.android.application'

android {
    compileSdkVersion 25
    buildToolsVersion "25.0.2"
    defaultConfig {
        applicationId "com.feng.uiautomator"
        minSdkVersion 21
        targetSdkVersion 25
        versionCode 1
        versionName "1.0"
        testInstrumentationRunner "android.support.test.runner.AndroidJUnitRunner"
    }
    buildTypes {
        release {
            minifyEnabled false
            proguardFiles getDefaultProguardFile('proguard-android.txt'), 'proguard-rules.pro'
        }
    }
}

dependencies {
    compile fileTree(dir: 'libs', include: ['*.jar'])
    androidTestCompile('com.android.support.test.espresso:espresso-core:2.2.2', {
        exclude group: 'com.android.support', module: 'support-annotations'
    })
    compile 'com.android.support:appcompat-v7:25.3.1'
    testCompile 'junit:junit:4.12'

    //添加uiautomator测试依赖的包
    androidTestCompile 'com.android.support.test.uiautomator:uiautomator-v18:2.1.1'
}
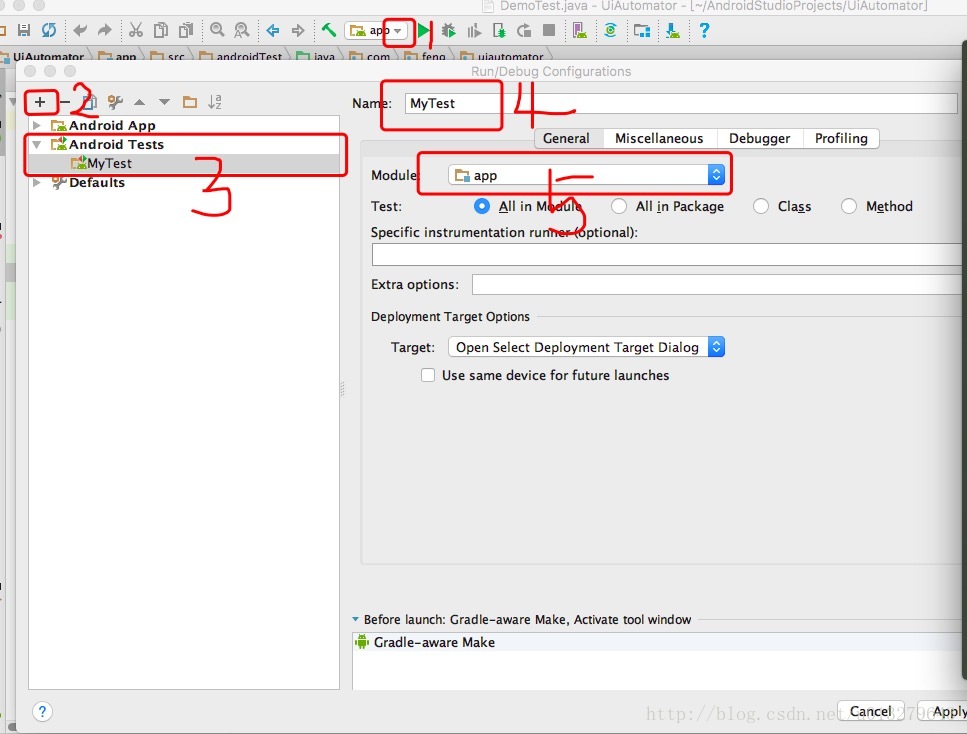
第二步:修改run Config
点击stuido运行三角左边的下拉选, 选择 “Edit Configurations…”
第二步:编写自己的测试方法
在app/src/androidTest/java/项目报名 下新建DemoTest类 写一个空方法test()
package com.feng.uiautomator;
import android.support.test.uiautomator.UiAutomatorTestCase;
import android.util.Log;

/**
 * Created by wen on 2017/5/18.
 */
public class DemoTest extends UiAutomatorTestCase {

    private static final String TAG = DemoTest.class.getName();

    public void test(){
        Log.i(TAG,"Hello UiAutomator");
    }

}
到这里我们验证一下前面的劳动成果
选择测试项目,并开始运行
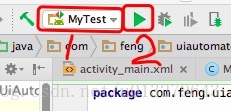
运行效果如下:(出现绿条说明你已经成功了)

细心的同学一定会发现,log呢??
切换到Andoird Monitor下

哈哈!激动人心的时刻到了,接下来,我们就可以参考 UiAutomator API来实现我们自动化测试的功能了
这里做一个简单的登录吧,两个editText 一个button, 功能简单不赘述
直接进入正题
编写DemoTest 中的test方法
package com.feng.uiautomator;

import android.support.test.uiautomator.UiAutomatorTestCase;
import android.support.test.uiautomator.UiDevice;
import android.support.test.uiautomator.UiObject;
import android.support.test.uiautomator.UiObjectNotFoundException;
import android.support.test.uiautomator.UiScrollable;
import android.support.test.uiautomator.UiSelector;
import android.util.Log;

/**
 * Created by wen on 2017/5/18.
 */

public class DemoTest extends UiAutomatorTestCase {

    private static final String TAG = DemoTest.class.getName();


    public void test() throws UiObjectNotFoundException {

        Log.i(TAG,"Hello UiAutomator");

        UiDevice.getInstance(getInstrumentation());

        //注意!为了防止小白卡在这里,建议第一次直接将自己的程序放在桌面首页(按Home键即可看到)

        //上来先home 只为找到你
        getUiDevice().pressHome();
        UiScrollable appViews = new UiScrollable(new UiSelector().scrollable(true));
        //这里会抛出  UiObjectNotFoundException 异常     参数 为桌面  app_name所在的TextView的类  以及 app_name(应用名)
        UiObject myApp = appViews.getChildByText(new UiSelector().className("android.widget.TextView"), "UiAutomator");
        //要等到新的窗口出来才继续往下走
        myApp.clickAndWaitForNewWindow();

        UiObject etUser = new UiObject(new UiSelector().resourceId("com.feng.uiautomator:id/edit_ac_main_user"));
        UiObject etPwd = new UiObject(new UiSelector().resourceId("com.feng.uiautomator:id/edit_ac_main_pwd"));
        UiObject btnLogin = new UiObject(new UiSelector().resourceId("com.feng.uiautomator:id/btn_ac_main_login"));

        sleep(1000);
        etUser.setText("admin");
        sleep(1000);
        etPwd.setText("123");
        sleep(1000);
        btnLogin.click();
        sleep(1000);
        Log.i(TAG,"测试结束...");
    }
}
同上,点击运行, 即可看到我们的程序真的自己跑起来啦!!


 5425
5425


 被折叠的 条评论
为什么被折叠?
被折叠的 条评论
为什么被折叠?
 到【灌水乐园】发言


