


猫猫分享,必须精品
原创文章,欢迎转载。转载请注明:翟乃玉的博客
地址:http://blog.csdn.net/u013357243?viewmode=contents
素材源码地址:http://blog.csdn.net/u013357243/article/details/45828841
效果
实现过程:
基础UI搭建
这里主要是用了xib搭建,首先我们分析,有中间的开始按钮,背景图片,还有星座按钮,这里能用xib做的事开始按钮和背景图片。
如图:
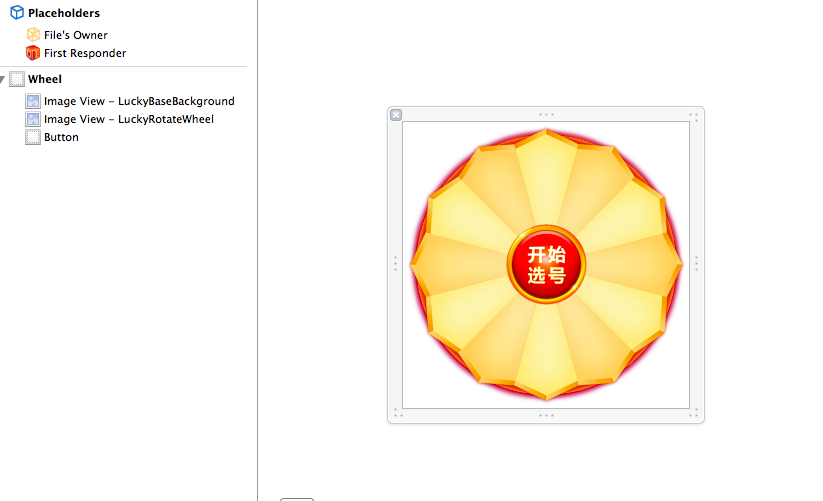
星座按钮的搭建:
这里主要用了for循环的代码:
先确定图片,然后主要是根据我们的旋转角度来设置12个按钮的anchorPoint和position
// 加载图片
    UIImage *norImage = [UIImage imageNamed:@"LuckyAstrology"];
    UIImage *selImage = [UIImage imageNamed:@"LuckyAstrologyPressed"];


    // 创建12个按钮添加到中间的轮盘上
    for (int index = 0; index < 12; index++) {
        // 1.创建按钮
        NYWheelButton *btn = [[NYWheelButton alloc] init];

        // 2.设置按钮选中状态的图片
        [btn setBackgroundImage:[UIImage imageNamed:@"LuckyRototeSelected"] forState:UIControlStateSelected];


        // 3.设置按钮的bounds
        btn.bounds = CGRectMake(0, 0, 68, 143);

        // 4.设置按钮的锚点
        btn.layer.anchorPoint = CGPointMake(0.5, 1);
        // 5.设置按钮的position
        btn.layer.position = CGPointMake(self.frame.size.width * 0.5, self.frame.size.height * 0.5);

        // 6然按钮围绕锚点旋转
        // 6.1计算按钮应该旋转的弧度
        CGFloat angle = (30 * index)/180.0 * M_PI;
        btn.transform = CGAffineTransformMakeRotation(angle);

        // 7.监听按钮的点击事件
        [btn addTarget:self action:@selector(update:) forControlEvents:UIControlEventTouchUpInside];

        // 获取当前是否是retain屏
        //        NSLog(@"%.1f", [UIScreen mainScreen].scale);

        // 8.切割图片,将切割好的图片设置到按钮上
        CGFloat imageH = NYImageHeight * [UIScreen mainScreen].scale;
        CGFloat imageW = NYImageWidth * [UIScreen mainScreen].scale;
        CGFloat imageY = 0;
        CGFloat imageX = index * imageW;
        CGRect rect = CGRectMake(imageX, imageY, imageW, imageH);
        // 8.1根据rect切割图片
        // CGImage中rect是当做像素来使用
        // UIKit 中是点坐标系
        // 坐标系的特点:如果在非retain屏上 1个点等于1个像素
        //   在retain屏上1个点等于2个像素
        // 剪切默认状态的图片
        CGImageRef norCGImageRef= CGImageCreateWithImageInRect(norImage.CGImage, rect);
        // 将切割好的图片转换为uiimage设置为按钮的背景
        [btn setImage:[UIImage imageWithCGImage:norCGImageRef]  forState:UIControlStateNormal];

        //   剪切选中状态图片
        CGImageRef selCGImageRef= CGImageCreateWithImageInRect(selImage.CGImage, rect);
        // 将切割好的图片转换为uiimage设置为按钮的背景
        [btn setImage:[UIImage imageWithCGImage:selCGImageRef]  forState:UIControlStateSelected];


        // 添加按钮到中间轮盘图片上
        [self.centerWheel addSubview:btn];
这里需要我们自定义按钮,主要是显示图片要缩小下,要不然显示不出来,前面也有介绍,前面是自定义图片在文字右边的自定义按钮。
@implementation NYWheelButton

/**
重写按钮图片位置
 */
- (CGRect)imageRectForContentRect:(CGRect)contentRect
{
    CGFloat imageX = (contentRect.size.width - NYImageWidth ) * 0.5;
    CGFloat imageY = 18;
    return CGRectMake(imageX, imageY, NYImageWidth, NYImageHeight);
}

/**
什么也不做,就让按钮不会有高亮
 */
- (void)setHighlighted:(BOOL)highlighted
{

}
@end
这两个是宏定义的图像位置,12个按钮中的图片显示bounds设置用的
#define NYImageWidth 40
#define NYImageHeight 47
是否retain屏
[UIScreen mainScreen].scale
表示的是是否retain屏,如果是返回的时2,不是则是1,代码中我们这样设计,同时将图片切割,赋给btn(选中状态以及非选中状态)
// 8.切割图片,将切割好的图片设置到按钮上
        CGFloat imageH = NYImageHeight * [UIScreen mainScreen].scale;
        CGFloat imageW = NYImageWidth * [UIScreen mainScreen].scale;
        CGFloat imageY = 0;
        CGFloat imageX = index * imageW;
        CGRect rect = CGRectMake(imageX, imageY, imageW, imageH);
        // 8.1根据rect切割图片
        // CGImage中rect是当做像素来使用
        // UIKit 中是点坐标系
        // 坐标系的特点:如果在非retain屏上 1个点等于1个像素
        //   在retain屏上1个点等于2个像素
        // 剪切默认状态的图片
        CGImageRef norCGImageRef= CGImageCreateWithImageInRect(norImage.CGImage, rect);
        // 将切割好的图片转换为uiimage设置为按钮的背景
        [btn setImage:[UIImage imageWithCGImage:norCGImageRef]  forState:UIControlStateNormal];

        //   剪切选中状态图片
        CGImageRef selCGImageRef= CGImageCreateWithImageInRect(selImage.CGImage, rect);
        // 将切割好的图片转换为uiimage设置为按钮的背景
        [btn setImage:[UIImage imageWithCGImage:selCGImageRef]  forState:UIControlStateSelected];
旋转动画:
这个其实很简单,一个用的是核心动画,一个用的是UIView封装的组动画,有时间可以深究一下。
转的慢的:
点击开始或者停止来控制
- (IBAction)start:(id)sender {
    [self.wheel startRotating];
}

- (IBAction)stop:(id)sender {
    [self.wheel stopRotating];
}
然后呢 调用的方法其实是开启一个计时器 然后尽心UIView封装的组动画:
- (void)startRotating
{
    //    self.centerWheel.transform = CGAffineTransformMakeRotation(2 * M_PI * 10);
    if (self.link != nil) return;


    CADisplayLink *link = [CADisplayLink displayLinkWithTarget:self selector:@selector(centerImageRotation)];
    [link addToRunLoop:[NSRunLoop mainRunLoop] forMode:NSDefaultRunLoopMode];
    self.link = link;
}

- (void)centerImageRotation
{

    self.centerWheel.transform = CGAffineTransformRotate(self.centerWheel.transform, M_PI_4/ 250);
}

- (void)stopRotating
{
    // 关闭定时器
    [self.link invalidate];
    self.link = nil;
}

+ (instancetype)wheel
{
    return [[[NSBundle mainBundle] loadNibNamed:@"NYWheel" owner:nil options:nil] lastObject];
}


- (void)animationDidStop:(CAAnimation *)anim finished:(BOOL)flag
{
    self.userInteractionEnabled = YES;
}
转的快的: (中间的开始)
- (IBAction)startBtnClick:(id)sender {
    // 禁止用户交互
    self.userInteractionEnabled = NO;

    CABasicAnimation *anima = [CABasicAnimation animation];
    anima.keyPath = @"transform.rotation";
    anima.toValue = @(2  * M_PI * 3);
    anima.duration = 3.0;
    anima.timingFunction = [CAMediaTimingFunction functionWithName:kCAMediaTimingFunctionEaseInEaseOut];
    anima.delegate = self;
    [self.centerWheel.layer addAnimation:anima forKey:nil];

}
这里注意两个
1是:让动画转起来时候先慢后快然后再慢(FunctionEaseInEaseOut)
anima.timingFunction = [CAMediaTimingFunction functionWithName:kCAMediaTimingFunctionEaseInEaseOut];
2是:点击以后禁止用户交互,因为如果有人不停地点击,就会不停地增加执行这个动画。。。
// 禁止用户交互
    self.userInteractionEnabled = NO;


 146
146


 被折叠的 条评论
为什么被折叠?
被折叠的 条评论
为什么被折叠?
 到【灌水乐园】发言


