


这几天可能要用到Maven 项目管理,所以一顿穷搜,在网上找了一大堆资料各说各的,没有一个是能说的清楚明白的,经过一下午的奋战终于把大致的安装和配置弄清楚了.如下:
1.安装Nexus(作用:正常我们在局域网内如果配置好了Maven,他会每次都到maven官方网址去下载Jar包,如果10个人都需要这个jar那么无疑需要下载10次,所以安装Nexus,让Maven每次都从nexus去下载,如果Nexus没有的话,Nexus就去maven官方去下载并保存到nexus服务器中,之后就可以重复利用了)
安装步骤:
1.下载nexus (我下的是nexus-2.8.1-01)
2.下载后解压文件包,
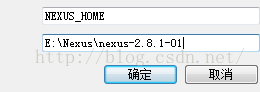
3.配置环境变量(可选):
4.在windows窗口下输入 nexus 
5.启动Nexus。两种方式 1. nexus install 安装版 在服务力打开(有可能报错) 2.nexus console 直接启动.(肯定会成功 如果不成功可能是你的java 《1.7》版本活环境变量没有配置)
6.进入页面 localhost:8081.nexus
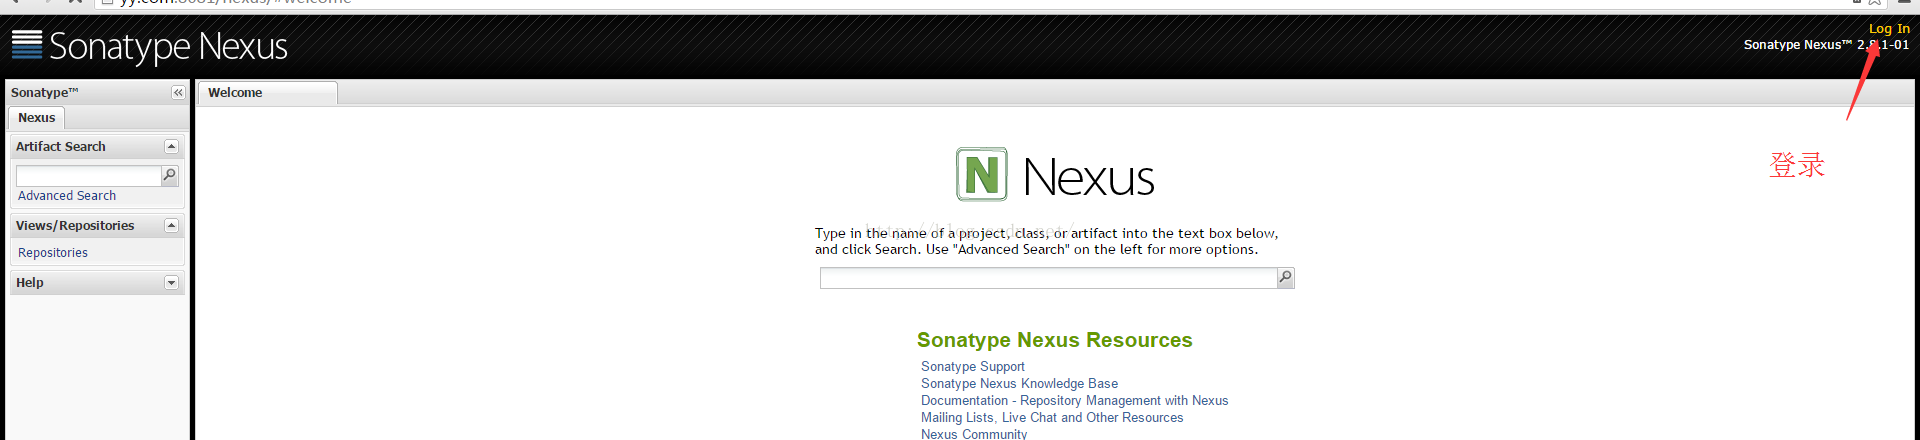
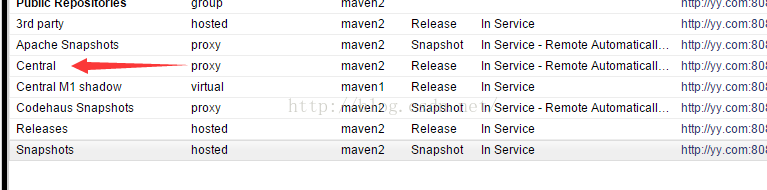
7. admin admin123 帐号密码
8.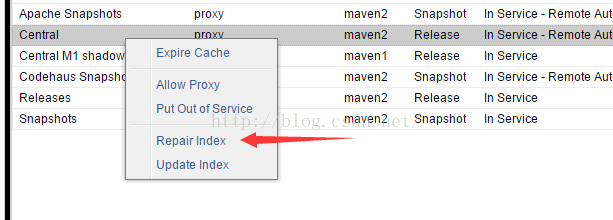
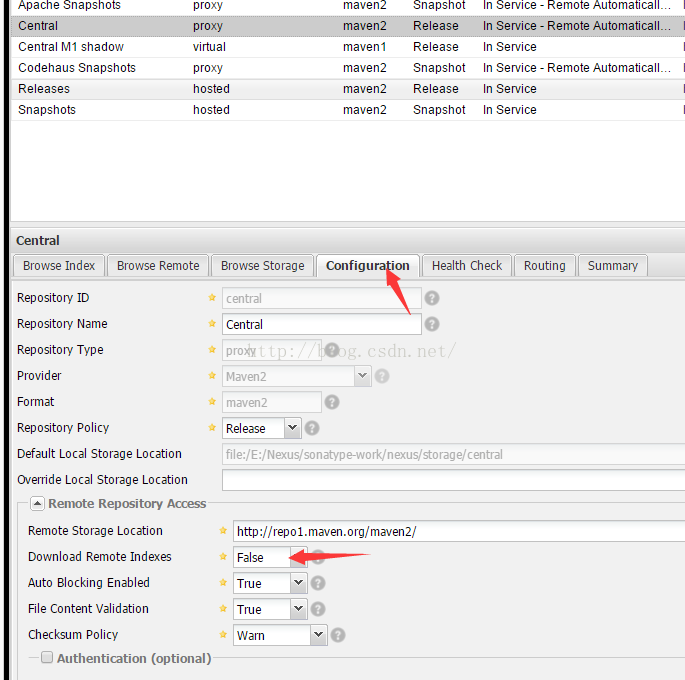
9.设置成true ,选中Central 右键选中“Repair Index” 点击 save 等一会 , Apache Snapshots、Codehaus Snapshots 执行相同步骤.
10.Releases、Snapshots 比较特殊除了上诉步骤 还要将Deployment Policy 属性设置成 Allow Redeploy 保存
11. Ok 设置成功。查看这几个里面的 会发现什么都没有.因为还没有下载东西
安装Maven
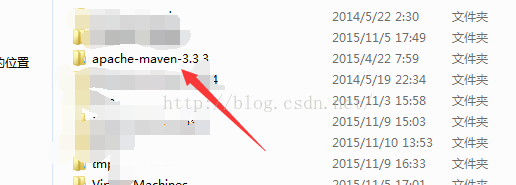
1. 解压Maven
2.进入apache-maven-3.3.3\conf 文件夹 找到settings.xml文件。
3. 编辑settings.xml 看代码
<localRepository>D:\repository</localRepository> 指明本地下载的jar存放路径 ,创建D盘下repository 文件夹
4.在servers 标签下加入
<server>
<id>releases</id>
<username>admin</username>
<password>admin123</password>
</server>
<server>
<id>snapshots</id>
<username>admin</username>
<password>admin123</password>
</server>
5. 在mirrors标签下加入 告诉让你的maven到nexus服务器去下载jar
<mirror>
<id>nexus</id>
<mirrorOf>*</mirrorOf>
<url>http://127.0.0.1:8081/nexus/content/groups/public</url>
</mirror>
6.在profiles 标签下 加入 repositories 仓库下载地址 pluginRepositories插件仓库下载jar地址
<profile>
<id>nexus</id>
<!--指定仓库-->
<repositories>
<repository>
<id>central</id>
<url>http://127.0.0.1:8081/nexus/content/groups/public</url>
<releases><enabled>true</enabled></releases>
<snapshots><enabled>true</enabled></snapshots>
</repository>
</repositories>
<!--指定插件仓库-->
<pluginRepositories>
<pluginRepository>
<id>central</id>
<url>http://maven.com:8081/nexus/content/groups/public</url>
<releases><enabled>true</enabled></releases>
<snapshots><enabled>true</enabled></snapshots>
</pluginRepository>
</pluginRepositories>
</profile>
7.激活profile 让其有效
<activeProfiles>
<activeProfile>nexus</activeProfile>
</activeProfiles>
8.OK安装完成.下面带你们在Myeclipse下去试试啊.
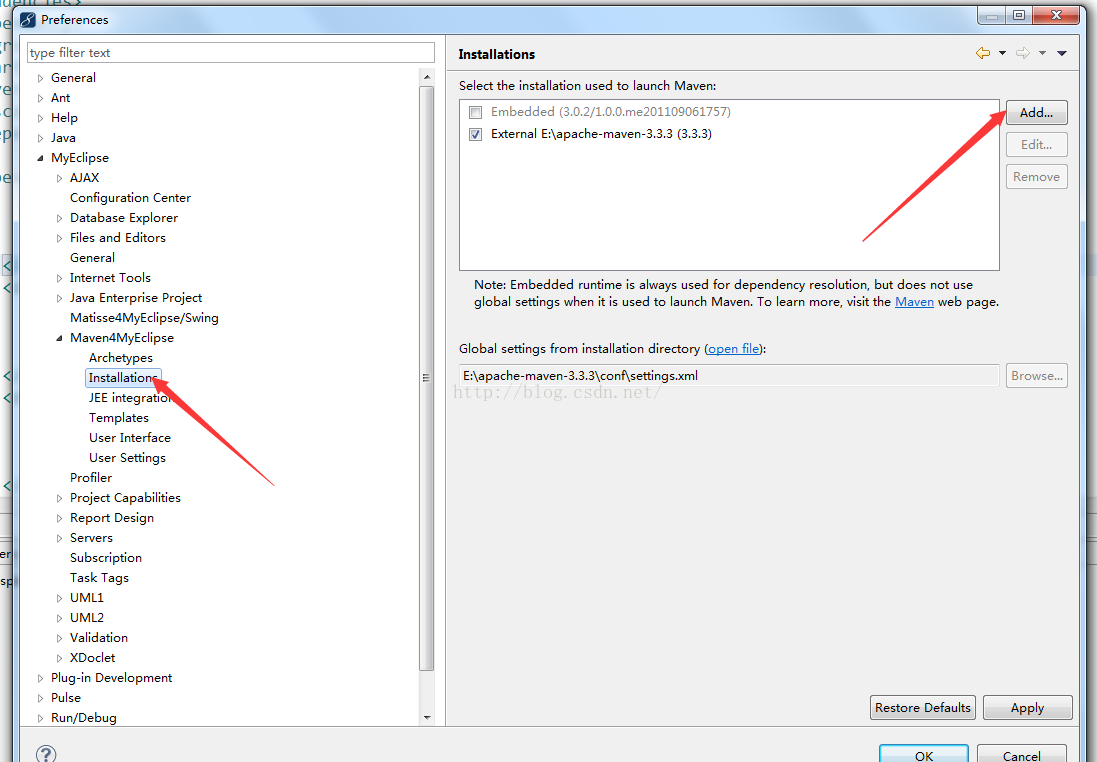
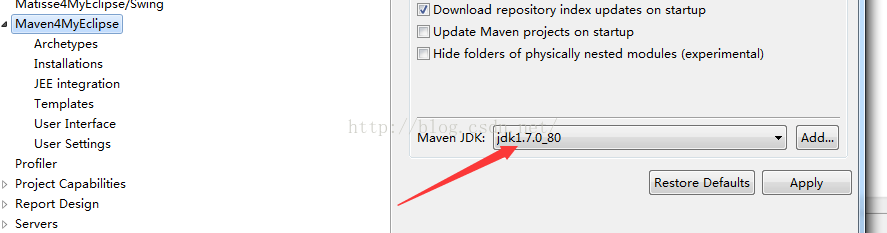
9.windows--preferences--MavenMyeclipse-- installations --添加maven 选中你解压的那个maven 文件夹 (与添加tomcat类似),记住啊 你的运行环境一定要是1.7啊,否则运行不了
10.将你maven/conf 文件夹下的setting.xml复制到D:\repository 下
设置用户设置 User-settings 选中你创建的D:\repository 文件夹 点击确定
11. 在Myeclipse下创建Maven项目 添加个依赖试试啊
<dependency>
<groupId>org.apache.poi</groupId>
<artifactId>poi-ooxml</artifactId>
<version>3.9</version>
</dependency>
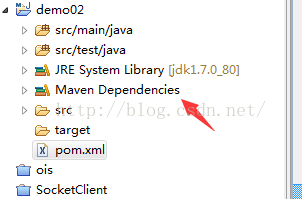
你会发先在你依赖包下会自动出现jar啦 说明你成功了, 第一次时间较长 你可以在
好啦 Maven + Nexus 私服搭建完成 具体里面的标签含义自己去理解吧. 一起加油啊! 如果有不对的地方欢迎大家批评指正啊。
图片有的混了 尽量看吧.


 9898
9898


 被折叠的 条评论
为什么被折叠?
被折叠的 条评论
为什么被折叠?
 到【灌水乐园】发言


