


一、准备阶段
请看这篇文章:http://blog.csdn.net/ruoyunliufeng/article/details/77921361
1.补充pysinstall和pycharm的集成:
1.1pip安装pyinstall
pip install pyinstall
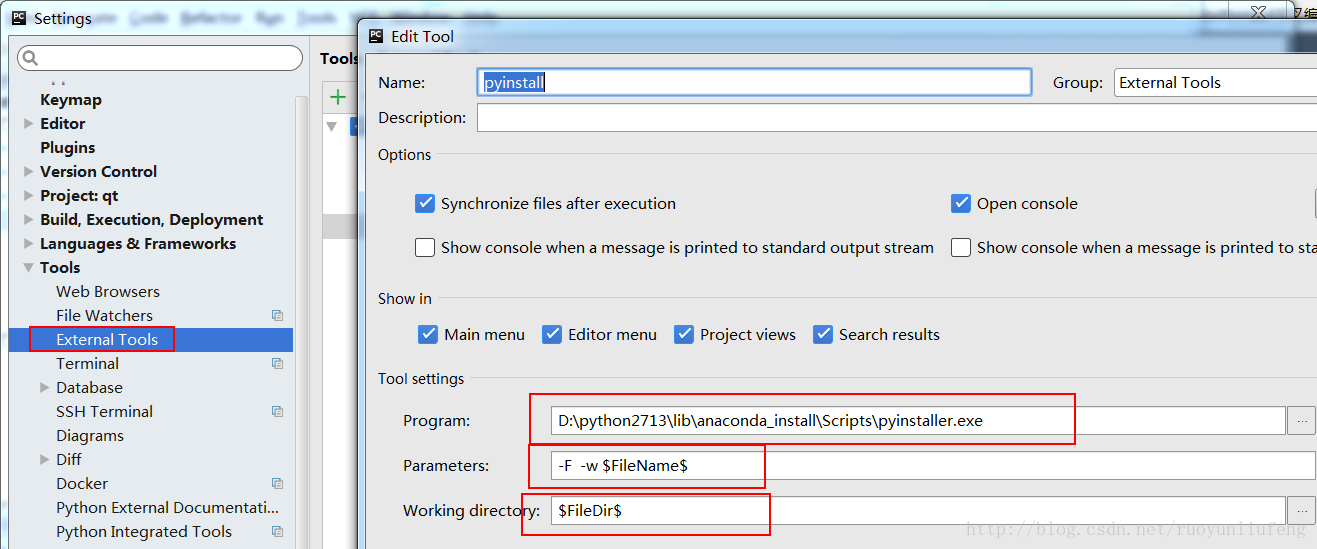
1.2按照下图配置
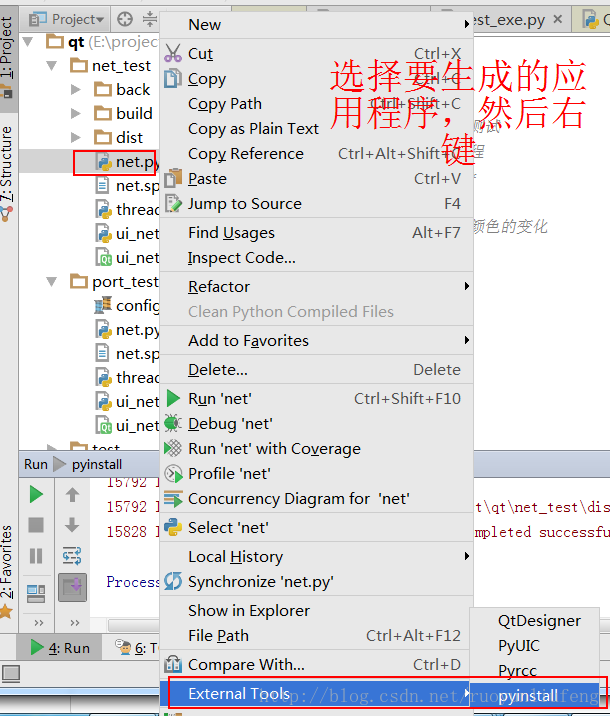
3.使用
二、程序编写
1.设计UI
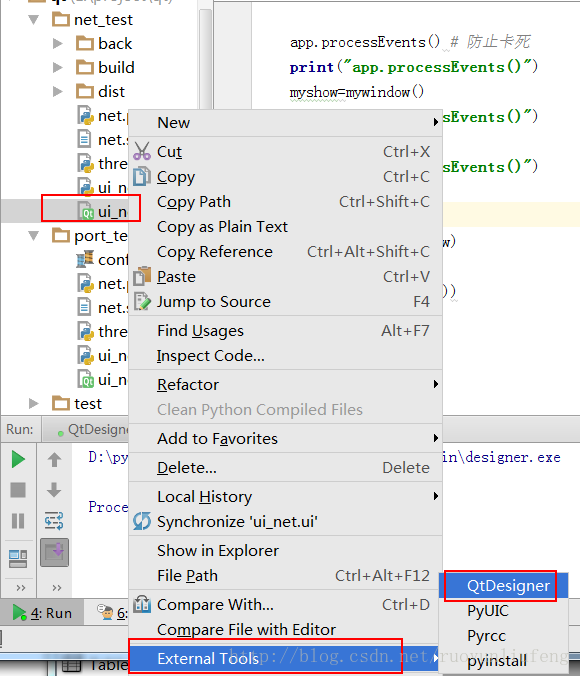
在当前问津新建.ui文件(前提是你已经完成上面的安装步骤),然后右击文件选择外部工具的QTdesigner
QTdesigner的设计部分,我就不多讲了,可能后续会出博客专题专门讲。大体原理就是拖拖拽拽改改参数。
2.将UI程序转换成python程序
转换后注释三行代码:
        # MainWindow.setCentralWidget(self.centralwidget)
        # MainWindow.setStatusBar(self.statusbar)
        # MainWindow.setMenuBar(self.menuBar)
主程序
# encoding: utf-8

# ***网络测试程序V0.1***
# 1.采用ping原理进行网络测试
# 2.分离UI主线程和工作线程
# ***********************
# V0.2
# 更新网络成功或失败按钮颜色的变化


import os
import sys
import time


global ip


from ui_net import Ui_MainWindow
from PyQt5 import QtWidgets,QtCore,Qt
from PyQt5.QtGui import QPixmap,QPalette
from PyQt5.QtCore import *
from PyQt5.QtGui import *
from PyQt5.QtWidgets import *


class WorkThread(QtCore.QThread):
    sinOut = pyqtSignal(int)
    def __int__(self):
        super(WorkThread,self).__init__()


    def run(self ):
        global ip
        exit_code = os.system(u'ping %s'%ip)
        if exit_code:
            # raise Exception('connect failed.')
            self.sinOut.emit(0)    #反馈信号出去
        else:
            self.sinOut.emit(1) #反馈信号出去


#
class mywindow(QtWidgets.QWidget, Ui_MainWindow):
    trigger = QtCore.pyqtSignal()
    def __init__(self):
        super(mywindow, self).__init__()
        self.setupUi(self)

        # 连接 QPushButton 的点击信号到槽 BigWork()
        self.pushButton.clicked.connect(self.net_work)

        # # 延时为了看启动界面
        # time.sleep(1)

    def net_work(self):
        # print("开始多线程")

        self.wt = WorkThread()
        global  ip
        ip =  self.lineEdit.text()
        print (ip)
        #开始执行run()函数里的内容
        self.wt.start()

        # # 收到信号
        self.wt.sinOut.connect(self.net_back)  #将信号连接至net_back函数

    def net_back(self,net_bool):
        if net_bool ==1:
            self.pushButton.setText(u"成功")
            # button1.setStyleSheet("background-color: red");
            # button2.setStyleSheet("background-color:#ff0000;");
            # button3.setStyleSheet("background-color:rgb(255,0,0)");
            self.pushButton.setStyleSheet("background-color: green")

        else:
            self.pushButton.setText(u"失败")
            self.pushButton.setStyleSheet("background-color: red")

if __name__=="__main__":
    app=QtWidgets.QApplication(sys.argv)

    # 启动界面
    splash = QtWidgets.QSplashScreen(QPixmap("D://D.png"))
    splash.show()
    splash.showMessage(u"正在加载软件",alignment = QtCore.Qt.AlignHCenter)

    app.processEvents() # 防止卡死
    print("app.processEvents()")
    myshow=mywindow()
    print("app.processEvents()")
    myshow.show()
    print("app.processEvents()")

    # 关闭启动界面
    splash.finish(myshow)

    sys.exit(app.exec_())
程序有几个要点:
1.开机界面实现。
2.线程实现,方式运行程序过程中UI界面的卡死。
3.调用windows命令行的实现。
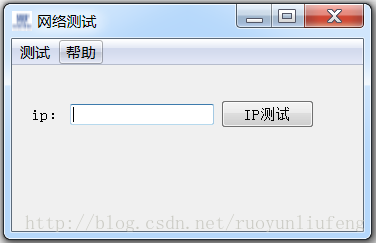
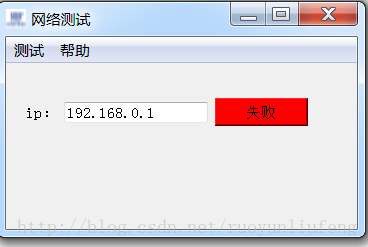
三、效果


 7016
7016


 被折叠的 条评论
为什么被折叠?
被折叠的 条评论
为什么被折叠?
 到【灌水乐园】发言


