


Picasso是Squareup公司出的一款图片加载框架,能够解决我们在Android开发中加载图片时遇到的诸多问题,比如OOM,图片错位等,问题主要集中在加载图片列表时,因为单张图片加载谁都会写。如果我们想在ListView或者GridView或者RecyclerView中加载图片墙,那么这个时候对原图片的二次处理就显得非常重要了,否则就会出现我们上文说的OOM或者图片错位等。不过,如果你使用了Picasso来加载图片的话,那么所有问题都会变得很简单。OK,那我们今天就来看看Picasso的使用。
1.基本使用
Picasso加载一张网络图片,最简单的一行代码就搞定:
- Picasso.with(this).load(“http://n.sinaimg.cn/translate/20160819/9BpA-fxvcsrn8627957.jpg”).into(iv);
Picasso.with(this).load("http://n.sinaimg.cn/translate/20160819/9BpA-fxvcsrn8627957.jpg").into(iv);如果你想对这张图片进行剪裁,可以使用resize方法:
- Picasso.with(this).load(“http://n.sinaimg.cn/translate/20160819/9BpA-fxvcsrn8627957.jpg”)
- .resize(200,200)
- .into(iv);
Picasso.with(this).load("http://n.sinaimg.cn/translate/20160819/9BpA-fxvcsrn8627957.jpg")
                .resize(200,200)
                .into(iv);
注意这里的200表示200px,如果你想在resize时指定dp,可以使用如下方法:
- Picasso.with(this).load(“http://n.sinaimg.cn/translate/20160819/9BpA-fxvcsrn8627957.jpg”)
- .resizeDimen(R.dimen.iv_width,R.dimen.iv_height)
- .into(iv);
Picasso.with(this).load("http://n.sinaimg.cn/translate/20160819/9BpA-fxvcsrn8627957.jpg")
                .resizeDimen(R.dimen.iv_width,R.dimen.iv_height)
                .into(iv);
在dimen文件中定义宽高即可:
- <dimen name=“iv_width”>200dp</dimen>
- <dimen name=”iv_height”>200dp</dimen>
<dimen name="iv_width">200dp</dimen>
    <dimen name="iv_height">200dp</dimen>
其实我们看看resizeDimen的源码就知道它是怎么设置dp了:
- /** Resize the image to the specified dimension size. */
- public RequestCreator resizeDimen(int targetWidthResId, int targetHeightResId) {
- Resources resources = picasso.context.getResources();
- int targetWidth = resources.getDimensionPixelSize(targetWidthResId);
- int targetHeight = resources.getDimensionPixelSize(targetHeightResId);
- return resize(targetWidth, targetHeight);
- }
  /** Resize the image to the specified dimension size. */
  public RequestCreator resizeDimen(int targetWidthResId, int targetHeightResId) {
    Resources resources = picasso.context.getResources();
    int targetWidth = resources.getDimensionPixelSize(targetWidthResId);
    int targetHeight = resources.getDimensionPixelSize(targetHeightResId);
    return resize(targetWidth, targetHeight);
  }
一句话,它就是把dp读取成px然后调用resize方法实现的。
OK,很多时候我还可以给Picasso下载的图片设置缩放模式,也就是ImageView的ScaleType属性(不了解的请移步这里),但是注意,缩放模式centerCrop和centerInside要和resize一起使用,否则会抛异常,而缩放模式fit不可以和resize一起使用,如下:
使用fit:
- Picasso.with(this).load(“http://n.sinaimg.cn/translate/20160819/9BpA-fxvcsrn8627957.jpg”)
- .fit()
- .into(iv);
Picasso.with(this).load("http://n.sinaimg.cn/translate/20160819/9BpA-fxvcsrn8627957.jpg")
                .fit()
                .into(iv);
使用centerCrop:
- Picasso.with(this).load(“http://n.sinaimg.cn/translate/20160819/9BpA-fxvcsrn8627957.jpg”)
- .resizeDimen(R.dimen.iv_width,R.dimen.iv_height)
- .centerCrop()
- .into(iv);
        Picasso.with(this).load("http://n.sinaimg.cn/translate/20160819/9BpA-fxvcsrn8627957.jpg")
                .resizeDimen(R.dimen.iv_width,R.dimen.iv_height)
                .centerCrop()
                .into(iv);
很多时候我们在图片加载出来之前需要先显示一张默认图片,也即占位图,而在图片加载出错的时候我们可能想显示一张错误图,这个Picasso也是支持的:
- Picasso.with(this).load(“http://n.sinaimg.cn/translate/20160819/9BpA-fxvcsrn8627957.jpg”)
- //占位图,图片加载出来之前显示的默认图片
- .placeholder(R.mipmap.ic_launcher)
- //错误图,图片加载出错时显示的图片
- .error(R.mipmap.ic_launcher)
- .into(iv);
Picasso.with(this).load("http://n.sinaimg.cn/translate/20160819/9BpA-fxvcsrn8627957.jpg")
                //占位图,图片加载出来之前显示的默认图片
                .placeholder(R.mipmap.ic_launcher)
                //错误图,图片加载出错时显示的图片
                .error(R.mipmap.ic_launcher)
                .into(iv);
很多时候,我们可能想显示一个用户图像,但是这个用户图像是个圆形图片,这个用Picasso该怎么实现呢?首先定义一个Transformation,在transform方法中对图片进行二次处理,包括剪裁重新处理等等,那我这里想把原图变为一个圆形图,就可以按下面的写法来:
- Transformation transformation = new Transformation() {
- @Override
- public Bitmap transform(Bitmap source) {
- int width = source.getWidth();
- int height = source.getHeight();
- int size = Math.min(width, height);
- Bitmap blankBitmap = Bitmap.createBitmap(width, height, Bitmap.Config.ARGB_8888);
- Canvas canvas = new Canvas(blankBitmap);
- Paint paint = new Paint();
- paint.setAntiAlias(true);
- canvas.drawCircle(size / 2, size / 2, size / 2, paint);
- paint.setXfermode(new PorterDuffXfermode(PorterDuff.Mode.SRC_IN));
- canvas.drawBitmap(source, 0, 0, paint);
- if (source != null && !source.isRecycled()) {
- source.recycle();
- }
- return blankBitmap;
- }
- @Override
- public String key() {
- return “squareup”;
- }
- };
Transformation transformation = new Transformation() {
            @Override
            public Bitmap transform(Bitmap source) {
                int width = source.getWidth();
                int height = source.getHeight();
                int size = Math.min(width, height);
                Bitmap blankBitmap = Bitmap.createBitmap(width, height, Bitmap.Config.ARGB_8888);
                Canvas canvas = new Canvas(blankBitmap);
                Paint paint = new Paint();
                paint.setAntiAlias(true);
                canvas.drawCircle(size / 2, size / 2, size / 2, paint);
                paint.setXfermode(new PorterDuffXfermode(PorterDuff.Mode.SRC_IN));
                canvas.drawBitmap(source, 0, 0, paint);
                if (source != null && !source.isRecycled()) {
                    source.recycle();
                }
                return blankBitmap;
            }

            @Override
            public String key() {
                return "squareup";
            }
        };
paint的setXfermode表示最终显示的图形取所绘制图形的交集,我这里先绘制了圆形,又绘制了一个矩形的Bitmap,圆形没有Bitmap大,所以交集肯定是圆形,所以最终显示结果就为圆形,在加载图片的时候可以通过transform属性来使用自定义的这个transformation,如下:
- Picasso.with(this).load(“http://n.sinaimg.cn/translate/20160819/9BpA-fxvcsrn8627957.jpg”)
- .transform(transformation)
- .into(iv);
 Picasso.with(this).load("http://n.sinaimg.cn/translate/20160819/9BpA-fxvcsrn8627957.jpg")
                .transform(transformation)
                .into(iv);
最终显示结果如下:

依照这个思路,你想把图像做成什么形状都可以了吧!
Picasso还可以通过开启指示器,让你看到这个图片是从内存加载来的还是从SD卡加载来的还是从网络加载来的,设置方式如下:
- Picasso picasso = Picasso.with(this);
- //开启指示器
- picasso.setIndicatorsEnabled(true);
- picasso.load(”http://n.sinaimg.cn/translate/20160819/9BpA-fxvcsrn8627957.jpg”)
- .into(iv);
 Picasso picasso = Picasso.with(this);
        //开启指示器
        picasso.setIndicatorsEnabled(true);
        picasso.load("http://n.sinaimg.cn/translate/20160819/9BpA-fxvcsrn8627957.jpg")
                .into(iv);
开启之后,图片的加载效果如下:

左上角会有一个蓝色的三角符号,不同的颜色表示图片的来源不同,红、蓝、绿三种颜色分别代表网络、SD卡和内存。
现在大部分的图片缓存框架都是支持三级缓存的,在Picasso中,我们也可以手动设置缓存策略,比如说当我们查看一张大图的时候,可能由于图片太大,不想将其缓存在内存中,那么可以自定义缓存策略,如下:
- Picasso picasso = Picasso.with(this);
- //开启指示器
- picasso.setIndicatorsEnabled(true);
- picasso
- .load(”http://n.sinaimg.cn/translate/20160819/9BpA-fxvcsrn8627957.jpg”)
- //第一个参数是指图片加载时放弃在内存缓存中查找
- //第二个参数是指图片加载完不缓存在内存中
- .memoryPolicy(MemoryPolicy.NO_CACHE, MemoryPolicy.NO_STORE)
- .into(iv);
        Picasso picasso = Picasso.with(this);
        //开启指示器
        picasso.setIndicatorsEnabled(true);
        picasso
                .load("http://n.sinaimg.cn/translate/20160819/9BpA-fxvcsrn8627957.jpg")
                //第一个参数是指图片加载时放弃在内存缓存中查找
                //第二个参数是指图片加载完不缓存在内存中
                .memoryPolicy(MemoryPolicy.NO_CACHE, MemoryPolicy.NO_STORE)
                .into(iv);
当然,如果你想给图片加载过程设置一个监听器也是可以的,如下:
- Picasso picasso = Picasso.with(this);
- //开启指示器
- picasso.setIndicatorsEnabled(true);
- picasso
- .load(”http://n.sinaimg.cn/translate/20160819/9BpA-fxvcsrn8627957.jpg”)
- //第一个参数是指图片加载时放弃在内存缓存中查找
- //第二个参数是指图片加载完不缓存在内存中
- .memoryPolicy(MemoryPolicy.NO_CACHE, MemoryPolicy.NO_STORE)
- .into(iv, new Callback() {
- @Override
- public void onSuccess() {
- Log.d(”google_lenve_fb”, “onSuccess: 图片加载成功!”);
- }
- @Override
- public void onError() {
- Log.d(”google_lenve_fb”, “onSuccess: 图片加载失败!”);
- }
- });
        Picasso picasso = Picasso.with(this);
        //开启指示器
        picasso.setIndicatorsEnabled(true);
        picasso
                .load("http://n.sinaimg.cn/translate/20160819/9BpA-fxvcsrn8627957.jpg")
                //第一个参数是指图片加载时放弃在内存缓存中查找
                //第二个参数是指图片加载完不缓存在内存中
                .memoryPolicy(MemoryPolicy.NO_CACHE, MemoryPolicy.NO_STORE)
                .into(iv, new Callback() {
                    @Override
                    public void onSuccess() {
                        Log.d("google_lenve_fb", "onSuccess: 图片加载成功!");
                    }

                    @Override
                    public void onError() {
                        Log.d("google_lenve_fb", "onSuccess: 图片加载失败!");
                    }
                });
在ListView或者RecyclerView中加载图片时,当列表处于滑动状态的时候,我们可以停止图片的加载,当列表停止滚动的时候,我们又可以继续加载图片,如下:
- Object tag = new Object();
- Picasso with = Picasso.with(this);
- with.load(”http://n.sinaimg.cn/translate/20160819/9BpA-fxvcsrn8627957.jpg”)
- .into(iv);
- //暂停加载
- with.pauseTag(tag);
- //恢复加载
- with.resumeTag(tag);
        Object tag = new Object();
        Picasso with = Picasso.with(this);
        with.load("http://n.sinaimg.cn/translate/20160819/9BpA-fxvcsrn8627957.jpg")
                .into(iv);
        //暂停加载
        with.pauseTag(tag);
        //恢复加载
        with.resumeTag(tag);
这里要传递的对象可以是任意对象,这两个方法的使用需要我们自己去监听ListView或者GridView的滑动状态。OK,以上这些都属于Picasso的一个基本使用,接下来我们来看看一些高级使用技巧。
2.自定义缓存位置
既然我们知道Picasso自带三级缓存,那么问题就来了,存储在SD卡的图片到底存储在哪里呢?在手机的内部存储中,即 /data/data/应用包名/cache 目录下,这个目录如果你有root权限就可以查看,可是有的时候我们需要自定义缓存位置,即不想将图片缓存在这里,又该怎么办?说到这里,我们不得不来看看Picasso的源码,with方法源码如下:
- public static Picasso with(Context context) {
- if (singleton == null) {
- synchronized (Picasso.class) {
- if (singleton == null) {
- singleton = new Builder(context).build();
- }
- }
- }
- return singleton;
- }
  public static Picasso with(Context context) {
    if (singleton == null) {
      synchronized (Picasso.class) {
        if (singleton == null) {
          singleton = new Builder(context).build();
        }
      }
    }
    return singleton;
}- public Picasso build() {
- Context context = this.context;
- if (downloader == null) {
- downloader = Utils.createDefaultDownloader(context);
- }
- if (cache == null) {
- cache = new LruCache(context);
- }
- if (service == null) {
- service = new PicassoExecutorService();
- }
- if (transformer == null) {
- transformer = RequestTransformer.IDENTITY;
- }
- Stats stats = new Stats(cache);
- Dispatcher dispatcher = new Dispatcher(context, service, HANDLER, downloader, cache, stats);
- return new Picasso(context, dispatcher, cache, listener, transformer, requestHandlers, stats,
- defaultBitmapConfig, indicatorsEnabled, loggingEnabled);
- }
    public Picasso build() {
      Context context = this.context;

      if (downloader == null) {
        downloader = Utils.createDefaultDownloader(context);
      }
      if (cache == null) {
        cache = new LruCache(context);
      }
      if (service == null) {
        service = new PicassoExecutorService();
      }
      if (transformer == null) {
        transformer = RequestTransformer.IDENTITY;
      }

      Stats stats = new Stats(cache);

      Dispatcher dispatcher = new Dispatcher(context, service, HANDLER, downloader, cache, stats);

      return new Picasso(context, dispatcher, cache, listener, transformer, requestHandlers, stats,
          defaultBitmapConfig, indicatorsEnabled, loggingEnabled);
    }
  }
我们先不急着看build中的其他方法,先来看看downloader这个判断(如果我使用with方法downloader肯定为null),如果downloader为null,则系统会帮我们创建一个默认的downloader,那我们来看看这个默认的downloader是怎么创建的:
- static Downloader createDefaultDownloader(Context context) {
- try {
- Class.forName(”com.squareup.okhttp.OkHttpClient”);
- return OkHttpLoaderCreator.create(context);
- } catch (ClassNotFoundException ignored) {
- }
- return new UrlConnectionDownloader(context);
- }
  static Downloader createDefaultDownloader(Context context) {
    try {
      Class.forName("com.squareup.okhttp.OkHttpClient");
      return OkHttpLoaderCreator.create(context);
    } catch (ClassNotFoundException ignored) {
    }
    return new UrlConnectionDownloader(context);
  }
啊哈,这里就很明白了,系统通过反射来检查我们在项目中是否使用了OkHttp,如果使用了,就使用OkHttp来创建一个下载器,否则就使用HttpUrlConnection来创建一个下载器,可是大家注意Class.forName(“com.squareup.okhttp.OkHttpClient”);这个方法的参数,这是OkHttp3以前的写法,现在我们都是使用OkHttp3了,OkHttp3的包名就不是这个样子,而是okhttp3.OkHttpClient,所以即使你在项目中引用了OkHttp3,Picasso还是会把HttpUrlConnection当作下载器来下载图片的,这个问题估计Picasso会在以后的版本中修正吧!OK,那如果我们想要使用自己的下载器又该怎么做呢?其实很简单,首先不使用with这个方法来初始化Picasso,而是使用Builder来初始化,在初始化的过程中传入自己的下载器,自己的下载器我们可以模仿Picasso里边的这个下载器来写,也可以自定义,我们来看一个Demo:
- Picasso picasso = new Picasso.Builder(this)
- .downloader(new OkHttp3Downloader(this.getExternalCacheDir()))
- .build();
- Picasso.setSingletonInstance(picasso);
- picasso.load(”http://n.sinaimg.cn/translate/20160819/9BpA-fxvcsrn8627957.jpg”).into(iv);
Picasso picasso = new Picasso.Builder(this)
                .downloader(new OkHttp3Downloader(this.getExternalCacheDir()))
                .build();
        Picasso.setSingletonInstance(picasso);
        picasso.load("http://n.sinaimg.cn/translate/20160819/9BpA-fxvcsrn8627957.jpg").into(iv);
使用Builder来构建一个Picasso,在构建的过程中传入自己的下载器,这个下载器我没有自己来写,使用GitHub上的开源项目 https://github.com/JakeWharton/picasso2-okhttp3-downloader,里边的代码也都很简单,只有一个类,拷贝到你的项目中就可使用,不赘述。这样修改之后,Picasso的图片缓存位置就发生了改变,存到了 /storage/sdcard/Android/data/应用包名/cache 文件夹中,不同手机这个地址前面一部分可能会有一点点差异。使用这个方法初始化的时候,还调用了setSingletonInstance方法,我们来看看这个方法:
- public static void setSingletonInstance(Picasso picasso) {
- synchronized (Picasso.class) {
- if (singleton != null) {
- throw new IllegalStateException(“Singleton instance already exists.”);
- }
- singleton = picasso;
- }
- }
  public static void setSingletonInstance(Picasso picasso) {
    synchronized (Picasso.class) {
      if (singleton != null) {
        throw new IllegalStateException("Singleton instance already exists.");
      }
      singleton = picasso;
    }
  }
这个主要是用来检查Picasso的单例模式,如果Picasso不是单例的,则LruCache会失效,原因很简单,如果Picasso不是单例的,每一个Picasso都有自己的LruCache,那么LruCache本身的功能当然会失效。这一点需要注意。
3.自定义下载线程池
关于android开发中线程池,如果你还不了解,可以参考Android开发之线程池使用总结,使用Picasso下载图片的时候,系统内部也是有一个线程池,想看这个,我们还是得回到build方法:
- public Picasso build() {
- Context context = this.context;
- if (downloader == null) {
- downloader = Utils.createDefaultDownloader(context);
- }
- if (cache == null) {
- cache = new LruCache(context);
- }
- if (service == null) {
- service = new PicassoExecutorService();
- }
- if (transformer == null) {
- transformer = RequestTransformer.IDENTITY;
- }
- Stats stats = new Stats(cache);
- Dispatcher dispatcher = new Dispatcher(context, service, HANDLER, downloader, cache, stats);
- return new Picasso(context, dispatcher, cache, listener, transformer, requestHandlers, stats,
- defaultBitmapConfig, indicatorsEnabled, loggingEnabled);
- }
    public Picasso build() {
      Context context = this.context;

      if (downloader == null) {
        downloader = Utils.createDefaultDownloader(context);
      }
      if (cache == null) {
        cache = new LruCache(context);
      }
      if (service == null) {
        service = new PicassoExecutorService();
      }
      if (transformer == null) {
        transformer = RequestTransformer.IDENTITY;
      }

      Stats stats = new Stats(cache);

      Dispatcher dispatcher = new Dispatcher(context, service, HANDLER, downloader, cache, stats);

      return new Picasso(context, dispatcher, cache, listener, transformer, requestHandlers, stats,
          defaultBitmapConfig, indicatorsEnabled, loggingEnabled);
    }
  }
在build方法中还有一个判断,如果service为null,则新创建一个PicassoExecutorService,我们来看看这个PicassoExecutorService:
- class PicassoExecutorService extends ThreadPoolExecutor {
- private static final int DEFAULT_THREAD_COUNT = 3;
- PicassoExecutorService() {
- super(DEFAULT_THREAD_COUNT, DEFAULT_THREAD_COUNT, 0, TimeUnit.MILLISECONDS,
- new PriorityBlockingQueue<Runnable>(), new Utils.PicassoThreadFactory());
- }
- ….
- ….
- }
class PicassoExecutorService extends ThreadPoolExecutor {
  private static final int DEFAULT_THREAD_COUNT = 3;

  PicassoExecutorService() {
    super(DEFAULT_THREAD_COUNT, DEFAULT_THREAD_COUNT, 0, TimeUnit.MILLISECONDS,
        new PriorityBlockingQueue<Runnable>(), new Utils.PicassoThreadFactory());
  }

  ....
  ....
}
大家看到,这个PicassoExecutorService继承自ThreadPoolExecutor这个线程池,线程池中的核心线程数为3,线程池的最大线程数也为3,说明线程池中没有非核心线程,线程队列使用了PriorityBlockingQueue,说明所有加载进来的任务都将实现Comparator接口。OK,这是系统默认帮我们创建的线程池,如果你想修改,可以在创建Picasso实例的时候传入自己的线程池:
- int CPU_COUNT = Runtime.getRuntime().availableProcessors();
- ThreadPoolExecutor threadPoolExecutor = new ThreadPoolExecutor(CPU_COUNT + 1, CPU_COUNT * 2 + 1,
- 1, TimeUnit.MINUTES, new PriorityBlockingQueue<Runnable>());
- Picasso picasso = new Picasso.Builder(this)
- .executor(threadPoolExecutor)
- .downloader(new OkHttp3Downloader(this.getExternalCacheDir()))
- .build();
- Picasso.setSingletonInstance(picasso);
- picasso.load(”http://n.sinaimg.cn/translate/20160819/9BpA-fxvcsrn8627957.jpg”).into(iv);
        int CPU_COUNT = Runtime.getRuntime().availableProcessors();
        ThreadPoolExecutor threadPoolExecutor = new ThreadPoolExecutor(CPU_COUNT + 1, CPU_COUNT * 2 + 1,
                1, TimeUnit.MINUTES, new PriorityBlockingQueue<Runnable>());
        Picasso picasso = new Picasso.Builder(this)
                .executor(threadPoolExecutor)
                .downloader(new OkHttp3Downloader(this.getExternalCacheDir()))
                .build();
        Picasso.setSingletonInstance(picasso);
        picasso.load("http://n.sinaimg.cn/translate/20160819/9BpA-fxvcsrn8627957.jpg").into(iv);
对线程池的创建如果还不了解的话,请参考 Android开发之线程池使用总结。
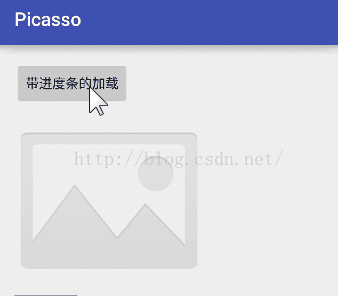
4.自定义下载进度条
我在之前的一篇文章中专门介绍过自定义进度条,没看过的小伙伴请戳这里Android自定义View之ProgressBar出场记。那我们今天就给Picasso加载图片的过程也来一个进度条,先来看看显示效果吧:
整体思路其实很简单,最关键是你要会用OkHttp。
经过上文的讲解,小伙伴们已经知道,我可以在构造一个Picasso实例的时候给它设置一个下载器,这个下载器是由OkHttp实现的,在这个下载器中我可以修改Picasso所加载图片的存储位置,同理,下载器中我也可以传递一个OkHttpClient作为构造参数(上文使用了缓存文件夹作为构造参数),我们来看看:
- public OkHttp3Downloader(OkHttpClient client) {
- this.client = client;
- this.cache = client.cache();
- }
    public OkHttp3Downloader(OkHttpClient client) {
        this.client = client;
        this.cache = client.cache();
    }
大家看到,如果我使用OkHttpClient作为构造参数,那么缓存位置则为OkHttpClient的缓存地址。而在OkHttpClient中有一个拦截器,我们可以在拦截器中来计算当前下载百分比,整体思路就是这样,我们来看看实现过程:
首先我来定义一个接口,这个接口用来更新我的进度条:
- public interface ProgressListener {
- //定义接口,取值范围为0~100
- public void update(@IntRange(from = 0, to = 100) int progress);
- }
public interface ProgressListener {
    //定义接口,取值范围为0~100
    public void update(@IntRange(from = 0, to = 100) int progress);
}- OkHttpClient client = new OkHttpClient.Builder()
- .addNetworkInterceptor(new Interceptor() {
- @Override
- public Response intercept(Chain chain) throws IOException {
- Response response = chain.proceed(chain.request());
- return response.newBuilder()
- .body(new MyProgressbarResponseBody(new ProgressListener() {
- @Override
- public void update(@IntRange(from = 0, to = 100) final int progress) {
- //更新进度条
- runOnUiThread(new Runnable() {
- @Override
- public void run() {
- Log.d(”google_lenve_fb”, “run: ” + progress);
- myPb.setSweepAngle(progress * 360f / 100);
- }
- });
- }
- }, response.body()))
- .build();
- }
- })
- //设置缓存位置,Picasso下载的图片将缓存在这里
- .cache(new Cache(this.getExternalCacheDir(), 10 * 1024 * 1024))
- .build();
OkHttpClient client = new OkHttpClient.Builder()
                .addNetworkInterceptor(new Interceptor() {
                    @Override
                    public Response intercept(Chain chain) throws IOException {
                        Response response = chain.proceed(chain.request());
                        return response.newBuilder()
                                .body(new MyProgressbarResponseBody(new ProgressListener() {
                                    @Override
                                    public void update(@IntRange(from = 0, to = 100) final int progress) {
                                        //更新进度条
                                        runOnUiThread(new Runnable() {
                                            @Override
                                            public void run() {
                                                Log.d("google_lenve_fb", "run: " + progress);
                                                myPb.setSweepAngle(progress * 360f / 100);
                                            }
                                        });
                                    }
                                }, response.body()))
                                .build();
                    }
                })
                //设置缓存位置,Picasso下载的图片将缓存在这里
                .cache(new Cache(this.getExternalCacheDir(), 10 * 1024 * 1024))
                .build();
大家看到,这里核心的代码要算addNetworkInterceptor中的代码了,OkHttp中的拦截器有点类似于JavaWeb中的过滤器 ,在所有的请求到达Servlet之前,先对其进行一个简单的处理。而OkHttp中的拦截器,我们可以观察,修改请求和响应,大多数情况下我们使用拦截器来添加、移除、转换请求或者响应的头信息。OK,那么在本案例中我重新修改了Response的body属性,给它传入两个参数,一个就是刚刚定义的监听器,还有一个就是response的body,我们来看看这个MyProgressbarResponseBody,如下:
- public class MyProgressbarResponseBody extends ResponseBody {
- private ResponseBody responseBody;
- private ProgressListener progressListener;
- private BufferedSource bufferedSource;
- public MyProgressbarResponseBody(ProgressListener progressListener, ResponseBody responseBody) {
- this.progressListener = progressListener;
- this.responseBody = responseBody;
- }
- @Override
- public MediaType contentType() {
- return responseBody.contentType();
- }
- @Override
- public long contentLength() {
- return responseBody.contentLength();
- }
- @Override
- public BufferedSource source() {
- if (bufferedSource == null) {
- bufferedSource = Okio.buffer(source(responseBody.source()));
- }
- return bufferedSource;
- }
- private Source source(Source source) {
- return new ForwardingSource(source) {
- long totalBytesRead = 0L;
- @Override
- public long read(Buffer sink, long byteCount) throws IOException {
- long bytesRead = super.read(sink, byteCount);
- totalBytesRead += bytesRead != -1 ? bytesRead : 0;
- if (progressListener != null) {
- progressListener.update(
- ((int) ((100 * totalBytesRead) / responseBody.contentLength())));
- }
- return bytesRead;
- }
- };
- }
- }
public class MyProgressbarResponseBody extends ResponseBody {
    private ResponseBody responseBody;
    private ProgressListener progressListener;
    private BufferedSource bufferedSource;

    public MyProgressbarResponseBody(ProgressListener progressListener, ResponseBody responseBody) {
        this.progressListener = progressListener;
        this.responseBody = responseBody;
    }

    @Override
    public MediaType contentType() {
        return responseBody.contentType();
    }

    @Override
    public long contentLength() {
        return responseBody.contentLength();
    }

    @Override
    public BufferedSource source() {
        if (bufferedSource == null) {
            bufferedSource = Okio.buffer(source(responseBody.source()));
        }
        return bufferedSource;
    }
    private Source source(Source source) {

        return new ForwardingSource(source) {
            long totalBytesRead = 0L;

            @Override
            public long read(Buffer sink, long byteCount) throws IOException {
                long bytesRead = super.read(sink, byteCount);
                totalBytesRead += bytesRead != -1 ? bytesRead : 0;
                if (progressListener != null) {
                    progressListener.update(
                            ((int) ((100 * totalBytesRead) / responseBody.contentLength())));
                }
                return bytesRead;
            }
        };
    }
}
MyProgressbarResponseBody继承自ResponseBody,并重写它里边的三个方法,分别返回数据类型,数据大小等信息,在source方法中我们来统计当前下载百分比,并且回调监听器中的接口。最后再来看一眼自定义的ProgressBar,对这个如果还不了解,请参考 Android自定义View之ProgressBar出场记 。
- public class MyProgressBar extends View {
- /**
- * View默认的宽
- */
- private static final int DEFAULTWIDTH = 200;
- /**
- * View默认的高度
- */
- private static final int DEFAULTHEIGHT = 200;
- private Paint sweepPaint;
- private int padding = 20;
- /**
- * 内层实体圆的颜色
- */
- private int sweepColor = getResources().getColor(R.color.pbColor);
- /**
- * 开始绘制的角度
- */
- private int startAngle = -90;
- /**
- * 已经绘制的角度
- */
- private float sweepAngle = 0;
- public MyProgressBar(Context context) {
- this(context, null);
- }
- public MyProgressBar(Context context, AttributeSet attrs) {
- this(context, attrs, 0);
- }
- public MyProgressBar(Context context, AttributeSet attrs, int defStyleAttr) {
- super(context, attrs, defStyleAttr);
- setAlpha(0.8f);
- sweepPaint = new Paint();
- sweepPaint.setColor(sweepColor);
- sweepPaint.setAntiAlias(true);
- }
- @Override
- protected void onMeasure(int widthMeasureSpec, int heightMeasureSpec) {
- super.onMeasure(widthMeasureSpec, heightMeasureSpec);
- //获取宽的测量模式
- int widthMode = MeasureSpec.getMode(widthMeasureSpec);
- //获取宽的测量值
- int widthSize = MeasureSpec.getSize(widthMeasureSpec);
- //获取高的测量模式
- int heightMode = MeasureSpec.getMode(heightMeasureSpec);
- //获取高的测量值
- int heightSize = MeasureSpec.getSize(heightMeasureSpec);
- switch (widthMode) {
- case MeasureSpec.EXACTLY:
- break;
- case MeasureSpec.AT_MOST:
- case MeasureSpec.UNSPECIFIED:
- //如果宽为wrap_content,则给定一个默认值
- widthSize = (int) TypedValue.applyDimension(TypedValue.COMPLEX_UNIT_DIP, DEFAULTWIDTH, getResources().getDisplayMetrics());
- break;
- }
- switch (heightMode) {
- case MeasureSpec.EXACTLY:
- break;
- case MeasureSpec.AT_MOST:
- case MeasureSpec.UNSPECIFIED:
- heightSize = (int) TypedValue.applyDimension(TypedValue.COMPLEX_UNIT_DIP, DEFAULTHEIGHT, getResources().getDisplayMetrics());
- break;
- }
- widthSize = heightSize = Math.min(widthSize, heightSize);
- //设置测量结果
- setMeasuredDimension(widthSize, heightSize);
- }
- @Override
- protected void onDraw(Canvas canvas) {
- if (sweepAngle != 360 && sweepAngle != 0) {
- RectF oval = new RectF(padding, padding, getWidth() - padding, getHeight() - padding);
- Log.d(”google_lenve_fb”, “onDraw: ” + sweepAngle);
- canvas.drawArc(oval, startAngle, sweepAngle, true, sweepPaint);
- }
- }
- public void setSweepAngle(float sweepAngle) {
- this.sweepAngle = sweepAngle;
- if (Build.VERSION.SDK_INT > 15) {
- postInvalidateOnAnimation();
- } else {
- ViewCompat.postInvalidateOnAnimation(this);
- }
- }
- }
public class MyProgressBar extends View {
    /**
     * View默认的宽
     */
    private static final int DEFAULTWIDTH = 200;
    /**
     * View默认的高度
     */
    private static final int DEFAULTHEIGHT = 200;
    private Paint sweepPaint;
    private int padding = 20;
    /**
     * 内层实体圆的颜色
     */
    private int sweepColor = getResources().getColor(R.color.pbColor);
    /**
     * 开始绘制的角度
     */
    private int startAngle = -90;
    /**
     * 已经绘制的角度
     */
    private float sweepAngle = 0;

    public MyProgressBar(Context context) {
        this(context, null);
    }

    public MyProgressBar(Context context, AttributeSet attrs) {
        this(context, attrs, 0);
    }

    public MyProgressBar(Context context, AttributeSet attrs, int defStyleAttr) {
        super(context, attrs, defStyleAttr);
        setAlpha(0.8f);
        sweepPaint = new Paint();
        sweepPaint.setColor(sweepColor);
        sweepPaint.setAntiAlias(true);
    }

    @Override
    protected void onMeasure(int widthMeasureSpec, int heightMeasureSpec) {
        super.onMeasure(widthMeasureSpec, heightMeasureSpec);
        //获取宽的测量模式
        int widthMode = MeasureSpec.getMode(widthMeasureSpec);
        //获取宽的测量值
        int widthSize = MeasureSpec.getSize(widthMeasureSpec);
        //获取高的测量模式
        int heightMode = MeasureSpec.getMode(heightMeasureSpec);
        //获取高的测量值
        int heightSize = MeasureSpec.getSize(heightMeasureSpec);
        switch (widthMode) {
            case MeasureSpec.EXACTLY:
                break;
            case MeasureSpec.AT_MOST:
            case MeasureSpec.UNSPECIFIED:
                //如果宽为wrap_content,则给定一个默认值
                widthSize = (int) TypedValue.applyDimension(TypedValue.COMPLEX_UNIT_DIP, DEFAULTWIDTH, getResources().getDisplayMetrics());
                break;
        }
        switch (heightMode) {
            case MeasureSpec.EXACTLY:
                break;
            case MeasureSpec.AT_MOST:
            case MeasureSpec.UNSPECIFIED:
                heightSize = (int) TypedValue.applyDimension(TypedValue.COMPLEX_UNIT_DIP, DEFAULTHEIGHT, getResources().getDisplayMetrics());
                break;
        }
        widthSize = heightSize = Math.min(widthSize, heightSize);
        //设置测量结果
        setMeasuredDimension(widthSize, heightSize);
    }

    @Override
    protected void onDraw(Canvas canvas) {
        if (sweepAngle != 360 && sweepAngle != 0) {
            RectF oval = new RectF(padding, padding, getWidth() - padding, getHeight() - padding);
            Log.d("google_lenve_fb", "onDraw: " + sweepAngle);
            canvas.drawArc(oval, startAngle, sweepAngle, true, sweepPaint);
        }
    }

    public void setSweepAngle(float sweepAngle) {
        this.sweepAngle = sweepAngle;
        if (Build.VERSION.SDK_INT > 15) {
            postInvalidateOnAnimation();
        } else {
            ViewCompat.postInvalidateOnAnimation(this);
        }
    }
}
最后,加载一张网络图片几个,注意下载器的创建方式:
- Picasso picasso = new Picasso
- .Builder(this)
- .downloader(new OkHttp3Downloader(client))
- .build();
     Picasso picasso = new Picasso
                .Builder(this)
                .downloader(new OkHttp3Downloader(client))
                .build();
5.Picasso源码剖析
其实我们在上文已经涉及到一些源码方面的东西了,那么接下来我们就来理一理Picasso加载图片的整体思路,首先还是先从with方法开始,进入到build方法中:
- public Picasso build() {
- Context context = this.context;
- if (downloader == null) {
- downloader = Utils.createDefaultDownloader(context);
- }
- if (cache == null) {
- cache = new LruCache(context);
- }
- if (service == null) {
- service = new PicassoExecutorService();
- }
- if (transformer == null) {
- transformer = RequestTransformer.IDENTITY;
- }
- Stats stats = new Stats(cache);
- Dispatcher dispatcher = new Dispatcher(context, service, HANDLER, downloader, cache, stats);
- return new Picasso(context, dispatcher, cache, listener, transformer, requestHandlers, stats,
- defaultBitmapConfig, indicatorsEnabled, loggingEnabled);
- }
    public Picasso build() {
      Context context = this.context;

      if (downloader == null) {
        downloader = Utils.createDefaultDownloader(context);
      }
      if (cache == null) {
        cache = new LruCache(context);
      }
      if (service == null) {
        service = new PicassoExecutorService();
      }
      if (transformer == null) {
        transformer = RequestTransformer.IDENTITY;
      }

      Stats stats = new Stats(cache);

      Dispatcher dispatcher = new Dispatcher(context, service, HANDLER, downloader, cache, stats);

      return new Picasso(context, dispatcher, cache, listener, transformer, requestHandlers, stats,
          defaultBitmapConfig, indicatorsEnabled, loggingEnabled);
    }
  }
build方法中前面几个if判断我们刚才已经说过了,这几个判断中的变量我们在创建Picasso实例的时候都可以自定义,也可以使用系统默认创建的,我们再来总结一下:
downloader 创建一个下载器
cache 创建图片的缓存器,默认使用LruCache,这个我们一般不做修改,最多重新配置一下LruCache
service 创建图片下载的线程池
transformer 对Request进行转换,默认不做任何出处理,事实上我们一般也不需要做任何处理。
接下来就是创建一个Stats实例,这个stats主要是用来统计缓存,下载数量等数据,一言以蔽之,就是保存图片的一些状态信息。再之后,则是创建一个Dispatcher,创建Dispatcher的时候还传入了一个HANDLER,这个Handler我们在后文再说,dispatcher顾名思义就是分发,事实上dispatcher主要用来任务调度,这个一会再说,最后new一个Picasso实例返回:
- Picasso(Context context, Dispatcher dispatcher, Cache cache, Listener listener,
- RequestTransformer requestTransformer, List<RequestHandler> extraRequestHandlers, Stats stats,
- Bitmap.Config defaultBitmapConfig, boolean indicatorsEnabled, boolean loggingEnabled) {
- this.context = context;
- this.dispatcher = dispatcher;
- this.cache = cache;
- this.listener = listener;
- this.requestTransformer = requestTransformer;
- this.defaultBitmapConfig = defaultBitmapConfig;
- int builtInHandlers = 7; // Adjust this as internal handlers are added or removed.
- int extraCount = (extraRequestHandlers != null ? extraRequestHandlers.size() : 0);
- List<RequestHandler> allRequestHandlers =
- new ArrayList<RequestHandler>(builtInHandlers + extraCount);
- // ResourceRequestHandler needs to be the first in the list to avoid
- // forcing other RequestHandlers to perform null checks on request.uri
- // to cover the (request.resourceId != 0) case.
- allRequestHandlers.add(new ResourceRequestHandler(context));
- if (extraRequestHandlers != null) {
- allRequestHandlers.addAll(extraRequestHandlers);
- }
- allRequestHandlers.add(new ContactsPhotoRequestHandler(context));
- allRequestHandlers.add(new MediaStoreRequestHandler(context));
- allRequestHandlers.add(new ContentStreamRequestHandler(context));
- allRequestHandlers.add(new AssetRequestHandler(context));
- allRequestHandlers.add(new FileRequestHandler(context));
- allRequestHandlers.add(new NetworkRequestHandler(dispatcher.downloader, stats));
- requestHandlers = Collections.unmodifiableList(allRequestHandlers);
- this.stats = stats;
- this.targetToAction = new WeakHashMap<Object, Action>();
- this.targetToDeferredRequestCreator = new WeakHashMap<ImageView, DeferredRequestCreator>();
- this.indicatorsEnabled = indicatorsEnabled;
- this.loggingEnabled = loggingEnabled;
- this.referenceQueue = new ReferenceQueue<Object>();
- this.cleanupThread = new CleanupThread(referenceQueue, HANDLER);
- this.cleanupThread.start();
- }
  Picasso(Context context, Dispatcher dispatcher, Cache cache, Listener listener,
      RequestTransformer requestTransformer, List<RequestHandler> extraRequestHandlers, Stats stats,
      Bitmap.Config defaultBitmapConfig, boolean indicatorsEnabled, boolean loggingEnabled) {
    this.context = context;
    this.dispatcher = dispatcher;
    this.cache = cache;
    this.listener = listener;
    this.requestTransformer = requestTransformer;
    this.defaultBitmapConfig = defaultBitmapConfig;

    int builtInHandlers = 7; // Adjust this as internal handlers are added or removed.
    int extraCount = (extraRequestHandlers != null ? extraRequestHandlers.size() : 0);
    List<RequestHandler> allRequestHandlers =
        new ArrayList<RequestHandler>(builtInHandlers + extraCount);

    // ResourceRequestHandler needs to be the first in the list to avoid
    // forcing other RequestHandlers to perform null checks on request.uri
    // to cover the (request.resourceId != 0) case.
    allRequestHandlers.add(new ResourceRequestHandler(context));
    if (extraRequestHandlers != null) {
      allRequestHandlers.addAll(extraRequestHandlers);
    }
    allRequestHandlers.add(new ContactsPhotoRequestHandler(context));
    allRequestHandlers.add(new MediaStoreRequestHandler(context));
    allRequestHandlers.add(new ContentStreamRequestHandler(context));
    allRequestHandlers.add(new AssetRequestHandler(context));
    allRequestHandlers.add(new FileRequestHandler(context));
    allRequestHandlers.add(new NetworkRequestHandler(dispatcher.downloader, stats));
    requestHandlers = Collections.unmodifiableList(allRequestHandlers);

    this.stats = stats;
    this.targetToAction = new WeakHashMap<Object, Action>();
    this.targetToDeferredRequestCreator = new WeakHashMap<ImageView, DeferredRequestCreator>();
    this.indicatorsEnabled = indicatorsEnabled;
    this.loggingEnabled = loggingEnabled;
    this.referenceQueue = new ReferenceQueue<Object>();
    this.cleanupThread = new CleanupThread(referenceQueue, HANDLER);
    this.cleanupThread.start();
  }
OK,大家看到在Picasso的构造方法里主要进行了一些变量的初始化,也初始化了RequestHandler,初始化RequestHandler时首先将我们提交进来的requestHandler加入到集合中,然后还往allRequestHandlers中提交了其它的RequestHandler,这些不同的RequestHandler,分别用来处理不同的资源,比如加载相册的图片、加载资产文件夹中的图片、加载网络图片等。
OK,那么到目前为止,我们所看到的都是build方法中引出的源码,执行完build之后,我们接下来该做的就是调用load方法了,不管你在load中传入了什么,最终都会到达下面这个方法:
- RequestCreator(Picasso picasso, Uri uri, int resourceId) {
- if (picasso.shutdown) {
- throw new IllegalStateException(
- ”Picasso instance already shut down. Cannot submit new requests.”);
- }
- this.picasso = picasso;
- this.data = new Request.Builder(uri, resourceId, picasso.defaultBitmapConfig);
- }
  RequestCreator(Picasso picasso, Uri uri, int resourceId) {
    if (picasso.shutdown) {
      throw new IllegalStateException(
          "Picasso instance already shut down. Cannot submit new requests.");
    }
    this.picasso = picasso;
    this.data = new Request.Builder(uri, resourceId, picasso.defaultBitmapConfig);
  }
shutdown属性是判断Picasso实例是否已经停止运行,如果已经shutdown则抛异常,否则将我们即将要加载的图片信息保存在data中,data是一个Request.Builder对象,里边保存了我们所有的图片加载的配置信息,比如你调用了centerCrop方法:
- public RequestCreator centerCrop() {
- data.centerCrop();
- return this;
- }
  public RequestCreator centerCrop() {
    data.centerCrop();
    return this;
  }
大家看到这些方法不过都是修改data里边的变量,当所有的配置信息都完成之后,接下载就到into方法了,那么小伙伴们大概也猜到了,真正的图片加载过程是在into方法中完成的,如下:
- public void into(ImageView target, Callback callback) {
- long started = System.nanoTime();
- checkMain();
- if (target == null) {
- throw new IllegalArgumentException(“Target must not be null.”);
- }
- if (!data.hasImage()) {
- picasso.cancelRequest(target);
- if (setPlaceholder) {
- setPlaceholder(target, getPlaceholderDrawable());
- }
- return;
- }
- if (deferred) {
- if (data.hasSize()) {
- throw new IllegalStateException(“Fit cannot be used with resize.”);
- }
- int width = target.getWidth();
- int height = target.getHeight();
- if (width == 0 || height == 0) {
- if (setPlaceholder) {
- setPlaceholder(target, getPlaceholderDrawable());
- }
- picasso.defer(target, new DeferredRequestCreator(this, target, callback));
- return;
- }
- data.resize(width, height);
- }
- Request request = createRequest(started);
- String requestKey = createKey(request);
- if (shouldReadFromMemoryCache(memoryPolicy)) {
- Bitmap bitmap = picasso.quickMemoryCacheCheck(requestKey);
- if (bitmap != null) {
- picasso.cancelRequest(target);
- setBitmap(target, picasso.context, bitmap, MEMORY, noFade, picasso.indicatorsEnabled);
- if (picasso.loggingEnabled) {
- log(OWNER_MAIN, VERB_COMPLETED, request.plainId(), ”from ” + MEMORY);
- }
- if (callback != null) {
- callback.onSuccess();
- }
- return;
- }
- }
- if (setPlaceholder) {
- setPlaceholder(target, getPlaceholderDrawable());
- }
- Action action =
- new ImageViewAction(picasso, target, request, memoryPolicy, networkPolicy, errorResId,
- errorDrawable, requestKey, tag, callback, noFade);
- picasso.enqueueAndSubmit(action);
- }
  public void into(ImageView target, Callback callback) {
    long started = System.nanoTime();
    checkMain();

    if (target == null) {
      throw new IllegalArgumentException("Target must not be null.");
    }

    if (!data.hasImage()) {
      picasso.cancelRequest(target);
      if (setPlaceholder) {
        setPlaceholder(target, getPlaceholderDrawable());
      }
      return;
    }

    if (deferred) {
      if (data.hasSize()) {
        throw new IllegalStateException("Fit cannot be used with resize.");
      }
      int width = target.getWidth();
      int height = target.getHeight();
      if (width == 0 || height == 0) {
        if (setPlaceholder) {
          setPlaceholder(target, getPlaceholderDrawable());
        }
        picasso.defer(target, new DeferredRequestCreator(this, target, callback));
        return;
      }
      data.resize(width, height);
    }

    Request request = createRequest(started);
    String requestKey = createKey(request);

    if (shouldReadFromMemoryCache(memoryPolicy)) {
      Bitmap bitmap = picasso.quickMemoryCacheCheck(requestKey);
      if (bitmap != null) {
        picasso.cancelRequest(target);
        setBitmap(target, picasso.context, bitmap, MEMORY, noFade, picasso.indicatorsEnabled);
        if (picasso.loggingEnabled) {
          log(OWNER_MAIN, VERB_COMPLETED, request.plainId(), "from " + MEMORY);
        }
        if (callback != null) {
          callback.onSuccess();
        }
        return;
      }
    }

    if (setPlaceholder) {
      setPlaceholder(target, getPlaceholderDrawable());
    }

    Action action =
        new ImageViewAction(picasso, target, request, memoryPolicy, networkPolicy, errorResId,
            errorDrawable, requestKey, tag, callback, noFade);

    picasso.enqueueAndSubmit(action);
  }
into方法有点长,但是逻辑还是很清晰,我们来看一下,
首先checkMain方法检查程序是否运行在主线程,接下来target不能为空,这个不用多说,简单。data.hasImage表示是否设置了要加载的图片资源,如果设置了,则返回true,否则返回false。返回false时进入到if判断中,这个时候首先取消加载,然后如果设置了占位图片,就将其显示出来。接下来进入到if(deferred)的判断中,deferred这个变量是在哪里进行初始化的呢?我们来看看这里:
- public RequestCreator fit() {
- deferred = true;
- return this;
- }
- /** Internal use only. Used by {@link DeferredRequestCreator}. */
- RequestCreator unfit() {
- deferred = false;
- return this;
- }
  public RequestCreator fit() {
    deferred = true;
    return this;
  }

  /** Internal use only. Used by {@link DeferredRequestCreator}. */
  RequestCreator unfit() {
    deferred = false;
    return this;
  }
是在我们调用了fit方法的时候,也就是说,如果我们希望我们的图片在加载的过程中能够自由缩放以填满整个ImageView的话,那么就会进入到这个分支中,进来之后首先是判断data.hasSize,我们知道这个是判断图片是否有宽高,我们来看看hasSize方法:
- boolean hasSize() {
- return targetWidth != 0 || targetHeight != 0;
- }
    boolean hasSize() {
      return targetWidth != 0 || targetHeight != 0;
    }
那么targetWidth和targetHeight又是在什么地方调用的呢?我们不由得想到了resize方法:
- public Builder resize(int targetWidth, int targetHeight) {
- if (targetWidth < 0) {
- throw new IllegalArgumentException(“Width must be positive number or 0.”);
- }
- if (targetHeight < 0) {
- throw new IllegalArgumentException(“Height must be positive number or 0.”);
- }
- if (targetHeight == 0 && targetWidth == 0) {
- throw new IllegalArgumentException(“At least one dimension has to be positive number.”);
- }
- this.targetWidth = targetWidth;
- this.targetHeight = targetHeight;
- return this;
- }
    public Builder resize(int targetWidth, int targetHeight) {
      if (targetWidth < 0) {
        throw new IllegalArgumentException("Width must be positive number or 0.");
      }
      if (targetHeight < 0) {
        throw new IllegalArgumentException("Height must be positive number or 0.");
      }
      if (targetHeight == 0 && targetWidth == 0) {
        throw new IllegalArgumentException("At least one dimension has to be positive number.");
      }
      this.targetWidth = targetWidth;
      this.targetHeight = targetHeight;
      return this;
    }
没错,是这里,那我们在这里可以得出结论了,如果在加载一张图片的是否使用了fit这种缩放模式的话,那么不可以给图片设置resize属性,否则会抛一个Fit cannot be used with resize异常,其实这个也很好理解,你设置了fit就是希望图片自由缩放以便将ImageView填充满,结果又给图片设置了固定大小,那么你到底想怎样?。接下来系统来获取ImageView的宽和高,如果ImageView的宽和高为0的话,则首先把占位图片设置上,然后去监听ImageView的target.getViewTreeObserver().addOnPreDrawListener(this);接口,当ImageView的宽高被赋值之后,继续加载。否则直接设置ImageView的宽高为图片的宽高。OK,以上还都是在做准备工作,一个网络请求还是没有发起。接下来我们就要开始构造请求了,在into方法的第33行,我们构建一个请求,接下来是一个shouldReadFromMemoryCache,看名字就知道是否该从内存中读取图片,如果是,则根据key从Cache中读取一张图片出来,不知道大家是否还记得我们的Cache实际上就是LruCache。
如果从内从中读取到了图片,就取消请求,并把图片设置给ImageView。同时,如果我们设置了回调,则调用回调的onSuccess方法。
接下来55行创建Action,并且将Action添加到一个Picasso的enqueueAndSubmit方法中。接下来我们就来看看这个请求入队的方法:
- void enqueueAndSubmit(Action action) {
- Object target = action.getTarget();
- if (target != null && targetToAction.get(target) != action) {
- // This will also check we are on the main thread.
- cancelExistingRequest(target);
- targetToAction.put(target, action);
- }
- submit(action);
- }
  void enqueueAndSubmit(Action action) {
    Object target = action.getTarget();
    if (target != null && targetToAction.get(target) != action) {
      // This will also check we are on the main thread.
      cancelExistingRequest(target);
      targetToAction.put(target, action);
    }
    submit(action);
  }
首先获取action里边的target,其实就是我们的ImageView,如果这个ImageView不为空,并且该ImageView已经有了一个Action,则取消已经存在的请求,然后重新给该target设置Action,完了之后就是submit了,我们来看看这个submit:
- void submit(Action action) {
- dispatcher.dispatchSubmit(action);
- }
void submit(Action action) {
    dispatcher.dispatchSubmit(action);
  }
咦,dispatcher,大家还记不记得我们是在哪里初始化的dispatcher呢?没错,build方法中,这里调用了dispatcher的dispatchSubmit方法,点击去再看:
- void dispatchSubmit(Action action) {
- handler.sendMessage(handler.obtainMessage(REQUEST_SUBMIT, action));
- }
void dispatchSubmit(Action action) {
    handler.sendMessage(handler.obtainMessage(REQUEST_SUBMIT, action));
  }
哦,原来是使用了Handler,发送了一条消息,那我们来找找handler初始化的地方,在Dispatcher类中,Handler通过如下方式初始化:
- this.handler = new DispatcherHandler(dispatcherThread.getLooper(), this);
this.handler = new DispatcherHandler(dispatcherThread.getLooper(), this);- private static class DispatcherHandler extends Handler {
- private final Dispatcher dispatcher;
- public DispatcherHandler(Looper looper, Dispatcher dispatcher) {
- super(looper);
- this.dispatcher = dispatcher;
- }
- @Override public void handleMessage(final Message msg) {
- switch (msg.what) {
- case REQUEST_SUBMIT: {
- Action action = (Action) msg.obj;
- dispatcher.performSubmit(action);
- break;
- }
- case REQUEST_CANCEL: {
- Action action = (Action) msg.obj;
- dispatcher.performCancel(action);
- break;
- }
- case TAG_PAUSE: {
- Object tag = msg.obj;
- dispatcher.performPauseTag(tag);
- break;
- }
- case TAG_RESUME: {
- Object tag = msg.obj;
- dispatcher.performResumeTag(tag);
- break;
- }
- case HUNTER_COMPLETE: {
- BitmapHunter hunter = (BitmapHunter) msg.obj;
- dispatcher.performComplete(hunter);
- break;
- }
- case HUNTER_RETRY: {
- BitmapHunter hunter = (BitmapHunter) msg.obj;
- dispatcher.performRetry(hunter);
- break;
- }
- case HUNTER_DECODE_FAILED: {
- BitmapHunter hunter = (BitmapHunter) msg.obj;
- dispatcher.performError(hunter, false);
- break;
- }
- case HUNTER_DELAY_NEXT_BATCH: {
- dispatcher.performBatchComplete();
- break;
- }
- case NETWORK_STATE_CHANGE: {
- NetworkInfo info = (NetworkInfo) msg.obj;
- dispatcher.performNetworkStateChange(info);
- break;
- }
- case AIRPLANE_MODE_CHANGE: {
- dispatcher.performAirplaneModeChange(msg.arg1 == AIRPLANE_MODE_ON);
- break;
- }
- default:
- Picasso.HANDLER.post(new Runnable() {
- @Override public void run() {
- throw new AssertionError(“Unknown handler message received: ” + msg.what);
- }
- });
- }
- }
- }
  private static class DispatcherHandler extends Handler {
    private final Dispatcher dispatcher;

    public DispatcherHandler(Looper looper, Dispatcher dispatcher) {
      super(looper);
      this.dispatcher = dispatcher;
    }

    @Override public void handleMessage(final Message msg) {
      switch (msg.what) {
        case REQUEST_SUBMIT: {
          Action action = (Action) msg.obj;
          dispatcher.performSubmit(action);
          break;
        }
        case REQUEST_CANCEL: {
          Action action = (Action) msg.obj;
          dispatcher.performCancel(action);
          break;
        }
        case TAG_PAUSE: {
          Object tag = msg.obj;
          dispatcher.performPauseTag(tag);
          break;
        }
        case TAG_RESUME: {
          Object tag = msg.obj;
          dispatcher.performResumeTag(tag);
          break;
        }
        case HUNTER_COMPLETE: {
          BitmapHunter hunter = (BitmapHunter) msg.obj;
          dispatcher.performComplete(hunter);
          break;
        }
        case HUNTER_RETRY: {
          BitmapHunter hunter = (BitmapHunter) msg.obj;
          dispatcher.performRetry(hunter);
          break;
        }
        case HUNTER_DECODE_FAILED: {
          BitmapHunter hunter = (BitmapHunter) msg.obj;
          dispatcher.performError(hunter, false);
          break;
        }
        case HUNTER_DELAY_NEXT_BATCH: {
          dispatcher.performBatchComplete();
          break;
        }
        case NETWORK_STATE_CHANGE: {
          NetworkInfo info = (NetworkInfo) msg.obj;
          dispatcher.performNetworkStateChange(info);
          break;
        }
        case AIRPLANE_MODE_CHANGE: {
          dispatcher.performAirplaneModeChange(msg.arg1 == AIRPLANE_MODE_ON);
          break;
        }
        default:
          Picasso.HANDLER.post(new Runnable() {
            @Override public void run() {
              throw new AssertionError("Unknown handler message received: " + msg.what);
            }
          });
      }
    }
  }
DispatcherHandler继承自Handler重写了它里边的方法,顺藤摸瓜,找到属于我们的case,点进去,最终来到了这个方法:
- void performSubmit(Action action, boolean dismissFailed) {
- if (pausedTags.contains(action.getTag())) {
- pausedActions.put(action.getTarget(), action);
- if (action.getPicasso().loggingEnabled) {
- log(OWNER_DISPATCHER, VERB_PAUSED, action.request.logId(),
- ”because tag ’” + action.getTag() + “’ is paused”);
- }
- return;
- }
- BitmapHunter hunter = hunterMap.get(action.getKey());
- if (hunter != null) {
- hunter.attach(action);
- return;
- }
- if (service.isShutdown()) {
- if (action.getPicasso().loggingEnabled) {
- log(OWNER_DISPATCHER, VERB_IGNORED, action.request.logId(), ”because shut down”);
- }
- return;
- }
- hunter = forRequest(action.getPicasso(), this, cache, stats, action);
- hunter.future = service.submit(hunter);
- hunterMap.put(action.getKey(), hunter);
- if (dismissFailed) {
- failedActions.remove(action.getTarget());
- }
- if (action.getPicasso().loggingEnabled) {
- log(OWNER_DISPATCHER, VERB_ENQUEUED, action.request.logId());
- }
- }
  void performSubmit(Action action, boolean dismissFailed) {
    if (pausedTags.contains(action.getTag())) {
      pausedActions.put(action.getTarget(), action);
      if (action.getPicasso().loggingEnabled) {
        log(OWNER_DISPATCHER, VERB_PAUSED, action.request.logId(),
            "because tag '" + action.getTag() + "' is paused");
      }
      return;
    }

    BitmapHunter hunter = hunterMap.get(action.getKey());
    if (hunter != null) {
      hunter.attach(action);
      return;
    }

    if (service.isShutdown()) {
      if (action.getPicasso().loggingEnabled) {
        log(OWNER_DISPATCHER, VERB_IGNORED, action.request.logId(), "because shut down");
      }
      return;
    }

    hunter = forRequest(action.getPicasso(), this, cache, stats, action);
    hunter.future = service.submit(hunter);
    hunterMap.put(action.getKey(), hunter);
    if (dismissFailed) {
      failedActions.remove(action.getTarget());
    }

    if (action.getPicasso().loggingEnabled) {
      log(OWNER_DISPATCHER, VERB_ENQUEUED, action.request.logId());
    }
}- static BitmapHunter forRequest(Picasso picasso, Dispatcher dispatcher, Cache cache, Stats stats,
- Action action) {
- Request request = action.getRequest();
- List<RequestHandler> requestHandlers = picasso.getRequestHandlers();
- // Index-based loop to avoid allocating an iterator.
- //noinspection ForLoopReplaceableByForEach
- for (int i = 0, count = requestHandlers.size(); i < count; i++) {
- RequestHandler requestHandler = requestHandlers.get(i);
- if (requestHandler.canHandleRequest(request)) {
- return new BitmapHunter(picasso, dispatcher, cache, stats, action, requestHandler);
- }
- }
- return new BitmapHunter(picasso, dispatcher, cache, stats, action, ERRORING_HANDLER);
- }
  static BitmapHunter forRequest(Picasso picasso, Dispatcher dispatcher, Cache cache, Stats stats,
      Action action) {
    Request request = action.getRequest();
    List<RequestHandler> requestHandlers = picasso.getRequestHandlers();

    // Index-based loop to avoid allocating an iterator.
    //noinspection ForLoopReplaceableByForEach
    for (int i = 0, count = requestHandlers.size(); i < count; i++) {
      RequestHandler requestHandler = requestHandlers.get(i);
      if (requestHandler.canHandleRequest(request)) {
        return new BitmapHunter(picasso, dispatcher, cache, stats, action, requestHandler);
      }
    }

    return new BitmapHunter(picasso, dispatcher, cache, stats, action, ERRORING_HANDLER);
  }
这里有一个for循环,for循环中的东西就是我们所有的RequestHandler,然后通过一个if来匹配,看使用那个RequestHandler来处理我们的图片加载。
第25行创建一个BitmapHunter,并在线程池中执行请求,线程池中传入的对象是hunter,那毫无疑问,hunter肯定是实现了Runnable接口的,那接下来就去看看这个BitmapHunter的run方法:
- @Override public void run() {
- try {
- updateThreadName(data);
- if (picasso.loggingEnabled) {
- log(OWNER_HUNTER, VERB_EXECUTING, getLogIdsForHunter(this));
- }
- result = hunt();
- if (result == null) {
- dispatcher.dispatchFailed(this);
- } else {
- dispatcher.dispatchComplete(this);
- }
- } catch (Downloader.ResponseException e) {
- if (!e.localCacheOnly || e.responseCode != 504) {
- exception = e;
- }
- dispatcher.dispatchFailed(this);
- } catch (NetworkRequestHandler.ContentLengthException e) {
- exception = e;
- dispatcher.dispatchRetry(this);
- } catch (IOException e) {
- exception = e;
- dispatcher.dispatchRetry(this);
- } catch (OutOfMemoryError e) {
- StringWriter writer = new StringWriter();
- stats.createSnapshot().dump(new PrintWriter(writer));
- exception = new RuntimeException(writer.toString(), e);
- dispatcher.dispatchFailed(this);
- } catch (Exception e) {
- exception = e;
- dispatcher.dispatchFailed(this);
- } finally {
- Thread.currentThread().setName(Utils.THREAD_IDLE_NAME);
- }
- }
  @Override public void run() {
    try {
      updateThreadName(data);

      if (picasso.loggingEnabled) {
        log(OWNER_HUNTER, VERB_EXECUTING, getLogIdsForHunter(this));
      }

      result = hunt();

      if (result == null) {
        dispatcher.dispatchFailed(this);
      } else {
        dispatcher.dispatchComplete(this);
      }
    } catch (Downloader.ResponseException e) {
      if (!e.localCacheOnly || e.responseCode != 504) {
        exception = e;
      }
      dispatcher.dispatchFailed(this);
    } catch (NetworkRequestHandler.ContentLengthException e) {
      exception = e;
      dispatcher.dispatchRetry(this);
    } catch (IOException e) {
      exception = e;
      dispatcher.dispatchRetry(this);
    } catch (OutOfMemoryError e) {
      StringWriter writer = new StringWriter();
      stats.createSnapshot().dump(new PrintWriter(writer));
      exception = new RuntimeException(writer.toString(), e);
      dispatcher.dispatchFailed(this);
    } catch (Exception e) {
      exception = e;
      dispatcher.dispatchFailed(this);
    } finally {
      Thread.currentThread().setName(Utils.THREAD_IDLE_NAME);
    }
}- Bitmap hunt() throws IOException {
- Bitmap bitmap = null;
- if (shouldReadFromMemoryCache(memoryPolicy)) {
- bitmap = cache.get(key);
- if (bitmap != null) {
- stats.dispatchCacheHit();
- loadedFrom = MEMORY;
- if (picasso.loggingEnabled) {
- log(OWNER_HUNTER, VERB_DECODED, data.logId(), ”from cache”);
- }
- return bitmap;
- }
- }
- data.networkPolicy = retryCount == 0 ? NetworkPolicy.OFFLINE.index : networkPolicy;
- RequestHandler.Result result = requestHandler.load(data, networkPolicy);
- if (result != null) {
- loadedFrom = result.getLoadedFrom();
- exifRotation = result.getExifOrientation();
- bitmap = result.getBitmap();
- // If there was no Bitmap then we need to decode it from the stream.
- if (bitmap == null) {
- InputStream is = result.getStream();
- try {
- bitmap = decodeStream(is, data);
- } finally {
- Utils.closeQuietly(is);
- }
- }
- }
- if (bitmap != null) {
- if (picasso.loggingEnabled) {
- log(OWNER_HUNTER, VERB_DECODED, data.logId());
- }
- stats.dispatchBitmapDecoded(bitmap);
- if (data.needsTransformation() || exifRotation != 0) {
- synchronized (DECODE_LOCK) {
- if (data.needsMatrixTransform() || exifRotation != 0) {
- bitmap = transformResult(data, bitmap, exifRotation);
- if (picasso.loggingEnabled) {
- log(OWNER_HUNTER, VERB_TRANSFORMED, data.logId());
- }
- }
- if (data.hasCustomTransformations()) {
- bitmap = applyCustomTransformations(data.transformations, bitmap);
- if (picasso.loggingEnabled) {
- log(OWNER_HUNTER, VERB_TRANSFORMED, data.logId(), ”from custom transformations”);
- }
- }
- }
- if (bitmap != null) {
- stats.dispatchBitmapTransformed(bitmap);
- }
- }
- }
- return bitmap;
- }
  Bitmap hunt() throws IOException {
    Bitmap bitmap = null;

    if (shouldReadFromMemoryCache(memoryPolicy)) {
      bitmap = cache.get(key);
      if (bitmap != null) {
        stats.dispatchCacheHit();
        loadedFrom = MEMORY;
        if (picasso.loggingEnabled) {
          log(OWNER_HUNTER, VERB_DECODED, data.logId(), "from cache");
        }
        return bitmap;
      }
    }

    data.networkPolicy = retryCount == 0 ? NetworkPolicy.OFFLINE.index : networkPolicy;
    RequestHandler.Result result = requestHandler.load(data, networkPolicy);
    if (result != null) {
      loadedFrom = result.getLoadedFrom();
      exifRotation = result.getExifOrientation();

      bitmap = result.getBitmap();

      // If there was no Bitmap then we need to decode it from the stream.
      if (bitmap == null) {
        InputStream is = result.getStream();
        try {
          bitmap = decodeStream(is, data);
        } finally {
          Utils.closeQuietly(is);
        }
      }
    }

    if (bitmap != null) {
      if (picasso.loggingEnabled) {
        log(OWNER_HUNTER, VERB_DECODED, data.logId());
      }
      stats.dispatchBitmapDecoded(bitmap);
      if (data.needsTransformation() || exifRotation != 0) {
        synchronized (DECODE_LOCK) {
          if (data.needsMatrixTransform() || exifRotation != 0) {
            bitmap = transformResult(data, bitmap, exifRotation);
            if (picasso.loggingEnabled) {
              log(OWNER_HUNTER, VERB_TRANSFORMED, data.logId());
            }
          }
          if (data.hasCustomTransformations()) {
            bitmap = applyCustomTransformations(data.transformations, bitmap);
            if (picasso.loggingEnabled) {
              log(OWNER_HUNTER, VERB_TRANSFORMED, data.logId(), "from custom transformations");
            }
          }
        }
        if (bitmap != null) {
          stats.dispatchBitmapTransformed(bitmap);
        }
      }
    }

    return bitmap;
  }
首先是判断是否可以从内存中获取这张图片,如果可以,将图片加载出来并返回,并更新stats中相关变量,否则就会来到第17行,从一个RequestHandler中读取,那么RequestHandler是我们在new一个Picasso的时候传入了多个RequestHandler,这里到底是使用哪一个RequestHandler呢?这就和我们上文说的匹配RequestHandler有关了,毫无疑问,我们下载网络图片,当然是匹配NetworkRequestHandler,那我们看看NetworkRequestHandler里边的load方法:
- @Override public Result load(Request request, int networkPolicy) throws IOException {
- Response response = downloader.load(request.uri, request.networkPolicy);
- if (response == null) {
- return null;
- }
- Picasso.LoadedFrom loadedFrom = response.cached ? DISK : NETWORK;
- Bitmap bitmap = response.getBitmap();
- if (bitmap != null) {
- return new Result(bitmap, loadedFrom);
- }
- InputStream is = response.getInputStream();
- if (is == null) {
- return null;
- }
- // Sometimes response content length is zero when requests are being replayed. Haven’t found
- // root cause to this but retrying the request seems safe to do so.
- if (loadedFrom == DISK && response.getContentLength() == 0) {
- Utils.closeQuietly(is);
- throw new ContentLengthException(“Received response with 0 content-length header.”);
- }
- if (loadedFrom == NETWORK && response.getContentLength() > 0) {
- stats.dispatchDownloadFinished(response.getContentLength());
- }
- return new Result(is, loadedFrom);
- }
  @Override public Result load(Request request, int networkPolicy) throws IOException {
    Response response = downloader.load(request.uri, request.networkPolicy);
    if (response == null) {
      return null;
    }

    Picasso.LoadedFrom loadedFrom = response.cached ? DISK : NETWORK;

    Bitmap bitmap = response.getBitmap();
    if (bitmap != null) {
      return new Result(bitmap, loadedFrom);
    }

    InputStream is = response.getInputStream();
    if (is == null) {
      return null;
    }
    // Sometimes response content length is zero when requests are being replayed. Haven't found
    // root cause to this but retrying the request seems safe to do so.
    if (loadedFrom == DISK && response.getContentLength() == 0) {
      Utils.closeQuietly(is);
      throw new ContentLengthException("Received response with 0 content-length header.");
    }
    if (loadedFrom == NETWORK && response.getContentLength() > 0) {
      stats.dispatchDownloadFinished(response.getContentLength());
    }
    return new Result(is, loadedFrom);
  }
这个方法里首先调用了downloader里边的load方法,获取一个Response对象,然后再拿到这个response对象里边的Bitmap返回,downloader就是我们在上文说的那个downloader,我们就看那个源码吧,反正和Piasso自带的差不多,看看它里边的load方法:
- @Override
- public Response load(Uri uri, int networkPolicy) throws IOException {
- CacheControl cacheControl = null;
- if (networkPolicy != 0) {
- if (NetworkPolicy.isOfflineOnly(networkPolicy)) {
- cacheControl = CacheControl.FORCE_CACHE;
- } else {
- CacheControl.Builder builder = new CacheControl.Builder();
- if (!NetworkPolicy.shouldReadFromDiskCache(networkPolicy)) {
- builder.noCache();
- }
- if (!NetworkPolicy.shouldWriteToDiskCache(networkPolicy)) {
- builder.noStore();
- }
- cacheControl = builder.build();
- }
- }
- Request.Builder builder = new Request.Builder().url(uri.toString());
- if (cacheControl != null) {
- builder.cacheControl(cacheControl);
- }
- okhttp3.Response response = client.newCall(builder.build()).execute();
- int responseCode = response.code();
- if (responseCode >= 300) {
- response.body().close();
- throw new ResponseException(responseCode + “ ” + response.message(), networkPolicy,
- responseCode);
- }
- boolean fromCache = response.cacheResponse() != null;
- ResponseBody responseBody = response.body();
- return new Response(responseBody.byteStream(), fromCache, responseBody.contentLength());
- }
    @Override
    public Response load(Uri uri, int networkPolicy) throws IOException {
        CacheControl cacheControl = null;
        if (networkPolicy != 0) {
            if (NetworkPolicy.isOfflineOnly(networkPolicy)) {
                cacheControl = CacheControl.FORCE_CACHE;
            } else {
                CacheControl.Builder builder = new CacheControl.Builder();
                if (!NetworkPolicy.shouldReadFromDiskCache(networkPolicy)) {
                    builder.noCache();
                }
                if (!NetworkPolicy.shouldWriteToDiskCache(networkPolicy)) {
                    builder.noStore();
                }
                cacheControl = builder.build();
            }
        }

        Request.Builder builder = new Request.Builder().url(uri.toString());
        if (cacheControl != null) {
            builder.cacheControl(cacheControl);
        }

        okhttp3.Response response = client.newCall(builder.build()).execute();
        int responseCode = response.code();
        if (responseCode >= 300) {
            response.body().close();
            throw new ResponseException(responseCode + " " + response.message(), networkPolicy,
                    responseCode);
        }

        boolean fromCache = response.cacheResponse() != null;

        ResponseBody responseBody = response.body();
        return new Response(responseBody.byteStream(), fromCache, responseBody.contentLength());
}现在我们再回到BitmapHunter的run方法中,当成功获取到bitmap之后,接下来调用dispatcher.dispatchComplete(this);发送一条消息:
- void dispatchComplete(BitmapHunter hunter) {
- handler.sendMessage(handler.obtainMessage(HUNTER_COMPLETE, hunter));
- }
void dispatchComplete(BitmapHunter hunter) {
    handler.sendMessage(handler.obtainMessage(HUNTER_COMPLETE, hunter));
  }
又是Handler,再找:
- case HUNTER_COMPLETE: {
- BitmapHunter hunter = (BitmapHunter) msg.obj;
- dispatcher.performComplete(hunter);
- break;
- }
case HUNTER_COMPLETE: {
          BitmapHunter hunter = (BitmapHunter) msg.obj;
          dispatcher.performComplete(hunter);
          break;
        }
这里又调用了dispatcher.performComplete方法,点击去看看:
- void performComplete(BitmapHunter hunter) {
- if (shouldWriteToMemoryCache(hunter.getMemoryPolicy())) {
- cache.set(hunter.getKey(), hunter.getResult());
- }
- hunterMap.remove(hunter.getKey());
- batch(hunter);
- if (hunter.getPicasso().loggingEnabled) {
- log(OWNER_DISPATCHER, VERB_BATCHED, getLogIdsForHunter(hunter), ”for completion”);
- }
- }
  void performComplete(BitmapHunter hunter) {
    if (shouldWriteToMemoryCache(hunter.getMemoryPolicy())) {
      cache.set(hunter.getKey(), hunter.getResult());
    }
    hunterMap.remove(hunter.getKey());
    batch(hunter);
    if (hunter.getPicasso().loggingEnabled) {
      log(OWNER_DISPATCHER, VERB_BATCHED, getLogIdsForHunter(hunter), "for completion");
    }
  }
首先判断了是否该将Bitmap写入到内存缓存中,需要的话就写入,然后是batch方法:
- private void batch(BitmapHunter hunter) {
- if (hunter.isCancelled()) {
- return;
- }
- batch.add(hunter);
- if (!handler.hasMessages(HUNTER_DELAY_NEXT_BATCH)) {
- handler.sendEmptyMessageDelayed(HUNTER_DELAY_NEXT_BATCH, BATCH_DELAY);
- }
- }
private void batch(BitmapHunter hunter) {
    if (hunter.isCancelled()) {
      return;
    }
    batch.add(hunter);
    if (!handler.hasMessages(HUNTER_DELAY_NEXT_BATCH)) {
      handler.sendEmptyMessageDelayed(HUNTER_DELAY_NEXT_BATCH, BATCH_DELAY);
    }
  }
首先判断如果hunter已经被取消,则直接返回,否则将hunter加入到batch中,然后判断Handler中是否有一条HUNTER_DELAY_NEXT_BATCH消息,没有的话就发一条,OK,发一条之后,我们来找到相关的case:
- case HUNTER_DELAY_NEXT_BATCH: {
- dispatcher.performBatchComplete();
- break;
- }
case HUNTER_DELAY_NEXT_BATCH: {
          dispatcher.performBatchComplete();
          break;
        }
继续点:
- void performBatchComplete() {
- List<BitmapHunter> copy = new ArrayList<BitmapHunter>(batch);
- batch.clear();
- mainThreadHandler.sendMessage(mainThreadHandler.obtainMessage(HUNTER_BATCH_COMPLETE, copy));
- logBatch(copy);
- }
  void performBatchComplete() {
    List<BitmapHunter> copy = new ArrayList<BitmapHunter>(batch);
    batch.clear();
    mainThreadHandler.sendMessage(mainThreadHandler.obtainMessage(HUNTER_BATCH_COMPLETE, copy));
    logBatch(copy);
  }
在这里将batch存入到一个新的List集合中,然后mainThreadHandler又发送一条消息,这个mainThreadHandler是什么鬼?不知道大家是否还记得在build方法中我们创建Dispatch实例的时候传入了一个Handler,就是那个在主线程中创建的Handler,在Picasso那个类里边,我们找到了HUNTER_BATCH_COMPLETE这个case:
- case HUNTER_BATCH_COMPLETE: {
- @SuppressWarnings(“unchecked”) List<BitmapHunter> batch = (List<BitmapHunter>) msg.obj;
- //noinspection ForLoopReplaceableByForEach
- for (int i = 0, n = batch.size(); i < n; i++) {
- BitmapHunter hunter = batch.get(i);
- hunter.picasso.complete(hunter);
- }
- break;
- }
case HUNTER_BATCH_COMPLETE: {
          @SuppressWarnings("unchecked") List<BitmapHunter> batch = (List<BitmapHunter>) msg.obj;
          //noinspection ForLoopReplaceableByForEach
          for (int i = 0, n = batch.size(); i < n; i++) {
            BitmapHunter hunter = batch.get(i);
            hunter.picasso.complete(hunter);
          }
          break;
        }
这个case中我们来一条一条的处理batch中的消息,交给picasso的complete方法去处理:
- void complete(BitmapHunter hunter) {
- Action single = hunter.getAction();
- List<Action> joined = hunter.getActions();
- boolean hasMultiple = joined != null && !joined.isEmpty();
- boolean shouldDeliver = single != null || hasMultiple;
- if (!shouldDeliver) {
- return;
- }
- Uri uri = hunter.getData().uri;
- Exception exception = hunter.getException();
- Bitmap result = hunter.getResult();
- LoadedFrom from = hunter.getLoadedFrom();
- if (single != null) {
- deliverAction(result, from, single);
- }
- if (hasMultiple) {
- //noinspection ForLoopReplaceableByForEach
- for (int i = 0, n = joined.size(); i < n; i++) {
- Action join = joined.get(i);
- deliverAction(result, from, join);
- }
- }
- if (listener != null && exception != null) {
- listener.onImageLoadFailed(this, uri, exception);
- }
- }
 void complete(BitmapHunter hunter) {
    Action single = hunter.getAction();
    List<Action> joined = hunter.getActions();

    boolean hasMultiple = joined != null && !joined.isEmpty();
    boolean shouldDeliver = single != null || hasMultiple;

    if (!shouldDeliver) {
      return;
    }

    Uri uri = hunter.getData().uri;
    Exception exception = hunter.getException();
    Bitmap result = hunter.getResult();
    LoadedFrom from = hunter.getLoadedFrom();

    if (single != null) {
      deliverAction(result, from, single);
    }

    if (hasMultiple) {
      //noinspection ForLoopReplaceableByForEach
      for (int i = 0, n = joined.size(); i < n; i++) {
        Action join = joined.get(i);
        deliverAction(result, from, join);
      }
    }

    if (listener != null && exception != null) {
      listener.onImageLoadFailed(this, uri, exception);
    }
  }
在这里,14行我们拿到Bitmap,17行去派发Action,如果有合并的Action则在25行进行派发,我们来看看这个派发操作:
- private void deliverAction(Bitmap result, LoadedFrom from, Action action) {
- if (action.isCancelled()) {
- return;
- }
- if (!action.willReplay()) {
- targetToAction.remove(action.getTarget());
- }
- if (result != null) {
- if (from == null) {
- throw new AssertionError(“LoadedFrom cannot be null.”);
- }
- action.complete(result, from);
- if (loggingEnabled) {
- log(OWNER_MAIN, VERB_COMPLETED, action.request.logId(), ”from ” + from);
- }
- } else {
- action.error();
- if (loggingEnabled) {
- log(OWNER_MAIN, VERB_ERRORED, action.request.logId());
- }
- }
- }
  private void deliverAction(Bitmap result, LoadedFrom from, Action action) {
    if (action.isCancelled()) {
      return;
    }
    if (!action.willReplay()) {
      targetToAction.remove(action.getTarget());
    }
    if (result != null) {
      if (from == null) {
        throw new AssertionError("LoadedFrom cannot be null.");
      }
      action.complete(result, from);
      if (loggingEnabled) {
        log(OWNER_MAIN, VERB_COMPLETED, action.request.logId(), "from " + from);
      }
    } else {
      action.error();
      if (loggingEnabled) {
        log(OWNER_MAIN, VERB_ERRORED, action.request.logId());
      }
    }
}- @Override public void complete(Bitmap result, Picasso.LoadedFrom from) {
- if (result == null) {
- throw new AssertionError(
- String.format(”Attempted to complete action with no result!\n%s”, this));
- }
- ImageView target = this.target.get();
- if (target == null) {
- return;
- }
- Context context = picasso.context;
- boolean indicatorsEnabled = picasso.indicatorsEnabled;
- PicassoDrawable.setBitmap(target, context, result, from, noFade, indicatorsEnabled);
- if (callback != null) {
- callback.onSuccess();
- }
- }
  @Override public void complete(Bitmap result, Picasso.LoadedFrom from) {
    if (result == null) {
      throw new AssertionError(
          String.format("Attempted to complete action with no result!\n%s", this));
    }

    ImageView target = this.target.get();
    if (target == null) {
      return;
    }

    Context context = picasso.context;
    boolean indicatorsEnabled = picasso.indicatorsEnabled;
    PicassoDrawable.setBitmap(target, context, result, from, noFade, indicatorsEnabled);

    if (callback != null) {
      callback.onSuccess();
    }
  }
获取到所有信息之后,然后调用PicassoDrawable的setBitmap方法:
- static void setBitmap(ImageView target, Context context, Bitmap bitmap,
- Picasso.LoadedFrom loadedFrom, boolean noFade, boolean debugging) {
- Drawable placeholder = target.getDrawable();
- if (placeholder instanceof AnimationDrawable) {
- ((AnimationDrawable) placeholder).stop();
- }
- PicassoDrawable drawable =
- new PicassoDrawable(context, bitmap, placeholder, loadedFrom, noFade, debugging);
- target.setImageDrawable(drawable);
- }
  static void setBitmap(ImageView target, Context context, Bitmap bitmap,
      Picasso.LoadedFrom loadedFrom, boolean noFade, boolean debugging) {
    Drawable placeholder = target.getDrawable();
    if (placeholder instanceof AnimationDrawable) {
      ((AnimationDrawable) placeholder).stop();
    }
    PicassoDrawable drawable =
        new PicassoDrawable(context, bitmap, placeholder, loadedFrom, noFade, debugging);
    target.setImageDrawable(drawable);
  }
终于看到了给target设置图片的代码了,这里的代码都很简单,不多说。
OK,这就是对Picasso做了一个简单介绍,有问题的小伙伴欢迎留言讨论。
以上。
参考资料
1.http://blog.csdn.net/zxm317122667/article/details/51814095
2.http://www.jianshu.com/p/c2b029f69f52
转载自: http://blog.csdn.net/u012702547/article/details/52273918


 2956
2956


 被折叠的 条评论
为什么被折叠?
被折叠的 条评论
为什么被折叠?
 到【灌水乐园】发言


